
Summary of Contents for Alaris Medical Systems MedSystem III
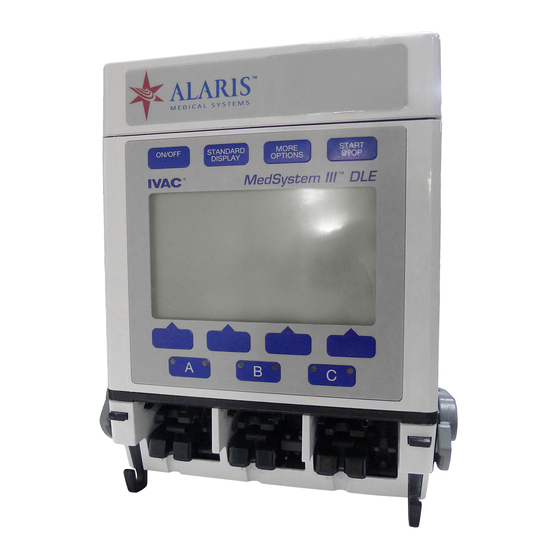
- Page 1 ® ® MedSystem III Infusion System with Advanced Dose Rate Calculation and Drug List Editor ® MORE O N / O F F STANDARD START OPTIONS DISPLAY STOP ® ® DIRECTIONS FOR USE...
-
Page 2: Table Of Contents
TABLE OF CONTENTS INTRODUCTION ABOUT THE PUMP ................... FEATURES . - Page 3 GENERAL CONTACT INFORMATION Customer Advocacy For clinical and technical questions, feedback, and troubleshooting assistance. Phone, toll-free, within the United States and Canada: (800) 854-7128, Ext. 7812 Technical Support For technical information related to maintenance procedures and service manual support. Phone: Outside the United States: (858) 458-6003 Toll-Free, within the United States : (800) 854-7128, Ext.
-
Page 4: Introduction
INTRODUCTION About the Pump ® The MedSystem III Drug List Editor Multi-Channel Infusion Pump is intended for use in today’s growing professional healthcare environment, including healthcare facilities and home care, for use on adults, pediatrics and neonates. ® The MedSystem III... -
Page 5: Features
Controller Pressure Operating Room II Free-flow Protection The MedSystem III® system Administration Sets contain a cassette that provides protection from free-flow conditions. To remove the cassette from the pump, the cassette’s slide clamp is pulled to full extension, occluding the tubing and preventing fluid from flowing. - Page 6 Features (Continued) Monitoring System The instrument continuously monitors pump conditions and alerts with adjustable audio tones and visual messages. Data Monitoring The pump can be configured to communicate with a remote computer, such as a centralized patient monitoring nurse’s station. The COMM receptacle is compatible with ®...
-
Page 7: System Components
System Components FRONT PANEL Instrument Keys Display Screen ® Softkey Pads Channel Indicator Lights Green: • Steady - infusing on AC MORE START STANDARD O N / O F F OPTIONS STOP DISPLAY power ® ® • Flashing - infusing on battery power Red: •... - Page 8 90°. Adjustable Pole Clamp Jaw with clutch feature, mounts pump to a pole or bedside. NOTE: The MedSystem III® instrument is designed to function in any orientation. However, the effectiveness of the administration set air trap is diminished when the instrument is in...
-
Page 9: Symbols
Symbols Canadian and Certification Mark: Products bearing this mark have been tested and U.S. certified in accordance with applicable and Canadian electrical safety and U.S. performance standards ( CSA C22.2 601.1 UL 2601-1 IEC 60601–2–24 Protection against fluid ingress: Drip Proof. IPX1 Attention: Refer to accompanying documentation. -
Page 10: Getting Started
This heading alerts the user to take special care for the safe and effective use of the device. Warnings and Cautions ® To ensure proper performance of the MedSystem III instrument and to reduce potential injury, observe the following precautions: Epidural Administration ®... - Page 11 Potential hazards include drug interactions, inaccurate delivery rates, inaccurate pressure alarms and nuisance alarms. WARNING ® Use only MedSystem III instrument 28 Series administration sets. The use of any other set may cause improper instrument operation, resulting in an inaccurate fluid delivery or other potential hazard.
- Page 12 • Before operating the instrument, verify that the administration set is free from kinks and installed correctly in the instrument. • MedSystem III ® administration sets are disposable, have a sterile fluid path and are intended only for one time use. Do not resterilize.
- Page 13 Warnings and Cautions (Continued) User Cautions (Continued) Dropping/Jarring Should an instrument be dropped or severely jarred, it should be immediately taken out of use and inspected by qualified service personnel, to ensure its proper function prior to reuse. DANGER Operating Environment Explosion risk if used in the presence Not for use in the presence of flammable anesthetics.
-
Page 14: Preparing The Infusion
C C l l e e a a r r p p o o r r t t i i o o n n o o f f c c a a s s s s e e t t t t e e Prime the MedSystem III® instrument administration set in accordance with the Administration Set Directions for Use. -
Page 15: Front Panel Overview
Displays infusion status (Infusing; ON/OFF STANDARD MORE START Stopped; Standby; KVO; ALARM; DISPLAY OPTIONS STOP FAULT; SERVICE) for each channel. ® MedSystem III ® NOTE: Status line in selected channel is highlighted. Stopped Standby Standby Infusion Rate ml/h ml/h ml/h Volume Remaining (ml) VR: 996.2... -
Page 16: Programming Page
Displays infusion status for selected channel. Infusion Rate MORE STANDARD START ON/OFF Volume Remaining DISPLAY OPTIONS STOP ® MedSystem III ® Time Remaining Stopped A: Primary Rate ml/h Volume Infused A: Pri VolRem (VR) 250 ml A: Pri Time(TR) 10h 00m Date/Time... - Page 17 To turn pump on Press • Upon start-up, the instrument performs an automatic self- test. Listen for a “beep” to ensure that the audio alarm transducer functions properly. • Instrument Information page is momentarily displayed. • Continuing to hold down ON/OFF key will keep the Information page on the display.
- Page 18 To program infusion (continued) ↓ ↓ F F a a s s t t ↓ ↓ • decrease highlighted values in single or multiple increments. ↑ ↑ ↓ ↓ F F a a s s t t ↑ ↑ • Pressing changes direction of the F F a a s s t t ↓...
-
Page 19: Programming Primary Function
Programming Primary Function To set primary rate Press • Programming Page is displayed. • Rate is highlighted. Stopped Stopped Press S S e e l l e e c c t t if current rate is desired A: Primary Rate ml/h A: Primary Rate ml/h... -
Page 20: Making Changes While Infusing
Making Changes While Infusing To titrate or change primary rate during infusion Press • Programming Page is displayed. • Rate is highlighted. ↑ ↑ ↓ ↓ ↑ ↑ ↓ ↓ Press , Fast or Fast to change Rate • Value flashes. Press to confirm. - Page 21 Making Changes While Infusing (continued) To simultaneously clear Total Volume Infused for all channels Press • Standard Display page is displayed. Press • softkeys appear. T T o o t t V V o o l l D D e e v v i i c c e e C C o o n n f f i i g g N N o o t t e e Stopped...
-
Page 22: Programming Option
Programming Option To set up an infusion by Rate/Volume or Volume/Time Press if channel is infusing. Press if Standard Display page not already displayed. Press •T T o o t t V V o o l l , D D e e v v i i c c e e , C C o o n n f f i i g g and N N o o t t e e softkeys appear. Press C C o o n n f f i i g g softkey. -
Page 23: Kvo Status
KVO Status To resume infusion when VR=0 (KVO) With a channel infusing at KVO rate: • Green light on channel key remains on. • Red light on channel key flashes. Infusion Complete • Two toned advisory sounds. VR = Press appropriate channel twice. -
Page 24: Secondary Mode
Secondary Mode This option allows two different rates of infusion to be administered sequentially. When secondary volume remaining reaches zero, primary infusion resumes automatically. To avoid the possibility of concurrent flow during secondary delivery of intermittent medications, set up the administration set as recommended below. - Page 25 Secondary Mode (Continued) Programming Secondary Infusion Press • Primary programming page is displayed. Infusing Primary A: Primary Rate 50 ml/h Press A: Pri VolRem (VR) ° ° A: Pri Time(TR) 09h 00m Press softkey. S S e e c c A: Pri VolInf(VI) 50 ml •...
- Page 26 Secondary Mode (Continued) To set secondary rate (Continued) Press to begin infusion. • Four tones sound (if primary infusion is in progress). Infusing Secondary • Pump starts infusing at secondary rate. A: Secondary Rate 100 ml/h A: Sec VolRem (VR) •...
-
Page 27: Dose Rate Calculator (Drc) Using A Specific Drug Name
Secondary Mode (Continued) To review or change primary value(s) during secondary infusion (Continued) Press to highlight value(s) to change. S S e e l l e e c c t t ↑ ↑ ↓ ↓ F F a a s s t t ↑ ↑ F F a a s s t t ↓... - Page 28 Programming Drug NOTE: Changing drug name clears previous values and changes drug concentration and dose r a t e p a r a m e t e r s t o parameters appropriate for the selected drug. Scroll using arrow softkeys to display alphabetized, abbreviated drug names.
- Page 29 Dose Rate Calculator (DRC) Programming using a specific drug name (Continued) Changing Volumetric Rate ↑ ↑ ↓ ↓ F F a a s s t t ↑ ↑ F F a a s s t t ↓ ↓ Choose rate value using the softkeys if dose rate is not as desired.
-
Page 30: Dose Rate Calculator Programming With Drug
Changing DRC values while infusing (Continued) When highlight is on value for VI or DI, C C l l e e a a r r softkey becomes active. Pressing the C C l l e e a a r r softkey changes the value to 0.0. - Page 31 Programming Concentration Choose concentration using ↑ ↑ , ↓ ↓ , F F a a s s t t ↑ ↑ and F F a a s s t t ↓ ↓ softkeys. Press E E n n t t e e r r when desired concentration is displayed. •...
- Page 32 Clearing Volume Infused (VI) or Dose Infused (DI) Press C C l l e e a a r r then E E n n t t e e r r to change VI value to 0. • Highlight moves to DI. Press C C l l e e a a r r then E E n n t t e e r r to change DI value to 0.
-
Page 33: Device
Device NOTE: The Device Type programming selection affects all three channels. It is not possible to program different Device Types for a channel independently. Stopped There are six Device Types with preset parameters that ml/h accommodate specific clinical applications. They are: VR: 450 G G e e n n e e r r a a l l P P u u r r p p o o s s e e O O p p e e r r a a t t i i n n g g R R o o o o m m... - Page 34 NOTE: Values shown in table can be modified to meet the institution’s requirements using FMS software. To review actual default parameters on a MedSystem III® DLE instrument. Select a Device Type and refer to Instrument Settings pages 2 through 5. An asterisk appears beside settings which are not factory default.
-
Page 35: Config
Config (Configuration) The Config option allows the user to view and/or change some instrument settings. There are five pages in this option. Items shown on page 1 of the C C o o n n f f i i g g option can be changed by the user (see Table 2). -
Page 36: Note
Note The Note soft key accesses the Special Note Message page. When a note is programmed, it appears when the pump is turned on. To access Note(s) Infusing Press ml/h VR: 450 Press VI: 50 • T T o o t t V V o o l l , D D e e v v i i c c e e , C C o o n n f f i i g g and N N o o t t e e softkeys appear. Stop affects channel A TotVol Device... - Page 37 T H I S PA G E I N T E N T I O N A L LY L E F T B L A N K GETTING STARTED...
-
Page 38: Alarms, Advisories And Prompts
ALARMS, ADVISORIES AND PROMPTS Use this troubleshooting information in conjunction with appropriate hospital procedures. Responding to an advisory, alarm, or fault message Press Q Q U U I I E E T T . • Audio tone stops. • Red light flashes on affected channel. Press affected channel •... -
Page 39: Advisories
Advisories Two beeps, slow flashing red light on infusing channel’s channel key; infusion continues. Alarm Meaning Response Check Air Sensor At installation of cassette: Verify tubing collar is fully seated in air sensor recess. a) air is detected in tubing; Verify tubing in air sensor recess b) tubing collar is not properly is not damaged, twisted or dirty. -
Page 40: Alarms
Alarms Four rapid-beeps, infusion stops, rapidly flashing red light on channel key. Alarm Meaning Response Air In Line Air detected in fluid pathway during infusion, or air sensor is Verify tubing collar is fully seated dirty. in air sensor recess. Verify tubing in air sensor recess is not damaged, twisted or dirty. - Page 41 Alarms (Continued) Alarm Meaning Response Air In Line Tubing (continued) (Continued) Set up pump at or slightly below IV site to minimize formation of micro bubbles. If no significant air is present, press to resume infusion. Battery Depleted Insufficient battery power. The Connect AC adapter power cord pump will shut down in 5 to pump and plug into wall...
- Page 42 Alarms (Continued) Alarm Meaning Response Cassette Not Latched Cassette is partially disengaged or Push cassette completely in. latching mechanism is dirty. Ensure slide clamp is flush with entire cassette. Press resume infusion. If condition continues, try cassette in a different channel. Replace administration set if alarm recurs.
- Page 43 Alarms (Continued) Alarm Meaning Response Fluid-Side Occluded Upstream restriction to flow. Check tubing between container and pump for a closed regulating clamp, closed vent (with unvented container), kinked tubing, empty syringe, or any restriction to flow. Clear occlusion. Press to resume infusion. Verify fluid is flowing in drip chamber.
-
Page 44: Fault
Fault Numeric message, E u r o p e a n s i r e n , r a p i d - flashing red light, infusion stops. Alarm Meaning Response Channel Out of Order Safety checks built into software CORRECTIVE ACTION for have detected a faulty channel. - Page 45 T H I S PA G E I N T E N T I O N A L LY L E F T B L A N K ALARMS, ADVISORIES AND PROMPTS...
-
Page 46: Maintenance
0.1 - 0.9 ml/hr ±10% with a standard deviation of 1.96. ADMINISTRATION SETS Use only MedSystem III® Administration Sets POWER CONSUMPTION 6 watts AC power. Use only MedSystem III® AC Adapter, Model 1555, or 1560A, ordered as 2861089. BATTERIES Main – Rechargeable NiCd Battery Pack Memory Back-up –... - Page 47 Specifications (Continued) F F U U S S E E S S 3 amp fast-blow internal G G R R O O U U N N D D C C O O N N T T I I N N U U I I T T Y Y Maximum 0.1 ohm Maximum 100 microamps L L E E A A K K A A G G E E C C U U R R R R E E N N T T...
-
Page 48: Check-In
Check-In This is a Quick Reference Procedure for check-in and configuration of a new and recently serviced Medsystem III® instrument. The following check-in and configuration procedures are taken from the current service manual. • Electrical Saftey Test • Power Tests •... - Page 49 Never operate the service. Please call ALARIS Medical Systems® Customer Service MedSystem III® instrument from a at 800-482-4822 or refer to qualified Biomedical technician.
- Page 50 Power Tests A. Power-Up Test Charge the instrument for at least one hour before performing this test. Proceed with the power-up test as follows: Disconnect the AC adapter from the instrument. Remove any cassettes installed in the instrument. Turn the instrument on and verify proper power-up. The instrument performs initial self-test during power-up;...
- Page 51 Cassette and Sensor Test (Continued) Verify that the pump latch mechanism of each channel returns to the Home position at the top of the stroke (nearest to the chassis). Press the channel select key (A, B or C), and then press the START/STOP key.
- Page 52 Patient-side Occlusion Detector Test This test verifies the proper functioning of the alarm which detects occlusion between the instrument and the patient. Repeat the following steps for each of the three channels, A, B, and C. Configure the instrument in the Controller Pressure Device Type.
- Page 53 Air In Line Detector Test This test verifies the proper functioning of the alarm which detects air in a line. Repeat the following procedure for each of the channels, A, B and C. Disconnect the drip chamber from the solution bottle, or inject a large air bubble into the tubing via the upstream y-site.
- Page 54 New Instrument Volume Accuracy Test Accuracy of fluid delivery is determined by measuring the volume of fluid delivered over a known time period and comparing this to the expected value. To ensure accurate measurements during the test, a volumetric glass burette (class A) must be used to collect the fluid.
- Page 55 New Instrument Volume Accuracy Test (Continued) Test Procedure Power up the Unit Under Test (UUT), Press the MORE OPTIONS key. Press the CONFIG soft key. Press the SELECT soft key twice to highlight the Set up line option. Press the ↑ arrow soft key to toggle setting to Y Y e e s s . Press the ENTER soft key to accept setting.
-
Page 56: Cleaning
Cleaning Clean the pump regularly to maintain proper working order and WARNING optimum performance. Turn the instrument off and DO NOT invert the pump during cleaning or rinsing. disconnect the power cord from the DO NOT clean the pump without first inspecting the power source before cleaning. - Page 57 To Clean (Continued) The Pump, lower housing, slide link and latch (Continued) SLIDE LINK ASSY. 3. Set the pump upright. 4. Clean the slide link and pump latch mechanism using a small soft-bristled brush (or lint free swab ) dampened with the appropriate cleaning solution, as specified in the “Cleaning”...
- Page 58 To Clean (Continued) WARNING Optomodule Failure to perform these inspections may result in improper instrument operation. 1. Place the instrument in the upright position. 2. Gently clean the optomodule using a lint-free swab dampened with the appropriate cleaning solution, as CAUTION specified in the “Cleaning”...
-
Page 59: Inspection Requirements
• Responds with the intended function for that key press. NOTE: Detailed instructions for performing periodic inspections and maintenance can be found in the Technical Service Manual for the MedSystem III® Multi-Channel Infusion Pump and in supplemental service bulletins. Periodic inspections must be performed every 12 months. A service agreement may be obtained from ALARIS Medical Systems, Inc., for the performance of all required periodic... -
Page 60: Service Information
Service Information N N O O T T E E : : If the instrument shows evidence of damage in transit, notify the carrier’s agent immediately. Do not return damaged equipment to the factory before the carrier’s agent has authorized repairs. - Page 61 T H I S PA G E I N T E N T I O N A L LY L E F T B L A N K MAINTENANCE...
-
Page 62: Warranty
WARRANTY Medical Systems, Inc., (hereinafter referred to as “ Medical Systems”) warrants that: ALARIS ALARIS A. Each new Medical Systems® instrument excluding battery is free from defects in material ALARIS and workmanship under normal use and service for a period of one ( ) year from the date of delivery by Medical Systems to the original purchaser. - Page 63 T H I S PA G E I N T E N T I O N A L LY L E F T B L A N K MAINTENANCE...
-
Page 64: Glossary
GLOSSARY Abbreviations, Acronyms, Units of Measure 1° Pri Primary infusion 2° Sec Secondary infusion a am AAMI American Association of Medical Instrumentation ABS acrylonitrile-butadiene-styrene AC alternating current (electrical power) BatLog Battery History Log Calc Calculator CalcOff Calculator Off CalcOn Calculator On ClrAir Clear Air Cntrst Contrast COMM Communications Port... - Page 65 Abbreviations, Acronyms, Units of Measure (Continued) ml milliliter mMol millimole milliunit µl microliter N/A not applicable Neontl Neonatal NextPg Next Page Ng Nanogram NiCd nickel-cadmium OR Operating Room OR II Operating Room II p pm Pri Primary psi pounds per square inch Sec Secondary Stnd Disp Standard Display STNDBY Standby...
- Page 66 ALARIS , ALARIS Medical Systems , MedSystem III are registered trademarks of ALARIS Medical Systems, Inc. All other trademarks belong to their respective owners. U.S. Patent Nos. 4,712,583; 4,814,685; 4,832,299; 4,850,817; 4,884,065; 4,919,596; 4,950,235; 5,006,110; 5,009,641; 5,041,086; 5,053,747; 5,064,412; 5,126,616 ; 5,149,603; 5,176,631; 5,243,510; 5,382,232; 5,616,124; 5,772,635; D309,662; D381,622. Italy Patent Nos. 247,824; 0,346,548; 319,277; 319,268;...
Need help?
Do you have a question about the MedSystem III and is the answer not in the manual?
Questions and answers