Table of Contents
Advertisement
Available languages
Available languages
Quick Links
Advertisement
Table of Contents

Subscribe to Our Youtube Channel
Related Manuals for VIPOW LIFELONG PSC001


Summary of Contents for VIPOW LIFELONG PSC001
- Page 3 SICHERHEITSANLEITUNGEN LESEN Sie diese Bedienungsanleitung sorgfältig vor dem benutzen und bewahren diese auf für späteres nachschlagen. Schützen Sie dieses Produkt vor Feuchtigkeit, Wasser und anderen Flüssigkeiten. Vermeiden Sie die Verwendung / Aufbewahrung in extremen Temperaturen. Setzen Sie es nicht direktem Sonnenlicht und Wärmequellen aus.
- Page 4 dass die Batterien richtig eingelegt sind. Vermeiden Sie die Umkehrung der Polarität +/-. Trennen Sie dieses Gerät von der Stromversorgung, nachdem die Batterien vollständig aufgeladen sind. 10. Falsche Verwendung kann zu einem elektrischen Schlag führen. 11. Verschiedene Batterien dürfen nicht gemischt werden.
- Page 5 • 0 Spannung Sprungstart Normalerweise haben alle Batterien vor dem Laden eine Restspannung. Wenn die Batteriespannung 0 V beträgt, werden die meisten Ladegeräte diese nicht aufladen. Dieses Ladegerät wird die Ladung wieder herstellen, auch wenn die Batteriespannung 0 V beträgt. •...
- Page 6 2 oder 4 AA/AAA Batterien in das Batteriefach einlegen. LED Anzeige Pozitiv Negativ Verbinden Sie das Ladegerät mit dem Stromnetz. Die rote LED leuchtet als Anzeige dass der Ladevorgang läuft. Wenn die LED wiederholt blinkt, ist dieses eine Anzeige für eine möglicherweise defekte Batterie oder Gerät.
-
Page 7: Störungsbehebung
Wenn die rote LED grün wird, zeigt dieses dass die Batterie oder Batterien voll aufgeladen sind. Ladegerät vom netz trennen und Batterien entfernen. Beachten Sie die empfohlenen Ladezeiten. Batterien nicht überladen. (GRÜN) Ladevorgang beendet STÖRUNGSBEHEBUNG Wenn die LED-Anzeige nicht leuchtet, stellen Sie sicher, dass das Gerät richtig in die Steckdose eingesteckt ist. -
Page 8: Technische Daten
TECHNISCHE DATEN EINGANG: AC 100-240 V; ~50/60 Hz AUSGANG: DC (2.8 V 250 mA) AA Größe DC (2.8 V 120 mA) AAA Größe Klasse 2 Ladezeit Batterie- Batterie-Type (ungefähr) Kapazität Ni-MH AA 2500 mAh 12 h Ni-MH AA 2000 mAh 9,6 h Ni-MH AA 1500 mAh... - Page 9 Deutsch Korrekte Entsorgung dieses Produkts (Elektromüll) (Anzuwenden in den Ländern der Europäischen Union und anderen europäischen Ländern mit einem separaten Sammelsystem). Kennzeichnung auf dem Produkt bzw. auf der dazugehörigen Literatur gibt an, dass es nach seiner Lebensdauer nicht zusammen mit dam normalen Haushaltsmüll entsorgt werden darf.
-
Page 10: Safety Instructions
SAFETY INSTRUCTIONS Read this instruction manual carefully before use and keep it for future reference. Protect this product from moisture, humidity, water and any other liquid. Avoid using/storing it in extreme temperatures. Do not expose it to direct sunlight and sources of heat. Product suitable for indoor use only. - Page 11 10. Incorrect use may result in electric shock. 11. Different batteries should not be mixed. Do not mix batteries with different sizes or capacities. 12. ALWAYS disconnect this device from power supply mains before cleaning. 13. Clean this device with soft, slightly damp cloth. Do not use any abrasives or chemical agents to clean this product.
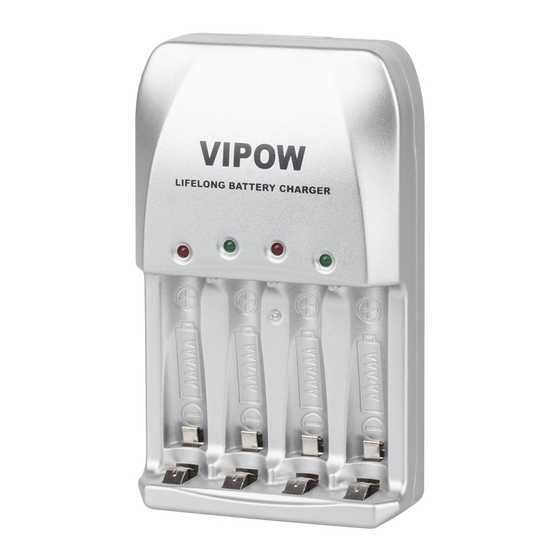
- Page 12 • Easy to Monitor Charge Indicators The unit uses simple red and green indicators to indicate when charging and fully charged. OPERATING INSTRUCTIONS Mount the plug first. (If the product is to be used in North America, use it as indicated in the illustration below)
- Page 13 Insert 2 or 4 AA/AAA batteries in the battery compartment. LED indicators Positive Negative Connect the charger to the adapter and mains power source. The red LED will light to indicate charging is in progress. If the light flashes repeatedly this indicates a possible defective battery or unit.
-
Page 14: Troubleshooting
When the red light turns green this indicates the battery or batteries are fully charged. Unplug the charger and remove the batteries. Observe the recommended charging time. Do not overcharge the batteries. (GREEN) charging complete TROUBLESHOOTING If the LED indicator does not light up, make sure the unit is properly plugged into the wall socket. -
Page 15: Specifications
SPECIFICATIONS INPUT: AC 100-240 V; ~50/60 Hz OUTPUT: DC (2.8 V 250 mA) AA size DC (2.8 V 120 mA) AAA Size Class 2 Battery type Battery capacity Charging time Ni-MH AA 2500 mAh 12 h Ni-MH AA 2000 mAh 9,6 h Ni-MH AA 1500 mAh... - Page 16 English Correct Disposal of This Product (Waste Electrical & Electronic Equipment) (Applicable in the European Union and other European countries with separate collection systems) This marking shown on the product or Its literature, indicates that It should not be disposed with other household wastes at the end of its working life.
- Page 17 KWESTIE BEZPIECZEŃSTWA Przed użyciem należy dokładnie zapoznać się z treścią instrukcji obsługi oraz zachować ją w celu późniejszego wykorzystania. Urządzenie należy chronić przed wilgocią, wodą oraz innymi płynami. Nie należy używać ani przechowywać urządzenia w zbyt wysokich/ zbyt niskich temperaturach. Urządzenie należy chronić...
- Page 18 Przed podłączeniem ładowarki do zasilania sieciowego, należy upewnić się, że baterie zostały umieszczone poprawnie. Baterie należy umieszczać zgodnie z zaznaczoną polaryzacją. Po zakończeniu ładowania baterii, urządzenie należy odłączyć od zasilania sieciowego. 10. Niewłaściwe użycie ładowarki może stwarzać ryzyko porażenia prądem. 11.
-
Page 19: Instrukcja Obsługi
które posiadają szczątkowy ładunek. • Wymienne wtyczki Łatwa i szybka zmiana wtyczek. • Wskaźniki ładowania Zielone i czerwone kontrolki LED wskazują trwające lub ukończone ładowanie. INSTRUKCJA OBSŁUGI Należy najpierw zamontować wtyk. (Jeśli ładowarka ma być używana w Ameryce Północnej, należy wykorzystać wtyk wbudowany w obudowę... - Page 20 Umieścić 2 lub 4 baterie AA/AAA w gnieździe baterii. Wskaźniki LED Plus albo Minus Podłączyć ładowarkę do zasilania sieciowego. Czerwona kontrolka LED sygnalizuje ładowanie baterii. Migająca kontrolka oznacza, że bateria lub ładowarka jest uszkodzona. (CZERWONA) ładowanie w trakcie...
-
Page 21: Rozwiązywanie Problemów
Zaświecenie się zielonej kontrolki wskazuje, że baterie zostały w pełni naładowane. Należy odłączyć ładowarkę od zasilania sieciowego, a następnie wyjąć baterie. Należy zwrócić uwagę na zalecany czas ładowania. Nie należy przekraczać zalecanego czasu ładowania. (ZIELONA) ładowanie ukończone ROZWIĄZYWANIE PROBLEMÓW Jeśli kontrolka LED się nie świeci, należy upewnić się, że ładowarka została prawidłowo podłączona do zasilania. - Page 22 SPECYFIKACJA Wejście: 100-240 V AC, ~50/60 Hz Wyjście: DC (2.8 V 250 mA) AA DC (2.8 V 120 mA) AAA Klasa 2 Szacowany Pojemność Typ baterii czas ładowania baterii Ni-MH AA 2500 mAh 12 h Ni-MH AA 2000 mAh 9,6 h Ni-MH AA 1500 mAh Ni-MH AAA...
- Page 23 Poland Prawidłowe usuwanie produktu (zużyty sprzęt elektryczny i elektroniczny) Oznaczenie umieszczone na produkcie lub w odnoszących się do niego tekstach wskazuje, że po upływie okresu użytkowania nie należy usuwać z innymi odpadami pochodzącymi z gospodarstw domowych. uniknąć szkodliwego wpływu na środowisko naturalne i zdrowie ludzi wskutek niekontrolowanego usuwania odpadów,...
-
Page 24: Instructiuni Privind Siguranta
INSTRUCTIUNI PRIVIND SIGURANTA Cititi cu atentie instructiunile si pastrati manualul pentru consultari ulterioare. Feriti produsul de umezeala, apa sau alte lichide. Nu utilizati/pastrati p[rodusul in medii cu temperaturi extreme. Nu expuneti produsul direct la razele soarelui sau la surse de caldura. Produsul se va utiliza doar in interior. - Page 25 marimi diferite. 12. DECONECTATI intotdeauna aparatul de la reteaua de alimentare inainte de curatare. 13. Curatati aparatul cu un material textil moale, umezit usor. Nu utilizati materiale abrazive sau agenti chimici pentru curatarea produsului. CARACTERISTICI • Control incarcare prin temporizare Aparatul opreste incarcarea daca timpul de incarcare depaseste 10 ore.
- Page 26 • Stecher interschimbabil Usor de introdus si de inlocuit. • Indicator pentru monitorizarea incarcarii Aparatul utilizeaza indicatoere cu LED simple, de culoare rosie si verde pentru a indica starea de incarcare. UTILIZARE Montati stecherul intai. (daca produsul este utilizat in America de Nord, consultati imaginile de mai jos) Europa America de Nord...
- Page 27 Introduceti 2 sau 4 acumulatori AA/AAA in compartimentul bateriilor. Indicatoare cu LED Pozitiv Negativ Conectati incarcatorul la adaptor si la reteaua de alimentare. LED-ul rosu indica o incarcare in desfasurare. Daca LED-ul palpaie, inseamna un acumulator defect sau o unitate defecta – vezi tabelul cu depanarea.
- Page 28 Cand LED-ul rosu se face verde, inseamna ca procesul de incarcare s-a incheiat. Deconectati incarcatorul de la retea si scoateti acumulatorii. Observati timpul de incarcare si comparati-l cu cel recomandat de catre producatorii acumulatorilor. Nu supraincarcati acumulatorii. (VERDE) incarcare completa DEPANARE Daca indicatorul cu LED nu functioneaza, verificati conexiunea la retea.
- Page 29 SPECIFICATII INTRARE: AC 100-240 V; ~50/60 Hz IESIRE: DC (2.8 V 250 mA) marime AA DC (2.8 V 120 mA) marime AAA Clasa 2 Capacitate Timp de incar- Tip baterie baterie care (aprox.) Ni-MH AA 2500 mAh 12 h Ni-MH AA 2000 mAh 9,6 h Ni-MH AA...
- Page 30 Romania Reciclarea corecta a acestui produs (reziduuri provenind din aparatura electrica si electronica) Marcajale de pe acest produs sau mentionate in instructiunile sale de folosire indica faptul ca produsul nu trebuie aruncat impreuna cu alte reziduuri din gospod arie atunci cand nu mai este in stare de functionare.
- Page 32 www.vipow.pl...
Need help?
Do you have a question about the LIFELONG PSC001 and is the answer not in the manual?
Questions and answers