CCV Mobile Premium Manual
Hide thumbs
Also See for CCV Mobile Premium:
- Quick operation manual (12 pages) ,
- First steps (64 pages) ,
- Quick start manual (43 pages)
Advertisement
Available languages
Available languages
Quick Links
Advertisement

Related Manuals for CCV CCV Mobile Premium


Summary of Contents for CCV CCV Mobile Premium
- Page 1 Erste Schritte CCV Mobile Premium...
- Page 2 Kalibrierung durchzuführen. Beim Gerät VX680 erfolgt diese über den Menüpunkt „Akkupflege“ (Menü/ Manager-PIN/ Verwaltung/ System/ Energieverwaltung). Bei den Geräten CCV Go, CCV Fly, CCV Mobile Premium und CCV Base Next erfolgt diese über den Betrieb bis zur vollständigen Entladung mit nachfol- gender vollen Aufladung des Akkus.
- Page 3 Betrieb ACHTUNG: Wegen des Risikos eines Stromschlages oder der Beschädigung des Terminals das Gerät nicht in der Nähe von Wasser (z.B. Badewanne, Waschbecken, Spüle, Waschmaschine, nasser Boden oder Schwimmbad) benutzen. Vermeiden Sie die Nutzung neben elektrischen Anlagen und Anlagen, die hohe Stromschwankungen verursachen oder eine hohe elektrische Strahlung abgeben (z.B.
- Page 4 CE Declaration of Conformity Hereby declares CCV Germany GmbH the accordance of the radio equipment CCV Mobile Premium and its power supply to the directive 2014/53/EU. The complete texts of the EU declarations of conformity are available on following internet address: https://ccv-deutschland.de/de/CCV_Mobile%20Premium...
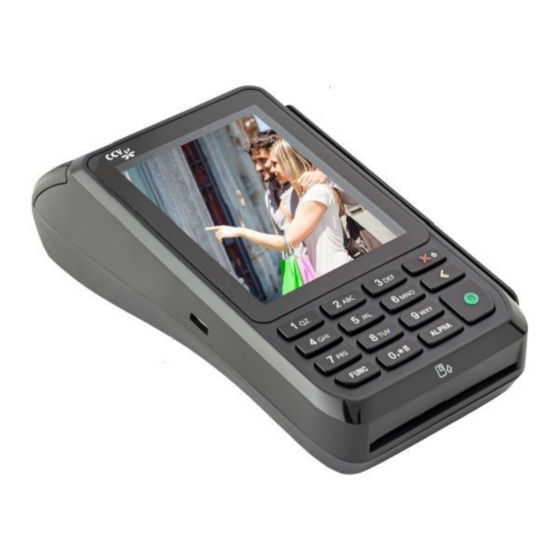
- Page 5 Produktbeschreibung Druckerklappe Magnetstreifen-Leser Kontaktlos-Leser (hinter dem Display) Micro-USB-Ladebuchse Chipkarten-Leser Akku-Stecker Akku SIM-Karten-Steckplatz Händlerkarten-Steckplatz (GeldKarte) Schraube für Deckel Seite 5...
- Page 6 1. Inhalt Inbetrieb- nahme - Terminal CCV Mobile Premium - Akku (Li-ion 2600 mAh, 3,7 V) - Netzteil (Micro-USB, Output: 5V DC, 1,0 A) 2. SIM-Karte einlegen 3. Akku vollständig laden mindestens 6 Stunden 4. Papierrolle einlegen (38 mm) Seite 6...
- Page 7 5. Terminal einschalten 6. Inbetriebnahme 2 Sekunden halten = einschalten/ ausschalten 7. Sprachenwahl und Terminal-ID eingeben 8. PU-Anwahlsatz und Kommunikation wählen Seite 7...
- Page 8 9. Kommunikation einrichten (3G/WLAN) Seite 8...
- Page 9 10. Optional - Kassenanbindung aktivieren Seite 9...
- Page 10 12. Grundzustand 11. Initialisierung Statusleiste Das Terminal startet am Ende der Inbetriebnahme (Kontaktlos-Anzeige, Uhrzeit, Kommunikations-Status) automatisch eine Initialisierung, eine erweiterte Diag- nose und eine EMV-Konfigurationsdiagnose. Bitte kontrollieren Sie die Belege. Sie erkennen die Betragseingabe erfolgreiche Abarbeitung am Text „Erfolgreich durchge- (Beispiel: Eingabe führt“.
- Page 11 Tagesabschluss Bedienung 1. Funktion Tagesab- 2. Beleg kontrollieren schluss („gebucht“) Zahlung 1. Betrag eingeben 2. Karte einlesen (Chip-, 3. PIN-Eingabe (opt.) 4. Beleg kontrollieren Magnet- oder Kontaktlos- und Bestätigung Karte) Kartenleser Chip-Karte stecken Kontaktlose Karte Magnetstreifen-Karte (Chip nach oben) Zügig durchziehen (Magnetstreifen Karte an Display halten.
- Page 12 Storno 1. Funktion Storno 2. Transaktionsnummer 3. Karte einlesen (Chip-, 4. PIN-Eingabe (opt.) und eingeben Magnet- oder Kontaktlos- Bestätigung Karte) Zahlungsverfahren (optional) Wahl des Zahlungsverfahrens durch den Kun- den: „Karte bitte“ Bildschirm → Anwendungsaus- wahl aktivieren (select-Button oder gelbe CORR -Taste) →...
- Page 13 Menü-Aufruf (Passworteingabe Kassierer, Softkeys Manager oder Techniker) Anwendungsauswahl (Wahl des Zahlungsver- fahrens) Softkey-Reihenfolge ändern Kassenschnitt (Einreichung Offline-Umsätze, Abschluss der Transaktion) Favoriten-Aufruf (Anzeige der möglichen Softkey-Funktionen) Konfigurations-Diagnose (z.B. Abholung eines TKM-Kommandos) Belegwiederholung (druckt Händler– und Kundenbeleg nochmals aus) Nachzahlung (Start einer Nachzahlung) Umschaltung Kommunikation (z.B.
- Page 14 Menü aufrufen Menü-PIN Beispiel: 000000 Seite 14...
-
Page 15: Technische Daten
Technische Daten Prozessor/ Arbeitsspeicher 32-bit ARM 11/ 192 MB (128 MB Flash/ 64 MB DDR), Micro SD (TF) bis zu 32 GB Tastatur 10 numerische Tasten, 5 zusätzliche Funktionstasten, hinterleuchtete Tastatur Display 3,5“, 240 x 320 Pixel Farbdisplay (QVGA) , kapazitiver Touchscreen Drucker Integrierter Thermodrucker mit 30 Zeilen/ sec, grafikfähig, Papierrollendurchmesser: 40 mm Kommunikation/ Schnittstellen... - Page 16 Sollte das Siegel gebrochen sein, kontaktieren Sie bitte unverzüglich Ihren Netzbe- treiber! Weitere Informationen finden Handbuch unter: http://www.ccv-deutschland.de —>Service —>Für Netzbetreiber, Partner & In- tegratoren —> Technische Dokumentation —> Mehr Infos © CCV Deutschland GmbH Alle Rechte vorbehalten. Änderungen vorbehalten. Abbildungen ähnlich. Verwendete Produktnamen sind Warenzeichen oder eingetragene Warenzeichen der jeweiligen Inhaber.
-
Page 17: First Steps
First steps CCV Mobile Premium Seite 17... -
Page 18: Safety Notes
Safety notes Power Before you connect the terminal power pack to an electrical outlet, check that the on/off power switch on the terminal is off. If the terminal does not have an on/off switch, check that the power cable connector is removed from the terminals´s power port. Or, when connecting the terminal to a power pack, always connect the plug of the power pack to an electrical wall outlet first. - Page 19 Location — Electrical Considerations CAUTION: Due to risk of electrical shock or terminal damage, do not use the terminal near water, inclu- ding a bathtub, wash bowl, kitchen sink or laundry tub, in a wet basement, or near a swimming pool. Also, avoid using this product during electrical storms.
- Page 20 CE Declaration of Conformity Hereby declares CCV Germany GmbH the accordance of the radio equipment CCV Mobile Premium and its power supply to the directive 2014/53/EU. The complete texts of the EU declarations of conformity are available on following internet address: https://ccv-deutschland.de/de/CCV_Mobile%20Premium...
- Page 21 Product despription Printer cover Magnetic-stripe reader Contacless reader Power connector (Micro-USB) Smart card reader Battery connector Battery SIM card slot Card slot for „Händlerkarte“ (GeldKarte) Screw for backcover Page 21...
- Page 22 1. Content Startup - Terminal CCV Mobile Premium - Battery (2600 mAh, 3,7 V) - Power supply (Micro-USB, Output: 9V DC, 1,0 A) 2. Input SIM card 3. Battery load More than 6 hours 4. Input paper roll (38 mm)
- Page 23 5. Switch on 6. Startup hold for 2 sec. = on/ off 7. Select language and enter Terminal-ID 8. Select Host target (communication unit) Page 23...
- Page 24 9. Set communication (3G/WIFI) Page 24...
- Page 25 10. Optional - activate cash register Page 25...
- Page 26 12. Initial state 11. Initialisation Status bar Please proof your receipts for a successful initialisation, (concactless reader ready, time and communication information) diagnosis and EMV diagnosis. After that the terminal is ready to use. If neccessary you can start the initialisation directly with Enter amount a softkey button or via the menu.
- Page 27 Reconsiliation with closure Handling 1. Softkey reconsiliation 2. Proof your receipt with closure Payment 1. Enter amount 2. Card please … (smart 3. Enter PIN 4. Proof your receipt card, magnetic stripe or contactless) Card reader Smart card Contactless card Magnetic stripe (Chip upside) (draw quickly and magnetic stripe...
- Page 28 Reversal 1. Softkey Reversal 2. Enter transaction num- 3. Card please … (smart 4. Enter PIN card, magnetic stripe or contactless) Select transaction type (optional) If enabled you can choose your payment appli- cation. Transaction information Softkey intermediate or menu revenue Information MENU-...
- Page 29 Menu (password level merchant, manager or Softkeys technician) Select payment application (select your payment application Softkey order (change your softkeys) Reconsiliation with closure (start of booking all open transactions end of the day) Favourites (show all possible softkeys) Config diagnosis (sync host commands) Receipt Copy (reprints merchant and custo- mer receipt) Additional payment (increase the original...
- Page 30 Menu Menu-PIN example: 000000 Page 30...
-
Page 31: Specifications
Specifica- tions CPU/ Memory 32-bit ARM 11/ 192 MB (128 MB Flash/ 64 MB DDR), expandable to 32 GB (Micro SD) Keypad 10 numeric keys, 5 function keys, back-lightning Display 3,5 Inch 240 x 320 pixels capacitive touch screen Communication/ Peripheral Ports WiFi (IEEE 802.11 b/g/n up to 72.2Mbps) + 3G (WCDMA), 1 x Micro-USB/ OTG Power Supply Input: 100-240 VAC, 50 /60 Hz (0,2 A max.), Ausgang: 5V / 1,0 A... - Page 32 If the seal is broken, contact your network provider immediately! Please find further information in the manual which you can download under: http://www.ccv-deutschland.de —>Service —>Für Netzbetreiber, Partner & In- tegratoren —> Technische Dokumentation —> Mehr Infos © CCV GmbH All rights reserved.
Need help?
Do you have a question about the CCV Mobile Premium and is the answer not in the manual?
Questions and answers