Advertisement
Available languages
Available languages
1/4-Rack Space Stereo Digital Vocal Reducer
Quick Start Owner's Manual
BOX CONTENTS
•
•
Manual de inicio rápido para el usuario
CONTENIDOS DE LA CAJA
•
•
Schnellbedienungsanleitung
SCHACHTELINHALT
•
•
Manuel d'utilisation du propriétaire
CONTENU DE LA BOÎTE
•
•
Manuale rapido di utilizzazione
CONTENUTO DELLA CONFEZIONE
•
•
UNIT
POWER SUPPLY
(ESPAÑOL)
UNIT
FUENTE DE ALIMENTACIÓN
(DEUTSCH)
UNIT
STROMKABEL
(FRANÇAIS)
UNIT
BLOC D'ALIMENTATION
(ITALIANO)
UNIT
CAVI DI ALIMENTAZIONE
7-51-0164-A
Advertisement
Table of Contents

Related Manuals for Alesis Vocal Zapper


Summary of Contents for Alesis Vocal Zapper
- Page 1 1/4-Rack Space Stereo Digital Vocal Reducer Quick Start Owner’s Manual BOX CONTENTS • UNIT • POWER SUPPLY Manual de inicio rápido para el usuario (ESPAÑOL) CONTENIDOS DE LA CAJA • UNIT • FUENTE DE ALIMENTACIÓN Schnellbedienungsanleitung (DEUTSCH) SCHACHTELINHALT • UNIT •...
-
Page 2: Rear Panel Connections
Connect the input source as indicated in the diagram. Connect the outputs to an audio amplification source. Plug the AC adapter into the Vocal Zapper and then into a grounded AC power source. Switch everything on in the following order: •... -
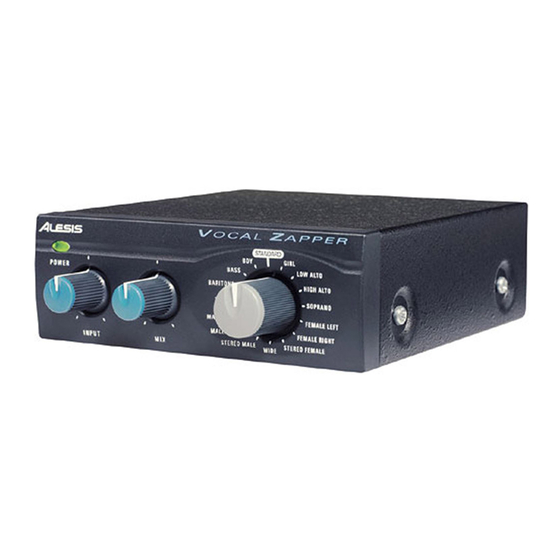
Page 3: Front Panel Controls
Front Panel Controls 1. Adjust the INPUT knob on the front of the Vocal Zapper until you hear a strong, clear signal coming from the unit. If you hear distortion or clipping, turn down the INPUT knob until the distortion goes away. -
Page 4: Conexiones Del Panel Trasero
Conecte la fuente de entrada como se indica en el diagrama. Conecte las salidas a una fuente de amplificación de audio Enchufe el adaptador de corriente alterna al Vocal Zapper y, a continuación, a una fuente de potencia de corriente alterna con toma de tierra. -
Page 5: Controles Del Panel Frontal
Controles del panel frontal 1. Ajuste el botón de entrada [INPUT] en la parte frontal del Vocal Zapper hasta que escuche una señal potente y clara proveniente de la unidad. Si percibe istorsión o «clipping», gire el botón de entrada [INPUT] hacia abajo hasta que la distorsión desaparezca. - Page 6 Anleitung aufgeführt sind, in der Schachtel befinden Sehen Sie sich dieses Aufbaudiagramm sorgfältig an Stellen Sie den Vocal Zapper an einen für den Betrieb geeigneten Platz Stellen Sie siher, daß alle Geräte ausgeschaltet sind und alle Lautstärkenregler auf "null" stehen Schliessen Sie die Eingabequellen wie im Diagramm gezeigt an Schliessen Sie die Ausgänge an eine Tonverstärkerquelle an...
-
Page 7: Bedienelemente Vorderseite
3. Drehen Sie den Programmregler, um jenes Programm, welches zum Entfernen der Stimme aus Ihrem Musikstück am effektivsten sein wird, auszuwählen. Der Vocal Zapper hat 16 voreingestellte Programme zur maximalen Effektivität bei allen Arten von Vokalen. Digitaler Stereo-Vocal Remover, welcher nur ¼ Platz im Rack braucht •... -
Page 8: Connexions Arrière
Brancher tous les appareils tel qu’indiqué sur le schéma Brancher cette sortie à une source d’amplification audio Brancher l’adaptateur CA au Vocal Zapper et ensuite à une prise CA avec mise à la terre Mettre tous les appareils sous tension dans l’ordre suivant : •... -
Page 9: Commandes Du Panneau Avant
Commandes du panneau avant 1. Réglez le niveau à l’aide du bouton INPUT situé sur le devant du Vocal Zapper jusqu’à ce que l’appareil émettre un signal clair et puissant. Pour supprimer la distorsion ou l’écrêtage, réglez le niveau à la baisse à l’aide du bouton INPUT. - Page 10 Collegare le sorgenti di ingresso come indicato nello schema Collegare le uscite ad una sorgente di amplificazione audio Inserire l’adattatore CA nel Vocal Zapper e quindi in una sorgente di alimentazione CA con messa a terra Accendere tutto nel seguente ordine: •...
- Page 11 3. Girare la manopola di programmazione per scegliere il programma preimpostato che sarà il più efficace nell’eliminare le parti vocali nella vostra musica sorgente. Il Vocal Zapper è dotato di 16 preimpostazioni, per la massima efficacia su tutti i tipi di parti vocali.
Need help?
Do you have a question about the Vocal Zapper and is the answer not in the manual?
Questions and answers