AVIRE DCP Installation Manual
Digital communication platform
Hide thumbs
Also See for DCP:
- Quick start manual (28 pages) ,
- Installation manual (23 pages) ,
- Installation manual (80 pages)
Advertisement
Quick Links
DCP
Digital Communication Platform
Installation Guide
Ref No MU7756XAV10A-AU
Part numbers:
3G DCP (RS232): AC-3CM10-620-F-20-000
4G Single SIM card (RS232): AC-4CM10-620-F-20-000
4G Dual SIM card (RS232): AC-4CM10-820-F-20-000
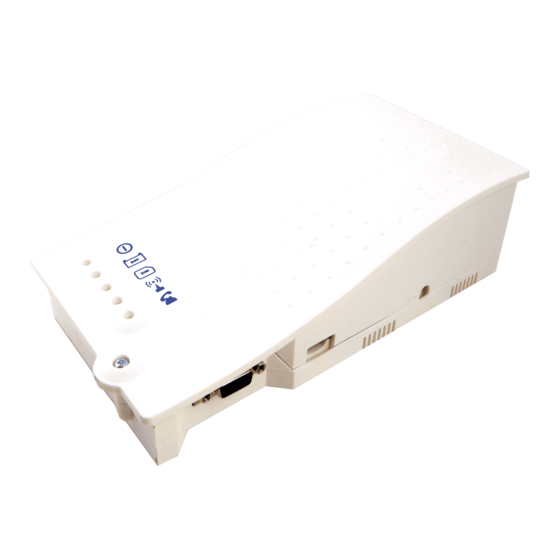
PRODUCT DESCRIPTION
The Digital Communications Platform (DCP) provides an information gateway between
all compatible connected Avire devices in the lift shaft and our online monitoring
platform the Avire Hub. The product is installed as a stand-alone device and doesn't
require connection to the controller panel.
Dual SIM card DCP version only: A dual SIM card version allows switching from one SIM
to another in case the connection is lost. The dual SIM card version also allows the use
of one SIM card for voice and the other one for data only.
In the Box
+
4G DCP (either single or dual version)
OR 3G DCP
+
Antenna
+
P-5 H-2V connector (x1)
+
P-3.5 H-4V connector (x1)
+
P-10 H-2V connector (x1)
+
Grey clamp (x2)
+
Manual
Not Included
+
Screwdriver
+
SIM card/s
1
Advertisement

Related Manuals for AVIRE DCP


Summary of Contents for AVIRE DCP
- Page 1 Avire Hub. The product is installed as a stand-alone device and doesn’t require connection to the controller panel. Dual SIM card DCP version only: A dual SIM card version allows switching from one SIM to another in case the connection is lost. The dual SIM card version also allows the use of one SIM card for voice and the other one for data only.
- Page 2 SIM card is activated and unlocked. Open the DCP with a PZ1 screwdriver. Depending on the version of DCP insert SIM(s) into the J4, pushing the SIM(s) until it (they) click(s). The Dual SIM card version will still work with only 1 SIM installed.
- Page 3 LEDs on the front of the DCP unit will show the network signal level Note: The signal scanner will indicate the best location for the device to receive signal, Network coverage will vary based on local conditions. Once finished turn SW1 dipswitch 1 back to OFF.
- Page 4 Clamp the power cable using the grey clamp provided inside the box. Place the lid back on the top of the DCP and fasten the lid with the screw. Turn on the power to the DCP. The RUN LED on the DCP should change colour from flashing amber to flashing green when the mains power connection is made.
- Page 5 You can remotely enter SIM PIN code into DCP by texting: P1234, P090 xxxx yyyy This option can only be used if DCP is already connected (if one of the two SIMs is active). Important Note: Check ADDITIONAL INFORMATION FOR PROGRAMMING THE DCP...
- Page 6 SETTING PARAMETERS ON NON AVIRE SIMS OPTION 1 Super settings allow quick and easy configuration of APN settings, depending on the country and network provider. Configure settings for the DCP based on the tables below. Example: Digit 1 Digit 2...
- Page 7 P100 + Avire Hub Other APN settings are available on the web and can be easily found online. If an APN is incorrect for the provider or is not set up correctly, the DCP will not check into the Avire HUB.
- Page 8 Important note: Example CCID number is highlighted in red on picture above. You will need to retrieve the CCID number when the DCP installation is set up on the Avire Hub online platform. Please ensure that the person configuring the DCP on the Avire Hub has both the CCID and detail relating to location of the DCP to ensure proper setup.
- Page 9 Please contact your local sales office for access to the Avire Hub. The link to the Avire Hub is http:/ /avirehub.avire-global.com To view installation tutorial videos please go to the “Help” section of the Avire Hub. Click on “Installations” in the menu on the side and then on “Buildings”.
- Page 10 In the new page, you should be able to see Groups and Elevators. Click on “Add Gateway” under “Gateway” tab and select “DCP 4G”. A pop up window will appear where you can enter the SIM information (Note: Avire SIMs are (+31), but this doesn’t affect costs).
- Page 11 Click “Save” in the left corner under the General data column. To make sure that everything has been set up correctly click on the green DCP button. The buttons “Access” and “Events” should now be accessible. Click on the “Access” button.
- Page 12 SIM0 - Voice SIM, SIM1 - Data SIM. SIM1 is attahed to network, listening to any incoming calls, once an alarm call is active, the DCP will switch to SIM0 and stay active till the end of alarm. Important Note: The default PIN code for DCP is always 1234.
-
Page 13: Connector Description
Programmable I/O J2 - External antenna - Connect the external antenna delivered with the kit to the J2 connector. Only antennas approved by Avire should be used in the installation, otherwise the device might not function properly and may be damaged. - Page 14 Inbuilt signal tester Default OFF Not used Not used Reserved Avire internal use only Default OFF CAN Ω Activates the CANBus End of Line (EOL) for the CAN connector. Default ON – DCP is typically an End of Line device.
- Page 15 (BAT) BATTERY FLASHING Green Amber Orange Charging DAU battery failure Error Important Note: DCP shows battery status of DCP or battery failure of any attached DAU units as per EN81-28:2018. Flashing Green Amber Green Amber Ongoing Sim error or Available...
- Page 16 System Architectures Triphony Unit Universal Power PIT Phone Display Digital Audio Unit Induction Loop CAN Bus Splitter (COP) Lift car system architecture with DCP, DAU, TOC Triphony Unit, Inductive Loop...
- Page 17 Two lift car system architecture with DCP, Two lift cars with DCP, UPS, CANBus Splitter, DAU, TOC and BOC Triphony Units TOC Triphony Unit, DAU, PIT Phone. Four lift cars with DCP, UPS, CANBus Splitters, DAU, Triphony Units TOC, PIT Phones...
- Page 18 If only connecting 1 device to the DCP (e.g. DAU) set SW1 dipswitch 4 to ON It is recommended to use shielded twisted pair cables If connecting 2 devices to the DCP (e.g. 1 DAU and 1 PIT unit) set SW1 dipswitch 4 to OFF There are no standard wiring colours for CANBus wiring Please refer to the DAU Installation guide for full setup of the DAU.
- Page 19 Installation with a Memcom When connecting a Memcom+ use the analogue phone line connection from J1A or J9. Please refer to the Memcom+ installation guide for full set up of the Memcom+. Connection on Memcom+ Connections on DCP J9 GSM phone J9 GSM...
-
Page 20: Installation
Use a soft dry cloth. Do not use solvent or abrasive products. SAFETY Please read these safety instructions before starting the device. Do not expose this device to liquids or excessive humidity. The DCP is an indoor device and is not waterproof. Do not expose the device to fire.
Need help?
Do you have a question about the DCP and is the answer not in the manual?
Questions and answers