
Related Manuals for GHL ProfiLux 4


Summary of Contents for GHL ProfiLux 4
- Page 1 ProfiLux 4 Resource Guide Step-by-step resource guide for ProfiLux 4 As of November 2018...
-
Page 2: Table Of Contents
ONTROL CENTER TO DO: GHL C ........................... 9 OWNLOAD ONNECT APP PROFILUX 4 CONNECTIVITY OPTIONS ........................10 LEARNING THE BASICS OF GHL CONTROL CENTER ..................... 10 ................................ 11 GCC START SCREEN ............................... 12 EVICES ................................13 ................................13 ................................13... - Page 3 – 1-10V I ............................50 SYSTEM NTERFACE ) ............................ 51 MAIL NOTIFICATION ROFILUX TO DO: ASSIGN PAB-DEVICES TO THE PROFILUX 4 ....................52 TO DO: PROBE CALIBRATION ............................55 ..........................56 ROBE CALIBRATION TERMINOLOGY ..............................56 PROBE CALIBRATION ............................57...
- Page 4 HOW TO SETUP EMAIL NOTIFICATION ........................98 HOW TO UPDATE PROFILUX 4 FIRMWARE ......................101 HOW TO UPDATE PROFILUX 4 WI-FI MODULE, WEB SERVER, WEB INTERFACE ............. 105 HOW TO UPDATE PAB-DEVICE FIRMWARE ......................107 PROGRAMMABLE LOGIC EXAMPLES ........................110 ..............
-
Page 5: Getting Started
This guide will provide step-by-step instructions and photos for setting up the most commonly used features and functions of the ProfiLux 4. When navigating through this guide, refer to the table of contents and pick a topic of choice. We HIGHLY recommend new ProfiLux 4 users to follow the TO DO steps first. -
Page 6: Please Read: Profilux 4 Connection Ports Overview
PLEASE READ: ProfiLux 4 connection ports overview Right out of the box your ProfiLux 4 controller comes packed with many ports for various purposes ranging from BNC-ports to ports for 1-10v devices. Here is a brief overview of the ports behind the ProfiLux 4. For more specific information on these ports, please refer to our Connection Overview ProfiLux 4 Manual;... -
Page 7: Finding Your Current Profilux 4 Firmware Version And More
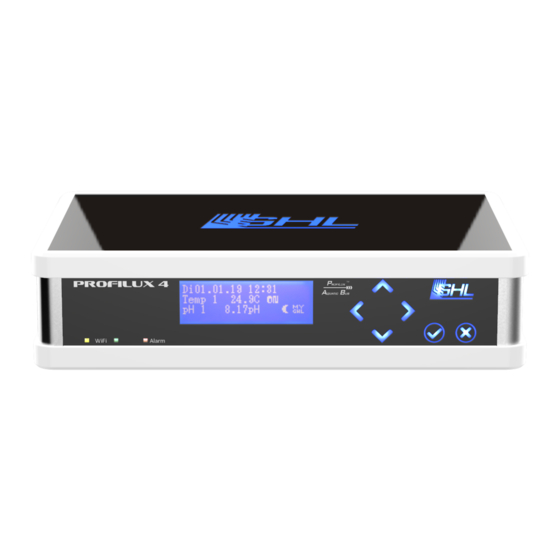
Understanding the meaning of the GHL Logo LED color codes The on-board LED status display at the top of the ProfiLux 4 serves as a notification tool to tell you the current status of your controller. Each color code has a separate meaning. In most cases, the ProfiLux 4 LED logo may light up with different colors indicating multiple notifications. -
Page 8: To Do: Unpack And Connect All Cables To The P4
Unpack and connect all cables to the P4 Carefully open up your ProfiLux 4 and unpack all the contents that are included in the box. Make sure that all parts are included. The list of included parts are shown on the product box. -
Page 9: To Do: Change The Langage From German To English
Change the Language from German to English When you power-on your controller for the first time, you will see that the text is displayed in German. The displayed language can be changed by either using the ProfiLux 4 touch keys or through GHL Control Center. -
Page 10: Profilux 4 Connectivity Options
ProfiLux 4, Mitras LX 7 series, and Doser 2.1. Think of this piece of software as your gateway to accessing all that your GHL product has to offer. From firmware updates to creating and assigning functions, GCC is there to help you navigate through our product’s features with ease. -
Page 11: Gcc Start Screen
GCC Start Screen This is the screen you will see when you open up GHL Control Center for the first time. A. This window is basically a shortcut for creating a new connection for your GHL device. -
Page 12: Gcc Tabs: Devices
GCC Tabs: Devices Devices tab is used for connecting to a GHL device. Here is where you can also add a new GHL device connection or modify an existing one. The UPDATE VIEW and SAVE CHANGES option is available when you are connected to a GHL device. -
Page 13: Gcc Tabs: View
GCC. (Recommended) Start window: Check the box to display the GHL CONTROL CENTER START window. GCC Tabs: Help This tab provides tips to learning more about GCC. It also includes a shortcut to our official support forum. -
Page 14: Gcc Tabs: Extras
Serial number (PAB): Click here to view PAB-device serial number Calibration (Expansion Box): Not applicable to this guide. GCC Tabs: Backup and restore This is where you can backup and restore your ProfiLux 4’s settings and probe calibration data. 2018-13-11... -
Page 15: Gcc Tabs: Communication
Adjust device address: Useful for those who have more than 1 ProfiLux on their network. Click to change device address. Communication monitor: Click to view the quality of the connection to your GHL device. 2018-13-11... -
Page 16: To Do: Connect Via Usb
Select the correct ProfiLux device to create a new connection. AUTO 9600 c. Give this new connection a name, set COM to and Baud to Save d. Click Connect 3. Click and the ProfiLux 4 will now connect via USB 2018-13-11... -
Page 17: To Do: Setup Wi-Fi Connectivity
TO DO: Setup Wi-Fi Connectivity This section will show you how to connect the ProfiLux 4 to your Wi-Fi network using GCC. The steps provided in this section will show you how to configure the P4’s Wi-Fi settings using Automatic IP and Static IP assignment methods. Follow the instructions for your IP address assignment method of choice. -
Page 18: Wi-Fi Auto Ip Setup
ProfiLux 4 Resource Guide TIP: Benefits of Access Point mode ProfiLux 4 is equipped with its own Wi-Fi hotspot which emitts a Wi-Fi signal for other devices (PC, Smartphone, Tablet) to connect to it. This is called Access Point Mode . -
Page 19: Wi-Fi Static Ip Setup
ProfiLux 4 Resource Guide 8. Wait 20-30 seconds for the ProfiLux 4 to connect to your network. When the middle light on the front of the P4 turns GREEN, the device is connected to your Wi-Fi network. Communication 9. Reconnect via USB, go to the settings page, and note the IP address that has been assigned to the ProfiLux 4. - Page 20 ProfiLux 4 Resource Guide 5. Enter the following information: SSID: Exact name of your Wi-Fi network Encryption: WPA WPA2PSK WiFi Key: Your Wi-Fi password 6. Select USE FOLLOWING SETTINGS. 7. Enter the following information: IP address: The IP address you wish to assign to the P4 i.
-
Page 21: Recommended: Setup P4 Wi-Fi Hotspot Settings
ProfiLux 4 Resource Guide 9. Wait 20-30 seconds for the ProfiLux 4 to connect to your network. When the middle light on the front of the P4 turns GREEN, the device is connected to your Wi-Fi network. Communication 10. Reconnect via USB, go to the settings page, and note the IP address that has been assigned to the ProfiLux 4. -
Page 22: How To Connect To The P4 Via Wi-Fi
NOTE: You must be on the same Wi-Fi network as your P4 In order to connect to your P4 wirelessly with either GHL Control Center or the app, the device you are using to connect must be on the same Wi-Fi network as your P4. -
Page 23: Recommended: Connect Via Wi - Fi Using Ghl Control Center
1. Open GHL Control Center on your PC and click ADMINISTRATE (see top right of screen). 2. Click NEW, then select the ProfiLux 4. 3. Set type of connection to NETWORK, type-in the IP address of your ProfiLux 4, give this connection a name (i.e. ProfiLux 4 Wi-Fi), click SAVE. -
Page 24: How To Setup Myghl Cloud Access
4. Select your newly made connection to connect to the P4 over Wi-Fi. How to setup myGHL cloud access Easily access/control your ProfiLux 4 from anywhere in the world via the cloud with myGHL. This section will show you how to get myGHL up and running. - Page 25 You can view our myGHL setup video by clicking the link below. Connecting GHL devices to myGHL: https://youtu.be/w7DoZ1Y6wdE To setup myGHL access, please follow these steps: 1. Connect to your ProfiLux 4 via USB (Wi-Fi is also okay) System 2. Click on the (+) icon right beside and select COMMUNICATION.
- Page 26 GCC. Paste the number into the Security key field on myGHL.com. The security key shown in your GHL Control Center will be automatically generated from the myGHL servers and is only shown once your device has been verified.
-
Page 27: Ghl Control Center Walkthrough
ProfiLux 4. For details not covered in this section, please refer to the P4 Programming Guide. As soon as you connect to the ProfiLux 4, you will be brought to the GENERAL settings page. A. This is the section where most ProfiLux functions are setup and assigned. -
Page 28: Illumination - Light Composer
More information on this can be found here. Illumination – Light Composer Here is where you can create and adjust your light schedule for the GHL Mitras LX6, LX7, and Lightbar2. When it comes to light customization, Light Composer is unmatched. See how to create your own light schedule by clicking the link below. -
Page 29: Illumination - Illumination Ch 1-32
The information below will only cover the basics of Illumination channel options. For more information on Illumination channels, please refer to page 19 of the ProfiLux 4 Programming Guide. A. This is where you select if the lighting fixture you’ll use is dimmable or not dimmable and if this channel will react to elevated temperature readings. -
Page 30: Illumination - Thunderstorm
ProfiLux 4 Resource Guide Illumination – Thunderstorm ProfiLux 4 is capable of controlling compatible dimmable fixtures in such a way that it can simulate Thunderstorm effects. Here is where you can adjust those settings. A. This is where you specify the days of the week to enable the Thunderstorm effect. You can also specify how many times to trigger the effect, the time it will occur, and duration. -
Page 31: Illumination - Simulation
ProfiLux 4 Resource Guide Illumination – Simulation ProfiLux 4 is capable of simulating cloud cover, moon phases, and rainy day events. These features can be used by ProfiLux-compatible dimmable lighting fixtures. NOTE More information on cloud cover, moon phase, and rainy days can be found on page 24 of the ProfiLux 4 Programming Guide. -
Page 32: Illumination - Temp.-Dep.lightred
ProfiLux 4 Resource Guide B. This is the moon phase simulation area. You can specify the time to begin and end the moon phase. More info on this feature can be found on page 24 of the P4 Programming Guide. -
Page 33: Illumination - Acclimation
ProfiLux 4 Resource Guide A. The temperature probe which will control this function is selected here. B. (Dimmable fixtures) Here is where you can select when the fixture should begin dimming and when it should shut off completely. C. (Non-dimmable fixtures) For non-dimmable fixtures, here is where you select when the... -
Page 34: Processes - Timers
B. Shows a visual of the light output increase over the course of the acclimation period. Processes – Timers Here is where you can create different kinds of timer functions ranging from basic on/off timers to short cycle timers. ProfiLux 4 supports up to 32 different timer functions. 2018-13-11... - Page 35 ProfiLux 4 Resource Guide A. Type in a description for this timer. B. This is where you select how this timer will operate. Normal: Normal timer for on/off functions Short: Used for short switching periods from 1s – 300s.
-
Page 36: Processes - Reminders
ProfiLux 4 Resource Guide Processes – Reminders This feature is perfect for helping you remember when a certain task needs to be performed. For example, replace bulbs, replace GFO media, water change, etc. A. Double-click on a reminder number to open up the editing window. -
Page 37: Dose Overview - Dosing Pump (Part 1)
This is where you can setup and configure dosing pump scheduling. These channels are NOT limited to only GHL Dosing Pumps (Gen 1, Doser 2.0/2.1, Doser Maxi). Those who have dosing pumps that can be run off of conventional timers can also benefit from the available features. - Page 38 ProfiLux 4 Resource Guide A. This is where you can see the approximate amount of ml remaining in your dosing container. Once a dosing schedule has been created, you will be able to see how many days you have until the container runs empty.
-
Page 39: Dose Overview - Dosing Pump (Part 2)
ProfiLux 4 Resource Guide Dose overview – Dosing pump (Part 2) This is a continuation of dosing pump (Part 1). The other half of dosing pump options will be covered here. A. A description of what you’re dosing goes here. -
Page 40: Extras - Stream Group
ProfiLux 4 Resource Guide E. Once your dosing schedule has been created, a graph will be displayed. This will show you when the doses will occur throughout the day. Automatically F. Available ONLY for the option. Here you can specify how many times per day you want to dose and how many ml each dose will consist of. -
Page 41: Extras - Feed Pause
B. Here is where you can select the flow mode and wave option. A full description of these options can be found on page 35 of the ProfiLux 4 Programming Guide. C. Pumps assigned to this group will be shown on the LEFT. You can assign a pump to a group by simply selecting the pump number to the RIGHT and clicking on the left- pointing arrow. -
Page 42: Probe/Sensor Controls - Basics
ProfiLux 4 Resource Guide A. This is where you select which Powerbar sockets will react to the maintenance mode. Switchplugs: Select which Powerbar socket will react to the selected Maintenance mode. Select if the socket will turn ON or OFF when maintenance mode is activated. - Page 43 ProfiLux 4 Resource Guide A. Here is where you enter the most important bits of information pertaining to the selected probe. Nominal value: This is the desired value you wish to maintain. Cooling difference: Applies to temperature probe only. See page 58 of P4 Programming guide for more information.
-
Page 44: Probe/Sensor Controls - Level Settings
The LEVEL settings page is where you can program how Level sensors will function. Level sensors are GHL-branded Float switches, optical sensors, leak sensors, and flow sensors. These sensors can be used for handling tasks such as ATO w/ 1 or 2 sensors, AWC, Leakage detection, etc. - Page 45 ProfiLux 4 Resource Guide Auto Top Off – When a single sensor detects a low water level, Fill Water the Powerbar socket with the function, , will turn on. When normal water level is reached, the socket will turn off.
-
Page 46: Probe/Sensor Controls - Measurement Data
ProfiLux 4 Resource Guide iii. Reset error automatically: This feature is useful if you wish to have a level alarm automatically reset when the assigned sensor detects that the problem is solved and/or normal water level is reached. iv. Used sensors for this control: Here is where you select the specific sensor to use for the assigned Operation mode. -
Page 47: Display
ProfiLux 4 Resource Guide Display This is where you can specify what information you want shown on the ProfiLux 4 display. Display brightness can also be adjusted here. A. Select the info you want to display on the ProfiLux 4. -
Page 48: System - Communication
PAB-devices assigned to the ProfiLux 4. C. Specifications for the selected device will be shown here. System – Communication All ProfiLux 4 communication related settings will be shown here. Wi-Fi, myGHL, and webserver login settings can be configured here. 2018-13-11... -
Page 49: System - Switch Channels And Outlets
ProfiLux 4 Resource Guide A. myGHL settings are configured here. B. Webserver admin and password will be displayed here. These are the credentials to enter when you access the P4 webserver. C. Wi-Fi module settings are configured here. D. Wi-Fi network settings for home network and P4 direct connection settings are configured here. -
Page 50: System - 1-10V Interface
ProfiLux 4 Resource Guide This page provides an overview of all 64 controllable sockets and displays their current states. Double click on the desired Powerbar socket and a new window will pop-up. This window is where you get to assign a specific function to the selected socket. Select the function to assign, type-in a description, set a Blackout-delay if needed, click OK. -
Page 51: Email Notification (Profilux)
ProfiLux 4 can be configured to send email notifications under various conditions such as triggered alarms and regular emails with probe readings and system status. Here is where you can enter your email server information and configure when the ProfiLux 4 should send an email. -
Page 52: To Do: Assign Pab-Devices To The Profilux 4
Password: Enter your email password here TO DO: Assign PAB-devices to the ProfiLux 4 This section will show you how to assign PAB-devices to the ProfiLux 4. NOTE: Preliminary setup PAB devices include Powerbar 5.1, ProfiLux Touch, GHL Doser 2/2.1, KH Director, etc. - Page 53 P4 and other end of the cable to the PAB-port on the Powerbar5.1. 2. Connect to the ProfiLux 4 using GHL Control Center and click on SYSTEM. 3. Click on ASSIGN DEVICES; a new window will pop up.
- Page 54 5. You will then be asked if you want to assign the PAB-devices now, click YES. 6. Reconnect to the ProfiLux 4 and go back to the SYSTEM settings page. Clicking on the (+) next to PAB will show the newly added PAB-device.
-
Page 55: To Do: Probe Calibration
P4 set which does not require any calibration. NOTE Probe calibration can be done through the ProfiLux 4 display. No need to use GHL Control Center for this process. Best calibration practices In order to acheive the most accurate probe readings, proper calibration must be performed. -
Page 56: Probe Calibration Terminology
ProfiLux 4 Resource Guide Calibration is not required for Temperature probe The GHL Temperature probe does not require calibration. Simply connect it to the Temperature BNC port and place it into the aquarium! Probe calibration terminology Before starting probe calibration, we recommend you become familiar with the terminology used during calibration: ... -
Page 57: Redox Probe Calibration
Null plug . This is the blank BNC connector plug that was included in the ProfiLux 4 product box and in Redox expansion cards. Please have this plug Null plug on-hand as it will be needed later in the calibration steps. This will connect to the Redox port on the P4. -
Page 58: Conductivity Probe Calibration
ProfiLux 4 Resource Guide 1. Press any of the arrow keys on the P4 and select SENSOR SETTINGS 2. Select REDOX 1 or desired Redox probe to calibrate 3. Select CALIBRATION 4. Select (1) for CALI. TOLERANCE if probe is brand new or less than 1 year old. -
Page 59: To Do: Setup Heater Control
TO DO: Setup heater control This section will show you how to create and assign a basic heater function on your ProfiLux 4. First, you will create the function, then you will assign the function to an outlet on your GHL Powerbar. - Page 60 You can view our how-to video on “Heater control setup“ by clicking the link below. How to setup and assign basic heater function: https://youtu.be/KyhGr8fdmOs To setup basic heater control on your ProfiLux 4, please follow these steps: CREATING THE FUNCTION 1. Connect to the ProfiLux 4 using GHL Control Center Probe/sensor controls 2.
- Page 61 ProfiLux 4 Resource Guide OPTIONAL: Trigger alarm for Temperature swings If you wish to activate an alarm when temperature rises or falls beyond a certain temperature, set the alarm to ACTIVE and set the maxiumum allowed deviation. If you want to turn OFF your heater when the temp reading goes...
-
Page 62: To Do: Setup Return Pump Control
TO DO: Setup return pump control When it comes to having the ProfiLux 4 control your return pump(s), you have many options to choose from. You can set the return pump to react to a feed pause, maintenance mode, control the flow via 1-10V interface, stay always ON, etc. -
Page 63: React To A Feed Pause
Shut down pump if sump water level gets too low In order to turn OFF the return pump to prevent it from running dry, you will need a GHL float or optical sensor. This sensor is what will trigger the pump to turn OFF. -
Page 64: To Do: Setup Skimmer Control
Shut down skimmer if sump water level gets too high or cup is full In order to turn OFF the skimmer to prevent it from overflowing, you will need a GHL float or optical sensor. This sensor is what will trigger the pump to turn OFF. -
Page 65: Combine Feed Pause And Timer Function
TO DO: Setup non-dimmable lighting timers If you have any non-dimmable lighting you would like to have controlled by the ProfiLux 4, please follow the steps below. These kinds of lights can be T5, MH, Refugium lighting, etc. First, you will create the function, then you will assign the function to an outlet on your GHL Powerbar. - Page 66 ProfiLux 4 Resource Guide TIP: Temperature dependent light reduction Temperature dependent light reduction ProfiLux includes a feature called This feature links your temperature probe to your lighting timers. If your tank temperature rises above a certain point, this feature will automatically turn off your lights to prevent further heat transfer.
- Page 67 ProfiLux 4 Resource Guide 2. Select SWITCH CHANNELS AND OUTLETS. 3. Select the outlet that has or will have the light fixture connected to it. 4. Set the function to ILLUMINATION and select the channel number that has your illumination settings.
-
Page 68: Optional: Temperature Dependent Light Reduction
ProfiLux 4 Resource Guide OPTIONAL: Temperature Dependent Light Reduction NOTE ProfiLux 4 can further assist with temperature management when you use Temperature dependent light reduction. If your tank temperature rises higher than a maximum allowed temp, the ProfiLux can be triggered to turn OFF specific lights for the remainder of the day. -
Page 69: To Do: Setup Normal On/Off Timers
This section will show you how to setup and assign standard ON/OFF timer functions to specific Powerbar outlets. First, you will create the function, then you will assign the function to an outlet on your GHL Powerbar. For this setup, you will use the TIMER options located under Processes... - Page 70 ProfiLux 4 Resource Guide Specific days of week: Select if you wish to activate this timer only on certain days of the week. Day interval: Select if you wish to activate this timer in intervals. For example, repeat all 3 days = Timer will run every 3 days.
-
Page 71: How To Setup 1-10V Lighting Control
With the correct GHL accessory, any dimmable lighting fixture that has its own 1-10V interface can be controlled by the ProfiLux 4. Lighting that is dimmed through a PWM signal can also be controlled. The accessory to use will depend on the lights you plan to control. - Page 72 1-10V Breakout Box LEDControl4 V2 as the CONNECT CONTROL CABLE 1. Take the 1-10V control cable and connect it to the lighting fixture and GHL accessory. 2. Connect the GHL accessory to an available YELLOW L-channel port on the back of the ...
- Page 73 ProfiLux 4 Resource Guide For example, if connected to L1/L2, you can configure L1 and L2 in the 1-10V interface settings page. If on L3/L4, you can configure L3 and L4. If you’ll be using 1 channel and not the other, select only 1 channel.
-
Page 74: Optional: Temperature Dependent Light Reduction
OPTIONAL: Temperature Dependent Light Reduction NOTE ProfiLux 4 can further assist with temperature management when you use Temperature dependent light reduction. If your tank temperature rises higher than a maximum allowed temp, the ProfiLux can be triggered to turn off specific lights for the remainder of the day. - Page 75 ProfiLux 4 Resource Guide To activate this feature, please follow these steps: 1. Select an ILLUMINATION channel. 2. Check the box, TEMP.-DEP. LIGHT REDUCTION. 3. Repeat steps 1 and 2 if you want multiple Illumination channels to react to this feature.
-
Page 76: How To Setup 1-10V Pump Control
1-10V pump up and running. First you will connect the control cables to the ProfiLux 4, then you will assign the 1- 10V interface function, then configure the pump’s behavior. - Page 77 ProfiLux 4 Resource Guide 1. Connect the 1-10V control cable from the pump or 1-10V breakout box to an available YELLOW 1-10v port to the back of the P4. If you are connecting a single cable directly to a 1-10V port, the control cable numbering will be assigned to the first number of that 1-10V port.
- Page 78 ProfiLux 4 Resource Guide ASSIGNING PUMPS TO A STREAM GROUP Now that the 1-10V interface has been assigned as a Stream Pump, it’s time to assign the pump(s) to a Stream Group. Extras 1. Click on the (+) icon to the left of...
- Page 79 Sinus wave: Gentle increase/decrease of flow between the Min/Max flow percentages. 4. Specify the Min/Max wave duration for the desired WAVE pattern. More information on this option can be found on page 37 of the ProfiLux 4 4.5.2.4 Wave Programming Guide, see 5.
-
Page 80: How To Setup Dosing Pump Schedules
PAB-port and traditional dosing pumps. Have a GHL Doser? If you plan to use your ProfiLux 4 to control a GHL doser such as Doser 2.1 or Doser Maxi, the doser must FIRST be assigned to the ProfiLux 4. Please... -
Page 81: How To Setup Reminders
5. Click SAVE CHANGES. To setup dosing pump schedules, please follow the steps shown in this video: How to create a dose schedule w/ GHL Control Center: https://youtu.be/yGUOIdygbuQ How to setup reminders Want to be reminded to change light bulbs or perhaps replace your carbon/phosphate media? Use the ProfiLux Reminders feature! This section will show you how to create and configure reminders. -
Page 82: How To Setup Feed Pause Functions
7. Type-in a description for this reminder and click OK. 8. Click SAVE CHANGES. Every time a reminder event occurs, the given text will be shown on the ProfiLux 4 display. How to setup Feed pause functions If you have certain Powerbar outlets that you’d like to turn OFF during feeding time, you can configure the ProfiLux 4 to temporarily turn these off. - Page 83 SHORTCUT KEY for Feed Pause Feed pause can be activated by pressing the (X) key on the ProfiLux 4 controller. Select which FP to activate and the function will be enabled. To setup a Feed pause function, please follow these steps:...
- Page 84 ProfiLux 4 Resource Guide NOTE Filter off In the column, you will see that the boxes are checked. A checked box means that when a certain FP is activated, any powerbar outlet with the corresponding function – FILTER will be turned OFF. An unchecked box will not affect those outlets.
-
Page 85: How To Setup Maintenance Modes
ProfiLux 4 Resource Guide How to setup Maintenance modes ProfiLux 4 can be configured to temporarily shut down specific outlets, 1-10V devices, and Mitras Lightbar. This feature is especially useful for manual water changes or general maintenance tasks. When activated, specific devices will be turned OFF for a certain amount of time, then turned back ON after the time has elapsed. -
Page 86: How To Setup Ato Control (1 Or 2 Sensors)
ProfiLux 4 Resource Guide Max. duration 6. Set the for this maintenance mode. 240 minutes (4 hours) is the maximum allowed time. 7. Click SAVE CHANGES. How to setup ATO control (1 or 2 sensors) This section will show you how to setup and assign an ATO function to an outlet on your Powerbar. - Page 87 This section will only show you how to get an ATO function running with a dedicated ATO pump connected to an outlet on your powerbar. Need a visual? You can view our “ATO setup for ProfiLux 4“ how-to video by clicking the link below. 1-sensor ATO setup: https://youtu.be/bNpl8dqp3g0...
- Page 88 ProfiLux 4 Resource Guide CREATING THE FUNCTION Probe/sensor controls 1. Click on the (+) icon to the left of and select LEVEL. 2. Select an unused CONTROL CIRCUIT Operation mode 3. Set the to AUTO TOP OFF, MIN/MAX CONTROL, OR, ATO 2 SENSORS.
- Page 89 ProfiLux 4 Resource Guide TIP: Sensor reaction time (Delay) Some filtration systems have high-flow sumps which can trigger the sensor when it is not neccessary. If you wish to change the reaction time for specific level sensors, you can do...
-
Page 90: How To Setup Awc Function
This section will show you how to setup and assign an Automatic Water Change function. First, you will create the function, then you will assign the function to outlets on your GHL Powerbar. In order to setup AWC control, you will need certain items. These items can be purchased at... - Page 91 To setup AWC control, please follow these steps: CONNECT ALL ACCESSORIES 1. Connect the 2x GHL Float or Optical sensors to an available Level-port on your P4. Take note which color port on the P4 you are connecting the sensors to.
- Page 92 ProfiLux 4 Resource Guide ATO & Water change: Similar to Water change, but also includes the ATO function where the top (max-point) sensor will serve for both ATO and AWC functions. i. If this option is selected, select if you want the ATO function always active.
- Page 93 ProfiLux 4 Resource Guide Processes 1. Click on the (+) icon to the left of and select an unused TIMER. Switchmode 2. Set the to EVENT START. 3. Select the days of the week to activate this TIMER (AWC function).
-
Page 94: How To Setup Leakage Detection
How to setup Leakage detection ProfiLux 4 comes equipped with a Leakage detection feature which can be set to notify you of a leak. This feature can also be used to shut down certain Powerbar outlets in cases where a leak is detected or shut down return pumps if the sump water level gets too low. - Page 95 To setup Leakage detection, please follow these steps: CONNECT ALL ACCESSORIES 1. Connect the GHL Leak interface, Float sensor, or Optical sensor to an available Level- port on your P4. Take note which color port on the P4 you are connecting it to.
- Page 96 ProfiLux 4 Resource Guide i. For example, if a single sensor is connected to Level 1/2, the sensor would automatically be assigned as Level sensor #1. 2. Connect the Leak sensor(s) to the Leak interface. (Applies ONLY to those using Leak sensors.)
- Page 97 ProfiLux 4 Resource Guide Using a Float or Optical sensor for a return pump? If you‘ll be using this leak detection feature for the purpose of shutting down your return pump if sump water level gets too low, you MUST invert the reaction of the sensor.
-
Page 98: How To Setup Email Notification
ProfiLux 4 Resource Guide How to setup Email notification ProfiLux 4 can be setup to email you under user-defined circumstances. These notifications can be sent on-schedule or as an event occurs. An email can be sent to any email address if an alarm is triggered or an alarm is cleared. - Page 99 10digitcellphonenumber@tmomail.net To setup Email notification, please follow these steps: CONFIGURING P4 EMAIL NOTIFICATION 1. Connect to your ProfiLux 4 and select EMAIL NOTIFICATION (PROFILUX). 2. Select DOMAIN MAILSERVER and type-in the domain mail server for your email provider. 3. Complete the following fields: ...
- Page 100 ProfiLux 4 Resource Guide CREATING AN EMAIL NOTIFICATION 1. Click NEW. 2. Type-in the recipient’s email address in the TO field. 3. Type-in the SUBJECT of the notification. 4. Select the scripts to include in the message body. Select a script and click INSERT 5.
-
Page 101: How To Update Profilux 4 Firmware
For more Gmail tips, click here. How to update ProfiLux 4 firmware This section will show you how to update the firmware on your ProfiLux 4 controller. A firmware update will ensure that you benefit from the newest available ProfiLux features. - Page 102 Perform an update ONLY on a PC that is grounded and connected to a power source. Need a visual? You can view our “ProfiLux 4 firmware update“ how-to video by clicking the link below. P4 Firmware update video: https://youtu.be/Fj0SH93QoKc...
- Page 103 3. Read the information shown on the screen, check the box, then click CONTINUE. 4. Click NEXT. ProfiLux 4 will now go into Bootloader mode. After 5 seconds, the P4’s LED logo light and display will turn off. Only the touch key backlight will stay ON.
- Page 104 OK. IGNORE that message as it will go away on its own. 9. When you see the “Update completed!” Message, click NEXT. 10. Click FINISH, then restart your ProfiLux 4 by disconnecting it from the power and plugging it back in.
-
Page 105: How To Update Profilux 4 Wi-Fi Module, Web Server, Web Interface
How to update ProfiLux 4 Wi-Fi module, Web Server, and Web Interface Updating the Wi-Fi module firmware on your ProfiLux 4 allows you to benefit from new web- based features and Wi-Fi signal improvements. This section will show you how to update network-based firmware such as Wi-Fi module, Web Server, and Web Interface on your ProfiLux 4 controller. - Page 106 ProfiLux 4 Resource Guide 3. Click on the MENU icon, select NETWORK. 4. Select FILE TRANSFER 5. Select desired type of update 6. Navigate to the location of the firmware file. This will be located within the GCC directory folder. Select the correct firmware file.
-
Page 107: How To Update Pab-Device Firmware
ProfiLux 4 Resource Guide How to update PAB-device firmware After each ProfiLux 4 firmware update, it is recommended that you also keep the firmware of your PAB-devices up-to-date. This section will show you how to update the firmware for all PAB-devices. - Page 108 ProfiLux 4 Resource Guide 6. Select the firmware file belonging to the PAB-device you wish to update. 7. Click OK to confirm. 2018-13-11...
- Page 109 ProfiLux 4 Resource Guide 8. Click OK to continue with the update. Since this is a normal update, there is no need to disconnect anything. 9. Update will now begin. Please allow the P4 to complete the update before proceeding any further.
-
Page 110: Programmable Logic Examples
In cases like this, Programmable Logic is necessary. Out of all PL function options, the functions, AND and OR are the most commonly used. This section will provide examples and tips for using PL functions on your ProfiLux 4. How to delay a skimmer from turning ON after a Maintenance mode ends Scenario: When a maintenance mode is activated, selected outlets turn OFF. - Page 111 ProfiLux 4 Resource Guide CREATE THE 2 PL FUNCTION: Combine first PL with another function Gate 1. Select another unused and set this function to AND. Input 1 2. Set to any existing function you wish to assign. For example, if you currently have the skimmer set to turn OFF for a feed pause, you’d select FILTER.
-
Page 112: Combining Feed Pause And Leakage Detection (Using And Function)
ProfiLux 4 Resource Guide ASSIGN THE 2 PL FUNCTION TO A POWERBAR OUTLET 1. Go to the SWITCH CHANNELS AND OUTLETS settings page and select the Powerbar outlet that has the skimmer connected to it. Gate 2. Set this function to PROGRAMMABLE LOGIC and select the... -
Page 113: Combining Feed Pause And Timer Function (Using Or Function)
ProfiLux 4 Resource Guide CREATE THE PL FUNCTION: Combine Feed Pause and Leakage Detection 1. Go to the PROGRAMMABLE LOGIC settings page Gate 2. Select an unused and set the function to AND. Input 1 3. Set to FILTER and select the Filter (Feed pause) number to assign. -
Page 114: Combining Multiple Pl Functions (Using And Function)
ProfiLux 4 Resource Guide Gate 2. Set this function to PROGRAMMABLE LOGIC and select the number you used when you created the PL function. a. For example, if you selected Gate 2 (G2) to create the PL function, select PROGRAMMABLE LOGIC 1. -
Page 115: How-To Videos
Quick way to connect to your P4 right out of the box Right out of the box you can connect to your P4 by using the GHL Connect app. Simply download the app from the Google Play Store or Apple Store and follow these steps.
Need help?
Do you have a question about the ProfiLux 4 and is the answer not in the manual?
Questions and answers