Advertisement
HS-TX416
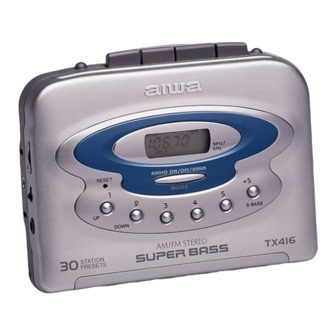
STEREO RADIO CASSETTE PLAYER
OPERATING INSTRUCTIONS
INSTRUCCIONES DE MANEJO
MODE D'EMPLOI
A
B
C
1
3
E
F
STOP
2
5
8B-HRC-901-11
001124BYO-O9
Printed in Indonesia
2
D
4
S-BASS
ENGLISH
OWNER'S RECORD
For your convenience, record the model number and the serial number (you will find it in
the cassette holder of your set) in the space provided below. Please refer to them when
you contact your Aiwa dealer in case of difficulty.
Model No. HS-TX416
Serial No.
PRECAUTIONS
To maintain good performance
Do not use the unit in places which are extremely hot, cold, dusty or humid. In particular,
do not keep the unit:
• in a high humidity area such as a bathroom
• near a heater
• in an area exposed to direct sunlight (e.g., inside a parked car, where there could be
a considerable rise in temperature).
Note on listening with the headphones
• Listen at a moderate volume to avoid hearing damage.
• Do not wear the headphones while driving or cycling. It may create a traffic hazard.
• You should use extreme caution or temporarily discontinue use in potentially hazardous
situations, such as walking, jogging, etc.
• Wear them properly; L is left, R is right.
Note on cassette tapes
• Take up any slack in the tape with a pencil or a similar tool before use. Slack tape may
break or jam in the mechanism.
• C-100 or longer tapes are extremely thin and easily deformed or damaged. They are
not recommended for use in this unit.
B
To use with the belt clip
USING ON DRY CELL BATTERIES
Insert two size AA (R6) dry cell batteries with the 0 and 9 marks correctly aligned.
If the cover of the battery compartment comes off
Battery replacement
The battery indicator in the display window changes from
depending on the remaining power of the dry cell batteries. Replace the batteries when
the battery indicator becomes
and starts flashing, tape speed slows down, volume
decreases, or sound becomes distorted.
To maintain preset data
When replacing the batteries, the unit will retain the preset station frequencies for about
1 minute. To prevent the erasure of the memories, replace the batteries within 1 minute.
Note on dry cell batteries
• Make sure that the 0 and 9 marks are correctly aligned.
• Do not mix different types of batteries, or an old battery with a new one.
• Never recharge the batteries, apply heat to them or take them apart.
• When not using the batteries, remove them to prevent needless wear.
• If liquid leaks from the batteries, wipe thoroughly to remove.
E
HOLD SWITCH
The HOLD switch deactivates the buttons on the front cabinet a of the main unit.
Before use, release the HOLD switch.
When not using the unit, set the HOLD switch to the hold position.
Accidentally pressed buttons will not function.
F
PLAYBACK
• Use only Type I (normal) tapes.
• Connect the supplied headphones to the \ jack on the main unit.
1 Release the HOLD switch.
2 Open the cassette holder and insert a cassette.
a The side to be played back
3 Press the RADIO ON/OFF/BAND MODE button repeatedly until the power is
turned off.
4 Press the lPLAY button to start playback.
"TAPE" is displayed on the window.
5 Adjust the volume.
Basic operation
Press the following buttons.
To fast forward
g button
To rewind
f button
To stop
s STOP button
• The lPLAY button is released automatically at the end of the tape. However, the f
and g buttons are not released at the end of the tape. Press the sSTOP button to
release them.
• To prevent tape damage, press the sSTOP button first before changing to radio mode.
Super bass
Press the +5 S-BASS button to emphasize the low frequencies.
appears in the display. Press the button again to resume the normal sound.
disappears from the display.
RADIO RECEPTION
1 Release the HOLD switch.
A
C
D
to
b
c
G
to
Advertisement
Table of Contents

Related Manuals for Aiwa HS-TX416


Summary of Contents for Aiwa HS-TX416
- Page 1 For your convenience, record the model number and the serial number (you will find it in the cassette holder of your set) in the space provided below. Please refer to them when you contact your Aiwa dealer in case of difficulty. Model No. HS-TX416...
- Page 2 RADIO ON / OFF / BAND MODE DOWN CAUTION Modifications or adjustments to this product, which are not expressly approved by the manufacturer, may void the user’s right or authority to operate this product. This device complies with Part 15 of the FCC Rules. Operation is subject to the condition that this device does not cause harmful interference.
- Page 3 ESPAÑOL PRECAUCIONES Para conservar el buen rendimiento No utilice el aparato en lugares que sean extremadamente calurosos, fríos, polvorosos o húmedos. En particular, no lo deje: • en sitios muy húmedos, como en el baño. • cerca de calefacciones. • en sitios expuestos a la luz directa del sol (por ejemplo, dentro de un vehículo aparcado, donde puede producirse un aumento considerable de la temperatura).
- Page 4 1 Suelte el interruptor HOLD. 2 Presione repetidamente el botón RADIO ON/OFF/BAND MODE para seleccionar entre AM, FM1 o FM2. FM1 y FM2 tienen la misma gama de frecuencias y ambos pueden utilizarse para sintonizar una emisora de FM. Si aparece en la pantalla, mantenga presionado el botón RADIO ON/OFF/ BAND MODE durante unos 2 segundos hasta que desaparezca 3 Pulse el botón UP o DOWN para sintonizar una emisora.
-
Page 5: Specifications
RADIO ON / OFF / BAND MODE RADIO ON / OFF / BAND MODE DOWN RADIO ON / OFF / BAND MODE RADIO ON / OFF / BAND MODE PRESETTING A total of 30 stations can be preset, 10 stations for each AM, FM1 and FM2 band. 1 Press the RADIO ON/OFF/BAND MODE button to select AM, FM1 or FM2. - Page 6 DOWN DOWN Maximum outside dimensions (W S - BASS Weight (excluding batteries): Accessories: The specifications and external appearance of this unit are subject to change without prior notice. RESET Approx. 7 hours using size AA (R6P) manganese batteries Approx. 24 hours using size AA (LR6) alkaline batteries 111.3 29 mm, 4 in.
- Page 7 ESPAÑOL PREFIJADO Se puede prefijar un máximo de 30 emisoras, 10 emisoras para cada banda de AM, FM1 y FM2. 1 Presione el botón RADIO ON/OFF/BAND MODE para seleccionar entre AM, FM1 o FM2. Si aparece en la pantalla, mantenga presionado el botón RADIO ON/OFF/ BAND MODE durante unos 2 segundos hasta que desaparezca 2 Presione el botón UP o DOWN para sintonizar una emisora.
- Page 8 Gama de frecuencias: Zona de recepción US AM 530 – 1.710 kHz (intervalos de 10 kHz) FM1 FM2 87,5 – 108,1 MHz (intervalos de recepción de 200 kHz) Zona de recepción JP AM 531 – 1.629 kHz (intervalos de 9 kHz) FM1, FM2 76 –...
Need help?
Do you have a question about the HS-TX416 and is the answer not in the manual?
Questions and answers