Glooko Transmitter Instructions For Use Manual
Hide thumbs
Also See for Glooko Transmitter:
- Quick manual (24 pages) ,
- Instructions for use manual (24 pages)
Table of Contents
Advertisement
Quick Links
Advertisement
Table of Contents

Subscribe to Our Youtube Channel
Related Manuals for Glooko Glooko Transmitter


Summary of Contents for Glooko Glooko Transmitter
- Page 1 Glooko Transmitter Instructions for use – for Glooko users...
-
Page 3: Table Of Contents
About Glooko ......................................6 Intended use ......................................6 Warnings .........................................6 Getting Started ....................7 Quick Tips ......................7 Setup of Glooko Transmitter.................8 Setup without a cable box ..................................8 Setup with cable box ....................................8 Connect a diabetes device ..................................9 Upload data ......................................9 Additional Information ................10 Ethernet setup .....................................10... -
Page 4: Find Your Device
Find your device Glucose meter Insulin pump Ascensia (Bayer) Abbott Breeze 2 ...............12 FreeStyle Freedom Lite ........... 11 Contour ................12 FreeStyle InsuLinx ............11 Contour Care ..............12 FreeStyle Lite ..............11 Contour Fit ..............12 FreeStyle Optium Neo ..........11 Contour Link ...............12 FreeStyle Precision Neo .........11 Contour Next ..............12 Precision Xtra .............11 Contour Next (Bluetooth) ........12... - Page 5 Accu-Chek Guide Me ..........14 Insulet Accu-Chek Instant ............ 14 OmniPod® System ........... 17 Accu-Chek instant S..........14 OmniPod® Dash™ System ........17 Accu-Chek Mobile (USB) ........14 Accu-Chek Nano ............15 Accu-Chek Performa ..........15 Accu-Chek Performa Connect ......14 Intuity Accu-Chek Performa Insight .........19 POGO®...
-
Page 6: General Information
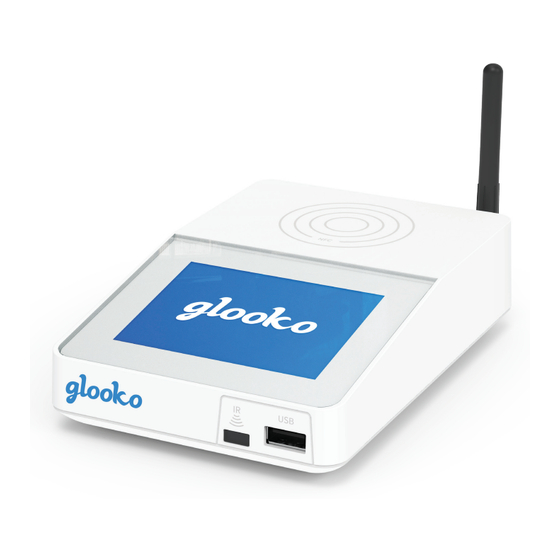
General information Product description Glooko Transmitter is indicated for use by health care professionals in health care facilities to transfer predefined data from home monitoring devices to a server database. About Glooko Glooko offers health care providers an online solution that collects and stores all their diabetes patients’ data centrally, without worrying about any software installation. -
Page 7: Getting Started
If you are missing a specific cable, please contact the device manufacturer. Quick Tips • No network connection? Try moving the Glooko Transmitter to a new location within your clinic keeping cellular network reception in mind. • Device isn’t uploading? Verify that the Glooko Transmitter displays “Ready to transfer” before connecting your diabetes device. -
Page 8: Setup Of Glooko Transmitter
Note: If you want to connect Glooko Transmitter to the Internet using Ethernet (instead of the built-in cellular connection). Plug in the Ethernet cable and Glooko Transmitter will configure itself. For further instructions see page 10. -
Page 9: Connect A Diabetes Device
Sign in to your Glooko account Go to https://my.glooko.com sign in to your Population Tracker. Navigate to the Assign Devices tab to retrieve the uploaded data. For more information about using Glooko Transmitter, please refer to the: Glooko for clinics - Quick Start Guide https://support.glooko.com... -
Page 10: Additional Information
If you want to configure the Ethernet connection manually or read the MAC address, please go to: Menu > Settings > Network settings > Ethernet settings If the configured Ethernet network is not available, Glooko Transmitter will automatically revert to cellular connection. -
Page 11: Compatible Devices And Transmission Methods
USB cable or via IR and it will upload automatically. You will need a Glooko account with Population Tracker access. The data uploaded using Glooko Transmitter will synchronize with your Population Tracker account, which can be accessed with your Glooko professional account login information. - Page 12 Blood glucose meters – connected with USB cable Continued from previous page AgaMatrix WaveSense Jazz™ AgaMatrix USB cable Animas Connect and press the meter’s OneTouch Ping (meter) power button. Mini USB Arkray Glucocard 01 Relion Confirm Arkray USB cable Glucocard Vital Relion Prime (2.5 mm) Glucocard Shine...
- Page 13 Glucose meters and CGMs - connected with USB cable Continued from previous page Beurer GL50 evo USB port on meter Bionime GE100 Bionime (Pura + Rightest) USB cable GlucoRx Mini USB Nexus i-SENS Connect and press the meter’s Alphacheck Professional power button.
- Page 14 Glucose meters and CGMs - connected with USB cable Continued from previous page Menarini GLUCOCARD SM Micro USB If the meter displays: E-3, GlucoMen LX2 disconnect it wait until the display is Menarini blue USB (3.5 mm) off, then connect the meter again. Trividia (Nipro) Connect and place the meter in the TRUE METRIX...
- Page 15 Blood glucose meters - with infrared connection IR window on Glooko Transmitter Set the meter in upload mode by following the instructions below. Place the glucose meter’s top end directed towards the IR window on Glooko Transmitter. Please make sure to keep the device completely still during the upload.
- Page 16 CGMs - connected with USB cable Note: If you have a USB hub connected to Glooko Transmitter, the USB hub must be powered by its own power supply. Dexcom If the upload doesn’t start, disconnect the receiver, select Shutdown in the G4 Platinum menu to turn the receiver off.
- Page 17 Insulin pumps - connected with standard USB cable Note: If you have a USB hub connected to Glooko Transmitter, the USB hub must be powered by its own power supply. Insulet OmniPod® System Mini USB 1. Plug DASH™ into Transmitter with the USB-A to Micro cable.
- Page 18 Insulin pumps - with infrared connection IR window on Glooko Transmitter For the Animas pumps, please make sure the pump is suspended and the screen is illuminated when transmission begins. The screen does not need to remain illuminated during the full transmission.
- Page 19 Smart Pix cable Smart Pix 2 cable Compatible infrared cables 1. Connect the Smart Pix 2 cable to Glooko Transmitter and wait for the blue indicator on the Smart Pix 2 to start flashing slowly. 2. Connect the handset to the Smart Pix 2 with a Roche micro USB cable.
- Page 20 • Consult the dealer or an experienced radio/TV technician for help. The FCC requires the user to be notified that any changes or modifications made to this Transmitter that are not expressly approved by Glooko, Inc. may void the user’s authority to operate the Transmitter. Glooko Inc...
Need help?
Do you have a question about the Glooko Transmitter and is the answer not in the manual?
Questions and answers