Table of Contents
Advertisement
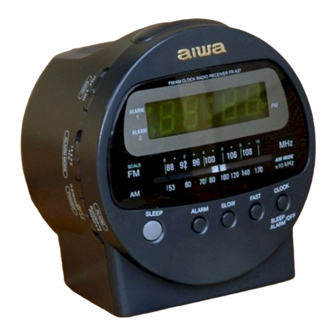
FR-A37 "
RADIO RECEIVER
RECEPTOR DE RADIO
OWNER'S RECORD
For your convenience,
record the model number (you will find
itatthe
bottom of the unit) andserial
number (you will find itin
the batfery compartment)
inthespace
provided below.
Please
refer to them when you contact your AIWA dealer in case of
difficulty.
'ode' '0 ~
'eria' '0"~
Advertisement
Table of Contents

Related Manuals for Aiwa FR-A37


Summary of Contents for Aiwa FR-A37
- Page 1 (you will find itatthe bottom of the unit) andserial number (you will find itin the batfery compartment) inthespace refer to them when you contact your AIWA dealer in case of difficulty. ‘ode’ ‘0 ~ ‘eria’ ‘0”~ provided below. Please...
- Page 2 ELECTRIC RISK OF SHOCK DO NOT OPEN CAUTION: REDUCE THE RISK OF ELECTRIC SHOCK, DO NOT REMOVE COVER (OR BACK). NO USER SERVICEABLE PARTS INSIDE. REFER SERVICING QUALIFIED SERVICE PERSONNEL WARNING: TO REDUCE THE RISK OF FIRE OR ELECTRIC SHOCK, DO NOT EXPOSE THIS APPLIANCE RAIN OR MOISTURE The symbols...
- Page 3 The lightning flash with arrowhead, user of the prescence of uninsulated that may be of sufficient magnitude to constitute L’ectair avec une fleche clans Ie triangle equilateral presence a I’inteneur de I’appareil o’une ‘tension dangereuse” d’une magnitude suffisante pour constituer rayo con una punts de flecha dentro eexistencia puede ser de suficiente magnitude como para consfituir un peligro de sacudidad electrica...
-
Page 4: Names Of Parts
NAMES OF PARTS For instructions on use, refer to the page number 1 BANDswitch@ SLEEP button@ 3 ALARM MODE switch@@ 4 ALARM/POWER switch (ALARM - RADIO/BLJZZER, POWER - ON/O STANDBY) @@@ 5 ALARM button@ 6 Display 7 Dial pointer and dial scale 8 CLOCK, SLEEP OFFIALARM OFF button @@@ 9 FAST button@@ 10 SLOW button@@... -
Page 5: Nombre De Las Partes
NOMBRE DE LAS PARTES Para Ias instrucciones sobre el USO, refierase a Ios ntimeros de pagina indicados a continuacion de cada patte. 1 Conmutador de banda (BAND)@ 2 Boton de dormir (SLEEP) @ 3 Interrupter del modo de alarma (ALARM MODE) @@ 4 Conmutador de alarma/corriente RADIOIBUZZER, POWER - ON/r5 STANDBY) @@@... -
Page 6: Backup Function
BACKUP FUNCTION If the AC power supply is interrupted, the clock display goes off and the alarm setting is canceled. To back up the clock and alarm, insert a 6F22 battery in the battery compartment rear of the unit. -+@ The backup function lasts about 10 minutes. - Page 7 FUNCION DE RESPALDO Si se corta la fuente de corriente alterna, indication del reloj y se cancela la alarma. Para mantener el respaldo del reloj la alarma, instale portapilas en la parte trasera del aparato, + ~ La funcion de respaldo dura unos 10 minutes. La pila de respaldo no sirve para escuchar la radio.
-
Page 8: Setting The Clock
SETTING THE CLOCK + @ 1 Connect the AC power cord to a wall outlet (@). The clock display begins flashing. 2 Keeping CLOCK down, prese SLOW to set the clock. midnight 12:00 12:00. noon To increase the clock digits quickly, press FAST instead of SLOW. -
Page 9: Ajuste Del Reloj
AJUSTE DEL RELOJ + @ 1 Conecte el cable electrico en el tomacorriente pared (@). La pantalla del reloj empieza a destellar. 2 Mantenga el boton CLOCK oprimido y presione SLOW para ajustar el reloj. 12:00 medianoche 12:00. mediodia Para que el reloj avarice rapidamente, presione FAST en Iugar de SLOW. -
Page 10: Radio Reception
TUNING -VOLUME RADIO RECEPTION 1 Set ALARMIPOWER to ON. 2 Set BAND to select FM or AM. 3 Turn the TUNING control to tune in to a station. 4 Adjust the volume. To turn off the radio Set ALARM/POWER to (!) STANDBY. For better reception + @ FM: Extend the FM wire antenna fully. -
Page 11: Reception Radio
RECEPCION DE LA RADIO 1 Mueva el ALARM/POWER a ON. 2 Mueva el BAND para seleccionar FM o AM. 3 Gire el control TUNING para sintonizar una emisora. 4 Ajuste el volumen. Para desconectar la radio Mueva ei ALARM/POWER a (!) STANDBY. Para una mejor recepcion + @ FM: Extienda completamente la antena de cable FM. -
Page 12: Alarm Setting
ALARM SETTING The radio or buzzer automatically sounds at the designated time every day. You can set two different alarm times, one in ALARM 1 and one in ALARM 2, so that the alarm timer operates twice a day. 1 Set ALARM MODE to 1 or 2. You cannot set the alarm time when ALARM MODE is set to 1+2. -
Page 13: Ajuste De La Alarma
AJUSTE DE LA ALARMA La radio o la alarma suenan automaticamente especificada todos IOSalias. Se pueden ajustar dos horas de alarma diferentes, ALARM 1 y la otra en ALARM 2 para que la alarma suene dos veces al dia. 1 Ajuste el ALARM MODE a 10 a 2. No es posible ajustar la hors... - Page 14 ALARM SETTING To set the alarm timer to sound twice a day 1 Set two alarm times ALARM 1 and 2 respectively referring to steps 1 and 2 on page 16. 2 Set ALARM/POWER to RADIO or BUZZER. 3 Set ALARM MODE to 1 +2. The ALARM SET indicators 1 and 2 (@) light up in the...
- Page 15 AJUSTEDE LAALARMA Para aiustar la alarma para aue suene dos veces al dia Aju;te horas”de aiarma en ALARM respectivamente refiriendose alospasosl Mueva el ALARM/POWER a RADIO o BUZZER. Ajuste el ALARM MODE a 1 +2. Los indicadores ALARM SET 1 y 2 (@) se encienden en la pantalla.
-
Page 16: Sleep Timer Setting
SLEEP TIMER SETTING You can use the sleep timer to turn the radio off automatically after up to 59 minutes. Before setting, tune in to a station. (See page 14.) 1 Set ALARMIPOWER 2 Press SLEEP. The radio comes on. The power will automatically after 59 minutes. - Page 17 AJUSTE DEL TEMPORIZADOR PARA DORMIR Se puede utilizar el temporizador para dormir para desconectar automaticamente la radio despues de 59 minutes Antes de este ajuste, sintonice una emisora. ~aaina 15.) 1’ Mueva el ALARM/POWER a 6 STANDBY. Presione SLEEP. Se enciende la radio.
-
Page 18: Specifications
SPECIFICATIONS Power source Household current AC 120 V, 60 Hz output 280 mW (EIAJ)/Max: Power consumption Spesker 57 mm Frequency rsnge FM: 87.5 – 108 MHz AM: 530-1,710 Antennss FM wire antenna Ferrite bar antenna for AM Dimensions (W x H x D) 130x 140x l17mm Weight Approx. -
Page 19: Especificaciones
ESPECIFICACIONES Fuente de alimentacion Corriente del hogar CA de 120 V, 60 Hz 280 mW (EIAJ)/Max. 400 mW Salida Consumo electrico Altavoz 57 mm Gama de frecuencias FM: 87,5 – 108 MHz AM: 530-1.710 Antenas Antena de cable FM Antena de barra de ferrita para AM Dimensioned (An. - Page 20 87-RU4-906-01 961 107AA0-OX AIWA CO.,LTD. Printed in Hong Kong...
Need help?
Do you have a question about the FR-A37 and is the answer not in the manual?
Questions and answers
Aida clock radio when set time chanesto wrong time
The Aiwa FR-A37 clock radio changes to the wrong time when set because its backup battery is either missing or depleted. The manual states that a 6F22 battery is required to maintain the clock and alarm settings during a power outage. If the battery is not installed or is weak, the clock display will disappear, and the alarm settings will be lost.
This answer is automatically generated