Table of Contents
Advertisement
Advertisement
Table of Contents

Subscribe to Our Youtube Channel
Related Manuals for Allflex Livestock Intelligence AWR250


Summary of Contents for Allflex Livestock Intelligence AWR250
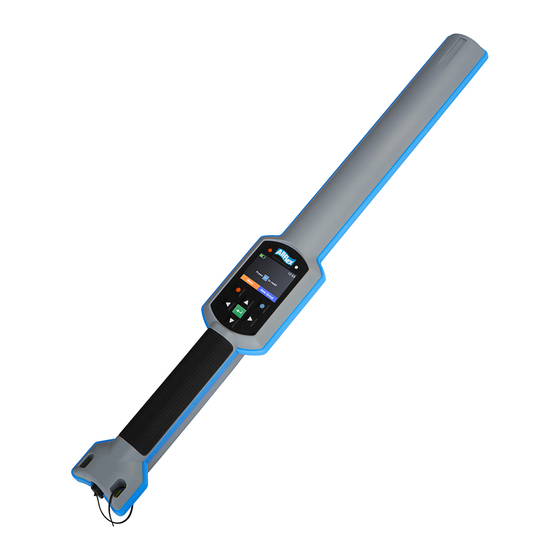
- Page 1 AWR250 User Manual Allflex AWR250 User Guide Firmware v1.11 and higher V13/11/19...
- Page 2 ©Copyright Agrident GmbH 2020 This manual is copyrighted. All rights are reserved, and no part of this publication may be reproduced or transmitted in any form or by any means without prior written consent. Disclaimer The information in this manual was accurate and reliable at the time of its release. However, we reserve the right to change the specifications of the product described in this manual without notice at any time.
-
Page 3: Table Of Contents
Introduction ......................1 1.1 Before You Start ......................1 Hardware Specifications ................... 1 2.1 AWR250 Parts ....................... 1 2.2 Accessories ........................2 2.3 Connecting the USB Cable .................... 3 Controlling the AWR250 ................... 4 3.1 AWR250 Display ......................4 3.2 Status Symbols at Top of Display.................. 5 Battery Status ...................... -
Page 4: Introduction
500mA, so charging the AWR250 over a USB port takes longer than charging it from the Allflex USB power supply adapter. The internal fast charging takes approx. 4 hours when using a power source capable of providing at least 1A, if the battery is completely empty. -
Page 5: Accessories
AWR250 User Guide • Speaker and a vibrating handle. • Can be controlled with seven ergonomic keys below the display • Uses a 3.6V Lithium-Ion battery with a capacity of 3.400mAh, which is located in the handle. It is not replaceable in the field. The battery should be replaced by authorized technical staff only, when it has reached end of life. -
Page 6: Connecting The Usb Cable
AWR250 User Guide Optional: USB power supply ‘APS500’ for charging the AWR250 from the mains Optional: Car charger ‘ACC500’ for charging of the AWR250 from a cigarette lighter socket 2.3 Connecting the USB Cable The AWR250 uses a Magnetic-USB connector. Because the magnets are polarized, the connectors 'find' the correct orientation almost automatically. -
Page 7: Controlling The Awr250
AWR250 User Guide 3 Controlling the AWR250 The AWR250 has a large color display and seven keys used for controlling the device. • The Reader is activated by pressing the key in the middle of the directional pad. • When the device is connected to a USB port of a computer while it is switched off, the reader enters MSD-Mode (Mass Storage Device) after 1-2 seconds. -
Page 8: Status Symbols At Top Of Display
AWR250 User Guide 3.2 Status Symbols at Top of Display The status bar in the first display line provides the time (on the right side) and information about the battery status and the different interfaces. The orange symbol is for Bluetooth. The color of this symbol depends on the current connection status. -
Page 9: Bluetooth Status
AWR250 User Guide Menu Item Description Show Battery Info’ in the ‘Setup’ menu (see chapter 6.6.5.1) shows an estimate of the remaining battery capacity and the estimated remaining operating time in idle mode and in continuous read mode. Navigation buttons in the home screen. Bluetooth Status Status Meaning... - Page 10 AWR250 User Guide • Left LED is a multicolor LED and color changes depending on the charging status • Right LED is blue and it is used for indicating the connection status. The RGB LED on the left side indicates the charging status of the battery pack as follows: Status Interval Meaning...
-
Page 11: Using The Keyboard
AWR250 User Guide 3.4 Using the Keyboard The AWR250 has 7 keys to allow easy operation of the reader. The directional pad has an ENTER key in the middle and two additional soft keys below the display whose functionality is dependent on the current action. -
Page 12: Operating States
AWR250 User Guide 4 Operating States The AWR250 has several operating states related to display status and communication possibilities over USB. The following chart shows the different states. When the reader is switched on and is connected via USB, it works in CDC mode. This means that a virtual comport is created on the computer and it can send commands to the device via a serial port connection. -
Page 13: Reading Transponders
AWR250 User Guide Reading Transponders 13/11/19 Page 10... - Page 14 AWR250 User Guide Flux Lines 13/11/19 Page 11...
- Page 15 AWR250 User Guide When a tag is read, the following information displays: VID – Visual ID EID – Electronic ID Name of the current group, here: ‘group 3’ Number of records in the current group, here: ‘15’ Return to home screen Show more information Screen Details...
-
Page 16: Menu Items
AWR250 User Guide 6 Menu Items Screen Details Press in the home screen to access the AWR250 menu. This screenshot shows the top menu level. It contains the items ‘New Group’, ‘Data’, ‘Print’ and ‘Setup’. If another language other than the default one has been selected, the menu items will be different. - Page 17 AWR250 User Guide Main Menu sub menu submenu submenu submenu New Group Start new group Data Show Data Select Group To Show Clear Data Clear Groups Clear Last Group Select Group Clear All Groups Memory Info Print Print Last Group Select Group Print All Groups Print Barcode...
-
Page 18: New Group
AWR250 User Guide Main Menu sub menu submenu submenu submenu Setup Reader Settings Volume & Vibrator Set Volume 0% (OFF) 60% * 100% Vibrator On/Off Vibrator ON * Vibrator OFF Display Set Date/Time [set values manually] Set Switch Off Time 60 min 30 min 20 min... - Page 19 AWR250 User Guide Screen Details After selecting ‘New Group’, you are prompted to enter a group name. You can accept the suggested name by pressing or delete it by pressing the left soft key character by character. A long press removes all digits in one step. Press open a soft keyboard.
-
Page 20: Data
AWR250 User Guide 6.3 Data Screen Details The ‘Data’ menu contains items for showing and deleting data. Show Data The device displays a list of all current groups. Each entry shows the group name and the number of records within the group in brackets. Screen Details …... - Page 21 AWR250 User Guide Screen Details … One record down … One record up … Scroll down 50 records … Scroll up 50 records … Select record … Switch between EID and VID view This example shows the same list but instead of the EID, the VID is shown.
-
Page 22: Clear Data
AWR250 User Guide Clear Data You can delete data from the AWR250. There are various ways to delete data, depending on how that data was collected. The standard records are saved in groups. These are the records that have been saved after the transponder reading starts from the home scr een. Screen Details fter selecting ‘Clear Data’, two submenus are shown:... -
Page 23: Memory Info
AWR250 User Guide Memory Info Screen Details This menu item shows information about the amount of collected data (number of records in number of groups), the number of entries in the uploaded Linklist and how many definitions have been uploaded. 6.4 Print You can send the collected records from the AWR250 to a mobile Bluetooth printer. -
Page 24: Select Group
AWR250 User Guide Screen Details The screen shows the reader is trying to connect to the Bluetooth printer. When the connection is established, printing starts immediately. If there is a lot of data to be printed, a progress bar is visible. The AWR250 returns to the printer menu afterwards. -
Page 25: Printer Setup
AWR250 User Guide Screen Details The barcode type is ‘2of5 interleaved’. Other barcode types are not currently supported. Printer Setup To set up the printer, select the correct model first. If this setting is incorrect, the printer feature will not work. All other additional options are software configurable. For example, SenseLink can be used for configuring all possible printer options. -
Page 26: Setup
AWR250 User Guide If Bluetooth is switched off, the AWR250 shows the corresponding error message. In this case, activate Bluetooth first (see chapter 6.6.3.3). After the scan has been completed, the available devices are listed. Note that not only printers are listed here, but other Bluetooth devices also. - Page 27 AWR250 User Guide • If deactivated, an EID can be stored twice in the same group. Deactivation enables double read of an EID. Screen Details Decide whether the Animal Counter should be activated or not using the keys and confirm with . The display also looks different after reading a transponder, depending on how this setting is configured.
- Page 28 AWR250 User Guide Screen Details Select the Read Mode using the keys and confirm with . The ‘Auto’ setting starts a Single Read on a short press of and Continuous Read on a long press (> one second). 6.5.1.3 Set Online Mode The Online Mode deals with the format used for sending the EID to the interfaces directly after a tag has been read.
- Page 29 HDX transponders. Since it is not possible to synchronize mobile readers wired in the field, Allflex readers offer a feature called ‘Wireless Synchronization’. This function enables mobile devices to operate close to stationary readers without interfering with them.
-
Page 30: Display
AWR250 User Guide Display Screen Details The Display menu contains the items shown on the left side. Use the keys to select a setting and enter the item via . 6.5.2.1 Set Date and Time Screen Details • DD … Date – Day MM … Date - Month •... -
Page 31: Interface Setup
AWR250 User Guide 6.5.2.3 Set Display Colors Screen Details Depending on the light conditions, it may be necessary to invert the background color. It can also be a question of user preference. That can be done within this menu item. …... - Page 32 AWR250 User Guide Screen Details There is only one menu item where the correct scale model needs to be configured. Choose the correct type depending on the model you have. … Select the scale type … Apply the setting Scales without integrated Bluetooth might be upgraded using an external adapter. Contact your local distributor for further details.
- Page 33 AWR250 User Guide 6.5.3.3 Bluetooth The AWR250 incorporates a Class1 Bluetooth module. The range is up to 80 meters in ‘line of sight’. When inside buildings or when any other obstacles are present, the range is lower. Note that the range also depends on the Bluetooth partner. If the other device is only Class2, the range is much lower.
- Page 34 AWR250 User Guide Screen Details The AWR250 starts scanning for other Bluetooth devices in range. This can take at least 10 seconds, depending on how many devices are found. The discovered devices are listed after the scan, sorted according to their names. To see the BD-address of the devices found instead of the names, you can switch between views by using the key.
- Page 35 AWR250 User Guide It is not recommended to have too many Bluetooth devices connected to the AWR250. To prevent unnecessary scans when switching from one Bluetooth partner to another one, the reader stores a ‘Bluetooth Device History’. This list includes the devices that were selected as Bluetooth partner in the past.
- Page 36 AWR250 User Guide The AWR250 itself does not need a passkey. However, if other Bluetooth devices use a higher security level and they require one, the passkeys on both devices must match to establish a connection. Screen Details Use the keys to change the character and the keys to move to the previous / next digit.
-
Page 37: Configuration
AWR250 User Guide Here the AWR250 is configured to be the Bluetooth Slave. It is discoverable by other devices and it is connectable. The reader does not try to connect to a remote device in this configuration but waits for incoming connections. Configuration Screen Details... - Page 38 AWR250 User Guide 6.5.5.1 Show Battery Info Screen Details When fully charged, the battery info shows ‘100%’. Below the charging indication are estimates concerning the remaining operating time in standby mode (AWR250 running but RFID engine is off), here 22 hours, and in continuous read mode, here 7 hours and 10 minutes.
-
Page 39: Appendix A: Battery Precautions
AWR250 User Guide Appendix A: Battery Precautions There are important things to consider concerning the rechargeable battery pack: • Permitted charge temperature is between 0°C to +45°C (32°F to 113°F). • Discharging is allowed within the range of -20°C to +60°C (-4°F to 140°F) – this is the allowed operating temperature for the battery. -
Page 40: Charging The Battery
When charging the battery, only use chargers supplied by Allflex. o Do not attach the batteries to a power supply plug or directly to a car's cigarette lighter. -
Page 41: Disposing Of The Battery
• Observe local, state and federal laws and regulations concerning battery disposal. • Do not disassemble the battery! Appendix B: Safety and Care Agrident GmbH (“Allflex”) accepts no liability for damage resulting from improper use or use not consistent with that described in these operating instructions. •... -
Page 42: Appendix D: International Approvals
Appendix D: International Approvals CE Marking Hereby, Allflex declares that the AWR250, if used according to the instructions, is in compliance with the essential requirements and other relevant provisions of the Radio Equipment Directive (RED) 2014/53/EU. For use in all countries of the EU. - Page 43 AWR250 User Guide 13/11/19 Page 40...
Need help?
Do you have a question about the Livestock Intelligence AWR250 and is the answer not in the manual?
Questions and answers