Table of Contents
Advertisement
Advertisement
Table of Contents

Subscribe to Our Youtube Channel
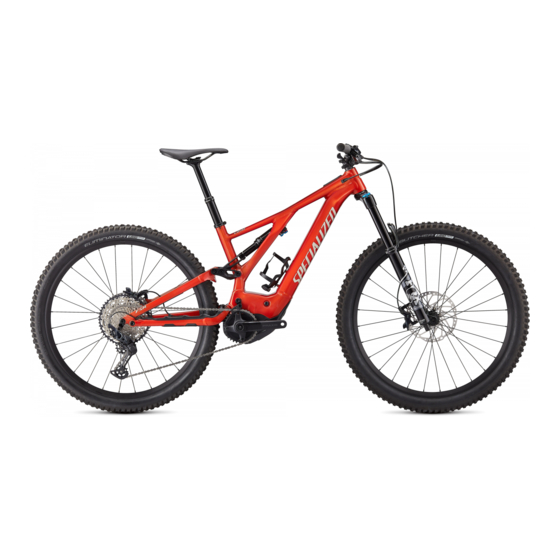
Related Manuals for Levo SW LTD


Summary of Contents for Levo SW LTD
- Page 1 USER MANUAL EN FR DE CZ PL SK...
-
Page 2: Table Of Contents
4. -
Page 3: Introduction
This user manual is specific to your Specialized Turbo Levo bicycle and should be read in addition to the Specialized Bicycle Owner’s Manual (“Owner’s Manual”). It contains important... -
Page 4: Levo Components
2. LEVO COMPONENTS TOP TUBE 23. SHIFTER DOWN TUBE 24. BRAKE LEVER SEAT TUBE 25. REMOTE HEAD TUBE 26. TCU 2 DISPLAY CHAINSTAY 27. STEM CHAINSTAY PROTECTOR 28. ADJUSTABLE HEADSET SEAT STAY 29. INTERNAL RECHARGEABLE BATTERY 12 1 FORK 30. CHARGING SOCKET SADDLE 31. -
Page 5: Geometry
TURBO CONNECT UNIT 2 (TCU 2) Fig. 2.3 Other Levo models are equipped with the TCU 2 display. The display turns on the motor, and provides a visual on the display for Speed,... -
Page 6: General Information About Your Levo
STACK 4.1. INTENDED USE REACH The Levo is intended and tested for All Mountain mountain biking (Condition 4) use only. HEAD TUBE LENGTH For more information on the intended use and structural weight limits, please refer to the HEAD TUBE ANGLE 64.5... -
Page 7: General Notes About Riding
Before your first ride, you should use The Levo motor provides pedal assistance only while you are pedaling and the bicycle is in the lowest power ECO mode and become familiar with the operation of the motion. -
Page 8: Know Your Range
Your Levo bicycle has a removable All of this can result in a loss of control, potentially causing serious injury and/ yellow sticker adhered to the frame, or death. -
Page 9: General Notes About Assembly
WARNING! Many components on the Levo, including, but not limited to the motor, battery and cable guides, are proprietary to the Levo. Only use to the frame and seatpost. originally supplied components and hardware at all times. Use of other MINIMUM INSERTION: The seatpost „... -
Page 10: Derailleur Hanger
CAUTION: If a cable-actuated seat post is inserted too far into the seat-tube, INFO: The Levo is equipped with a Seat post stopper located on the rear of the seat tube, the stopper is designed to stop the seatpost from being inserted too the housing can be damaged and cause the seat post to not function properly. -
Page 11: Chain Guide
6.5. CHAIN GUIDE 6.6. STEM Some Levo models are equipped with an Alloy Trail Stem. WARNING! The stem is designed with no gap between the stem body and the faceplate at the upper bolt area. The upper bolts must be tightened such that the faceplate bottoms out against the stem body before being torqued. -
Page 12: Tcu / Handlebar
6.7. TCU / HANDLEBAR The TCU sits above the top tube and has the potential to be struck by the handlebar or stem when the handlebar is rotated fully. When assembling the bicycle, make sure to have enough clearance between the handlebar, stem, and the TCU. The number of spacers below the stem necessary to clear TCU will depend on several factors. -
Page 13: General Notes About Maintenance
7. GENERAL NOTES ABOUT MAINTENANCE Regularly clean and lubricate the drivetrain according to the drivetrain manufacturer’s „ The Levo is a high performance bicycle. All regular maintenance, troubleshooting, repair and instructions. parts replacement must be performed by an Authorized Specialized Retailer. For general Do not use a high pressure water spray directly on the bearings. -
Page 14: System Interface
8. SYSTEM INTERFACE as well as on the removable yellow sticker, see section 5.4. Depending on the model, your Levo is equipped with either the TCU 1 or TCU 2 display. 8.2. TURBO CONNECT UNIT 2 (TCU 2) The functionality of the system interface as summarized in this manual is current as of the date this manual was written and is subject to change. -
Page 15: Handlebar Remote (Tcu 1)
2 MM 2 MM Fig. 8.4 The TCU 2 handlebar remote is included on some Levo models and controls the level of motor support and controls the functions and scrolling of the TCU 2. Fig. 8.3 A: (+ -) Support adjustment buttons. (Scrolling and setting up of the TCU 2) „... -
Page 16: Starting The System On The Tcu
8.5. STARTING THE SYSTEM ON THE TCU 8.6. SUPPORT MODES The Levo motor offers 6 Assist Modes, TURBO, TRAIL, ECO, OFF, SMART CONTROL, and MICRO TUNE mode. STANDARD BIKE ASSIST MODES: TURBO MODE: Maximum power mode for high speed sections and climbing. -
Page 17: Changing Support Modes On The Tcu
MICRO TUNE MODE: 8.8. CHANGING SUPPORT MODES ON THE REMOTE (TCU 1) Long pressing the (+) button on the remote will switch to Micro Tune mode, this mode „ allows you to change the level of support in small increments while riding. To switch out of Micro Tune and back to standard settings long-press the (+) button again. -
Page 18: Changing Support Modes On The Remote (Tcu 2)
8.11. ERROR CODES (TCU 1) A - F1 BUTTON: „ The Levo is equipped with a built-in diagnostic system to automatically check and identify the functionality of the system. If the system detects an error, the TCU display will alert the user •... -
Page 19: Error Codes (Tcu 2)
8.12. ERROR CODES (TCU 2) 8.11 8.12 ERROR SOLUTION BATTERY ERROR For Error Codes 1-4 try the following solutions. Fig. 8.12 • Reboot your bicycle. TCU 2 equipped models have a built-in diagnostic system to automatically check and identify BATTERY NOT FOUND the functionality of the system. -
Page 20: Factory Reset (Tcu 1)
8.13. FACTORY RESET (TCU 1) 8.14. FACTORY RESET (TCU 2) When a new or used bicycle is sold, a factory reset should be performed, including resetting When a new or used bicycle is sold, a factory reset should be performed, including resetting the peak power and support mode settings. -
Page 21: Mission Control
8.15. CHANGING THE INTERNAL BATTERY (TCU 1 ONLY) 8.15 The Specialized Mission Control App enables you to further enhance your Levo ride experience to your personal needs. Most importantly, the app allows you to customize motor characteristics, diagnose the bicycle system, record rides, see real-time ride data, and control bicycle range. -
Page 22: In-App Help Guide
Fig. 9.1 9.2. IN-APP HELP GUIDE 1: RIDE: „ Record your rides, route, speed, elevation, and more. See the live map and view live ride data. Activating Smart Control means the motor and battery output will adjust based on your setting of desired distance, duration, or heart rate goal. -
Page 23: Pairing Your Bike With Mission Control
When connecting to the Mission Control App for the first time, you need to pair using a code with your Levo. The code serves as a security measure since it ensures that only you as the When the app prompts you, to confirm the six-digit pairing code. The code will be displayed „... -
Page 24: Battery And Charger
Regularly inspect the battery and charger for damage. Never charge a battery which you „ Only use the Levo battery with the Levo bicycle. Do not use the Levo battery with any other suspect is damaged or know is broken, and do not use it. - Page 25 CAUTION: Always turn off the bicycle before plugging or unplugging the 10.3 10.4 charger. INFO: The battery can be charged whether installed in the bicycle or not. Refer to the appropriate instructions regarding removing and installing the battery. Only charge the battery at an ambient temperature between 0° C and +45° C (+32°...
-
Page 26: Charge Level Display
10.5 INFO: Please note that Li-ion batteries gradually lose capacity depending on age and use. Strongly reduced operating time after fully charging can be a sign that the battery is reaching the end of its useful life and has to be replaced. -
Page 27: Removing The Battery
10.3. REMOVING THE BATTERY 10.7 CAUTION: Installation or removal of the battery should be done with the bicycle on a repair stand so the battery can slide out at the bottom. Alternatively, if a repair stand is not available, the bicycle can be carefully placed on its side or turned upside down. -
Page 28: Cleaning
CAUTION: Never use a high-pressure cleaner or hose when cleaning your Levo. Best practice is to use a bucket of water with a wet cloth or a sponge to remove dirt, then dry off all surfaces with a clean towel. -
Page 29: Transport
The battery charge should be approximately 30%. ENERGY 500 WH 700 WH CAUTION: Be aware that your Levo bicycle is significantly heavier than a bicycle CHARGE TIME 3:50 5:15 without motor support. Use caution when handling, carrying or lifting your Levo bicycle. -
Page 30: Specifications
HDS NO.42/ACB/S/F/N 46CONE SPACER,AL HEADSET S182500005 COMPRS RING,UP1.125/LOW1.5 CRMO 45,AL CROWN RACE,ANO MATT BLK HEADSET CUPS S212500015 HDS MY22 LEVO HEADSET CUPS STC KCNC, SPL-SC02-386, EXTRUDED, 7075- SEAT COLLAR S184700004 T6, 38.6MM, SCM435, NONE FINISH BOLT, BOLT CLAMP TYPE SEAT COLLAR DIAMETER 38.6 mm... -
Page 31: Shock Customization
11.4. TOOLS REQUIRED Levo frames are available in a 29” front and 27.5” rear configuration, with different wheel/tire and/or fork options. Each of these variables will affect 2.5, 3, 4, 5, 6, 8 mm ALLEN (HEX) KEYS BLUE THREAD-LOCKER (LOCTITE 243) the bottom bracket height and head angle of the frame, as well as the general „... -
Page 32: Bearing Specifications
11.6. BEARING SPECIFICATIONS DERAILLEUR HANGER 8 mm HEX QTY PIVOT LOCATION DIMENSION BEARING HEAD TUBE ICR GUIDE SCREW T10 TORX MAIN PIVOT (CHAINSTAY) 12 ID x 24 OD x 6 W 6901 TCU DISPLAY 1 & 2 T10 TORX LINK MOTOR MOUNT BOLTS REAR T30 TORX 12 ID x 21 OD x 5 W... - Page 33 SCR,CUST,M6 X 1.0 X LINK @ SEAT STAY BOLT 4 mm HEX 8,SST 30 BOLT,CUST,M6 XIFEM X Link @ SEAT STAY BOLT AXLE 6 mm HEX 22.34, 7075,BLK SPCR,12.1 ID X 19.5 OD X 3 LINK @ SEAT STAY SPACER W,FSR,AL7075-T6 SPCR,CUST, 10 ID X 18.5 OD LINK @ EXTENSION SPACER...
- Page 34 11.1 EXPLODED VIEW - BEARINGS/SPACERS B U U B...
- Page 35 11.2 EXPLODED VIEW - BOLTS...
-
Page 36: Flip Chips
12. FLIP CHIPS 11.3 The geometry of the Levo can be modified by adjusting the Horst flip chips and adjustable headset cups. The flip chips are located on both sides of the chainstay near the Horst pivot and the headset cup is located in the upper head tube bearing bore. -
Page 37: Adjusting The Horst Pivot Flip Chip
Reinstall the flip chips in the desired high or low position. Make sure they are fully seated „ 12.1. ADJUSTING THE HORST PIVOT FLIP CHIP and aligned with the chain-stay protector before tightening the bolt. 12.1 Torque the Pivot bolt to 10 Nm / 90 in-lbf. „... - Page 38 12.3 12.4 Fig. 12.4 Remove the zero offset cup from the head tube and replace it with the +/- 1-degree headset „ cup. 12.5 FORK HEADSET COVER COMPRESSION RING UPPER BEARING ADJUSTABLE HEADSET CUP Fig. 12.3 Loosen the stem bolts that attach it to the fork steerer (A). „...
- Page 39 12.6 12.7 -1° +1° FORK Fig. 12.6 When aligning the headset cup, the etching that is at the front of the bicycle indicates which setting you are in. Make sure the head tube and headset cup are free of dirt and debris when Fig.
-
Page 40: Air Shock Setup
13. AIR SHOCK SETUP CHAINSTAY BOTTOM HEAD TUBE ADJUSTMENT POINT LENGTH BRACKET ANGLE HEIGHT When setting suspension, always set the shock first and fork second for air pressure, rebound, then compression. + 0 mm + 0 mm + 0° HORST ADJUSTABLE PIVOT (HIGH) Make sure you’re wearing all gear that would normally be worn on a ride + 5 mm HORST ADJUSTABLE PIVOT (LOW) -
Page 41: Adjusting Rebound
Fig 13.1 13.3. ADJUSTING COMPRESSION To check the sag, push the o-ring against the seal (A), then mount the bicycle while „ Compression damping (blue knob) controls the amount of support of the shock platform, in propped up against a wall and sit in the saddle in a normal riding position, without bouncing other words, the shock’s ability to resist low-speed pedaling forces while still being able to the suspension. -
Page 42: Derailleur Hanger
14. DERAILLEUR HANGER 14.3 14.4 WARNING! Correct grease application is critical to rider safety. ONLY apply grease as instructed. INSTALLATION PROCEDURE: 14.1 14.2 Fig.14.3 Install the UDH washer, then thread the UDH bolt through the washer and into the hanger. „... -
Page 43: Regulatory Statements
15. REGULATORY STATEMENTS 14.5 RoHS: Specialized Bicycle Components, Inc. Certifies that this product and its packaging are in compliance with European Union Directive 2011/65/EU on the Restriction of the Use of Certain Hazardous Substances in Electrical and Electronics Equipment, commonly known as RoHS. -
Page 44: Ec - Declaration Of Conformity
EPAC (Electrically Power Assisted Cycle) transmitter. This equipment should be installed and operated with a minimum distance of 20 LEVO SW LTD / LEVO SW CARBON / LEVO PRO millimeters between the radiator and your body. CARBON / LEVO EXPERT CARBON / LEVO COMP...
Need help?
Do you have a question about the SW LTD and is the answer not in the manual?
Questions and answers