Table of Contents
Advertisement
Quick Links
instruction Manual
orion
®
transporter 70 Min-EQ
™
#9859
Tabletop Equatorial Refracting Telescope
customer support (800) 676-1343
E-mail: support@telescope.com
corporate offices (831) 763-7000
89 Hangar Way, Watsonville, ca 95076
Providing Exceptional Consumer Optical Products Since 1975
IN 193 Rev. B 02/09
Advertisement
Table of Contents

Subscribe to Our Youtube Channel
Related Manuals for Orion Transporter 70 Min-EQ 9859


Summary of Contents for Orion Transporter 70 Min-EQ 9859
- Page 1 Manual orion ® transporter 70 Min-EQ ™ #9859 Tabletop Equatorial Refracting Telescope customer support (800) 676-1343 E-mail: support@telescope.com corporate offices (831) 763-7000 89 Hangar Way, Watsonville, ca 95076 Providing Exceptional Consumer Optical Products Since 1975 IN 193 Rev. B 02/09...
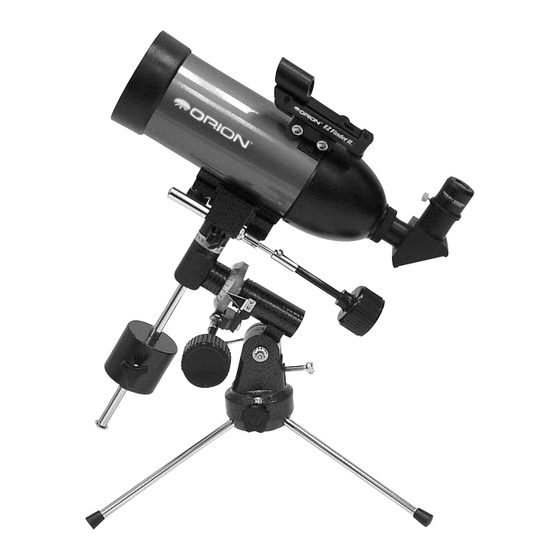
- Page 2 EZ Finder II reflex sight Eyepiece Declination lock knob Declination setting circle Star diagonal Declination slow motion Counterweight shaft control cable Counterweight Counterweight lock knob R.A. setting circle Latitude adjustment T-bolt R.A. slow motion control cable Azimuth lock knob Tripod leg Figure 1.
-
Page 3: Table Of Contents
Orion telescope. Your new Transporter 70 Min-EQ is the most portable equatorially mounted telescope ever developed by Orion. Since it fits completely in its included carrying case, you can take the Transporter 70 Min-EQ on camping trips, vacations, and anywhere else you want to bring it. -
Page 4: Getting Started
Power knob Figure 2a Figure 2b Azimuth adjustment knob Figure 2a, b. Proper operation of the equatorial mount requires Battery cover balancing the telescope tube on the R.A. axis. (a) With the R.A. lock Altitude Securing thumbscrews knob released, slide the counterweight along the counterweight adjustment shaft until it just counterbalances the tube. -
Page 5: Setting Up And Using The Equaltorial Mount
Declination setting circle Latitude adjustment scale Latitude adjustment T-bolt Latitude lock T-bolt R.A. lock knob Azimuth lock knob R.A. setting circle Figure 4. The Transporter 70 Min-EQ equatorial mount. rear of the sight. A 3-volt lithium battery provides the power for 2. - Page 6 Little Dipper (in Ursa Minor) N.C.P. Big Dipper (in Ursa Major) Polaris Cassiopeia Figure 5. To find Polaris in the night sky, look north and find the Big Dipper. Extend an imaginary line from the two "Pointer Stars" in the bowl of the Big Dipper.
- Page 7 Dec. setting circle are negative. look in the telescope’s eyepiece. If the EZ Finder II is properly So, the coordinates for the Orion Nebula listed in a star atlas aligned, the object should be visible somewhere in the field of will look like this: view.
-
Page 8: Astronomical Observing
Figure 6a Figure 6b Figure 6c Figure 6d Figure 6a,b,c,d. This illustration shows the telescope pointed in the four cardinal directions: (a) North, (b) South, (c) East, (d) West. Note that the tripod and mount have not been moved; only the telescope tube has been moved on the R.A. and Dec. axes. Use the slow-motion controls to center the object in the EZ Figure 6 illustrates how the telescope will look pointed at the Finder II, and it should appear in the telescope’s field of view. - Page 9 Beware, too, that nearby porch and streetlights and car head- lights will ruin your night vision. Eyepiece selection By using eyepieces of varying focal lengths, it is possible to attain many magnifications with the Transporter 70 Min-EQ. Your telescope comes with two Explorer II eyepieces, a 17mm that gives a magnification of 21x, and a 6mm that gives a magnification of 58x.
-
Page 10: Terrestrial Viewing
D. Deep-Sky Objects Remember that you are seeing these objects using your own telescope with your own eyes! The object you see in your eye- Under dark skies, you can observe a wealth of fascinating piece is in real-time, and not some conveniently provided deep-sky objects, including gaseous nebulas, open and glob- image from an expensive space probe. -
Page 11: Care And Maintenance
secure it in place with the velcro to form the top compartment removed using this method. Use caution; rubbing too hard may scratch the lens. For the large surface of the objective of the carry case. Place the optical tube in the top compart- ment of the carry case. - Page 12 This warranty is for the benefit of the original retail purchaser only. During this warranty period Orion Telescopes & Binoculars will repair or replace, at Orion’s option, any warranted instrument that proves to be defective, provided it is returned postage paid to: Orion Warranty Repair, 89 hangar Way, Watsonville, CA 95076.
Need help?
Do you have a question about the Transporter 70 Min-EQ 9859 and is the answer not in the manual?
Questions and answers