Table of Contents
Advertisement
Available languages
Available languages
Advertisement
Table of Contents

Related Manuals for LG DLHC1455 Series


Summary of Contents for LG DLHC1455 Series
- Page 1 OWNER'S MANUAL DRYER Read this owner's manual thoroughly before operating the appliance and keep it handy for reference at all times. ENGLISH DLHC1455* www.lg.com MFL71424358 Copyright © 2020-2021 LG Electronics Inc. All Rights Reserved. Rev.05_011321...
-
Page 2: Table Of Contents
Final Installation Check 22 OPERATION Before Use Loading the Dryer Control Panel Drying Cycles Options and Extra Functions 33 SMART FUNCTIONS LG ThinQ Application Smart Diagnosis Function 37 MAINTENANCE Regular Cleaning Periodic Cleaning Care in Cold Climates 43 TROUBLESHOOTING FAQs... -
Page 3: Important Safety Instructions
IMPORTANT SAFETY INSTRUCTIONS IMPORTANT SAFETY INSTRUCTIONS READ ALL INSTRUCTIONS BEFORE USE Safety Messages Your safety and the safety of others are very important. We have provided many important safety messages in this manual and on your appliance. Always read and follow all safety messages. - Page 4 • Do not grasp the power cord or touch the appliance controls with wet hands. • Do not modify or extend the power cord. • If the appliance has been submerged, contact an LG Electronics customer information center for instructions before resuming use.
- Page 5 IMPORTANT SAFETY INSTRUCTIONS • Always check the inside of the appliance for foreign objects. • Do not place items exposed to cooking oils in your dryer. Items contaminated with cooking oils may contribute to a chemical reaction that could cause a load to catch fire. To reduce the risk of fire due to contaminated loads, the final part of a tumble dryer cycle occurs without heat (cool down period).
-
Page 6: Caution Statements
IMPORTANT SAFETY INSTRUCTIONS CAUTION STATEMENTS CAUTION • To reduce the risk of minor or moderate injury to persons, malfunction, or damage to the product or property when using this product, follow basic precautions, including the following: Installation • Install the appliance on a firm and level floor. •... -
Page 7: Product Overview
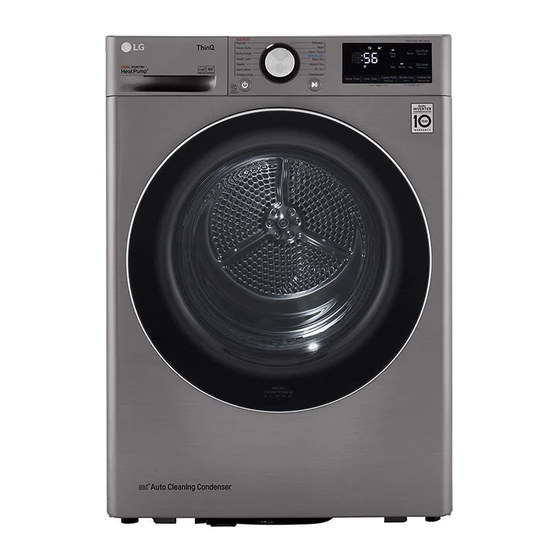
PRODUCT OVERVIEW PRODUCT OVERVIEW Product Features The images in this guide may be different from the actual components and accessories, which are subject to change by the manufacturer without prior notice for product improvement purposes. Front View Water Container Control Panel Door Drain Tube Rear View... - Page 8 PRODUCT OVERVIEW Product Specifications The appearance and specifications listed in this manual may vary due to constant product improvements. Electrical requirements: Please refer to the rating label for detailed information. Model DLHC1455* Description Heat Pump Electric Dryer Dimensions (Width × Depth × Height) 23 5/8'' x 27 1/4'' x 33 1/2'', 45 1/4'' (Depth with door open) 60 cm x 69 cm x 85 cm, 115 cm (Depth with door...
-
Page 9: Installation
INSTALLATION INSTALLATION Before Installing Installation Overview Please read the following installation instructions first after purchasing this dryer or transporting it to another location. Choose the proper location. Level the appliance. Connect the heat pump electric dryer. Plug in the power cord. Final Installation Check... -
Page 10: Choosing The Proper Location
10 INSTALLATION Choosing the Proper Ambient Temperature Location Install the appliance in an area where the temperature is over 45 ℉ (7 ℃). If the temperature around the appliance is too low, WARNING the appliance might not shut off at the end of an •... - Page 11 INSTALLATION Dimensions and Clearances The following clearances are recommended for the appliance. • Additional clearances should be considered for ease of installation and servicing. • Additional clearances should be considered on all sides of the dryer to reduce noise transfer. Installation spacing for Recessed Area or Closet Installation Description Dimension/Clearance...
- Page 12 12 INSTALLATION Closet Ventilation Requirements Closets with doors must have both an upper and lower vent to prevent heat and moisture buildup in the closet. One upper vent opening with a minimum opening of 48 sq. in. (310 cm ) must be installed no lower than 6 feet above the floor.
- Page 13 INSTALLATION Installation Spacing for Cabinet For cabinet installation with a door, minimum ventilation openings in the top of the cabinet are required. Description Dimension/Clearance Depth of Ventilation Opening 7″ (178 mm) Back Clearance 5″ (127 mm) Depth 27 1/4″ (690 mm) Front Clearance 1″...
-
Page 14: Leveling The Appliance
14 INSTALLATION Leveling the Appliance and front to back. Make sure that all four leveling feet are in firm contact with the floor. WARNING • Use long-sleeved gloves and safety glasses. • The appliance is heavy. Two or more people are required when installing the appliance. - Page 15 INSTALLATION • For safety reasons, two or more people need to work together to reverse the door. NOTE • The appearance of the screws varies and the screws must be inserted differently depending on the position. Make sure that you've selected the correct screw before tightening.
-
Page 16: Stacking The Appliance
• If using the 23 5/8″ (600 mm) top plate: LG Front Load Washing Machine The appliance may only be stacked on top of an LG front load washing machine. Do not attempt to stack the appliance on any other washing machine, as it could result in damage, injury or property damage. -
Page 17: Connecting Electric Dryers
INSTALLATION Installing the Optional Drain Hose equipment-grounding terminal or lead on the dryer. Normally, condensed water is pumped up to the • The dryer has its own terminal block that must water container where water is collected until be connected to a separate 240 VAC, 60-Hertz, manually emptied. - Page 18 18 INSTALLATION • Use a 30-amp, 240-volt, 4-wire, UL-listed power cord with #10 AWG-minimum copper conductor and closed loop or forked terminals with upturned ends. Remove the terminal block access cover on the upper back of the appliance. Install UL-listed strain relief into the power cord through-hole.
- Page 19 INSTALLATION Thread the 4-wire #10 AWG minimum copper Ground Screw power cable prepared in step 1 through the strain relief. Three-Wire Power Cord • A 3-wire connection is NOT permitted on new construction after January 1, 1996. • A UL-listed strain relief is required. •...
- Page 20 20 INSTALLATION Terminal block White Wire from Dryer harness UL-listed strain relief Hot Leads of Power Cord (Black and Red) UL-listed 3-wire power cord Neutral Wire (White) Attach the two hot leads (black and red) of the External Ground Wire (If required by local power cord to the outer terminal block codes) screws.
-
Page 21: Special Electrical Requirements
INSTALLATION Special Electrical Requirements For Mobile or Manufactured Homes • Any installation in a manufactured or mobile home must comply with the Manufactured Home Construction and Safety Standards Title 24 CFR, Part 3280 or Standard CAN/ CSA Z240 MH and local codes and ordinances. If you are uncertain whether your proposed installation will comply with these standards, please contact a service and installation professional for... -
Page 22: Operation
22 OPERATION OPERATION Before Use WARNING • To reduce the risk of fire, electric shock, or injury to persons, read the IMPORTANT SAFETY INSTRUCTIONS before operating this appliance. Operation Overview Press the Start/Pause button to start the drying cycle. Ensure the lint filter and water container are clean. -
Page 23: Loading The Dryer
OPERATION Loading the Dryer - Curtains and tablecloths - Bath mats NOTE Fiberglass • Do not overload the appliance for the best drying performance and most efficient energy • Do not dry fiberglass articles in your dryer. Glass usage. particles left in the dryer could be picked up by your clothes the next time you use the dryer and irritate your skin. -
Page 24: Control Panel
• Remote Start - With the LG ThinQ app, you can use a smartphone to control your appliance remotely. • Wi-Fi - Press and hold the Wrinkle Care button for 3 seconds to initiate the connection of the appliance to the LG ThinQ application. - Page 25 OPERATION Time and Status Display Water Full Indicator • lights up at the beginning of a cycle to remind you to empty the water container before drying. It also lights up when the water container is full and needs to be emptied. Lint Filter Status Indicator •...
-
Page 26: Drying Cycles
Sensor Dry Cycles Sensor dry cycles utilize LG's unique dual sensor system to detect and compare the moisture level in clothes and in the air and adjust the drying time as needed to ensure superior results. The appliance automatically sets the dryness level and temperature at the recommended setting for each cycle. - Page 27 OPERATION Cycle Antibacterial Description Using this cycle helps to reduce bacteria. Dry Level Not adjustable Dry Mode Default: Normal Available: Normal Cycle Delicates Description Use this cycle for drying dress shirts/blouses, nylons, lingerie, or sheer and lacy clothes which can easily be damaged. Dry Level Default: Normal Available: All...
- Page 28 Downloaded Description This cycle allows you to download a new and specialized drying cycle to your appliance with a smartphone. • Refer to the LG ThinQ smartphone application to see the cycles available for download. Selectable Drying Options Cycle Dry Mode Wrinkle Care †...
- Page 29 OPERATION Cycle Dry Mode Wrinkle Care † Cycle Dry Level Normal Energy Saver Air Dry † This option helps to reduce the energy used when drying clothes by circulating the refrigerant at a lower speed than in the Normal mode. When this option is selected, the drying time will increase.
-
Page 30: Options And Extra Functions
30 OPERATION Options and Extra Functions Wrinkle Care Selecting this option will tumble the load Your dryer includes several additional cycle periodically for up to 2 hours after the selected options to customize cycles to meet your individual cycle, or until the door is opened. This is helpful in needs. - Page 31 Use this function to disable the controls. This function can prevent children from changing • Some models do not include the drying rack. To cycles or operating the dryer. purchase a drying rack, contact an LG Electronics Customer Information Center or visit the NOTE website at http://www.lg.com.
- Page 32 32 OPERATION NOTE • Turning off the power will not reset this function. You must deactivate this function before you can access any other options and functions. Locking/Unlocking the Control Panel Turn on the power. Press and hold the Wrinkle Care and Condenser Care buttons at the same time for 3 seconds to activate or deactivate this function.
-
Page 33: Smart Functions
Turn off the Mobile data or Cellular Data on your smartphone. - Control the appliance remotely or check to see how much time is left in the cycle from the LG ThinQ application. NOTE • Once the remote control feature is enabled, you can start a cycle from the LG ThinQ application. - Page 34 34 SMART FUNCTIONS Press the Power button. NOTE • LG ThinQ is not responsible for any network Press and hold the Remote Start button for 3 connection problems or any faults, malfunctions, seconds to enable the remote control or errors caused by network connection.
-
Page 35: Smart Diagnosis Tm Function
This equipment complies with FCC radiation LG ThinQ application. exposure limits set forth for an uncontrolled • Launch the LG ThinQ application and select the environment. This transmitter must not be co- Smart Diagnosis feature in the menu. Follow located or operating in conjunction with any other the instructions provided in the LG ThinQ antenna or transmitter. - Page 36 36 SMART FUNCTIONS the instructions for audible diagnosis provided in the LG ThinQ application. Press the Power button to turn on the appliance. • Do not press any other buttons. Hold the mouthpiece of your phone in front of logo.
-
Page 37: Maintenance
MAINTENANCE MAINTENANCE WARNING • Unplug the appliance before cleaning. • Never use harsh chemicals, abrasive cleaners, or solvents to clean the appliance. They will damage the finish. Regular Cleaning Cleaning the Inner Filter Pull out the inner filter from the outer filter Cleaning the Lint Filter and then open the inner filter. - Page 38 38 MAINTENANCE Cleaning the Outer Filter Remove the dust or lint around the filter inlet. CAUTION • If the lint drops into the filter inlet, it may cause degradation of drying performance and increase in drying time. NOTE • Ensure the side of the filter is closed properly. If you fail to do so, any lint accumulated on the filter may get into the appliance and may cause degradation of the drying performance.
-
Page 39: Periodic Cleaning
MAINTENANCE Cleaning the Interior Pull out the water container. Wipe around the door opening and seal with a soft, damp cloth to prevent lint and dust buildup that could damage the door seal. Clean the window with a soft cloth dampened with warm water and a mild, nonabrasive household detergent. - Page 40 40 MAINTENANCE Reassemble the plug onto the drain tube and NOTE reclip the drain tube into its holder. • Warm air is expelled through the ventilation grille. CAUTION • The installation location should have adequate • If the plug is not securely inserted into the drain ventilation to avoid pulling in the air from nearby tube, water will leak out and could cause fuel-burning appliances.
-
Page 41: Care In Cold Climates
MAINTENANCE Open the dryer door and leave it open to Press the Start/Pause button to start allow air to circulate in the drum. cleaning the condenser. • The condenser cleaning process takes WARNING about 1 hour. • For safety reasons, do not allow children or animals to climb into the appliance. - Page 42 42 MAINTENANCE Thawing out the Appliance Turn on the appliance and run the Normal cycle for about 30 seconds. Then wait about 30 minutes. Running the Thawing Mode Turn on the appliance and press the Less Run the Normal cycle again. Check if the Time button for 3 seconds.
-
Page 43: Troubleshooting
Scan this QR code to quickly access the video search page on the offical LG website. On the lg.com/us home page, click on the Support menu tab to bring up the menu selections. Select Video Tutorials. Type Dryer in the search box on the new page and click the Search button. -
Page 44: Before Calling For Service
44 TROUBLESHOOTING Before Calling for Service The dryer is equipped with an automatic error-monitoring system to detect and diagnose problems at an early stage. If the dryer does not function properly or does not function at all, check the following before you call for service. - Page 45 The door is closed while clothes or foreign substance is caught in the door. • Check if clothes or foreign substance is caught in the door before using the appliance. If water leaks continuously, contact the LG Electronics Customer Information Center. The appliance runs This is normal operation for the Wrinkle Care option.
- Page 46 46 TROUBLESHOOTING Problem Possible Cause & Solution Clothes are Garment care instructions are not being followed. shrinking. • To avoid shrinking your clothes, always consult and follow fabric care instructions. Some fabrics will naturally shrink when washed. Other fabrics can be washed but will shrink when dried in a dryer.
- Page 47 TROUBLESHOOTING Odors Problem Possible Cause & Solution The appliance has an Are you using the appliance for the first time? unpleasant odor. • The odor is caused by the rubber material inside the appliance. The odor normal when the appliance is new and disappears after you run several cycles. Do you smell an odor during use? •...
-
Page 48: Warranty
Should your LG Dryer (collectively “Product”) fail due to a defect in materials or workmanship under normal and proper use, during the warranty period set forth below, LG will, at its option, repair or replace the Product. This limited warranty is valid only to the original retail purchaser of the Product (“You”) and applies only when purchased lawfully and used within the United States including U.S. - Page 49 Or by mail: LG Electronics, P.O. Box 240007, Huntsville, AL 35813 ATTN: Customer Service PROCEDURE FOR RESOLVING DISPUTES: ALL DISPUTES BETWEEN YOU AND LG ARISING OUT OF OR RELATING IN ANY WAY TO THIS LIMITED WARRANTY OR THE PRODUCT SHALL BE RESOLVED EXCLUSIVELY THROUGH BINDING ARBITRATION, AND NOT IN A COURT OF GENERAL JURISDICTION.
- Page 50 Notice of Dispute. In the event you intend to commence an arbitration proceeding, you must first notify LG in writing at least 30 days in advance of initiating the arbitration by sending a letter to LG at LG Electronics, USA, Inc. Attn: Legal Department-Arbitration 111 Sylvan Avenue, Englewood Cliffs, NJ 07632.
- Page 51 Opt Out. You may opt out of this dispute resolution procedure. If you opt out, neither you nor LG can require the other to participate in an arbitration proceeding. To opt out, you must send notice to LG no later than 30 calendar days from the date of the first consumer purchaser’s purchase of the product by...
- Page 52 52 Memo...
- Page 53 MANUAL DEL PROPIETARIO SECADORA Lea el manual del propietario detenidamente previo a operar el electrodoméstico y mantengalo al alcance para futuras referencias. ESPAÑOL DLHC1455* www.lg.com Copyright © 2020-2021 LG Electronics Inc. Todos los derechos reservados...
- Page 54 24 FUNCIONAMIENTO Antes de utilizarlo Carga de la secadora Panel de control Ciclos de secado Opciones y funciones adicionales 36 FUNCIONES INTELIGENTES Aplicación LG ThinQ Función Smart Diagnosis (Diagnóstico In- teligente) 40 MANTENIMIENTO Limpieza regular Limpieza periódica Cuidado en climas fríos 46 SOLUCIÓN DE PROBLEMAS...
- Page 55 INSTRUCCIONES IMPORTANTES DE SEGURIDAD INSTRUCCIONES IMPORTANTES DE SEGURIDAD LEA TODAS LAS INSTRUCCIONES ANTES DE UTILIZAR Mensajes de seguridad Su seguridad y la de los demás son muy importantes. Tanto en este manual como en el equipo, hemos proporcionado muchos mensajes de seguridad importantes.
- Page 56 • Si detecta un sonido extraño, olor a quemado o a químico, o humo provenientes del artefacto, desconéctelo de inmediato y contáctese con un Centro de Información al Cliente de LG Electronics. • Nunca desconecte el artefacto tirando del cable de alimentación. Sujete siempre con firmeza el enchufe y tire derecho para extraerlo del tomacorriente.
- Page 57 INSTRUCCIONES IMPORTANTES DE SEGURIDAD • No seque artículos que hayan sido previamente limpiados, lavados o manchados con gasolina, solventes de limpieza en seco, aceite vegetal, aceite de cocina u otras sustancias inflamables o explosivas, ni artículos a los cuales se haya sumergido en estos productos o que se hayan ensuciado con estas sustancias, ya que estas emiten vapores que pueden inflamarse o explotar.
- Page 58 INSTRUCCIONES IMPORTANTES DE SEGURIDAD y se asegure de que la toma está correctamente conectada a tierra. Si no se cumplen estas instrucciones, se podrá causar riesgo de descargas eléctricas y/o incendios.
- Page 59 INSTRUCCIONES IMPORTANTES DE SEGURIDAD MENSAJES DE PRECAUCIÓN PRECAUCIÓN • Para reducir el riesgo de lesiones leves o moderadas a personas, el mal funcionamiento o daño al producto o propiedad cuando use este producto, siga las precauciones básicas, incluido lo siguiente: Instalación •...
- Page 60 DESCRIPCIÓN GENERAL DEL PRODUCTO DESCRIPCIÓN GENERAL DEL PRODUCTO Características del producto Las ilustraciones en esta guía pueden diferir de los componentes y accesorios reales, los cuales están sujetos a cambios sin previo aviso por parte del fabricante a fin de introducir mejoras en el producto. Vista frontal Recipiente de agua Panel de control...
- Page 61 DESCRIPCIÓN GENERAL DEL PRODUCTO Especificaciones del producto La apariencia y las especificaciones detalladas en este manual podrían variar debido a mejoras constantes en el producto. Requisitos Eléctricos: Consulte la etiqueta de datos de servicio para más información. Modelo DLHC1455* Descripción Bomba de calor de secadoras eléctricas Dimensiones (Ancho x Profundidad x Altura) 23 5/8″...
- Page 62 10 INSTALACIÓN INSTALACIÓN Antes de la instalación Descripción general de la instalación Lea las siguientes instrucciones de instalación inmediatamente después de adquirir esta secadora o transportarla a otra ubicación. Elección de la ubicación adecuada. Nivelación del artefacto. Conecte la secadora eléctrica con bomba de calor. Enchufe el cable de alimentación.
- Page 63 INSTALACIÓN Elección de la ubicación dejar una separación de 18 pulgadas (45.7 cm) entre el piso del garaje y la parte inferior del adecuada artefacto. ADVERTENCIA • ¡Lea todas las instrucciones de instalación antes Temperatura ambiente de instalar y hacer funcionar su electrodoméstico! Es importante que revise este Instale el artefacto en un área donde la manual por completo antes de instalar y usar el...
- Page 64 12 INSTALACIÓN Dimensiones y espacios Se recomiendan los siguientes espacios libres para el artefacto. • Se debe considerar dejar espacios libres adicionales para facilitar las tareas de instalación y mantenimiento. • Se debe considerar dejar espacios libres adicionales en todos los lados de la secadora para reducir la transferencia de ruido.
- Page 65 INSTALACIÓN Descripción Dimensiones/espacios libres Altura de abertura del gabinete 33 1/2″ (850 mm) Requisitos de ventilación para armarios Los armarios con puertas deben tener ventilación tanto en la parte superior como en la inferior para evitar la acumulación de calor y humedad dentro del armario. Se debe instalar una abertura de ventilación superior con una apertura mínima de 48 pulgadas cuadradas (310 cm ) a no menos de 6 pies (1,8 m) del suelo.
- Page 66 14 INSTALACIÓN Descripción Dimensiones/espacios libres Espacio libre lateral 1″ (25 mm) 23 5/8″ (600 mm) † Ancho † Difiere según las dimensiones de la lavadora. Separación para instalación en gabinetes Para instalaciones en gabinetes con puerta, se requieren aberturas de ventilación mínimas en la parte superior del gabinete.
- Page 67 INSTALACIÓN Ajuste del electrodoméstico hasta que se encuentre nivelado de lado a lado y de adelante hacia atrás. Asegúrese de que las cuatro patas niveladoras se encuentran haciendo ADVERTENCIA contacto firme con el piso. • Use guantes con mangas largas y gafas de seguridad.
- Page 68 16 INSTALACIÓN por lo que debe leer las instrucciones con sumo Quite los 3 tornillos del ensamble del pestillo cuidado. de la puerta que está montado entre la puerta y el ensamble de la bisagra. Quite el tornillo del ensamble de la puerta. ADVERTENCIA •...
- Page 69 Secadora Lavadora de carga frontal LG El artefacto solo puede apilarse arriba de una lavadora de carga frontal LG. No intente apilar el artefacto sobre ninguna otra lavadora, ya que podría causar daños, lesiones o daños a la propiedad.
- Page 70 18 INSTALACIÓN Alinee el orificio del soporte con el orificio de la cubierta trasera de los artefactos. • Si utiliza la placa superior de 23 5/8″ (600 mm): PRECAUCIÓN • Si la manguera de desagüe está retorcida o pellizcada, no desaguará de manera adecuada. •...
- Page 71 INSTALACIÓN alambrado para que la secadora pueda ser Pase un cable de alimentación de movida de su ubicación normal en caso sea 30 amperios, 240 voltios, de 4 hilos necesario. homologado por UL con un conductor de cobre N.° 10 AWG como mínimo por el •...
- Page 72 20 INSTALACIÓN Alambre blanco movido del tornillo de conexión a tierra Conductores vivos del cable de alimentación (negro y rojo) Alambre neutro (blanco) Alambre de conexión a tierra del cable de alimentación Tornillo de conexión a tierra Bloque de bornes Aliviador de tensión homologado por UL Conexión directa de cuatro hilos Cable de alimentación de 4 hilos...
- Page 73 INSTALACIÓN Conecte el alambre neutro (blanco) al tornillo Alambre neutro (blanco) central del bloque de bornes. Alambre de conexión a tierra del cable de alimentación Conecte el cable de conexión a tierra exterior Tornillo de conexión a tierra (si así lo requieren los códigos locales) al tornillo de conexión a tierra de color verde.
- Page 74 22 INSTALACIÓN 1’’ (2.5 cm) Quite la cubierta de acceso al bloque de bornes localizada en la parte superior trasera del artefacto. Instale un aliviador de tensión homologado Alambre blanco del arnés de cableado del por UL en el orificio por el que pasa el cable artefacto de alimentación.
- Page 75 INSTALACIÓN • Asegúrese de que la secadora disponga del debido acceso al aire fresco del exterior para garantizar un funcionamiento adecuado. La abertura para la toma de aire fresco del exterior debe ser de, como mínimo, 25 pulgadas cuadradas (163 cm •...
- Page 76 24 FUNCIONAMIENTO FUNCIONAMIENTO Antes de utilizarlo ADVERTENCIA • Para reducir el riesgo de incendios, descargas eléctricas o lesiones a las personas, lea las INSTRUCCIONES IMPORTANTES DE SEGURIDAD antes de operar este artefacto. Funcionamiento general Normal . Consulte la tabla de ciclos para obtener información detallada.
- Page 77 FUNCIONAMIENTO Planchado permanente y sintéticos • Tanto la temperatura ambiente elevada como una habitación pequeña pueden aumentar el • No sobrecargue su secadora. Extraiga los tiempo de secado y el consumo de energía. artículos de planchado permanente tan pronto como se detenga la secadora, para disminuir las arrugas.
- Page 78 26 FUNCIONAMIENTO Secado por centrifugado Etiqueta Indicaciones No secar por centrifugado No secar (usado junto a no lavar) Ajuste de calor Etiqueta Indicaciones Alta Media Baja Sin calor/aire...
- Page 79 • Utilice estos botones para seleccionar las opciones deseadas para el ciclo seleccionado. No todas las opciones están disponibles para cada ciclo. • Inicio remoto - Con la aplicación LG ThinQ , puede utilizar un teléfono inteligente para controlar su artefacto de manera remota. • Wi-Fi - Mantenga presionado el botón Wrinkle Care (Prevención de Arrugas) durante 3 segundos, para...
- Page 80 28 FUNCIONAMIENTO Pantalla de tiempo y estado • La pantalla muestra las configuraciones, el tiempo restante estimado, las opciones y los mensajes de estado del artefacto. Cuando el artefacto esté encendido, se encenderán las configuraciones predeterminadas. Pantalla de tiempo y estado Indicador de recipiente de agua lleno •...
- Page 81 Ciclos de Secado con sensor Los ciclos de Secado con sensor utilizan el sistema exclusivo de sensor doble de LG para detectar y comparar el nivel de humedad en las prendas y en el aire, y ajustar el tiempo de secado según sea necesario para garantizar resultados superiores.
- Page 82 30 FUNCIONAMIENTO Ciclo Sportswear (Ropa deportiva) Descripción Utilice este ciclo para secar ropa especial, deportiva y para exteriores. Nivel de secado No es ajustable Modo Seco Predeterminado: Energy Saver (Ahorro Disponible: Energy Saver (Ahorro de de Energía) Energía) Ciclo Antibacterial (Antibacteriano) Descripción El uso de este ciclo ayuda a reducir las bacterias.
- Page 83 Este ciclo le permite descargar un ciclo de secado nuevo y especializado a su artefacto utilizando un teléfono inteligente. • Consulte la aplicación LG ThinQ de teléfono inteligente para ver los ciclos disponibles que puede descargar. Opciones de secado seleccionables...
- Page 84 32 FUNCIONAMIENTO Ciclo Dry Mode (Modo de Secado) Wrinkle Care Energy Saver Dry Level (Prevención (Ahorro de Ciclo (Nivel de Apagado Normal de Arrugas) † Secado) Energía) Antibacterial (Antibacterian Delicates Very (Muy) (Delicadas) Normal Damp (Planchado) Wool (Lana) Perm. Press Very (Muy) (Planchado Normal...
- Page 85 FUNCIONAMIENTO Opciones y funciones Más tiempo/menos tiempo adicionales Use estos botones para aumentar o disminuir los tiempos de secado en incrementos de 1 minuto, Su secadora incluye varias opciones de ciclos cuando use ciclos de secado manual como Rack adicionales para personalizarlos de modo que Dry (Secado Sobre Rejilla), Heated Dry (Aire cumplan con sus necesidades.
- Page 86 Para comprar una rejilla de secado, que se usan frecuentemente como un programa comuníquese con el Centro de Información al personalizado. Cliente de LG Electronics o visite el sitio web en http://www.lg.com. Guardar un programa personalizado Encienda el artefacto y seleccione los ajustes...
- Page 87 FUNCIONAMIENTO Ajuste el tiempo de secado presionando los botones More Time (Más tiempo) y Less Time (Menos tiempo). Presione el botón de Inicio/Pausa para iniciar el ciclo. Bloqueo de Panel Utilice esta función para desactivar los controles. Esta función puede evitar que los niños cambien los ciclos o manejen esta secadora.
- Page 88 • Una vez que la función de control remoto esté habilitada, puede iniciar un ciclo desde la aplicación LG ThinQ. Si el ciclo no se inicia, el artefacto esperará a iniciarlo hasta que el Conecte su teléfono inteligente al enrutador producto se apague de forma remota o hasta inalámbrico.
- Page 89 Inicie un ciclo desde la aplicación LG ThinQ en • Si el electrodoméstico no puede registrarse su teléfono inteligente. debido a problemas con la transmisión de la señal inalámbrica, desconéctelo y espere...
- Page 90 Sin embargo, no se LG Electronics también le proporcionará el código garantiza que dicha interferencia no pueda ocurrir abierto en un CD-ROM por un costo que cubra los en instalaciones particulares.
- Page 91 LG ThinQ. • Inicie la aplicación LG ThinQ y seleccione la función Smart Diagnosis en el menú. Siga las instrucciones provistas en la aplicación LG ThinQ.
- Page 92 40 MANTENIMIENTO MANTENIMIENTO ADVERTENCIA • Desenchufe el electrodoméstico antes de limpiarlo. • Nunca utilice productos químicos agresivos, limpiadores abrasivos ni solventes para limpiar el electrodoméstico. Estos productos arruinarán el acabado. Limpieza regular Limpieza del filtro interior Extraiga el filtro interior del filtro exterior y Limpieza del filtro de pelusa luego abra el filtro interior.
- Page 93 MANTENIMIENTO Limpieza del filtro exterior Quite el polvo o la pelusa alrededor de la entrada del filtro. PRECAUCIÓN • Si cae pelusa en la entrada del filtro, podría causar degradación del desempeño de secado y aumentar el tiempo de secado. NOTA •...
- Page 94 42 MANTENIMIENTO NOTA NOTA • Si el agua condensada se drena directamente a • No use alcohol metílico, solventes ni productos través de la manguera de desagüe opcional, no similares. es necesario vaciar el recipiente de agua. • Nunca use limpiadores abrasivos o de lana metálica;...
- Page 95 MANTENIMIENTO un flujo de aire inadecuado. Desenchufe siempre el artefacto antes de limpiarlo o aspirarlo. NOTA • Utilice el tanque de recolección de agua si está NOTA instalada la manguera de desagüe opcional o si • Sale aire caliente a través de la rejilla de el artefacto está...
- Page 96 44 MANTENIMIENTO • Si vierte más de 51 oz (1.5 litros) de agua en el compartimiento, se producirá una filtración de agua. Presione el botón de Inicio/Pausa. • Esta función opera durante casi 3 horas. Encienda el artefacto. Vacíe el recipiente de agua después de que Presione el botón de Condenser Care haya terminado la función.
- Page 97 MANTENIMIENTO funcionamiento de la unidad. Si se congela el agua Cuando la descongelación esté completa, dentro del electrodoméstico, siga los pasos para seque la ropa como de costumbre. descongelar antes de usarlo. Descongelación manual del artefacto NOTA Abra la puerta de la secadora y extraiga los •...
- Page 98 Escanee este código QR para acceder rápidamente a la página de búsqueda de videos en el sitio web de En la página de inicio de lg.com/us, haga clic en la pestaña del menú Soporte para ver las selecciones del menú. Seleccione Video Tutorials.
- Page 99 SOLUCIÓN DE PROBLEMAS Antes de llamar al servicio técnico La secadora está equipada con un sistema de monitoreo de errores automático para la detección y el diagnóstico de problemas en una etapa temprana. Si la secadora no funciona correctamente o no funciona en absoluto, consulte la siguiente información antes de llamar al servicio técnico.
- Page 100 • Compruebe que no haya ropa ni objetos extraños atascados en la puerta antes de usar el artefacto. Si hay filtraciones de agua continuamente, comuníquese con un Centro de Información al Cliente de LG Electronics. El artefacto se Este es el funcionamiento normal para la opción Wrinkle Care (Prevención de Arrugas).
- Page 101 SOLUCIÓN DE PROBLEMAS Problemas Causas posibles y solución Manchas de grasa o No se usó correctamente el suavizante de ropa. suciedad en la ropa. • Confirme y siga las instrucciones provistas por el fabricante del suavizante. Se están secando juntas ropa limpia y sucia. •...
- Page 102 50 SOLUCIÓN DE PROBLEMAS Problemas Causas posibles y solución La ropa tiene Carga muy grande o muy pequeña. Una única prenda grande como una manta o manchas de colcha. humedad después de • Si las prendas están muy apretadas o son demasiado escasas, el sensor puede tener un ciclo de Sensor problemas para leer el nivel de sequedad de la carga.
- Page 103 SOLUCIÓN DE PROBLEMAS Wi-Fi Problemas Causas posibles y solución Problema al conectar La contraseña de la red Wi-Fi fue ingresada incorrectamente. el electrodoméstico • Borre su red Wi-Fi doméstica e inicie el proceso de registro de nuevo. y el teléfono inteligente a la red Los Datos Móviles para su teléfono inteligente están activados.
- Page 104 FAVOR, VEA A CONTINUACIÓN LA SECCIÓN TITULADA “PROCEDIMIENTO PARA RESOLVER CONFLICTOS”. Si su secadora LG (el “Producto”) fallara debido a defectos de materiales o de fabricación en el uso doméstico normal y correcto, durante el período de garantía que se establece a continuación, LG tendrá la opción de reparar o reemplazar el Producto.
- Page 105 • Daños o fallos del producto causados por accidentes, pestes y alimañas, rayos, viento, incendio, inundaciones o hechos de fuerza mayor o cualquier otra causa ajena al control de LG. • Daños o fallos del Producto que resulten del mal uso, el maltrato, la instalación, la reparación o el mantenimiento incorrectos, o el servicio no aprobado por LG.
- Page 106 Aviso de disputa. En caso de que usted desee iniciar un procedimiento de arbitraje, primero debe notificar a LG por escrito al menos 30 días antes de iniciar el arbitraje enviando una carta a LG a LG Electronics, USA, Inc. Atención: Legal Department- Arbitration 111 Sylvan Avenue, Englewood Cliffs, NJ 07632.
- Page 107 LG pueden solicitar a la otra parte que participe en un procedimiento de arbitraje. Para excluirse, usted debe enviar una notificación a LG, en un lapso de hasta 30 días continuos, contados a partir de la fecha de la primera compra del consumidor del producto, ya sea por: (i) el envío de un correo electrónico a optout@lge.com con el siguiente Asunto: “Exclusión del arbitraje”...
- Page 108 LG Customer Information Center For inquiries or comments, visit www.lg.com or call: U.S.A. 1-800-243-0000 1-888-542-2623 CANADA Register your product Online! www.lg.com...
Need help?
Do you have a question about the DLHC1455 Series and is the answer not in the manual?
Questions and answers