
Related Manuals for Eaton FT1380e


Summary of Contents for Eaton FT1380e
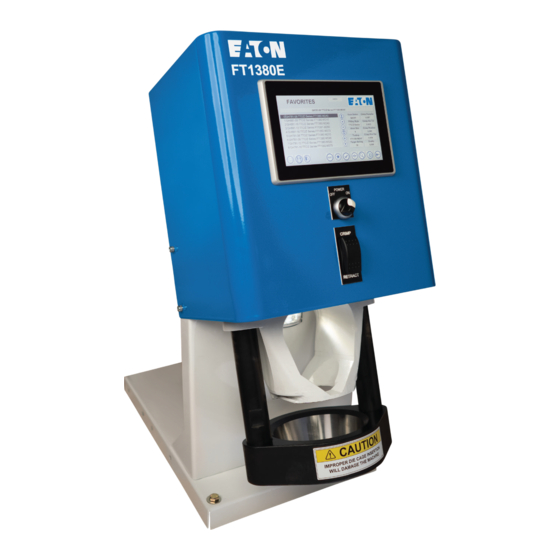
- Page 1 C R I M P M A C H I N E O P E R A T O R ’ S M A N U A L Eaton Electronic FT1380e Crimp Machine Operator’s Manual FT1380E Crimp Machine Operators Manual: E-HOAS-TT005-E...
-
Page 2: Table Of Contents
Table of Contents • Safety Instructions • Maintenance • Specifications • Maintenance Intervals • Accessories • Machine Maintenance Procedures • Setup and Installation • Die Cage Maintenance Procedures • Operating Instructions • Troubleshooting Tips • Crimping Procedures • Crimp Machine Components •... -
Page 3: Safety Instructions
Safety Instructions WARNING 4. Maintain dies with care. Dies used in the FT1380e crimp machine are sintered powdered metal, offering the best combination of strength and wear Failure to follow Eaton process and product instructions and limitations could resistance for long life. Sintered powdered metal dies are generally brittle lead to premature hose assembly failures, resulting in property damage, and care should be taken to avoid any sharp impact. -
Page 4: Specifications
FT1380e-115-UP 115v Electronic Upgrade Package SETUP AND INSTALLATION (requires shipment of current machine to manufacturer) 1. Mount your Eaton FT1380e crimp machine onto a workbench that will FT1380e-230-UP 230v Electronic Upgrade Package support at least 300 pounds. Secure the unit using the holes provided (requires shipment of current machine to manufacturer) in the corners of the crimp machine base. - Page 5 FT1380-200-M370 TTC/Z SERIES FITTING LOCATORS FT1380-200-M420 FT1382-200-M465 Part number............FT1330-XL FT1382-275-M520 4S SERIES FITTING LOCATORS (cannot be used in combination with FT1330-XL locators) Part number............FT1380-XL USB DRIVE Part number............FT1380e-1-7 STYLUS Part number............FT1380e-1-8 WIPING CLOTH Part number............FT1380e-1-9...
-
Page 6: Operating Instructions
Page Down Favorited Spec Save Favorite Scroll Up FT1380e CONTROL PANEL TUTORIAL The electronic FT1380e machine comes with an integrated Load Scroll Down touch screen to control the machine functions. This section provides Selected Spec instruction for how to use the touch screen controller. - Page 7 On the Product Library Screen, you can see the complete list Commonly crimped hoses should be saved as Favorites. If an offset of FT1380e crimp specs. has been entered for the crimp spec, it will be stored with the Favorites record.
-
Page 8: Calibration
Production Screen Maintenance The crimping procedure is performed from the Production Screen. Maintenance Screen displays crimp machine calibration information, revision level, and a crimp counter. Access to user privilege settings can also be found on this screen. This screen is only accessible when logged in as Admin. - Page 9 To search for a crimp spec • Navigate to the Product Library Screen by selecting the Product Library icon • Click the Search icon on the bottom of the screen. Once the keyboard appears, type in the hose series name on the keyboard, then hit ENT.
- Page 10 Loading a hose assembly crimp spec into the machine To load a crimp spec into the machine, go to the Product Library screen and select the relevant spec by either searching or scrolling. Hit the Load icon . Once the Load icon is selected, you are able to crimp with this spec via the production screen or navigate to the...
- Page 11 Saving a hose as a favorite Highlight a blank row B. Hit Save icon To save a hose as a favorite: Note: If a location is not selected when the save icon is selected, • Select the required spec and then load into machine by selecting the spec will save in the first available blank favorite row.
- Page 12 Moving a favorite record Crimping from product library menu Load a hose into the machine by selecting the Load icon and navigate If privileges are enabled, you can select a favorite row and then to production screen. Crimp spec details are shown. Verify the proper hose, move the selected spec up or down in the favorites list by selecting fitting, and tooling selections and begin the crimping process by pressing the move spec up...
- Page 13 Crimping from Favorites Menu Navigate to the Favorites menu . Highlight desired crimp spec and Navigate to the production screen . Crimp Spec details are shown. Verify the proper hose, fitting, and tooling selections and hit the Load icon to load the favorited spec into the machine. begin the crimping process by pressing the crimp switch on the machine.
- Page 14 Renaming Favorites To rename a favorite, select a spec to rename. Then press the Rename Favorite icon C. To save name hit ENT The current name is populated. Use the keyboard to change the name as desired. Use the back button to erase the characters in the current name.
- Page 15 Removing a Favorite A favorite record may be removed by highlighting it and selecting the remove favorite icon − You will be prompted to confirm that you do wish to remove the Favorite. A. Select crimp spec to be removed B.
- Page 16 Changing crimp offsets via calculator After crimping, measure the crimp diameter across each of the flats of the crimped fitting. Press the Calculator Icon A. Enter the 4 Measured Diameters in Measured “A” , “B” , “C” , and “D” B.
- Page 17 Changing crimp offsets via calculator (continued) If further adjustment is needed after another crimp, select Calculator Icon and enter the four measurements and select Calculate. Note: The additional offset is calculated and added to original offset value.
- Page 18 Changing crimp offset manually To change the crimp spec offset manually, press the “offset” Offset Verification field. Enter the desired offset using the keypad. Hit the Once the offset has been verified, select the box next to Offset button to save and close window. and a green checkmark will appear.
- Page 19 Setting variable retract position To set the Variable Retract Position, jog the crimper to desired retract position. Then, note value in “Position” field, which is shown for reference. B. Press “Retract” field C. Type desired value, hit ENT Jog the crimper to the desired retract position The crimper will now retract to the desired position.
- Page 20 Logging in as Admin To log in as Admin, press on Admin Login icon Enter the admin password provided and then press “ENTER” to log in as admin. A. Press Admin Login icon • Keyboard pops up...
- Page 21 Logging in as Admin (continued) When logged in as Admin, “Admin” displays at the top of the screen and the maintenance icon becomes visible. Note: The Admin account logs out after the specified period of time. This can be found and updated on the Privileges screen.
- Page 22 After entering your custom values, edit the favorite name by selecting the Rename Favorite icon . Then press the Save icon to save the Favorite. Caution: While logged in as admin, it is possible to edit attributes (such as crimp diameter) of other Eaton crimp specs saved as favorites.
- Page 23 Machine Calibration To check calibration or to recalibrate the machine, • Navigate to the Product Library. • Select CALIBRATION spec and load it into the machine. • Navigate to the production screen and crimp a TTC/Z series -8 fitting with an M240 die. •...
- Page 24 Privileges You must be logged in as Admin to set privileges. Remove Favorite When enabled, allows common user to remove a favorite • First select the maintenance icon • Then select the Privileges button. Retract Position When enabled, allows common user to set the crimp machine retract position The admin can then set the privileges that the non-Admin user can access.
- Page 25 EXIT closes the USB utility and returns to the crimper program. machine is shipped, the USB drive, stylus, and wiping cloth are placed EATON FT1380E USB UTILITY - BACKUP MENU in a cardboard box that is taped to the inside of the white pusher on the machine.
- Page 26 RESTORE ALL YOUR FILES 2. Open the drawer on the left side of the PLC and insert the micro-SD card. FACTORY RESET - RESTORE ALL ORIGINAL EATON FT1380E FILES 3. Close the SD card drawer. 4. Turn on the machine. Updates will install automatically.
- Page 27 “full retract” position and stops. The die cage may be inserted or 1. Retract the crimp ring by depressing the retract switch until the crimp removed in this position (figure 2). The FT1380e crimp machine will automatically ring is fully retracted. Select the proper die cage as shown in the retract when it has reached the target setting (this is when crimp is complete).
-
Page 28: Maintenance Intervals
Maintenance Procedures Maintenance Intervals: a. The sliding surface of the dies should appear smooth with no apparent Die Cage Lubrication galling. Galled dies must be replaced. Individual dies in a cage can be Every 50 crimps: Relube sliding surfaces of dies replaced without replacing all eight dies. -
Page 29: Troubleshooting Tips
Troubleshooting Tips Remember: The electric motor only runs during the crimping process. The motor energizes when the crimp switch is pressed and de-energizes when the crimp switch is released or when the crimp cycle is completed. While retracting, the hydraulic dump valve is energized. When the valve is energized, oil flow is directed from the pump to the cylinder. -
Page 30: Crimp Machine Components
Pump/Valve Assembly, 230v FT1380-3-21 Nut, 1-1/4”-12 Grade 8 FT1380-3-2 Cylinder, Enerpac FT1380-3-22 1/4-20 x 2.50” SHCS FT1380e-3-1-115 FT1380e Controls Assembly, 115v FT1380-3-24 1/4-20 x 0.38” Stainless SHCS FT1380e-3-1-230 FT1380e Controls Assembly, 230v FT1380-3-25 1/2-13 x 0.75” SHCS FT1380e-3-1- FT1380e Controls Assembly, 115v FT1380-3-26 #8-32 x 0.38”... -
Page 31: Die Cage Components
Die Cage Components FT1380-2-9 FT1380-2-9A FT1381-2-9 Detail Number Bill of Material Bill of Material Bill of Material Description Qty Req’d FT1330-2-9-21 FT1330-2-9-2 FT1330-2-9-21 Die Spring 8 or 16* FT1380-2-9-3 FT1380-2-9-2 FT1381-2-9-3 Front Plate FT1330-2-9-13 FT1330-2-9-3 FT1330-2-9-13 Spring Plate FT1330-2-9-55 FT1330-2-9-5 FT1381-2-9-55 Cap Screw FT1330-2-9-66... -
Page 32: Hydraulic Schematic
Hydraulic Schematic SEQUENCE 1. Pump on – Cylinder advances 2. Valve energized – Cylinder retracts 3. Pump and valve de-energized – Cylinder holds position FT1380E Crimp Machine Operators Manual: E-HOAS-TT005-E... - Page 33 FT1380E Crimp Machine Operators Manual: E-HOAS-TT005-E...
- Page 34 FT1380E Crimp Machine Operators Manual: E-HOAS-TT005-E...
Need help?
Do you have a question about the FT1380e and is the answer not in the manual?
Questions and answers