Table of Contents
Advertisement
Quick Links
Advertisement
Table of Contents

Subscribe to Our Youtube Channel
Related Manuals for Eagle Eye SG-Ultra Max


Summary of Contents for Eagle Eye SG-Ultra Max
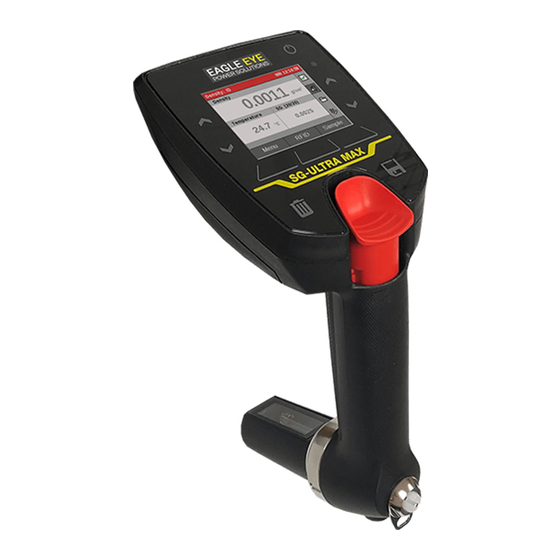
- Page 1 Instruction Manual SG-Ultra Max Portable Density Meter...
- Page 2 (print, photocopy, microfilm or any other process) without the prior written permission of Eagle Eye Power . Trade marks may be used in this instruction manual without being marked as such. These are the property of their respective owners and are legally protected.
-
Page 3: Table Of Contents
5.1 Front View ..................16 5.2 Keys on the Front................17 5.3 Rear View..................18 6 Putting the SG-Ultra Max into Operation ..........19 6.1 Connecting the Filling Tube ............19 6.2 Mounting the Syringe Adapter............19 6.3 Switching the Instrument On/Off ............. 19 7 Operating .... - Page 4 10.3 Performing a Custom Adjustment ..........35 10.4 Reset to Factory Adjustment............36 11 Methods and Sample IDs..............37 11.1 Methods ..................37 11.1.1 Managing Methods ............... 38 11.1.2 Assigning a Method to a Measurement ........ 39 11.1.3 Calculating the Temperature Coefficient Alpha ....39 11.2 Custom Parameters ..............
- Page 5 Appendix A: Technical Data..............63 A.1: Specifications................. 63 A.2: Instrument Data and Operating Conditions ........64 A.3: Wetted Parts .................. 64 Appendix B: Density [g/cm ] of Water (0 –40 °C / 32 –104 °F) ..... 65 Appendix C: Parameter Overview ............66 Appendix D: Example Files ..............
-
Page 7: About The Instruction Manual
If you receive any additions to or revisions of this instruction manual from Eagle Eye, these must be treated as part of the instruction manual. -
Page 8: Safety Instructions
• Use the instrument only for the purpose described in the instruction manual. Eagle Eye is not liable for damages caused by incorrect use of the instrument. • The results delivered by the instrument depend not only on the correct functioning of the instrument but also on various other factors. - Page 9 2.2 Installation and Use • The installation procedure shall be carried out only by authorized personnel who are familiar with the installation instructions. Use only accessories and consumables supplied or approved by Eagle • • Ensure that all operators have been trained beforehand to use the instrument safely and correctly.
- Page 10 • Service and repair procedures may be carried out only by authorized personnel or Eagle Eye. For repairs, contact Eagle Eye Power Solutions. The instrument must not • be returned without the filled out "Safety Declaration for Instrument Repairs" and must be cleaned before return.
-
Page 11: Overview
You can allocate sample IDs to your samples for easier identification. SG-Ultra Max is operated via keys on the front side. Up to 1024 measured data can be stored in the memory of the SG-Ultra Max density meter and can be recalled, exported to a PC, or printed later. -
Page 12: Measuring Principle
3.1 Measuring Principle Definition of density The density (ρ) of a sample is defined as its mass (m) divided by its volume (V): ---- - As the volume changes with temperature, density is a temperature- dependent measuring unit. The oscillating U-tube method The sample is introduced into a U-shaped borosilicate glass tube that is being electronically excited to vibrate at its characteristic frequency. -
Page 13: Checking The Supplied Parts
2. To check the delivery for completeness, compare the supplied parts to those listed in table 4-1. 3. If a part is missing, contact your local Eagle Eye representative. 4. If a part is damaged, contact the transportation company and your local Eagle Eye representative. - Page 14 Table 4-1: Supplied parts (cont.) Symbol Pcs. Article description Rubber housing SG-Ultra Max measuring cell Instruction manual Filling tube 180 mm Adapter Luer ¼" UNF Syringes 2 mL Luer Allen key 3 mm DIN 911...
- Page 15 Article description Screw plug ¼" UNF Filling tube 600 mm Spare wristband for portable instruments Set carrying strap SG-Ultra Max Bluetooth USB adapter ABS disc tag 30 mm, 5 mm hole R/W White PVC sticker disc tag 30 mm R/W...
-
Page 16: View Of Sg-Ultra Max
5 View 5.1 Front View Fig. 5-1: Front view of the instrument 1 Arrow keys 7 LCD display 2 Function keys 8 Power ON/OFF key 3 Delete key 9 Arrow keys 4 Filling pump 10 Data storage key 5 Screw plug 11 Measuring cell 6 Filling tube... -
Page 17: Keys On The Front
5.2 Keys on the Front Power ON/OFF key to switch the instrument on and off to start a measurement When the measurement is finished, the Data storage key result is stored automatically in the internal memory. Delete key to delete the data of the last measurement to navigate in the quick access area, in Arrow keys menus or in selection/character lists... -
Page 18: Rear View
5.3 Rear View Fig. 5-2: Rear view of the instrument 1 RFID interface and type plate with serial number 2 Screw of battery compartment... -
Page 19: Putting The Sg-Ultra Max Into Operation
6 Putting the unit into Operation 6.1 Connecting the Filling Tube Screw in the filling tube by hand until some resistance against further turning can be felt. Tighten with your fingers only, do not use any tools. Fig. 6-1: Connecting the filling tube 6.2 Mounting the Syringe Adapter For some applications, e.g. -
Page 20: Operating
7 Operating SG-Ultra Max 7.1 Main Screen Fig. 7-1: Example main screen 1 Key functions 6 Sample ID 2 Status bar 7 Battery charge status symbol 3 Output field 8 Current time 4 Header 9 Quick access area 5 Method... - Page 21 Symbols in the header Symbol Description The battery charge status symbol informs you about the battery charge status. See section 15.1.1 for details. The RFID symbol shows in the header of the main screen when an RFID tag is read. The Bluetooth symbol shows in the header of the main screen when data is sent via Bluetooth.
-
Page 22: Key Functions
7.2 Key Functions The key functions correspond to the function keys below/above the display (the assignment of keys adapts to the active selection). The following key functions are available: Function Description Back Leaves the menu and goes to the next higher menu level. Cancel Aborts an operation. -
Page 23: Quick Access Area
7.3 Quick Access Area Use the arrow keys to select a quick access function. Activate the function with the right function key. The following quick access functions are available: Icon Function "Status" function Use it to check the measurement status. The status indicator can assume 3 states: •... -
Page 24: Entering Text Or Numbers
7.5 Entering Text or Numbers After you have switched into editing mode, you see a selection bar on the right side of the screen: 1. Use the arrow keys to select the next character/digit to enter. TIP: Keep the arrow keys pressed to scroll through the selection bar quickly. Select the red left arrow , if available, to edit the previous position (one character to the left). -
Page 25: Instrument Settings
8 Instrument Settings 8.1 Setting the Language 1. Tap <Menu> and select Setup > Language. 2. Tap <Edit>. 3. Select the preferred language: English Deutsch 4. Tap <Back> repeatedly to return to the main screen. 8.2 Setting Date and Time Date and time are automatically saved with measurement and check data. -
Page 26: Setting Pin Protection
8.3 Setting PIN Protection You can protect access to the menu by a PIN (personal identification number). After you have set PIN protection, you can still use all functions of the quick access area (performing measurements, selecting methods and sample IDs, etc.) without the need for entering a PIN. Activating PIN protection 1. -
Page 27: Display Settings
Changing the active PIN 1. Tap <Menu> and enter the currently active PIN. 2. Select Setup > PIN Settings. 3. "Active PIN" is preselected. Tap <Edit> and enter the currently active PIN. 4. Select "New PIN" and tap <Edit>. 5. Enter the new PIN. 6. -
Page 28: Sound Settings
Setting the display dimming 1. Tap <Menu> and select Setup > Display Settings. 2. Select "Display Dimming" and tap <Edit>. 3. Select one of three dimming options: 30 Seconds 60 Seconds Off (no dimming) 4. Tap <Back> repeatedly to return to the main screen. 8.5 Sound Settings When sound is enabled, the instrument beeps whenever a key is tapped. -
Page 29: Setting Up Bluetooth Connections
8.7 Setting up Bluetooth Connections Setting up the connection to a printer 1. Switch on the Bluetooth printer. 2. On SG-Ultra Max tap <Menu> and select Setup > Data Transfer > Configure Printer. 3. Tap <Edit> and select "Bluetooth Printer". -
Page 30: Reset To Factory Settings
8.8 Reset to Factory Settings 1. Tap <Menu> and select Setup > Reset to Factory Settings. The following settings will be reset: Setting Factory setting Language English Methods Defined standard methods Active method Density Sample IDs Date format DD.MM.YYYY Time format Measurement mode Precise Display rotation... -
Page 31: Measuring Settings
9 Measuring Settings 9.1 Setting the Measurement Mode SG-Ultra Max features three measurement modes, "Precise", "Fast" and "Manual". For each measurement mode, different stability criteria have to be fulfilled before the measuring result is stored. The stability criterion is always related to the temperature: Measurement mode "Precise":... -
Page 32: Defining An Offset
9.2 Defining an Offset You can define an offset for your measurement which is automatically added to parameter 1 of your measurement. You can define an offset for each method separately. Defining an offset 1. Tap <Menu> and select Methods > Edit Method. 2. -
Page 33: Output Fields On The Main Screen
9.4 Output Fields on the Main Screen The arrangement of output fields on the main screen depends on your choice of parameters to be displayed (which you have made with the method settings, see section 11.1.1). Fig. 9-2: Possible arrangements of output fields P1/P2 ...freely configurable parameters T...measuring temperature... -
Page 34: Checks And Adjustments
10 Checks and Adjustments Perform a water check every day before you start the measurements to verify that the instrument is measuring with adequate accuracy. Perform a water adjustment if the water check advises you to do so. 10.1 Performing a Water Check Use freshly degassed ultra-pure (bi-distilled or deionized) water. -
Page 35: Performing A Custom Adjustment
6. After the procedure has finished, the density deviation to the previous adjustment is displayed. 7. To save the adjustment, tap <Save>. To refuse the adjustment, tap <Cancel>. 10.3 Performing a Custom Adjustment You can use any other reference liquid with a known density at 20 °C and known temperature coefficient Alpha for a custom adjustment. -
Page 36: Reset To Factory Adjustment
10.4 Reset to Factory Adjustment If you want to undo all your adjustments, reset the instrument to factory adjustment. Resetting the instrument to factory adjustment 1. Tap <Menu> and select Adjustments > Factory Adjustment. 2. Tap <Yes> to reset to factory adjustment. The factory adjustment is restored. -
Page 37: Methods And Sample Ids
11 Methods and Sample IDs 11.1 Methods Methods are preset measurement settings which you can simply assign to a measurement by the method name. A method of SG-Ultra Max comprises the following method settings: • Method Name Choose as required. -
Page 38: Managing Methods
2. On the PC, right-click the file and select "Send it to Bluetooth". 3. On SG-Ultra Max tap <Menu> and select Setup > Data Transfer > File Transfer > Import Methods. 4. Tap <Start> to start the automatic import procedure. -
Page 39: Assigning A Method To A Measurement
Deleting methods 1. Tap <Menu> and select Methods > Edit Method. 2. Select a method that you want to delete and tap <Delete>. 3. Tap <Yes> to confirm deletion. Tap <No> to abort deletion. 4. Tap <Back> repeatedly to return to the main screen. 11.1.2 Assigning a Method to a Measurement 1. -
Page 40: Custom Parameters
1. Save the file on a PC (e.g. on the desktop). 2. On the PC, right-click the file and select "Send it to Bluetooth". 3. On SG-Ultra Max tap <Menu> and select Setup > Data Transfer > File Transfer > Import Custom Parameters. -
Page 41: Defining And Using Sample Ids
2. On the PC, right-click the file and select "Send it to Bluetooth". 3. On SG-Ultra Max tap <Menu> and select Setup > Data Transfer > File Transfer > Import Sample IDs. 4. Tap <Start> to start the automatic import procedure. -
Page 42: Using The Rfid Function
Assigning a Sample ID to a Measurement 1. In the quick access area, activate ("Sample ID" function). 2. Select "Sample ID" and tap <Edit>. 3. Select the appropriate sample ID from the list. 4. Tap <Back> to return to the main screen. All subsequent measurements will use the selected sample ID until you assign a new one. - Page 43 1. Tap <Menu> and select Setup > RFID > Read Tag. 2. Hold the RFID tag to the RFID interface of the instrument until the RFID tag information is displayed. 3. To read another RFID tag, tap <Back>, then select "Read Tag", and continue with step 2.
- Page 44 Assigning sample ID and method to a measurement via RFID This procedure works only if the sample ID and method on the RFID tag are also stored on the instrument. 1. Tap <RFID>. 2. Hold the programmed RFID tag to the RFID interface of the instrument. After reading the RFID tag information, the instrument returns to the main screen.
-
Page 45: Measuring
• Make sure you wear protective clothes or ensure alternative protection from burns when handling high temperature samples. WARNING SG-Ultra Max is not insulated against high voltages. Measuring samples under high voltage (e.g. in energized battery banks) bears the risk of an electric shock. -
Page 46: Filling The Sample
12.1 Filling the Sample Depending on the viscosity of the sample, you can fill the measuring cell using the filling tube or a syringe. When filling highly viscous samples, we recommend using the syringe. 12.1.1 Filling with the Filling Tube 1. -
Page 47: Filling With A Syringe
12.1.2 Filling with a Syringe WARNING If you remove the pump when filling with a syringe, or remove the syringe after filling, the system becomes leaky. Harmful liquids leaking from the instrument may cause injuries. • Do not remove the pump. •... -
Page 48: Measuring
12.2 Measuring 1. Before you start a measurement, check that you have selected the proper measuring mode (see section 9.1). you have assigned the proper method (see section 11.1.2). you have assigned the proper sample ID, if needed (see section 11.3). the sample’s temperature is between 0 °C and 100 °C (32 °F and 212 °F). -
Page 49: Measurement/Check Data In The Data Memory
13 Measurement/Check Data in the Data Memory Measured data as well as check data are stored automatically in the data memory. All stored data sets include date and time of the measurement or check. The data memory can hold a total of 1024 data sets. Further measurements will overwrite the oldest saved data sets. -
Page 50: Exporting Data To A Pc
8.7 for details about setting up a Bluetooth connection). 2. For saving methods, sample IDs or custom parameters, proceed as follows: a. On SG-Ultra Max tap <Menu> and select Setup > Data Transfer > File Transfer. b. Select the data to be exported (methods, sample IDs, custom... -
Page 51: Deleting Data
Tap <Yes> to export the selected data. The file is now transferred to your PC and stored on the desktop. 3. For saving measurement data, proceed as follows: a. On SG-Ultra Max tap <Menu> and select Measurement Data > Export Measurement Data. b. Tap <Yes>. -
Page 52: Cleaning And Storing
To displace the sample, empty the measuring cell after the measurement and rinse it with the next sample before measuring that one. Clean your SG-Ultra Max thoroughly at the end of your measurement cycle. Cleaning For samples with different chemical properties which are... -
Page 53: Cleaning At The End Of A Measurement Cycle
14.2.1 Cleaning at the End of a Measurement Cycle At the end of your measuring cycle clean your SG-Ultra Max thoroughly before you store it. You do not need to dry the measuring cell (assuming that you make sure the cleaning liquid does not freeze in the measuring cell). - Page 54 • Cleaning liquid 2 removes cleaning liquid 1 (has to be a good solvent for cleaning liquid 1) and evaporates easily in order to accelerate drying of the cell. It must not attack the U-tube or leave any deposits, as drops of cleaning liquid 2 will remain in the U-tube.
- Page 55 Before filling samples with unknown cleaning properties into the measuring cell, always perform some preliminary cleaning experiments on a glass plate (e.g. microscopic slide). A sample should only be introduced into the density measuring cell if it can be removed completely by rinsing (not wiping!) with a suitable solvent.
-
Page 56: Cleaning The Filling Pump
14.3 Cleaning the Filling Pump Clean the filling pump regularly, depending on your application. If you measure aggressive samples, e.g. battery acid, clean the filling pump more often. Dismounting the pump 1. Push the pump lever upwards with both thumbs. 2. - Page 57 Remounting the pump 1. If the pump shaft has been locked, release the lock (see fig. 14-2): a. Press the marks on the front and rear of the pump shaft. b. Pull on the end of the pump shaft. Fig. 14-2: Releasing a locked pump 2.
-
Page 58: Cleaning The Housing And Display
14.4 Cleaning the Housing and Display To clean the housing and display, use a soft cloth dipped in ethanol or warm water. If necessary, you can use a mild solvent (pH < 10). Remove the rubber housing of the measuring cell periodically to ensure that no liquid is located between the measuring cell and the rubber housing Cleaning the rubber housing of the measuring cell 1. -
Page 59: Maintenance And Repair
15 Maintenance and Repair 15.1 Maintenance Eagle Eye recommends a preventive maintenance interval of at least once a year by an authorized service technician. 15.1.1 Exchanging the Batteries Battery charge status An icon in the right corner of the header indicates the battery charge status. - Page 60 Fig. 15-1: Removing the battery compartment 2. Remove the cover of the battery compartment by pressing down and sliding it forward simultaneously (see fig. 15-2). Fig. 15-2: Removing the battery compartment 3. Exchange the batteries for new ones. NOTICE • Observe the correct polarity when you insert the batteries, see the engraving in the battery compartment.
-
Page 61: Exchanging The Pump Lever
15.2 Firmware Update Your Eagle Eye representative will inform you when a new firmware update for your SG-Ultra Max is available. After receiving the update file, you can import it into the instrument via Bluetooth. For details about setting up a Bluetooth connection, see section 8.7. -
Page 62: Warranty Exclusions
The instrument must not be returned without the filled out "Safety Declaration for Instrument Repairs" and must be cleaned before return. TIP: Find the contact data for Eagle Eye Power Solutions on their website: www.eepowersolutions.com... -
Page 63: Appendix A: Technical Data
Appendix A: Technical Data A.1: Specifications Measuring range Density 0–3 g/cm Temperature 0–40 °C (32–104 °F) Viscosity 0–1000 mPa·s Accuracy Density 0.001 g/cm Temperature 0.2 °C (0.4 °F) Repeatability s.d. Density 0.0005 g/cm Temperature 0.1 °C (0.2 °F) Resolution Density 0.0001 g/cm Temperature 0.1 °C (0.1 °F) -
Page 64: A.2: Instrument Data And Operating Conditions
A.2: Instrument Data and Operating Conditions Dimensions 245 mm x 103 mm x 126 mm (L x W x H) (96.5 in x 40.6 in x 49.6 in) Weight 660 g (23.3 oz) Power supply Battery type 3# Alkaline battery 1.5V, type EN91 (LR06, AA) Battery life >... -
Page 65: Appendix B: Density [G/Cm 3 ] Of Water (0 -40 °C / 32 -104 °F)
Appendix B: Density [g/cm ] of Water (0 °C to 40 °C / 32 °F to 104 °F) T °C .99984 .99985 .99985 .99986 .99987 .99987 .99988 .99988 .99989 .99989 .99990 .99990 .99991 .99991 .99992 .99992 .99993 .99993 .99993 .99994 .99994 .99994 .99995 .99995 .99995 .99995 .99996 .99996 .99996 .99996 .99996 .99997 .99997 .99997 .99997 .99997 .99997 .99997 .99997 .99997 .99997 .99997 .99997 .99997 .99997 .99997 .99997 .99997 .99997 .99997... -
Page 66: Appendix C: Parameter Overview
Appendix C: Parameter Overview Parameters marked with * require additional settings, see table C-2 for an overview of the additional settings and section 11.1.1 for more details. The parameters number is used when importing methods. Table C-1: Parameter Overview Param. Parameter No. - Page 67 Table C-1: Parameter Overview (cont.) Param. Parameter No. Description type API Gravity A API number for the product group A @ 15°C (crude oil), referred to the @ 20°C respective reference temperature @ 29.5°C @ 60°F API Gravity B API number for the product group B @ 15°C (fuels), referred to the respective @ 20°C...
- Page 68 Table C-1: Parameter Overview (cont.) Param. Parameter No. Description type API Density B Density of the product group B @ 15°C (fuels), referred to the respective @ 20°C reference temperature @ 29.5°C @ 60°F API Density D Density of the product group D @ 15°C (lubricants), referred to the @ 20°C...
- Page 69 Table C-1: Parameter Overview (cont.) Param. Parameter No. Description type Custom Klosterneuburger Mostwaage Austrian-specific unit for the sugar content in must Öchsle Measuring unit calculated from the density of grape must. NaOH Concentration of sodium hydroxide in % w/w HNO3 Concentration of nitric acid in % w/w Methanol...
- Page 70 Table C-2: Additional settings Parameter Additional settings Description Density@ Temperature 1 Reference temperature at which the density is displayed Alpha (g/cm Temperature coefficient (see section 11.1.3) Specific Temperature 1 Reference temperature for the density Gravity SG of the sample Temperature 2 Reference temperature for the density of water Alpha (g/cm...
-
Page 71: Appendix D: Example Files
Appendix D: Example Files methods.txt Method: Name=H2SO4 Parameter1=44 Offset=0.000000 Parameter2=1 Method: Name=Density Parameter1=1 Offset=0.000000 Parameter2=3 Temp1=20 Temp2=20 Alpha=0.000300 see table C-1 for the number of the desired parameter sampleID.txt ID 1 ID 2 ID 3 Appendix E: Firmware Versions Firmware Date of Document Remarks... -
Page 72: Appendix F: Menu Tree
Appendix F: Menu Tree Measurement Export Data Measurement Data Print All Delete Last Delete All Sample IDs Methods New Method Edit Method Setup Data Transfer Configure Export Target Configure Printer Target Configure Printer Configure Data Format File Transfer Export Sample IDs Export Methods Export Custom Parameters... - Page 73 Setup Display Settings Sound Units Reset to Factory Settings Adjustments Water Adjustment Custom Adjustment Factory Adjustment Service System Information Live Raw Data Calibration Mode for service purposes only...
Need help?
Do you have a question about the SG-Ultra Max and is the answer not in the manual?
Questions and answers