Table of Contents
Advertisement
Quick Links
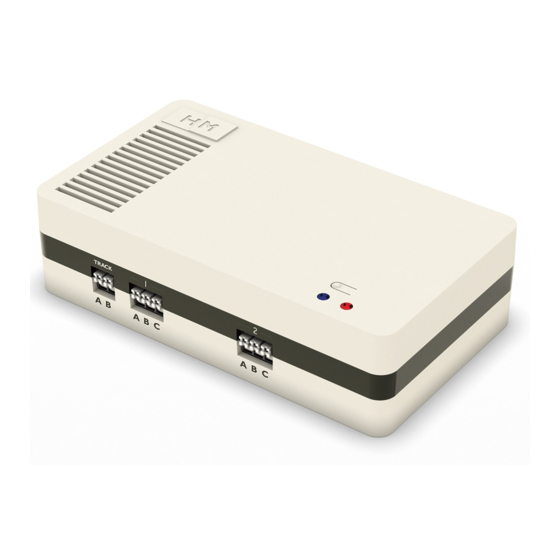
Getting to know the HM6010
Se familiariser avec le HM6010
Your new Bluetooth accessory controller.
Votre nouveau contrôleur d'accessoires Bluetooth.
Front
Face avant
Power LED
LED de l'alimentation
Bluetooth connection LED
D'alimentation LED de connexion Bluetooth
Initial setup
Your quick step guide
Configuration initiale
Guide de prise en main
Firstly, ensure there is no power to the device and the 'Red' and 'Blue' LED's are off. Next, pick the
1
'Push terminal tool' out from the underside of the HM6010 (A). Line up the push terminal tool with
the white '+' of the terminal (B). Following the diagram in (C), delicately push in the white '+' with the
tool and feed the wire into the open slot of the terminal.
Vérifiez d'abord que le dispositif n'est pas alimenté et que les LED
décrochez l'outil pour terminal à enfichage de la face inférieure du HM6010 (1). Alignez l'outil pour terminal à
enfichage avec le « + » blanc du terminal (2). Suivez le schéma (3) et enfoncez délicatement le « + », blanc
au moyen de l'outil puis mettez le fil dans la fente ouverte du terminal.
A
B
Once the wire is in place, take the pressure off the terminal and remove the push terminal tool.
Lastly, give the wire a very light tug to ensure it is in place. Repeat steps (A) - (C) to connect your
given accessories (D).
Une fois le fil mis en place, relâchez la pression sur le terminal et enlevez l'outil pour terminal à enfichage.
Enfin, tirez très doucement sur le fil pour vérifier qu'il est bien en place. Répétez les étapes (1) - (3) pour
connecter vos accessoires (4).
C
Quick Start Guide
Guide de prise en main
Download the HM | DC application.
3
Téléchargez l'application HM | DC
Scan the QR code with a compatible Android or IOS device.
A.
Flashez le code QR avec un appareil Android ou IOS compatible.
On the Hornby website, touch on the relevant app store
B.
button.
Sur le site web Hornby Hobbies, touchez le bouton pertinent dans
l'app store.
C.
Touch on 'GET' or 'Install' next to the HM | DC app icon and
follow the on-screen instructions.
Touchez « OBTENIR » ou « Installer » en face de l'icône de
l'application HM | DC et suivez les instructions à l'écran.
Open the HM | DC application on your device to get started.
D.
Ouvrez l'application HM | DC sur votre appareil pour démarrer.
A.
B.
C.
Screw Fixing Points
Points d'accrochage aux vis
Underside
Face inférieure
Push terminal tool
Outil pour terminal à
enfichage
Reset Button
Bouton de
réinitialisation
Channel '1'
Canal « 1 »
Channel '2'
Canal « 2 »
Screw fixing points
Track power input
Points d'accrochage
Entrée d'alimentation de voie
aux vis
et
sont éteintes. Ensuite,
rouge
bleue
D
D.
60mm / 2.362"
Transformer
Transformateur
P9103 (US/CA) sold separately
P9103 vendu séparément
Connect your HM6010
DCC
2
to the DC mains or a DCC
For DCC (digital), connect 'A' & 'B'
(digital) circuit.
with wiring into a R8241 Digital
Connectez votre HM6010 à
Power Track
l'alimentation DC ou à un circuit
Pour DCC (digital), branchez
DCC (digital).
« A » & « B » avec les fils
DC
à un R8241 Piste de
puissance
For DC (analogue), connect the
numérique
transformer jack to the DC port
Pour DC (analogique), branchez la
fiche jack du transformateur
au port DC
Transformer lead
Cordon du transformateur
DC jack
Connecteur DC / Jack DC
Connect your HM6010 to HM | DC.
4
Connectez votre HM6010 à HM | DC.
Ensure your Power LED is solid 'Red', if not refer to Step [2] of 'Initial setup'.
A.
Vérifiez que la LED d'alimentation est
l'étape 2 de « Configuration initiale ».
On your compatible device you wish to use, ensure that your Bluetooth is turned on.
B.
Sur l'appareil compatible que vous souhaitez utiliser, vérifiez que Bluetooth est activé.
Open the application and follow the initial setup process, ensuring you allow HM | DC to
C.
access and use Bluetooth on your device.
Ouvrez l'application et suivez la phase de configuration initiale en veillant bien à autoriser HM | DC
à accéder et utiliser Bluetooth sur votre appareil.
Once initial setup is complete, the Bluetooth connection LED should be solid 'Blue'.
D.
Quand la configuration initiale est terminée, la LED de connexion Bluetooth doit devenir
pas clignoter.
A.
B.
Power LED
LED de l'alimentation
In DCC operation, the wiring can
be connected any way round
En fonctionnement DCC, le câblage peut
être connecté de n'importe quelle manière
et ne clignote pas. Si ce n'est pas le cas, consultez
rouge
C.
D.
Bluetooth
connection LED
D'alimentation LED de
connexion Bluetooth
Reverse
Envers
Power port
Port d'alimentation
Channel '4'
Canal « 4 »
Channel '3'
Canal « 3 »
et ne
bleue
Advertisement
Table of Contents

Related Manuals for Hornby HM6010


Summary of Contents for Hornby HM6010
- Page 1 Firstly, ensure there is no power to the device and the ‘Red’ and ‘Blue’ LED’s are off. Next, pick the to the DC mains or a DCC ‘Push terminal tool’ out from the underside of the HM6010 (A). Line up the push terminal tool with For DCC (digital), connect ‘A’ & ‘B’...
- Page 2 20 cm from all persons and must not be collocated or operating in conjunction with any other This instruction sheet or part thereof may not be copied, duplicated, amended or circulated in any form whatsoever without written permission from Hornby Hobbies Ltd.
Need help?
Do you have a question about the HM6010 and is the answer not in the manual?
Questions and answers