Table of Contents
Advertisement
Quick Links
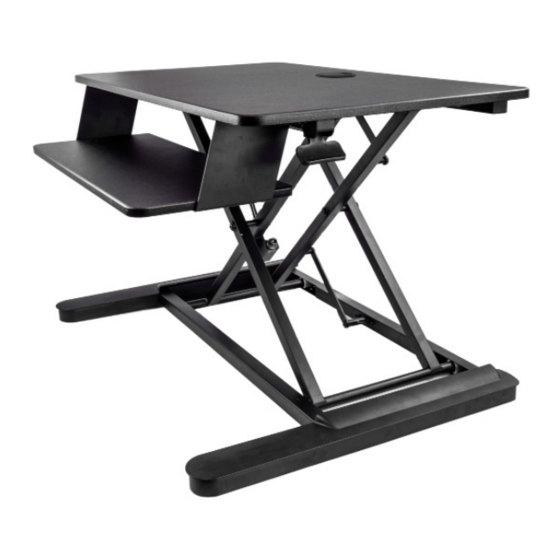
Sit-Stand Desktop Workstation
ARMSTSLG
ARMSTSCORNR
FR: Guide de l'utilisateur - fr.startech.com
DE: Bedienungsanleitung - de.startech.com
ES: Guía del usuario - es.startech.com
NL: Gebruiksaanwijzing - nl.startech.com
PT: Guia do usuário - pt.startech.com
IT: Guida per l'uso - it.startech.com
For the latest information, technical specifications, and support for this product, please visit
www.StarTech.com/ARMSTSLG or www.StarTech.com/ARMSTSCORNR
Manual Revision: 04/29/2021
ARMSTSLG
*actual product may vary from photos
Advertisement
Table of Contents

Related Manuals for StarTech.com ARMSTSLG


Summary of Contents for StarTech.com ARMSTSLG
- Page 1 Sit-Stand Desktop Workstation ARMSTSLG ARMSTSCORNR ARMSTSLG *actual product may vary from photos FR: Guide de l’utilisateur - fr.startech.com DE: Bedienungsanleitung - de.startech.com ES: Guía del usuario - es.startech.com NL: Gebruiksaanwijzing - nl.startech.com PT: Guia do usuário - pt.startech.com IT: Guida per l’uso - it.startech.com For the latest information, technical specifications, and support for this product, please visit www.StarTech.com/ARMSTSLG or www.StarTech.com/ARMSTSCORNR...
- Page 2 StarTech.com. Where they occur these references are for illustrative purposes only and do not represent an endorsement of a product or service by StarTech.com, or an endorsement of the product(s) to which this manual applies by the third-party company in question.
-
Page 3: Warning Statements
Warning Statements • Assemble this product according to the instructions. • Read the entire manual and ensure the instructions are fully understood before assembling and/or using this product. • Do not exceed the weight capacity of this product. Overloading this product might result in injury or property damage. - Page 4 • Arbetsstationens viktkapacitet: 12,7 kg (28 lb.) • Tangentbordslådans viktkapacitet: 2,3 kg (5 lb.) • Låt inte barn klättra på produkten eller använda produkten utan uppsikt. • Produkten är endast avsedd för användning inomhus och ska inte användas utomhus. • Dra inte åt skruvarna för hårt när du monterar produkten. Om du måste ta i när du skruvar åt kan du sluta skruva åt.
- Page 5 worden gebruikt. • Draai de schroeven niet te strak vast wanneer u dit product in elkaar zet. Als u weerstand voelt tijdens het vastdraaien van de schroeven, stop dan. • Gebruik dit product nooit als er onderdelen ontbreken of beschadigd zijn. •...
- Page 6 • 机や設置面が、 本製品と積載する機器の合計重量に耐えられるか確認して ください。 確認を怠ると、 破損や怪我につながる可能性があります。 • 本製品を降ろしたり上げたりするときは、 搭載機器が適切に固定または保 持されていることを確認し、 機器が不安定にならないように十分な速度で 行ってください。 誤った操作をすると、 破損や怪我につながる可能性があり ます。 • すべての機器のケーブルが、 本製品/ディスプレイを最も高い位置に設定 した場合に適切な長さになっているか確認してください。 確認を怠ると、 破 損や怪我につながる可能性があります。 • チップの危険。 この製品は自立型であるため、 取り扱いを誤ったり、 過負荷 になったりすると転倒しやすくなります。 製品を移動、 ロード、 アンロード、 お よび調整するときは注意してください。 そうしないと、 機器の損傷や人身事 故につながる可能性があります。 • 反動注意! 本製品にはスプリング機構が搭載されており、 作動させるとアセ ンブリ部品やディスプレイが反動で上方向に大きく動く場合があります。 付 属の説明書に従い、...
- Page 7 sia sufficientemente bassa da evitare qualsiasi instabilità dell’attrezzatura. In caso contrario, potrebbero verificarsi danni alla proprietà e/o lesioni personali. • Assicurarsi che tutti i cavi dell’attrezzatura siano di lunghezza adeguata per la posizione più alta della stazione di lavoro/display. In caso contrario, si potrebbero verificare danni alla proprietà...
- Page 8 respect de cette consigne peut entraîner des dommages matériels et/ou corporels. • Assurez-vous que tous les câbles de l’équipement sont d’une longueur adéquate pour la position la plus élevée du poste de travail/de l’écran. Le non-respect de cette consigne peut entraîner des dommages matériels et/ ou corporels.
- Page 9 • Assegur que todos os cabos do equipamento têm o comprimento adequado para a posição mais alta do posto de trabalho/posição do visor. Não o fazer pode resultar em danos materiais e/ou ferimentos pessoais. • Derrubando o perigo! Este produto é independente e, portanto, sujeito a tombar se for manuseado incorretamente ou sobrecarregado.
- Page 10 • ¡Peligro de vuelco! Este producto es independiente y, por lo tanto, propenso a volcarse si se manipula incorrectamente o se sobrecarga. Tenga cuidado al mover, cargar, descargar y ajustar el producto. El no hacerlo podría resultar en daños al equipo y / o lesiones personales. •...
- Page 11 • Kippgefahr! Dieses Produkt ist freistehend und neigt daher bei falscher Handhabung oder Überlastung zum Umkippen. Seien Sie vorsichtig, wenn Sie das Produkt bewegen, laden, entladen und einstellen. Andernfalls kann es zu Geräteschäden und / oder Verletzungen kommen. • Gefahr durch gespeicherte Energie! Dieses Produkt enthält einen Federmechanismus, der dazu führen kann, dass sich die Montagekomponenten und/oder das Display bei Betätigung gewaltsam und schnell nach oben bewegen.
-
Page 12: Table Of Contents
Table of Contents Warning Statements ................i Product dimensions ................1 ARMSTSLG..............................1 Weight capacity ............................2 ARMSTSCORNR ............................3 Weight capacity ............................4 Package contents ...................5 Requirements ..................5 Raise or lower the Workstation ............6 Adding equipment to the Workstation..........7 Place free-standing equipment onto the Workstation ..............7 Clamp equipment to the grommet hole .................. -
Page 13: Product Dimensions
Product dimensions ARMSTSLG 160 mm (6.3”) 22 mm (0.9”) 15 mm (0.6”) 560 mm (22.0”) 15 mm (0.6”) 422 mm (16.6”) Instruction manual... -
Page 14: Weight Capacity
900 mm (35.4”) 50 mm (1.9”) Diameter 60 mm 530 mm 703 mm (2.4”) (20.9”) (27.6”) 666 mm (26.2”) 265 mm (10.4”) 680 mm 173 mm 130 mm (26.8”) (6.8”) (5.1”) Weight capacity 0 to 12.7 kg (0 to 28 lb.) 0 to 2.3 kg (0 to 5 lb.) Instruction manual... -
Page 15: Armstscornr
ARMSTSCORNR 113 mm 155 mm (4.4”) (6.1”) 585 mm (23”) 452 mm (17.8”) Instruction Manual... -
Page 16: Weight Capacity
1135 mm (44.7”) 50 mm (1.97”) 449.66 mm (17.7”) 667 mm 530 mm 640 mm (26.3”) 60 mm (20.9”) (25.2”) (2.4”) 128 mm (5”) 680 mm (26.8”) Weight capacity 0 to 12.7 kg (0 to 28 lb.) 0 to 2.3 kg (0 to 5 lb.) Instruction Manual... -
Page 17: Package Contents
• 1 x ³/₈ - 16 x 50 mm bolt • 1 x instruction manual Requirements • 1 x wrench (if you use the grommet hole to mount your equipment) Requirements are subject to change. For the latest requirements, please visit www.StarTech.com/ARMSTSLG -- or -- www.StarTech.com/ARMSTSCORNR. Instruction manual... -
Page 18: Raise Or Lower The Workstation
Raise or lower the Workstation Stored Energy Hazard! This product contains a spring mechanism which can cause the assembly and/or mounted equipment to move forcibly, and quickly, when released via the actuating lever or handle. Read and follow the operating instructions and heed any precautions provided. -
Page 19: Adding Equipment To The Workstation
1. To move the workstation up or down, squeeze the paddle located on the right side of the Workstation. (figure 1) 2. When the workstation is at the desired height, release the paddle to lock the Workstation into position. Adding equipment to the Workstation You can place equipment onto the Workstation or you can use the provided hardware and grommet hole to mount your equipment to the Workstation. - Page 20 3. Make sure that your equipment is stable on the workstation before you move the Workstation. 4. Raise the Workstation a short distance. If you can’t easily move the Workstation upwards or it begins to move downwards when you squeeze the paddle, you need to adjust the tension.
-
Page 21: Clamp Equipment To The Grommet Hole
Clamp equipment to the grommet hole Warning! Do not exceed the weight capacity of the Workstation. StarTech.com offers optional monitor mounting accessories that are compatible with the Workstation. For example, the ARMDUAL, ARMSLIM, ARMPIVOT, and so on. To attach a mounting accessory to the grommet hole on the Workstation, complete the following steps. -
Page 22: Adjust The Tension Of The Workstation
6. Make sure that your equipment is stable on the workstation before you move the Workstation. 7. Raise the Workstation a short distance. If you can’t easily move the Workstation upwards or it begins to move downwards when you squeeze the paddle, you need to adjust the tension. -
Page 23: Reposition The Keyboard Tray
2. Raise the Workstation to the highest position. 3. To adjust the tension of the Workstation, use the large hex key to turn the adjustment screw clockwise or counterclockwise. (figure 6) 4. To check to see if the tension requires further adjustment, move the Workstation to the lowest position. - Page 24 figure 7 Small hex key Note: The Workstation is flipped over in the first drawing to illustrate where the screws are located. Instruction manual...
-
Page 25: Warranty Information
Limitation of Liability In no event shall the liability of StarTech.com Ltd. and StarTech.com USA LLP (or their officers, directors, employees or agents) for any damages (whether direct or indirect, special, punitive, incidental, consequential, or otherwise), loss of profits, loss of business, or any pecuniary loss, arising out of or related to the use of the product exceed the actual price paid for the product. - Page 26 Hard-to-find made easy. At StarTech.com, that isn’t a slogan. It’s a promise. StarTech.com is your one-stop source for every connectivity part you need. From the latest technology to legacy products — and all the parts that bridge the old and new — we can help you find the parts that connect your solutions.
Need help?
Do you have a question about the ARMSTSLG and is the answer not in the manual?
Questions and answers