
Subscribe to Our Youtube Channel
Related Manuals for PRESIDIUM PEGG


Summary of Contents for PRESIDIUM PEGG
-
Page 1: Table Of Contents
06 IV. IMPORTANT NOTICE pg. 08 1. GETTING STARTED with your Presidium Electronic Gem Gauge pg. 10 2. PERFORMING A TEST with your Presidium Electronic Gem Gauge pg. 11 3. TAKING CARE of your Presidium Electronic Gem Gauge pg. 14... -
Page 2: Disclaimers, Exclusions And Limitations Of Liability
PLEASE READ AND NOTE PRESIDIUM WARRANTY TERMS AND CONDITIONS as stated in the warranty card. Presidium warranty for its testers are subject to proper use by its users in accordance with all the terms and conditions as stated in the relevant user handbook and shall cover only manufacturing defects. -
Page 3: About This Book
II. About this book Thank you for purchasing the Presidium Electronic Gem Gauge (“PEGG” or “gauge”). This handbook is designed to help you set up your gauge and describes all you need to know about how to use your gauge accurately and take care of it in line with its requirements. -
Page 4: About Your Presidium Electronic Gem Gauge
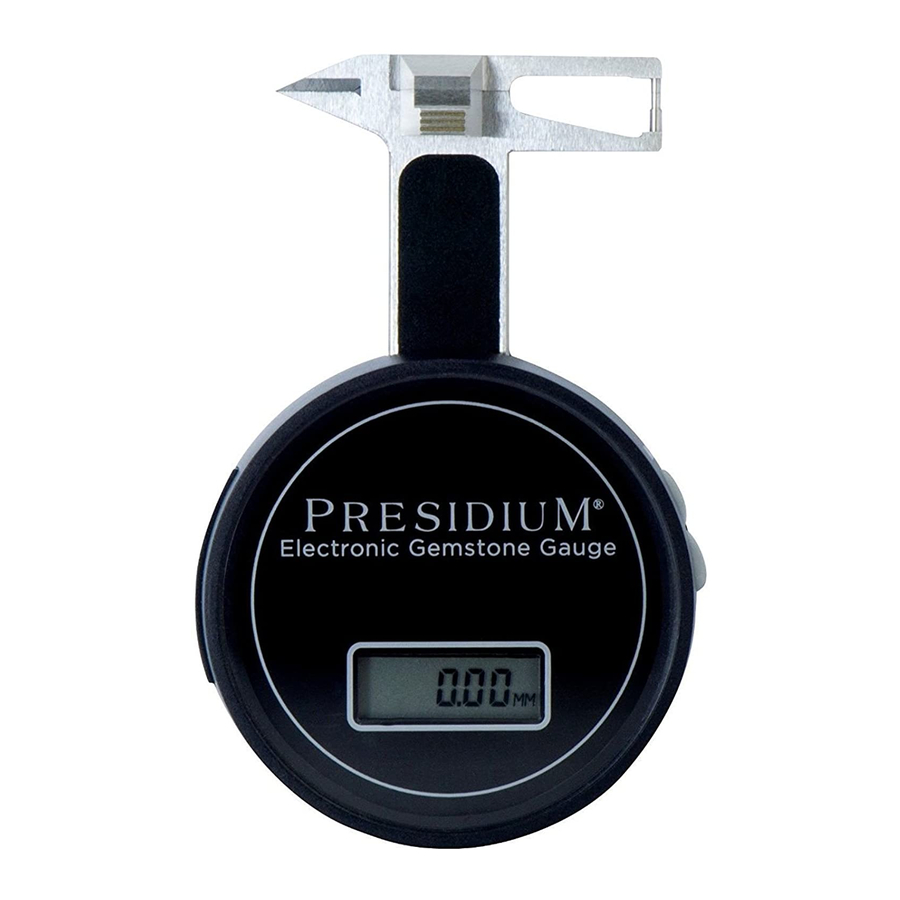
III. About your Presidium Electronic Gem Gauge The Presidium Electronic Gem Gauge utilizes capacitance measurement in which the capacitance IC output the change in capacitance of two sliding plates into binary values and finally being converted by equations in microprocessor into dimension (in millimeters) and weight (in carat). - Page 5 Display Window Battery Compartment Slider Wedge-shaped Points Fixed Rod Protruding Probe Jewelry Attachment Zero Reset / ct/mm conversion Button...
-
Page 6: Important Notice
IV. IMPORTANT NOTICE • Keep the gauge dry. Precipitation and all types of liquids or moisture can contain minerals that will corrode electronic circuits. If your gauge does get wet, remove the battery, and allow the gauge to dry completely before replacing it. •... - Page 7 Do not paint the gauge. Paint can clog the moving parts and prevent proper operation. If your gauge is not working properly, kindly contact Presidium Customer Service at service@presidium.com. sg or: Presidium Instruments Pte Ltd Unit 7, 207 Henderson Road...
-
Page 8: Getting Started With Your Presidium Electronic Gem Gauge
1. GETTING STARTED with your Presidium Electronic Gem Gauge Inserting the battery into your Presidium Electronic Gem Gauge 1. Pull the battery slider sideway outward using either fingernails or a screwdriver. 2. Place a CR 2032 3V battery with the (+) sign facing upward in the battery compartment and close by pushing the battery slider sideway inward (Fig. -
Page 9: Performing A Test With Your Presidium Electronic Gem Gauge
2. PERFORMING A TEST with your Presidium Electronic Gem Gauge • The Presidium Electronic Gem Gauge should be held in the palm of either hand. Control the Slider with the thumb (Fig 2.1). Fig. 2.1 • When measuring loose stones, pull the Slider (Fig. 2.2) and place the stone on the Slider platform. - Page 10 • Slowly close the Slider. The reading will be displayed on the window immediately. • Press MM/Ct (Fig. 2.3) to convert between dimension in millimeter or weight in carat. Fig. 2.3 When measuring mounted stones, insert the jewelry attachment to the gauge (Fig. 2.4) and place the stone between the jewelry attachment and Slider anvil.
- Page 11 Functions of your Presidium Electronic Gem Gauge Use the Wedge Shape Points when measuring: - Stones mounted in rubbed over settings - Interiors of empty settings - Ring size Use the Projecting Probe when measuring: - Depth of mounted stones...
-
Page 12: Electronic Gem Gauge
3. TAKING CARE of your Presidium Electronic Gem Gauge Do not leave worn out batteries in the battery compartment as the batteries may corrode, leak or damage the gauge. Batteries should be removed when the gauge is expected to be stored for an extended period of time.
Need help?
Do you have a question about the PEGG and is the answer not in the manual?
Questions and answers