AUDAX BioAx Operation Manual
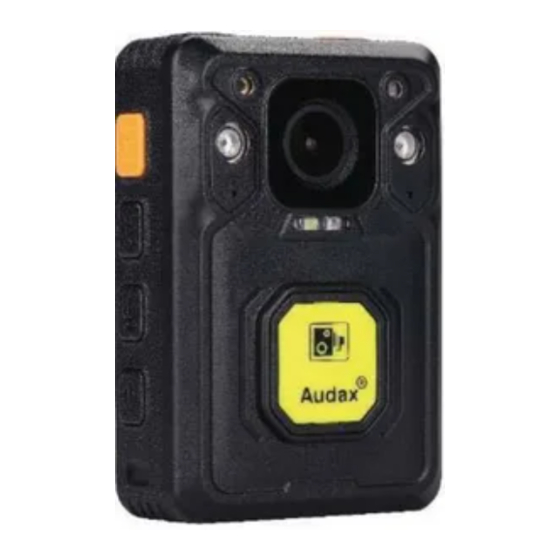
Chest camera
Hide thumbs
Also See for BioAx:
- User manual (27 pages) ,
- User manual (16 pages) ,
- User manual (20 pages)

Related Manuals for AUDAX BioAx


Summary of Contents for AUDAX BioAx
- Page 1 Bio-AX® Camera Operation Manual Document Version: Document Security: OFFICIAL: COMMERCIAL Bio-AX® Camera Operation Manual 2020 Page: Pg 1 of 22 Document ID: Bio-AX® Camera Manual Version: Date of Approval: 24/09/2020 Next Review Date: 24/09/2021...
- Page 2 INTENTIONALLY LEFT BLANK Bio-AX® Camera Operation Manual 2020 Page: Pg 2 of 22 Document ID: Bio-AX® Camera Manual Version: Date of Approval: 24/09/2020 Next Review Date: 24/09/2021...
- Page 3 If using a printed version of this document, ensure it is the latest published version. Version Date Approved Publication Date Approved By Summary of Changes 20/09/2020 24/09/2020 Audax New Document Bio-AX® Camera Operation Manual 2020 Page: Pg 3 of 22 Document ID: Bio-AX® Camera Manual Version:...
- Page 4 Page Paragraph Description Statement System Component System Features Notes/Warnings Camera Views General System Operation Playback Menu Camera Settings Data Upload General Settings About Settings Cam Manager Warranty Bio-AX® Camera Operation Manual 2020 Page: Pg 4 of 22 Document ID: Bio-AX® Camera Manual Version: Date of Approval: 24/09/2020...
- Page 5 INTENTIONALLY LEFT BLANK Bio-AX® Camera Operation Manual 2020 Page: Pg 5 of 22 Document ID: Bio-AX® Camera Manual Version: Date of Approval: 24/09/2020 Next Review Date: 24/09/2021...
- Page 6 Statement The content descripted in the manual may be different from the version you use now, owing to our commitment to progressive development. If you encounter the problem which is unable to be solved at the time of using this manual, please contact us directly.
-
Page 7: Notes / Warnings
Passwords). The password will not allow access to administrator settings and downloading with this password. Audax recommend that this Password is re-set and safely recorded at the earliest opportunity. For Admin Users. The “Settings” Menu has the initial password set as 888888 (Please see Section 12, para B part 5 for details of how to set Passwords). - Page 8 Screen Protectors – The Chest Camera device may be dispatched with a protective film covering the camera lens (front) and viewing screen (back). Please ensure that the film is peeled off before using. Camera Views Power (Left) – BLUE LED shows the device is powered. GREEN LED shows the device is ON (standby).
- Page 9 Right USB / SIM Card slot. SOS button. Rear 360° detachable clip. Display Screen. (1) “Menu” / “OK” button. (2) “Up” button. (3) “Down” button. (4) “Back” / “Replay” button. 1 2 3 4 General System Operation. Power On/ Off. Press and hold the POWER ON / OFF button for 3 seconds;...
- Page 10 If recording is required in “low light” conditions, press the IR button (unless IR “Auto” has been previously selected). The IR illuminators will be turned on and the device will enter the night shooting mode. IMPORTANT NOTE: Video recorded when IR has been selected will be in black and white only.
- Page 11 Software), press and hold to trigger SOS. On CMSV6, it will show as an “Emergency” message within the command prompt. Push To Talk Button. Press and hold when the camera is connected to CMSV6(Monitoring Software) to communicate via voice with the command centre. Infrared Light Button.
- Page 12 Audio Playback. When in the “playback” state, select the audio play back option and press the UP or DOWN button to select the audio file you want to hear. Press the OK button to play the audio. Camera Settings. Resolution. Whilst the camera is on, in the mode of framing and preview, press the menu button to set and select options of resolution.
- Page 13 Streaming Control. This option is to select streaming. The options are off, video, audio, text, audio and video, all. H265 Encoding. H265 encoding can be selected on or off. The compression efficiency and decoding difficulty of H265 are higher than H264, and H265 encoding is off by default.
-
Page 14: Ntsc And Pal
General Settings. Language Setting. Multiple languages are available, English is the default. TV Out. This option allows you to choose the form of TV out. The options are NTSC and PAL. GPS. The item is used to open or close the function of GPS. Vibration. - Page 15 Password Mode. This option turns password mode on and off. If on, you need to enter the correct password to enter the menu for setting, and the password is "888888" by default. The general default setting is on. 3G/4G. This can turn the 3G / 4G module on and off. You can choose to turn it on manually and turn it on automatically.
- Page 16 SIM Card. This item shows whether the SIM card exists. APN. This is the display APN. 3G/4G IP. This is the display 3G/4G IP. 3G/4G Signal. This is the display 3G/4G Signal. WLAN MAC. This is the display WLAN MAC. WLAN SSID.
- Page 17 Audax BioAX Cam Manager. Camera Info. This is the main landing page when you first login. Device ID. This is the name you will call the device, and this must exactly reflect the Device ID that you will assign to the AgentDEMS.
- Page 18 Network Settings Page. Device Name. Rename to suit your configuration. Account. This is the name you have created in CMS within the DeviceID page, this represents the Device IMEI number. Protocol. Within this page you can choose Cloud Dems for CMS applications, ONVIF for interoperable systems, Off if you do not want to stream, and protocol 28181.
- Page 19 APN. APN, APN username, and APN password will be as per your mobile providers configuration page. Apply. REMEMBER TO SELECT APPPLY AFTER EVERY CHANGE IN A TAB OR BOX. Camera Settings. Within this page you have the option to remotely configure the device without have to browse through menu structures.
- Page 20 Other Settings. Bio-AX® Camera Operation Manual 2020 Page: Pg 20 of 22 Document ID: Bio-AX® Camera Manual Version: Date of Approval: 24/09/2020 Next Review Date: 24/09/2021...
- Page 21 Password Settings Tab. It is recommended that you change your password for both the admin and general user immediately upon receipt of this software. Bio-AX® Camera Operation Manual 2020 Page: Pg 21 of 22 Document ID: Bio-AX® Camera Manual Version: Date of Approval: 24/09/2020 Next Review Date:...
- Page 22 Audax in the first instance © Audax Global Solutions Ltd 2020 This document is not to be reproduced in part or in whole without the prior permission of Audax Global Solutions Bio-AX® Camera Operation Manual 2020...
Need help?
Do you have a question about the BioAx and is the answer not in the manual?
Questions and answers