Table of Contents
Advertisement
Quick Links
MODEL PSRAL
ASSEMBLY MANUAL
If you have problems or questions about your Creative Playthings play set,
Contact Creative Playthings Customer Service at 1-800-598-4997 or
All hardware on this set is specially coated
for corrosion resistance.
If non-Creative Playthings hardware is used,
it must be galvanized or stainless steel.
This product is intended for single
family home/residential use only and
not intended for use in any public
setting. Placement in any public
setting constitutes a misuse of this
product.
DO NOT CALL THE RETAILER.
customerservice@creativeplaythings.com
™
Please read the owner's manual before the
assembly of your Play Set. it provides additional
information on the care and use of your Play Set.
You must carefully read the entire instruction man-
ual before proceeding with the assembly or use
of your new Play Set.
Creative Playthings takes great care to design its
products with your child's safety in mind. How-
ever, only with careful supervision and proper
safety instructions, can you be assured of safe
play time on any product designed for children.
Save these instructions for reference in case you
need to contact customer service.
By
Advertisement
Table of Contents

Related Manuals for Creative Playthings Playtime PSRAL


Summary of Contents for Creative Playthings Playtime PSRAL
- Page 1 ™ MODEL PSRAL ASSEMBLY MANUAL If you have problems or questions about your Creative Playthings play set, DO NOT CALL THE RETAILER. Contact Creative Playthings Customer Service at 1-800-598-4997 or customerservice@creativeplaythings.com Please read the owner’s manual before the All hardware on this set is specially coated assembly of your Play Set.
- Page 2 • Until assembly is complete, DO NOT let your children use the Play Set. • Never fasten anything not approved by Creative Playthings to your Play Set. Accessories or items not ap- proved by Creative Playthings include; Dog runs, clothes lines, electrical devices, or bird feeders etc.
-
Page 3: Safe Play Area
(2 M) (2 M) Whichever is greater (4.27 M) Landscape Timbers 6' from (2 M) play structure. A FALL ONTO A HARD SURFACE COULD RESULT IN SERIOUS INJURY. MODEL PSRAL Page 3 © Copyright 2014, Creative Playthings 19864-300 Rev A (07-20) -
Page 4: Hardware Bag Contents
Hex Bolt 1/4 x 3-1/2" 17003-1609 Hex Bolt 1/4 x 4" 17119-409 Truss Head Bolt 1/4 x 1" More hardware is included than is required for assembly. MODEL PSRAL Page 4 © Copyright 2014, Creative Playthings 19864-300 Rev A (07-20) -
Page 5: Pre Assembly Information
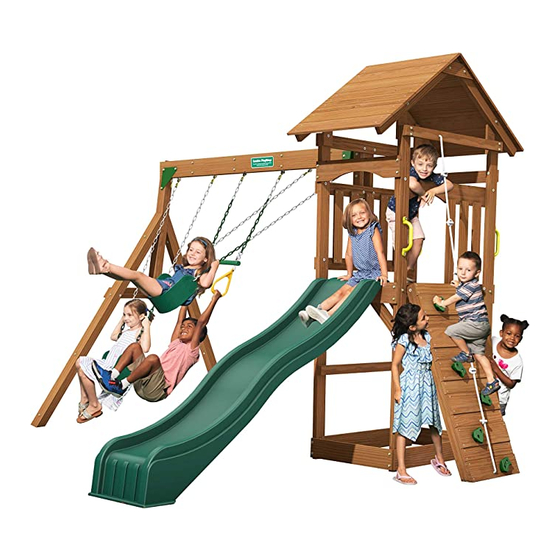
PRE ASSEMBLY INFORMATION CREATIVE PLAYTHINGS PLAY SETS USE A FEW STANDARD CONNECTIONS. BECOMING FAMILIAR WITH THESE CONNECTIONS WILL SIMPLIFY ASSEMBLY AND ENSURE A SAFER PLAY PRODUCT FOR YOUR CHILDREN. Hex Bolt & Weld Nut Assembly Procedure: Assembly Layout: Align the holes in the parts to be fastened. Start preliminary tightening of bolt into weld nut by hand. - Page 6 PLAY SET VIEW Items Packaged Separately: 60081-102 Playtime Swing Beam 8515-202 8 Ft. Wave Slide, Green AA934-204 2 Swings, 1 Trapeze MODEL PSRAL Page 6 © Copyright 2014, Creative Playthings 19864-300 Rev A (07-20)
-
Page 7: Component View
Raleigh Hardware Bag AP 1 8515-202 8 Ft. Wave Slide, Green 1 50534-740 Raleigh Screw Bag 1 50534-135 Instruction Pack, Raleigh * Not marked on Play Set View page. MODEL PSRAL Page 7 © Copyright 2014, Creative Playthings 19864-300 Rev A (07-20) -
Page 8: Maintenance Instructions
• Check structure twice monthly during usage for any evidence of deterioration. If upon inspection, hardware has sharp edges, rusted or structural pieces have signs of premature failure; replace them through Creative Playthings Customer Service. • Oil all metallic moving parts monthly during the usage season. - Page 9 1/4 x 4" Hex Bolts in top holes, 1/4 x 2" Lag Screws in bottom holes. Note the orientation of these holes. MODEL PSRAL Page 9 © Copyright 2014, Creative Playthings 19864-300 Rev A (07-20)
- Page 10 Use 1/4 x 2" Hex Bolt Assemblies in the top holes and 1/4" x 2" Lag Screws with 1/4" Flat Washers in the bottom holes. t o w MODEL PSRAL Page 10 © Copyright 2014, Creative Playthings 19864-300 Rev A (07-20)
- Page 11 Washers in the bottom holes. Hex Bolts t o w t o w 1/4 x 2" Hex Bolts in top holes, 1/4 x 2" Lag Screws in bottom holes. MODEL PSRAL Page 11 © Copyright 2014, Creative Playthings 19864-300 Rev A (07-20)
- Page 12 Secure the Stringer using #10 x 1-5/8" Screws Screws through the center hole of each deck board. Don't let the tips of the screws protrude below the Stringer. MODEL PSRAL Page 12 © Copyright 2014, Creative Playthings 19864-300 Rev A (07-20)
- Page 13 STEP 12 — Swing Mounts: Fasten the two Swing Mounts (X) to the Upper Wall Sup- ports using two 1/4 x 3-1/2" Hex Bolt Assemblies each. 3-1/2" Hex Bolts MODEL PSRAL Page 13 © Copyright 2014, Creative Playthings 19864-300 Rev A (07-20)
- Page 14 Brackets flat against the Platform Back as shown. Secure the Brackets using 1/4 x 1" Hex Bolt Assemblies. 1/4 x 1-1/2" Hex Bolt 1/4 x 1" Hex Bolt MODEL PSRAL Page 14 © Copyright 2014, Creative Playthings 19864-300 Rev A (07-20)
- Page 15 Rafters on the assembled panel. Align the ends. Fasten Roof Boards to the Roof Rafters using 1/8" diameter pilot holes and #10 x 1-5/8" Screws as with the first Roof Panel. MODEL PSRAL Page 15 © Copyright 2014, Creative Playthings 19864-300 Rev A (07-20)
- Page 16 (AH) using one 1/4 x 1-1/2" Hex Bolt Assembly. Fasten each Rock Upright Bracket to the Platform Right, as shown, using one 1/4 x 1-1/2" Hex Bolt Assembly. 1/4 x 1-1/2" Hex Bolt Assemblies MODEL PSRAL Page 16 © Copyright 2014, Creative Playthings 19864-300 Rev A (07-20)
- Page 17 3-1/8". #8 x 1-1/4" Screws Use a level to ensure that each Slat is plumb. Fasten each using four #8 x 1-1/4" Screws. Parts omitted for clarity MODEL PSRAL Page 17 © Copyright 2014, Creative Playthings 19864-300 Rev A (07-20)
- Page 18 Fasten the Safety Rail (AF) to the left posts using one 1/4 x 2" Lag Screw and Flat Washer in each end. Use the pre- piloted holes provided. 1/4 x 2" Lag Screws MODEL PSRAL Page 18 © Copyright 2014, Creative Playthings 19864-300 Rev A (07-20)
- Page 19 Weld Nut 1/4" x 1" Truss Head in the Framing Member. Re-attach the Platform Board and Bolts with weld nuts. continue securing the Slide. MODEL PSRAL Page 19 © Copyright 2014, Creative Playthings 19864-300 Rev A (07-20)
- Page 20 Swing Set. Save all instruction sheets and receipts in case it becomes necessary to contact Creative Playthings for warranty service and/or part replacement. The warranty can be found in your Owner’s Manual. MODEL PSRAL Page 20 ©...
Need help?
Do you have a question about the Playtime PSRAL and is the answer not in the manual?
Questions and answers