
Related Manuals for PRESONUS revelator


Summary of Contents for PRESONUS revelator
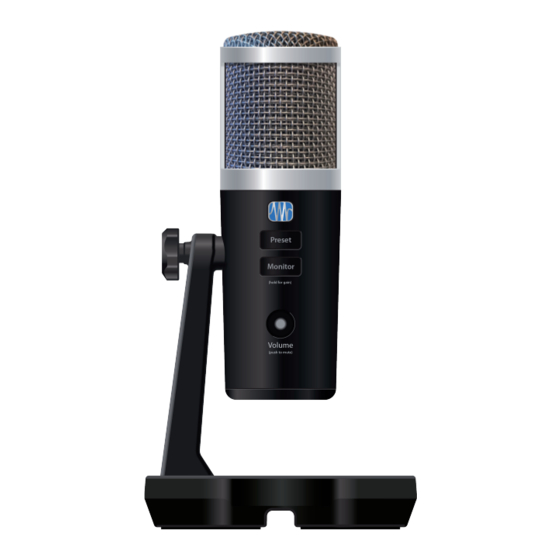
- Page 1 USB Microphone with StudioLive processing inside ® Owner’s Manual ® English www.presonus.com...
-
Page 2: Table Of Contents
Customization Tools — 40 Using Your Revelator Settings Menu — 40 with Popular Applications — 12 3.2.1 Using Revelator for System Audio — 13 Advanced Fat Channel and Voice Effects Controls — 41 3.2.2 Using Revelator for Skype — 16 6.2.1... - Page 3 Microphone Tips and Tricks — 63 8.2.1 Handling Noise — 63 8.2.2 How Close is Too Close? — 64 8.2.3 Problematic Pronunciation — 64 8.2.4 Putting it All Together — 64 8.2.5 Removing Revelator from its Base — 65 Technical Specifications — 65...
-
Page 4: Overview
CAUTION: Changes or modifications to this device not expressly approved by PreSonus Audio Electronics could void the user’s authority to dropped. All PreSonus products in the USA should be serviced at the PreSonus factory operate the equipment under FCC rules. -
Page 5: What Is In Your Mypresonus Account
What is in your MyPreSonus account What is in your MyPreSonus account There’s more to your Revelator than what comes in the box! Let’s take a moment to register your Revelator and download the digital products that come with it. These include: •... - Page 6 5. Click “Register a Product. ” 6. In the pop-up menu, click on the Hardware tab. 7. Select your purchase date and enter your Revelator Serial Number. You can find your serial number on the bottom of your microphone as well as on your Quick Start Guide.
-
Page 7: Step 2: Download And Install Universal Control
What is in your MyPreSonus account Step 2: Download and Install Universal Control 1.3.2 1. From the Revelator product listing in MyPreSonus, click the “Download Universal Control” button at the top. MyPreSonus will scan your computer and present the correct installer for your operating system. -
Page 8: Step 3: Download And Install Studio One Artist (Optional)
Step 3: Download and Install Studio One Artist (Optional) 1.3.3 1. From the Revelator product listing in MyPreSonus, locate Studio One Artist from the product listing. Quick links to every digital product that comes with your Revelator will be listed here. Click the “Download Installer” button at the bottom of the Studio One Artist listing. -
Page 9: Step 4: Download And Install Studio Magic (Optional)
1.3.4 Step 4: Download and Install Studio Magic (Optional) From the Revelator product listing in MyPreSonus, you will also find a complete list with links to all the Studio Magic products that came with your Revelator registration. Click on the “View More Details” button below any product you’d like to install. -
Page 10: Connections And Controls
USB-C Compatible Connection. Use this port to connect your Revelator to your computer. While the Revelator’s onboard connection is USB Type C, it is fully compatible with USB Type A 2.0 and 3.0 connections. Use the USB-C to A cable that came with your Revelator if your computer has a USB-A connection rather than a USB-C connection. -
Page 11: Setting The Microphone Level
Owner’s Manual Standalone controls Setting the Microphone Level 2.2.1 To set your Revelator’s input level, press and hold the Monitor button. The Volume knob will turn green, letting you know that it is now controlling the microphone HOLD level. Monitor Power User Tip: If your input level is too loud, the Volume knob will flash red. -
Page 12: Selecting Presets
2.2.4 EQ and compression are the secret behind the professional broadcast studio sound we all know so well. Your Revelator has you covered with 8 easy-to-use, professionally-crafted processing and effects presets. These presets are designed to give you great-sounding results with no audio engineering experience required! The first four presets can be accessed right from the Preset button on your Revelator. -
Page 13: Universal Control
64 to 8,192 samples. Lowering the buffer size will lower latency, which is the amount of time it takes for your audio to go from Revelator to the computer and back to your ears; however, this will also increase performance demands on your computer. -
Page 14: Launch Window Menu Items
3 different devices on your computer: Revelator, Revelator Loopback 1, and Revelator Loopback 2. Each of these devices has 2 inputs and 2 outputs. This is great for applications like Skype that only allow you to use the first two inputs and outputs of any audio interface. -
Page 15: Using Your Revelator With Popular Applications
If you’ve never used an audio interface, your computer and every application on it are currently sourcing audio from the built-in microphone and routing audio out to the onboard sound card. To use Revelator with any application that can access audio inputs or outputs or both, you must first set up your computer to use Revelator as an audio interface. -
Page 16: Using Revelator For System Audio
Revelator, it will also set your default Internet browser to use Revelator as well. Power User Tip: Setting your Revelator as the default sound card for your system will also route music streaming applications like Spotify and Apple Music to the headphone output on your new microphone. - Page 17 Owner’s Manual Using Your Revelator with Popular Applications 4. Click on the Inputs tab and select Revelator from the device list. This will set your Revelator microphone as the input source for your computer. Your Revelator is ready to use! Windows 1.
- Page 18 4. Click on Sound 5. Click on “Choose your Output Device” and choose HP Out L/R (Revelator) 6. Click on “Choose your input device” and choose Mic 1/2 (Revelator)
-
Page 19: Using Revelator For Skype
Skype call to the headphone output on your Revelator. Power User Tip: If you would like to record your Skype call, select Revelator Loopback 1 or Revelator Loopback 2 from the Speaker menu. See Section 5 for more information on using loopback audio. - Page 20 Power User Tip: When this option is selected, the sliders in Zoom will not have any effect on the Speaker output or Microphone Input gain, as these are controlled by the Revelator itself—either by the on-board controls and/or through the Universal Control software.
- Page 21 Power User Tip: When this option is selected, the sliders in Zoom will not have any effect on the Speaker output or Microphone Input gain, as these are controlled by the Revelator itself—either by the on-board controls and/or through the Universal Control software.
- Page 22 Using Your Revelator with Popular Applications When in a Zoom meeting/call, click on the drop-down menu in the upper left corner to choose Original Sound for Revelator. Make sure the selection is checked as shown here. This disables Zoom’s echo cancellation and audio-enhancing features.
-
Page 23: Using Revelator For Google Meets
Owner’s Manual Using Your Revelator with Popular Applications All Windows users and Mac users running Revelator in Multi Mode will see Revelator appear in a list similar to this: 3.2.4 Using Revelator for Google Meets Open Google Meet, and click on the vertical dots in the lower right corner of the... -
Page 24: Using Revelator For Obs
There is a chance that the next time you open Google Meet that it may default to a different audio device without notifying you. Be sure to check your audio settings to make sure Revelator is selected. PreSonus has no control over how this device selection works. - Page 25 Please note, you must route the output for those applications to the same device. For example, if you would like the audio output from your Skype call to be available on Auxiliary Audio 2, you would set “Revelator Loopback 1” as both the Speaker output for Skype and the source for Auxiliary Audio 2.
-
Page 26: Using Revelator On Chromebook
Using Your Revelator with Popular Applications 3.2.6 Using Revelator on Chromebook While Chromebooks are compatible with Revelator, there is no way to run Universal Control for advanced editing of the settings or effects presets beyond what is directly accessible on the microphone itself. -
Page 27: Using Revelator With Zoom On Chromebook
3.2.7 Using Revelator with Zoom on Chromebook You can use Revelator on a Chromebook to conduct Zoom meetings. Chrome does not install an application for Zoom like it does on macOS or Windows. Instead, on Chromebook, Zoom installs a widget for the Chrome browser, through which you can select your audio device and toggle some advanced audio settings. -
Page 28: Using Revelator With Google Meet On Chromebook
There is a chance that the next time you open Google Meet that it may choose a different audio device without notifying you. Be sure to check your audio settings to make sure Revelator is selected. PreSonus has no control over how this device selection works. -
Page 29: Using Revelator With Ios/Ipados Devices
Adapter, not the Lightning to USB cable. 3.2.10 Using Revelator with Android devices Revelator works great when connected directly to Android devices. If you find your Android device doesn’t provide enough power, an externally-powered USB hub can be connected to your Android device to provide additional power to your Revelator. -
Page 30: Presets, Fat Channel, And Voice Effects
Presets, Fat Channel, and Voice Effects Preset Management Your Revelator can access 4 presets using the Preset button... but there are 4 more presets created by PreSonus for you to enjoy—plus another 8 preset slots for you to create custom presets. These 16 presets are all available from Universal Control. -
Page 31: Changing Preset Button Slots
Preset Management Changing Preset Button Slots 4.1.1 To change one of the presets available from Revelator: 1. Click to select the slot you would like to change. 2. Select the desired preset using either the Preset selection knob or selecting it from the dropdown menu. -
Page 32: Storing New Presets
Revelator Presets, Fat Channel, and Voice Effects Owner’s Manual Preset Management Storing New Presets 4.1.2 We’re going to get into all the Fat Channel settings in the next section (Section 4.2), but while we’re here, let’s talk about storing new Presets. -
Page 33: Fat Channel And Voice Fx
4. Click Ok. Done! Now, if you’d like that new preset stored in one of the positions available from the Preset button on your Revelator, follow the instructions in Section 4.1.1 and customize away! Fat Channel and Voice FX The Fat Channel provides essential vocal processing tools to sculpt your sound, as well as Voice FX section to warp, distort, and bounce it around. -
Page 34: High Pass Filter (Hpf)
Revelator Presets, Fat Channel, and Voice Effects Owner’s Manual Fat Channel and Voice FX High Pass Filter (HPF) 4.2.1 Also known as a low-end roll-off filter, the High Pass Filter (HPF) lets you cut all frequencies below a specified point, letting the frequencies above that point pass through unchanged. -
Page 35: Compressor (Comp)
In other words, you’ll still sound like you. For more advanced compression controls and to learn about the different compressor models onboard your Revelator, see Section 6.2.3. 4.2.4 Equalizer (EQ) An equalizer, or EQ, is a filter that allows you to adjust the volume level of a frequency or range of frequencies within an audio signal. -
Page 36: Limiter
Everybody’s voice is unique and because EQs are entirely dependent on the frequency of the source, your ears are your best tool in finding the right sound for your voice. Like the Compressor, Revelator offers advanced controls and several EQ models to choose from when you’re ready to dive deeper. -
Page 37: Voice Fx
Revelator Presets, Fat Channel, and Voice Effects Owner’s Manual Reverb Voice FX 4.2.6 Need an effect for your Sci-Fi podcast? Want to add a little spookiness to your Halloween stream? Voice FX are here to give you fun, fantastical effects for your audio. - Page 38 To adjust the amount of Reverb you hear in your mix, raise or lower the Reverb Fader in the mixer. See Section 5.2.2 for more information on your Revelator mixer. 1. Preset. Choose between Small, Medium, and Large. These presets emulate room size.
-
Page 39: Mixing And Loopback Audio
Gameplay audio and your mic at the same time quick and easy. Best of all, the Revelator’s mixer makes it easy to monitor any mix you create, so you can record and stream with confidence, knowing that what... -
Page 40: Mixer Controls
As you turn it to the left, it will be louder in the left side. 3. Clip Light. This light will illuminate red when the signal level of your microphone is too loud and clipping. If your input signal clips, it will overload the Revelator’s analog-to-digital converters, causing digital distortion. This distortion sounds terrible and cannot be undone if your voice is recorded that way. -
Page 41: Main Output Controls And Mix Selection
1. Phones. Click on this tab to bring up the mix for the Phones. 2. Main. Click on this tab to bring up the mix for the Revelator Device. 3. Loopback 1. Click on this tab to bring up the mix for the Revelator Loopback 1 Device. -
Page 42: Feedback Loops Are Bad
Whenever you’re recording using the Revelator mixer with an application that offers monitoring, like Studio One or OBS, you must either disable monitoring or mute the return channel in your Revelator mixer to avoid creating a feedback loop. Applications like Skype and Zoom have a “mix minus” feature that removes the input signal from the output signal, so you don’t have to worry about this if... -
Page 43: Advanced Features And Customization Tools
1. Reset. Click this button to reset your Revelator to its factory default state. 2. Polar patterns. Your Revelator can be set to one of the following polar patterns: Cardioid. In this pattern, your Revelator will pick up signal the best from the front. -
Page 44: Advanced Fat Channel And Voice Effects Controls
Revelator Advanced Features and Customization Tools Owner’s Manual Advanced Fat Channel and Voice Effects Controls Advanced Fat Channel and Voice Effects Controls To open the advanced Fat Channel and Voice Effects Controls, click on the Advanced button (...) in the Fat Channel section. -
Page 45: Compressor
As previously mentioned, a compressor is a dynamics processor that reduces the dynamic range of a signal by attenuating it by a set ratio when it exceeds a defined threshold. Your Revelator is equipped with three compressor models from which to choose: Standard, Tube, and FET. - Page 46 Revelator Advanced Features and Customization Tools Owner’s Manual Advanced Fat Channel and Voice Effects Controls Standard Compressor 1. On/Off. Turns the Compressor on or off in the signal chain. 2. Threshold. Sets the level above which the compressor begins to attenuate the signal.
- Page 47 Revelator Advanced Features and Customization Tools Owner’s Manual Advanced Fat Channel and Voice Effects Controls Tube Leveling Amplifier 1. On/Off. Turns the Compressor on or off in the signal chain. 2. Gain. Sets input gain to the compressor. Because this type of...
-
Page 48: Changing The Signal Chain
You can boost or cut the level of ranges of frequencies, to make corrective or creative changes to the signal. Like the compressor, your Revelator is equipped with three EQ models from which to choose: Standard, Passive, and Vintage. - Page 49 Revelator Advanced Features and Customization Tools Owner’s Manual Advanced Fat Channel and Voice Effects Controls Standard EQ 1. On/Off. Turns the EQ on or off in the signal chain. 2. Frequency. This control sets the center frequency at which signals are boosted or cut for the currently selected band.
- Page 50 Revelator Advanced Features and Customization Tools Owner’s Manual Advanced Fat Channel and Voice Effects Controls Passive Program EQ 1. On/Off. Turns the EQ on or off in the signal chain. 2. Low Boost. Sets the level of boost applied around the chosen low frequency.
-
Page 51: Limiter
6.2.7 Voice FX Your Revelator is equipped with six Voice FX processors that can make your voice sound ethereal, otherworldly, or just plain weird… your choice! This section will go through each effect in detail. Note that while you can use any of these effects with the Fat Channel and Reverb, you can only use one effect at a time. - Page 52 Revelator Advanced Features and Customization Tools Owner’s Manual Advanced Fat Channel and Voice Effects Controls Detuner True to its name, the Detuner will artificially lower your voice. 1. Tune. Sets the amount your voice will be lowered. 2. Wet/Dry. Blends the affected sound with the dry sound of your voice. Set to 100% to only hear the processed sound.
- Page 53 Revelator Advanced Features and Customization Tools Owner’s Manual Advanced Fat Channel and Voice Effects Controls Filters This is a custom filter bank that allows you to create some truly otherworldly effects! 1. Tune: Adjusts the pitch of the affected signal from high to low.
-
Page 54: Studio One Artist Quick Start Guide
Power User Tip: As a valued PreSonus customer, you are eligible for a discount upgrade to Studio One Professional. For more details on the Studio One upgrade program for PreSonus customers, please visit https://shop.presonus.com/products/software/studio-... -
Page 55: Setting Up Studio One
Internet when you launch the application for the first time. Power User Tip: You may be prompted to enter your My.PreSonus user account information. Clicking “Remember Credentials” will allow you to have immediate access to any content you purchase from the PreSonus Marketplace. -
Page 56: Configuring Audio Devices
In the middle of the Start page, you will see the Setup area. Studio One Artist automatically scans your system for all available drivers and selects a driver. By default, it will choose a PreSonus driver if one is available. If you do not see your device listed on the Start page when you launch Studio One, click on the Configure Audio Devices link in the Setup area to open the Options window. - Page 57 Make sure you have connected the MIDI Out of your external MIDI controller to a MIDI In on your PreSonus audio interface (if available) or other MIDI interface. If you are using a USB MIDI controller, connect it to your computer and power it on.
- Page 58 Revelator Studio One Artist Quick Start Guide Owner’s Manual Setting Up Studio One 3. From the menu on the left, select your MIDI controller from the list of manufacturers and models. If you do not see your MIDI controller listed, select New Keyboard.
- Page 59 Revelator Studio One Artist Quick Start Guide Owner’s Manual Setting Up Studio One Make sure you have connected the MIDI In of your external sound module to the MIDI Out of your MIDI interface. 1. In the External Devices window, click the Add button.
-
Page 60: Creating A New Song
Revelator Studio One Artist Quick Start Guide Owner’s Manual Creating a New Song Creating a New Song Now that you’ve configured your audio and MIDI devices, let’s create a new Song. We’ll start by setting up your default audio I/O. - Page 61 Creating a New Song 2. Click on the Audio I/O Setup tab. 3. From the Inputs tab, you can enable the inputs for your Revelator, including the Loopback Inputs. that you’d like to have available. We recommend you create a mono input using Input 1 of your Revelator and two Stereo Inputs;...
-
Page 62: Creating Audio And Instrument
Revelator Studio One Artist Quick Start Guide Owner’s Manual Creating a New Song Creating Audio and Instrument Tracks 7.3.2 1. In the upper left corner of the Arrange window, you will notice several buttons. The button furthest to the right is the Add Tracks button. -
Page 63: Recording An Audio Track
1. To begin recording, create an audio track from the Add Tracks window, set its input to Input 1 on your Revelator, and connect a microphone to the same input. 2. Select Record Enable on the track. Turn up the Input 1 level on your Revelator while speaking/singing into the microphone. - Page 64 Revelator Studio One Artist Quick Start Guide Owner’s Manual Creating a New Song Drag-and-Drop Virtual Instruments To add a virtual instrument to your session, open the browser and click on the Instrument button. Select the instrument or one of its patches from the Instrument browser and drag it into the Arrange view.
-
Page 65: Resources
Then, and only then, should you gain it down. Step 1: Setting the Microphone Gain First, press and hold the Monitor button on your Revelator until it lights green. HOLD Monitor Turn the Volume knob for your Revelator clockwise while speaking into the microphone. -
Page 66: Microphone Tips And Tricks
Don’t worry, we’ve all been there, and PreSonus has put together this tutorial to help you mitigate the most common mistakes people make when getting started recording their voice with a microphone. -
Page 67: How Close Is Too Close
Professional DAW applications, like PreSonus Studio One, are also equipped with a de-esser plug-in especially for this purpose. Power User Tip: If you are recording a several speakers at once with your Revelator, using a de-esser can cause more problems than it solves, because over-using a de-esser or putting one where it is not needed can turn all your ‘S’... -
Page 68: Removing Revelator From Its Base
Software Controls Mic Gain, Pattern Select, Monitor Mix, Preset Management Onboard DSP PreSonus Fat Channel: High Pass Filter, Noise Gate, 3 Compressor models, 3 EQ models, and Limiter Voice Effects: Comb Filter, Delay, Doubler, Ring Modulator, Vocoder, Reverb Physical Dimensions (HxWxD) 8.875”... - Page 69 BONUS: Extra cabbage can be used as a condiment with meat, eggs, sandwiches, etc. © 2020 PreSonus Audio Electronics, Inc. All Rights Reserved. StudioLive is a registered trademark of PreSonus Audio Electronics, Inc. Studio One is a registered trademark of PreSonus Software Ltd.
- Page 70 USB Microphone with StudioLive processing inside ® Owner’s Manual 18011 Grand Bay Ct. • Baton Rouge, ® Louisiana 70809 USA• 1-225-216-7887 Part# 70-12000161-A www.presonus.com...
Need help?
Do you have a question about the revelator and is the answer not in the manual?
Questions and answers