Advertisement
Quick Links
Advertisement

Subscribe to Our Youtube Channel
Related Manuals for ELME Servicebox 817 INNOVATION


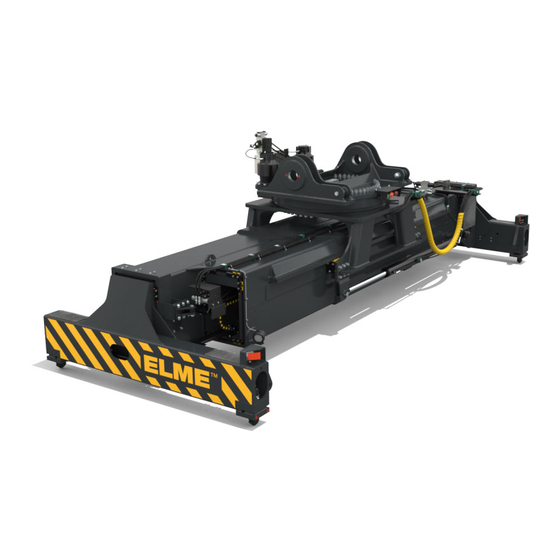
Summary of Contents for ELME Servicebox 817 INNOVATION
- Page 1 MANUAL Servicebox 817 INNOVATION...
- Page 2 All information, illustrations and specifications in this manual are based on the latest information at the time of publication. The right is reserved to make changes at any time without notice. COPYRIGHT© 2021 ELME Spreader AB.
- Page 3 Index Twistlock Assembly Wear pads 10-13 Flextrack Chain Assembly 14-15 Summary of all parts included Why use Genuine Parts?
- Page 4 TWISTLOCK ASSEMBLY The twistlock is a genuine ELME part, which is certified and marked with a unique serial number.
- Page 5 The tie-rod is a fixed unit and is not adjustable (does not apply for WTP). To remove the tie-rod proceed as follows: 1 Remove the indicator assy. (item 14) or the Locked / Not locked sensor bracket (item 1), if it is a spreader with WTP or with overheight legs. 2 Loosen one of the adjuster bolts at the twistlock cylinder, enough to give some play.
- Page 6 7 Support the twistlock (item 5) from below so that it does not drop out. Using a screwdriver prise the collet (item 8) out of the recess in the twistlock (item 5). It is now possible to lower the twistlock out of the end beam. The sleeve (item 9) and lower bearing set (item 10) will in most cases accompany the twist lock as it is removed, this is quite normal.
- Page 7 15 In order to fit the tie-rod (item 6) it is necessary to mount both cranks (item 4) to the tie-rod before placing it in the end beam.* Fit the ball joints, O-rings, and plastic washers to the tie-rod ends and then fit the fork of the crank (item 4) over the tie-rod end.
- Page 8 Seated / Landed signal adjustment 1 Check that the SEATED PIN can move up and down freely. The force needed to lift the pin is approx. 10 kg (20 lbs). 2 The SEATED signal should switch on with the pin protruding approx. 9 mm below the landing surface of the end beam.
- Page 9 Twistlock angle adjustment 1 Turn the twistlocks (pos 1) to the fully UNLOCKED position (as shown). 2 If the twistlock heads do not line up with the twistlock sleeve, they can be adjusted by loosening the lock nuts (pos 5) for the adjuster bolts (pos 2). 3 Turn the twistlocks at each end of the end beam so that they line up with the sleeves, if it is found difficult to line up the twistlocks and sleeves accurately distri- bute the misalignment equally on both sides of the sleeve.
- Page 10 WEAR PADS To eliminate mechanical friction, there are plastic pads between extension beams and main frame. The pads are positioned for support to reduce and also to absorb horizon- tal and vertical shock loads, they are mounted in several retainers. This design makes inspection and replacement easy.
- Page 11 Wear pads wear limits Below pictures and tables show the maximum wear limits for the different wear pads on the spreader. Make sure to regularly inspect the wear pads and to replace them when needed. The nylon wear pads should be inspected for wear at the same time as their tracks are lubricated.
- Page 12 Changing wear pads 1. Extend the left extension beam ~ 1000 mm to make room for service on the right beam. If the spreader has the option hydraulic stops, disassemble the stop cylinder. 2. Use a M6S 20x90 bolt (1) to lift the rear end of the extension beam ~ 2 mm to make sure the extension beam does not rest on the lower wear pad.
- Page 13 Changing wear pads 4. Now it is possible to remove the upper wear pads by loosening bolts (4) and pull out the wear pad retainer. * Remove the side wear pad bolts (5) and pull out the wear pad retainer. * 5.
- Page 14 FLEXTRACK CHAIN ASSEMBLY Included in this service box is a complete assembly of flextrack chain, hydraulic hoses and electrical cable. On the following pages, you will find instructions how to replace the flextrack chain assembly.
- Page 15 Flex track chain guide Cable chain Bolt Bolt Hydraulic hose assy. Flex track chain guide To change flex track chain, loosen and remove the circled bolts, replace the flex track chain and reassamble in reverse order.
- Page 16 Summary of all parts included in the box: Twistlock kit Twistlock Assembly Seated pin Bracket Indicator arm Tie rod Compression spring Compression spring Wear pad - Mainframe Wear pads Wear pad - Mainframe lower Wear pad - Extension beam lower Wear pad - Extension beam upper Wear pad - Extension beam lower Wear pad - Extension beam lower...
- Page 17 - this must be corrected before use. If the spreader needs to be repaired, please contact a specialist and see to that only ELME Genuine Parts are used if need of replacement. This is to ensure that the spreader still is reliable. Repairs made by a non-qualified person or use of non-genuine parts may lead to increased risk of personal injuries or damages.
- Page 18 HEADOFFICE SALES AND SPARE PARTS SPARE PARTS ELME Spreader AB ELME Spreader Trading (Shanghai) Co. Ltd ELME Americas Inc. Älmhult, Sweden Shanghai, China Martin, TN, United States sales@elme.com sales.cn@elme.cn sales.us@elme.com www.elme.com...
Need help?
Do you have a question about the Servicebox 817 INNOVATION and is the answer not in the manual?
Questions and answers