Table of Contents
Advertisement
Quick Links
Advertisement
Table of Contents

Related Manuals for H3 Falcon 4005


Summary of Contents for H3 Falcon 4005
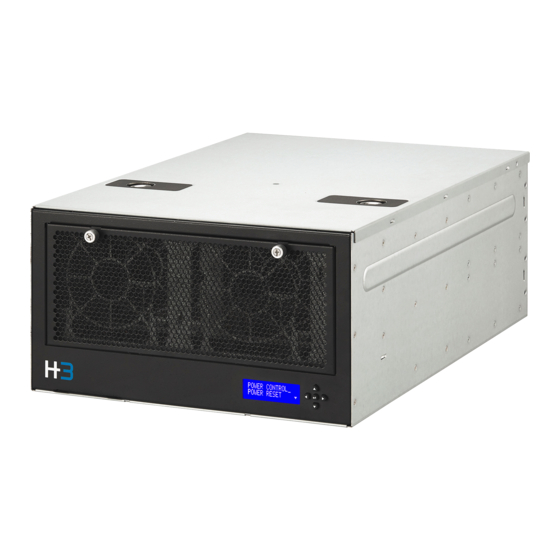
- Page 1 Falcon 4005 User Manual...
- Page 2 Navigation Device Allocation P.14 Firmware update P.24 GUI Introduction Hardware Installation (Quick Installation Guide) LCD Operation P.34 License Key Activation P.31 Operational Safety P.45 PCIe Port Configuration P.16 Rest to Default P.44 Service Parts P.33 Specifications System modes Trouble Shooting P.46...
-
Page 3: Table Of Contents
Table of Contents 1. Introduction ........................4 1.1 Key Features ........................4 2. Package Contents ......................4 3. Technical Specifications ....................5 4. Requirements........................5 4.1 Host Server ........................5 4.2 Host OS/BIOs ........................5 4.3 Web Browsers ........................6 5. - Page 4 9.1 Operation ........................34 9.2 Menus..........................35 9.2.1 Main menu ............................35 9.2.2 Power control ............................36 9.2.3 Power reset ............................36 9.2.4 System ..............................36 9.2.5 Slot ............................... 37 9.2.6 Devices ..............................38 9.2.7 Hosts ..............................39 9.2.8 Health ..............................40 9.2.9 Temperature ............................
-
Page 5: Introduction
Real-time GPU cluster topology System performance monitoring Role-based authentication and access control 2. Package Contents Falcon 4005 GPU Expansion Chassis Main chassis (1) GPU drawer (1) PSU (1) Fan (4) Power cord (PSU) Mini-SAS HD external cable ... -
Page 6: Technical Specifications
3. Technical Specifications Chassis BMC/mCPU Aspeed AST 2500 PCIe Switch PEX 88096; PCIe 4.0 PCIe Slots* 5x PCIe4.0 x16 dual-width, FHFL Host Interface SFF-8644 connectors Power 1600W; 220V AC; 80+ Platinum; hot swap 120x120x38mm; 6700 RPM; hot swap Operating Temp. 0°C ~ 35°C (32°F ~ 95°F) Dimension 174(H) x 320(W) x 466 (D) mm... -
Page 7: Web Browsers
Please see Falcon 4005 Quick Installation Guide for system set up. 6. System Modes There are two system modes for Falcon 4005. The Standard Mode is limited to single host connection and does not support device dynamic allocation or host port bifurcation. The Advanced mode supports multiple host connection and could allocated devices to hosts dynamically. -
Page 8: Graphical User Interface
7. Graphical User Interface 7.1 Log-in Every time you access GUI, you will be asked to log in. Please enter your username and password. 7.2 Functions The drop-down menu is at the top-left of the page Please find details of each function in the relative section. -
Page 9: Overview
Usage of specific device types (GPU, NVMe, and NIC) features can be accessed with premium license activated. “Used” indicates the number of devices that are currently assigned to hosts. e.g. Used 4 of 5. There are 5 devices installed in Falcon 4005, 4 of them are assigned to the host(s). - Page 10 GPU Utilization Rate(%) In the GPU utilization chart, users can check the GPU utilization of a specific GPU in a specific period. Y-axis represents the utilization rate and X-axis represents a specific GPU. The data is read from PCIe devices directly, only the compatible devices with the out-band information will be shown here. 1.
- Page 11 increases. 3. Time: The X-axis display system times (per hour) 4. Devices: List all the devices installed. Every device has a unique color indicator. 5. Throughput curve: The curve of PCIe throughput of each device, distinguished by the color. 6. List down menu: Displays throughput of each device at a specific time point.
- Page 12 Thermal(°C) The Thermal chart displays the average temperature of each component (in °C) in the Falcon 4005 chassis is displayed. Green Good thermal performance Amber Moderate thermal performance Overheat. Please check out the system. * Falcon 4005 will shut down automatically when the system detects any device temperature >85°C for over...
-
Page 13: Resource Management
7.2.2 Resource Management The topology view shows the graph of hosts, devices, and PCIe switch. The list view lists all the devices and hosts in a table. Under advanced mode, users can provision or re-provisioned the PCIe devices to connected hosts using topology view. - Page 14 Port Information: 1. Link icon: This icon indicates that the device is assigned to a host already. 2. Color tag: Each host has a colored frame. This color tag indicates that the device is assigned to the host with the same color. E.g.
- Page 15 Device Allocation This feature is only enabled in Advanced mode. Go to Resource Management page (Use Topology mode) 1. Select the target host 2. Check the box beside the vacant device 3. Click “Allocate” to assign the device to the host If multiple PCIe devices should be provisioned to one connected host, users can also select multiple devices at one time then allocate to one connected host.
- Page 16 Release Device from host This feature is only enabled in Advanced mode. Go to Resource Management page (Use Topology mode) 1. click the link icon next to the target device You can only deallocate one device at a time with this method. The confirmation message will pop-up to ask users for confirmation.
-
Page 17: Port Configuration
7.2.3 Port Configuration Falcon 4005 provides user defined PCIe port configurations. All PCIe ports are default to 16 lanes (PCIe 4.0). The lanes can be configured into 2x8 lanes or 4x 4lanes depending on the custom requirements. 1. Undo and Apply: Undo or Apply configuration settings. - Page 18 Click “Yes” to confirm. Click “OK” to finish the configuration processes. After you finished the configuration, your new configuration will be displayed, and the text should turn Black. e.g. Please power-cycle Falcon 4005 (or the drawer) for the new configuration to take effect...
-
Page 19: Monitor
7.2.4 Monitor In the Monitor page, users can see the real-time traffic, link speed, and the error count of each PCIe port. 1. Sub-menu: Select the monitor information you would like to see. 2. Drawer 1 PCIe ports: PCIe ports of drawer 1 are in green background. 3. - Page 20 Link Speed When select Link Speed, the link speed information will show up on the right side of every white box (port). Display format [PCIe generation] x[PCIe lanes]. e.g. Nvidia A100 PCIe is a PCIe Gen4 x16lane device, under normal condition, the link speed should be displayed as Gen4 x16 1.
-
Page 21: System Health
7.2.5 System Health The System Health page provides consolidated health information of the chassis. Including drawer and device temperatures, chassis temperature, power consumptions, and fan speeds. 1. Drawer 1 device temperature graph: see Device temperature graph section for details. 2. Chassis temperature graph: see Chassis temperature graph section for details. - Page 22 Device temperature graph 1. Temperature: Temperature scale in degree Celsius 2. Time: Time scale in hours 3. Devices: List of devices in the drawer, each given a color tag e.g. Device 1:2 in the above image is given a blue 4.
- Page 23 Power consumption graph 1. Power consumption: Power consumption scale in degree Watts 2. Time: Time scale in hours 3. Devices: List of devices/drawers, each given a color tag e.g. Slot 1:1 is given a 4. Temperature curve: Temperature curves of all devices in the drawer, colors are corresponding to the devices e.g.
-
Page 24: Chassis
In the Chassis page, users can control the power of chassis UID, and the power of the GPU drawers separately. The LCD will blink when Falcon 4005 UID is turned on. When you turn the drawer off, only the drawer will be turned off, other components in the chassis (fans, PCIe switch, BMC…) remain powered on. -
Page 25: Maintenance
1. BMC firmware information 2. Drawer 1 PCIe switch firmware information 3. Upload/Install (see Firmware update section for details) Firmware update You will have to download the latest firmware files from H3 Platform official website (https://www.h3platform.com/knowledge-base/document) Go to Knowledge Base→ Download Product type:... - Page 26 Upload the firmware .img file. The confirmation message will pop-up, click “Yes” to proceed. When the update completes, the notification message will pop-up, click “Close” to end Now reboot Falcon 4005, the new firmware will be installed. Note: The system will automatically detect which firmware file is uploaded...
-
Page 27: Event Logs
7.2.8 Event Logs In the Event Logs page, users will find consolidated logs. The logs are filtered by log levels, users can find specific logs by levels or using the search bar. 1. Select log types: Sort logs by levels Actual logs (new →... -
Page 28: Setting
7.2.9 Setting In Setting page, users can modify all the system settings, manage accounts and licenses. Functions including time setting, network setting, user management, ELK configuration, and license management. Time setting Find your time setting information or modify time settings from the Time Settings page. 1. - Page 29 Network setting Find your network setting information or modify network settings from the Network Settings page. 1. TCP/IP settings: Obtain IP address automatically Use a static IP address Users must fill in the IP address, Subnet Mask, and Default Gateway fields for this option.
- Page 30 User management Manage user accounts, change user passwords, create/delete user accounts from the User Management page. 1. Search bar: Search for specific user information 2. User details: Each roll contains details of the accounts, including username, role*, and UUID. 3. Edit user accounts: Click the edit icon to change password for the account Change password: 1.
- Page 31 Delete user accounts Delete Click the delete icon to delete the account. The confirmation message will pop-up, click “Yes” to proceed. Click “Close” when finished. User roles and Authorities Administrator User_Admin User Guest Read PCIe Resource Read Chassis Info Read System Logs Manage PCIe Resource Change Password Read System Settings...
- Page 32 ELK configuration Find ELK server information or set up ELK server for log management from the ELK Config. page. 1. Set up ELK server: 1. Check the box to enable ELK server setting 2. Fill in the ELK server IP address 3.
- Page 33 2. Upload License Activate your premium license keys here 1. Key in the license key 2. Click “Apply” to activate After you activate the license key, the notification message will pop-up, click “close” to end. Mode switch Please make sure you have powered-off the connected server before switching modes. 1.
-
Page 34: Parts Replacement
8. Parts Replacement If any of your fans or PSU is out of order, you can order parts from H3 Platform directly. Please visit https://www.h3platform.com/ for details. 8.1 Fans Please use the suitable fans for replacement, damages caused by incompatible fan installation are not Warranted. -
Page 35: Lcd
9. LCD Users can control the chassis using the LCD module on the chassis. 9.1 Operation 1. The functions: List of functions accessible from the LCD module 2. The cursor: Indicating that you are on the specific function (selected), press → button to enter the sub- menu. -
Page 36: Menus
9.2 Menus 9.2.1 Main menu Press → button to enter the menu selection. Use the↑and↓button to scroll up and down the list. -
Page 37: Power Control
9.2.2 Power control Users can turn drawers on/off from Power control. 1. Press ↵ to proceed 2. Select “Yes” to confirm, select “No” to cancel 9.2.3 Power reset Users can run drawer power-cycles. *power reset will turn off then turn on the drawers, different from the power control function. 1. -
Page 38: Slot
9.2.5 Slot Users can view the link speed, availability of every device port, and the number of host server attached to every host ports Device port from 1:1 ~ 1:4 Host Port from 1:H1 ~ 1:H2 Device port info display format: [drawer #]:[slot#] [PCIe generation]x[Lanes] / [Status] AVL= Device available... -
Page 39: Devices
9.2.6 Devices Users can view port traffics, device name, device temperature, and error count. *Only the ports with devices installed will show. Device port from 1:1 ~ 1:4 Tx= PCIe switch to device traffic Rx= Device to PCIe switch traffic ERR= error counts [Bad DLLP] –... -
Page 40: Hosts
9.2.7 Hosts Users can see whether the host port connects to the host server or not. If it’s linked, users can get further information such as which device is allocated to the host. Host port display format: [Drawer #]:[Host Port#] [Link speed] / [Link Status] Attached device display format: [Drawer#] –... -
Page 41: Health
9.2.8 Health Users can view PSU status and fan speeds. PSU 1 ~ 2 Fan 1-1 ~ 1-2, 2-1 ~ 2-2 (Chassis rear view) (Chassis top view) PSU information display format: [PSU#] [status] GOOD= PSU is working well EMPTY= No PSU detected for the socket Fan information display format: [Fan#] [RPM] (Press↓to see more fans) -
Page 42: Temperature
9.2.9 Temperature Users can view temperature in degree Celsius of the two Atlas (PCIe switches) and all devices. SW1= Atlas 1 (PCIe switch for drawer 1) Device 1:1 ~ 1:4 E.g. Empty device slot will show 0°C 9.2.10 Network Users can see al the network settings and modify IP address. - Page 43 IP address (read only) Subnet mask (read only) Gateway (read only) DNS (read only) Network setting Users can modify IP address from the Network Setting menu Select Static and key in the static IP Select DHCP to generate IP address automatically...
-
Page 44: Password (Feature Coming Soon)
9.2.11 Password (Feature coming Soon) Users can modify password. Password change Select “Yes” to change password Key in the current password Key in the new password Verify new password Press ← and → to select digits. The selected digit will flash. Press↑or↓to change the numbers for the selected digit. -
Page 45: Reset To Default
9.2.12 Reset to default Users can reset the Falcon 4005 to default. Reset Process: Select “Yes” and the system will start resetting. “Action finished” will show when the reset is completed. After reset, the IP address, network gateway, and GUI log-in account will become default. -
Page 46: Operational Safety
10. Operational Safety Please power-off the entire chassis before opening the top cover. Especially when installing/replacing devices for the riser slot. Please power-off the drawer before you draw them out of the chassis Go to GUI→Chassis (see P.23) or use LCD power control function (see P.36) Power off the drawer to be drawn out. -
Page 47: Trouble Shooting
Insufficient PCI resources detected · There is not enough available PCI memory Resolution Disconnect Falcon 4005 from the host Go to the host BIOS → Advanced settings Enable 4G decoding Set MMIO High Size to 512G or higher Specific example: SuperMicro Server... - Page 48 Set Memory Mapped I/O Size to 512 G or higher Connect the GPU expansion chassis to the server and see if the server boots properly Please visit H3 platform FAQ https://www.h3platform.com/knowledge-base/faq or contact H3 Platform if you have any question.
- Page 49 H3 Platform; indemnity; and all others. The reader is advised that third parties may have intellectual property rights that may be relevant to this document and the technologies discussed herein, and is advised to seek the advice of competent legal counsel, without obligation of H3 Platform.
Need help?
Do you have a question about the Falcon 4005 and is the answer not in the manual?
Questions and answers