Advertisement
Quick Links
Advertisement

Related Manuals for H3 Falcon 4210


Summary of Contents for H3 Falcon 4210
- Page 1 Falcon 4210 Quick Installation Guide...
- Page 2 Release Date Note March 29 , 2021 May 26 , 2021 Firmware update process Falcon 4210 Default Settings: IP Address: 169.254.100.100 Gateway: 0.0.0.0 Administrator Username: admin Administrator Password: admin...
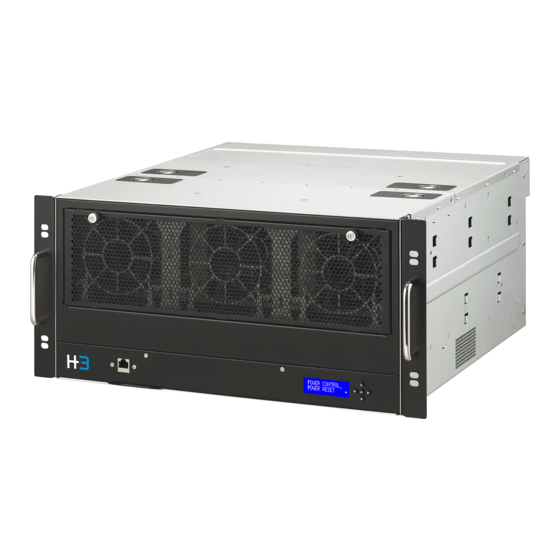
- Page 3 The excellent quality and performance make our products superior in the like product. For you to have the good understanding to Falcon 4210, please read the installation guide and user manual, and operate according to the suggested steps for each feature.
-
Page 4: Table Of Contents
Contents Chassis Overview ....................2 PCIe Port Number ....................3 GPU Installation ....................4 Cabling Guide ....................... 8 Additional Host Ports ..................10 Booting Process ....................11 GUI Initial Setup ....................13... -
Page 5: Chassis Overview
Chassis Overview... -
Page 6: Pcie Port Number
PCIe Port Number Please refer to the image below to find the physical PCIe slots that is corresponding to the port numbers displayed on the GUI. E.g. The device installed on the slot 1:1 will be shown on GUI as “1:1 – [device name]”. Chassis rear view GUI view Device name may vary. -
Page 7: Gpu Installation
GPU Installation 1. Pull out the drawer 1. Loosen the hand screws. 2. Pull the handle all the way down. 3. Pull the drawer out. 2. Remove the stabilization plate 1. Unscrew the stabilization plate (both sides). 2. Lift the plate up to remove. - Page 8 3. Install GPU 1. Plug the GPU to the PCIe slot. 2. Screw the bracket to hold the GPU in place. 3. Connect the PCIe power cable to the GPU. Caution: The slots are dual width. Oversized devices may not fit. Use the suitable power cable for your GPU model.
- Page 9 The power connectors are PCIe slot specific. Please do not cross connect power cables to the devices on other PCIe slots. The position of the power connector holder is adjustable. Adjust the position of the power connectors for smooth GPU installation. 1.
- Page 10 4. Put the stabilization plate back 1. Place the stabilization plate back. 2. Screws on both sides to hold the plate in place. There are three positions available for the stabilization plate, pick the ones that would not block the power connectors of your GPU.
-
Page 11: Cabling Guide
1:H1 on the GUI 2 ports x8 lanes (Advanced mode) Connect the corresponding ports as shown in the diagram. After booting up Falcon 4210, Go to GUI→Port Configuration Set the host port to 2x8 mode before power on the host machines. - Page 12 4 port x4 lanes (Advanced mode) Connect the correspond ports as shown in the right diagram. After booting up Falcon 4210, Go to GUI→Port Configuration Set the host port to 4x4 mode before power on the host machines. Host 1...
-
Page 13: Additional Host Ports
Make sure that the port(s) is configured into host mode before installing the re-timer card. See Falcon-4010 User Manual- Port Configuration for details Note: H3 re-timer card only supports 1x16 configuration now. Bifurcation function coming soon. Drawer 1 Drawer 2... -
Page 14: Booting Process
Booting Process Caution: Please complete Falcon 4210 boot up before power on any hosts. Improper operation can cause system errors. 1. Install GPUs to Falcon 4210 Please refer to the GPU installation section. 2. Connect the management port to your network 3. - Page 15 4. Connect to A/C power Falcon 4210 will be powered-on when the power cords are plugged in. No further action is required for this step. Please make sure that each drawer is powered by at least 1 PSU. 5. Check LCD for system readiness When the system is ready, the LCD will display the model name and the IP address.
-
Page 16: Gui Initial Setup
Chrome v_12 (or higher) Type the IP address of Falcon 4210 to the URL bar to enter GUI. You could find the IP address from the LCM module. Make sure the IP is correct and is under the same subnet as the management machine. - Page 17 2. User Setting The username for the initial account will be “admin” and is not changeable. You will be asked to reset the log-in password for admin. 1. Type in your new password 2. Confirm new password 3. Click next to proceed to Network Setting *...
- Page 18 4. Time Setting 1. Select your time zone 2. Setup the system time Synchronize with NTP server: Fill in the NTP server (NIST) address Click “Sync Now” Manual Setting: Select a date using calendar Set a time 3. Click “Apply” to proceed *...
- Page 19 Download item: Firmware 1. Download the firmware file to your device (i.e., your PC) 2. Go to Falcon 4210 GUI → Maintenance page Click “Upload/Install” Upload the firmware .img file. The confirmation message will pop-up, confirm that you have disconnected all host machines then click “Yes” to proceed.
- Page 20 When the update completes, click “restart now” the system will reboot automatically. The firmware update is completed after rebooting. The Falcon 4210 installation and initial set-up are completed. Please see Falcon 4210 User Manual for more operation details.
- Page 21 H3 Platform or its authorized distributor or retailer. H3 Platform's products are PCI s witches, and H3 Platform makes no warranty of the devices installed, or warranty on compatibility of all PCIe devices. H3 Platform will not be liable in any way for the loss of data stored on H3 Platform products and any damage caused by this.
- Page 22 H3 Platform or any supplier has been advised of the possibility of such damages and even if the reme dy fails of its essential purpose.
- Page 23 It is customer's sole responsibility to back up his/ her data. Before allowing any service from H3 Platform or its service pr ovider, including remote login check and repairing service, the customer must back up the data and remove any of the customer's confidential, proprietary or personal information.
- Page 24 TO THE EXTENT ALLOWED BY LOCAL LAW, THE REMEDIES IN THIS WARRANTY STATEMENT ARE CUSTOMER'S SOLE AND EXCLUSIVE REMEDIES. EXCEPT AS INDICATED ABOVE, IN NO EVENT WILL H3 PLATFORM OR ITS SUPPLIERS BE LIABLE FOR LOSS OF DATA OR FOR DIRECT, SPECIAL, INCIDENTAL, CONSEQUENTIAL (INCLUDING LOST PROFIT OR DATA), OR OTHER DAMAGE, WHETHER BASED IN CONTRACT, TORT, OR OTHERWISE.
Need help?
Do you have a question about the Falcon 4210 and is the answer not in the manual?
Questions and answers