Advertisement
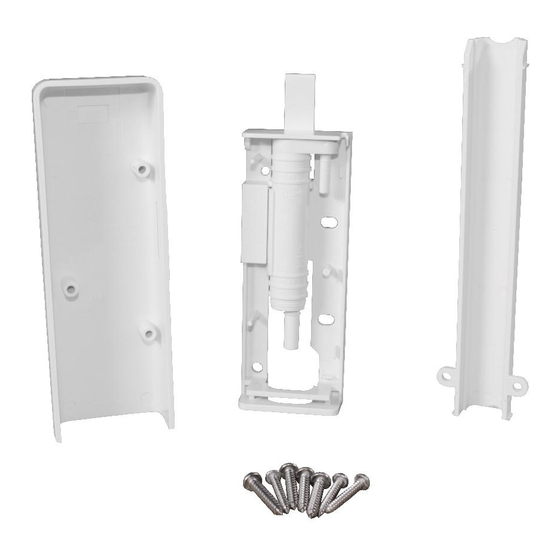
5. Install tube cover from the
backside of the mounting
bracket. Secure AG110-003
in mounting bracket and
tube cover with provided
mounting screws (See Fig 1-5).
6. Connect 1/4-inch OD poly
tubing from an RO unit to the
AG110-003 inlet port. Connect
3/8-inch OD poly tubing to the
outlet port and insert the other
end into a drain pipe through a
drain pipe adapter. (See FIG 1-6)
Tab Aligns
2"
Cover.
1/4" O.D.
5.8"
Poly tubing
3/8" O.D.
Poly tubing
6"
Fig 1-6
Front View
7. Apply decorative cover over wall mount bracket. For
dimensions, see FIG 1-7.
500 Jefferson Street, Placentia, California 92870 USA • 949-955-3928 • Email: orders@airgap.com
#6 Mounting Screw
#8 Mounting Screws
Tubing cover
#6 Mounting Screw
Fig 1-5
0.92-0.95"
Decorative Cover
Fig 1-7
Side View
Copyright AIR GAP INTERNATIONAL
Model:
AG110-003
REVERSE OSMOSIS
AIR GAP DRAIN
Old Part Number:
GAP-A-RO, KIT S-C
Doc.#400-0808-001
Placentia, California
Advertisement
Table of Contents

Related Manuals for AIR GAP AG110-003

Summary of Contents for AIR GAP AG110-003
- Page 1 #8 Mounting Screws 6. Connect 1/4-inch OD poly Model: tubing from an RO unit to the Tubing cover AG110-003 inlet port. Connect 3/8-inch OD poly tubing to the AG110-003 outlet port and insert the other #6 Mounting Screw end into a drain pipe through a drain pipe adapter.
- Page 2 Please read the instructions once through before starting. AG110-003 INSTALLATION INSTRUCTION 1. Make sure that the flow rate output of the RO equipment meets AG110-003 flow capacity limits such as 0.4 GPM (1.5 Liters/minute). 2. Check inlet and outlet ports marking on AG110-003 body. AG110-003 provided installed in wall mount bracket FIG 1-1, for dimensions see FIG 1-2.
Need help?
Do you have a question about the AG110-003 and is the answer not in the manual?
Questions and answers