Advertisement
Quick Links
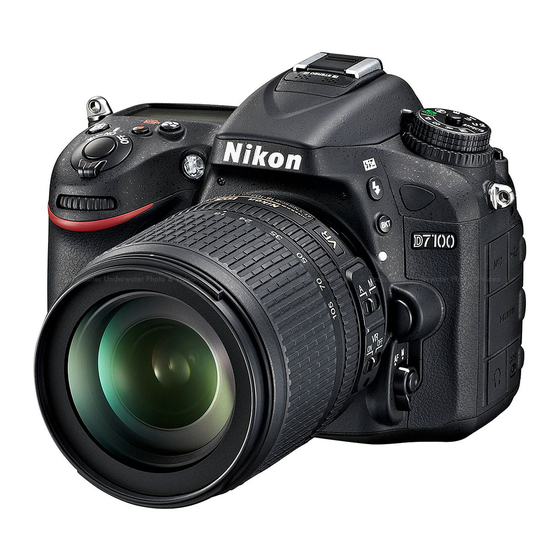
Exploring the
Nikon D7100
T
his chapter covers the key components of the D7100 — the buttons, switches,
dials, and knobs. These are the features you will need to master because you will
be using them all the time to modify settings in order to adapt to changing shooting
conditions.
The D7100 is very similar to its precursor, the D7000, and also very similar to its FX
sibling, the D600. If you're upgrading from the D7000 or you purchased the D7100 as
an adjunct to the D600, you'll feel right at home. If you're stepping up from a D5100 or
a D3200, the number of controls may surprise you. If you are accustomed to using
one of Nikon's compact pro bodies, such as the D300s, D700, or D800, then you will
defi nitely notice the difference in the control layout.
Getting to know all your camera's menus, buttons, and dials allows you to capture your
images just as you envision them.
1
C HAP T E R
Advertisement

Related Manuals for Nikon D7100


Summary of Contents for Nikon D7100
- Page 1 The D7100 is very similar to its precursor, the D7000, and also very similar to its FX sibling, the D600. If you’re upgrading from the D7000 or you purchased the D7100 as an adjunct to the D600, you’ll feel right at home.
-
Page 2: Top Of The Camera
Top of the camera A lot of important buttons are on the top of the D7100. This makes it easier to fi nd them, especially when you have your eye to the viewfi nder. This is where you fi nd the dials to change the shooting modes, as well as the all-important shutter-release but- ton and the relatively new Movie record button. - Page 3 Main Command dial allows you to modify the exposure that is set by the D7100’s light meter when it is set to Programmed auto ( ), Shutter- priority auto ( ), or Aperture-priority auto ( ) mode. Turning the Main Command dial to the right increases the exposure, while turning the dial to the left decreases the exposure.
- Page 4 Nikon D7100 Digital Field Guide Image courtesy of Nikon, Inc. Top-of-the-camera controls. Hot shoe. This is where you attach an accessory fl ash to the camera body. The ▶ hot shoe has an electronic contact that tells the fl ash to fi re when the shutter is released.
- Page 5 Release Mode dial. Although technically the Release Mode dial is located on the ▶ top of the camera, on recent Nikon cameras the Release modes are easier to view from the rear of the camera. The Release mode controls how the shutter is released when you press the shutter-release button.
- Page 6 Nikon D7100 Digital Field Guide frames at low speed. You can set the frame rate for this Release mode in Custom Setting menu ( ) d5. You can select from 1 to 5 fps. • Continuous high-speed shooting ( ). When you use this mode, pressing and holding the shutter-release button allows the camera to shoot multiple frames at high speed.
- Page 7 You can also use the multi-selector to navigate through the menu options. OK button ( ). When the D7100 is in Menu mode, you press the OK button ▶ ) to select the menu item that is highlighted. In Playback mode, pressing the...
- Page 8 Nikon D7100 Digital Field Guide Image courtesy of Nikon, Inc. Back-of-the-camera controls. Live View switch. Flipping the switch allows you to choose between shooting ▶ still photos ( ) or video ( Memory card access lamp. This light blinks when the memory card is in use.
- Page 9 When the D7100 is in Playback mode, press this button to protect (lock) the image from accidentally being deleted.
- Page 10 Front of the camera The front of the D7100 (with the lens facing you) is where you fi nd the buttons to quickly adjust the fl ash settings as well as some camera-focusing options, and with certain lenses, you will also fi nd some buttons that control focusing and Vibration Reduction (VR).
- Page 11 Chapter 1 Exploring the Nikon D7100 Image courtesy of Nikon, Inc. Front of the Nikon D7100. Preview button ( ). By default, this button stops down the aperture so that you ▶ can see in real time what the depth of fi eld will look like. It’s a customizable but- ton that you can change to a number of different settings.
- Page 12 On the left side of the camera (with the lens facing away from you) are the output terminals on the D7100. These terminals are used to connect your camera to a com- puter or to an external source for viewing your images directly from the camera. They are hidden under a rubber cover that helps keep out dust and moisture.
- Page 13 It requires a type C mini-pin HDMI cable that’s available at any electron- ics store. Accessory terminal. This is an accessory port that allows you to connect the ▶ optional Nikon GP-1 or a third-party GPS accessory for geo-tagging your images.
- Page 14 If you purchased the camera with a kit lens, there are a few switches on the lens as well. If you’re using a different Nikon lens or a third-party lens, there may be different switches, or no switches at all, depending on the lens and the features that it offers.
-
Page 15: Viewfi Nder Display
Around the edges of the main viewfi nder frame there are a few icons that appear when certain settings are engaged. Clockwise from top these icons are: Special effects mode indicator. When the D7100 mode dial is set to Effects ▶... - Page 16 Nikon D7100 Digital Field Guide Viewfi nder display. 1.3X DX Crop area. When the D7100 is set to 1.3X DX crop ( ) the cropped ▶ area is outlined. 1.3X DX Crop indicator. This icon appears when the crop feature is activated.
- Page 17 Chapter 1 Exploring the Nikon D7100 Focus indicator. This is a green dot that lets you know whether the camera ▶ detects that the scene is in focus. When focus is achieved, the green dot lights up; if the camera is not in focus, no dot is displayed. On either side of the dot is an arrow.
- Page 18 Nikon D7100 Digital Field Guide appears when in Manual exposure ( ) and when exposure compensation ( ) is applied. This display also doubles as a roll indicator for the Virtual horizon feature that allows you to ensure your camera is level, which is great when shooting landscapes.
-
Page 19: Control Panel
Control Panel The LCD control panel on the top of the camera gives you a quick way to reference some of the most important settings on your D7100. Kelvin color temp indicator. This indicator displays to alert you that the num- ▶... - Page 20 Nikon D7100 Digital Field Guide • Number of shots in bracketing sequence. When the D7100 Auto- bracketing feature is activated, pressing the Bracketing button ( ) dis- plays the number of shots left in the bracketing sequence. This includes white balance, exposure, and fl ash bracketing.
- Page 21 Chapter 1 Exploring the Nikon D7100 LCD control panel. ▶ F-stop/aperture number. At the default settings, this indicator displays the aperture at which the camera is set. It also displays other settings as follows: • Aperture (number of stops). This shows the number of stops for a non- CPU lens with no data entered into the camera.
- Page 22 • PC mode. This indicator appears as PC when you connect the D7100 to a computer via a USB cable. •...
- Page 23 ▶ record multiple exposures. You set multiple exposures in the Shooting menu ( Bracketing indicator. When the D7100 is in the exposure or fl ash bracketing ▶ setting, this indicator appears on the control panel; when the D7100 is using white balance bracketing, a WB icon ( ) also appears.
-
Page 24: Information Display
D7100 displays the Screen tips to guide you through what each setting does. If you don’t want Screen tips to appear, you can turn this feature off in Custom Setting menu ( ) d4. - Page 25 Chapter 1 Exploring the Nikon D7100 Shooting mode. This indicator displays the Shooting mode to which your cam- ▶ era is currently set. This can be one of the scene modes (in which case it displays the appropriate icon), or one of the semiautomatic modes, such as Programmed auto ( ), Shutter-priority auto ( ), Aperture-priority auto ( ), or Manual ( ) (in which case it displays the corresponding letter).
- Page 26 Nikon D7100 Digital Field Guide –1.3 +1.3 AUTO RAW+ BASIC 1 00 AF – A 1600 1 .0 AUTO RAW+ AUTO FINE –1.3 +1.3 AUTO RAW+ BASIC 1 00 AF – A 1600 1 .0 AUTO RAW+ AUTO FINE Information display.
- Page 27 Chapter 1 Exploring the Nikon D7100 • Auto-bracketing increments. You can adjust the exposure bracketing to over- and underexpose in 1/3-stop increments. When you set the Function button ( ) to Auto-bracketing, the number of EV stops appears in this area.
- Page 28 Image comment option. This indicator informs you that this fea- ture is on. Copyright information indicator. You can program the D7100 to add copyright ▶ information to the EXIF data of all your images. When you turn this option on, this indicator appears.
- Page 29 GPS connection indicator. This indicator appears when using an optional GPS ▶ device with the D7100. If the icon is fl ashing, the GPS unit is searching for a signal. If no icon is shown, there is no GPS connection. If the GPS indicator is solid, the GPS unit has a connection.
- Page 30 Nikon D7100 Digital Field Guide Image area. This setting allows you to change the crop from DX format ( ▶ to1.3X crop. High ISO noise reduction. You can adjust the high ISO noise reduction settings ▶ here. Active D-Lighting. You can change the Active D-Lighting settings here.
Need help?
Do you have a question about the D7100 and is the answer not in the manual?
Questions and answers