Table of Contents
Advertisement
Advertisement
Table of Contents

Related Manuals for Nikon D780


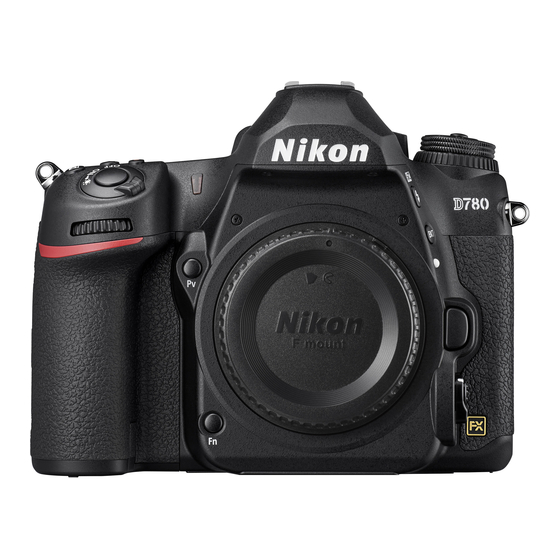
Summary of Contents for Nikon D780
- Page 1 DIGITAL CAMERA User's Manual (with Warranty) • Read this manual thoroughly before using the camera. • To ensure proper use of the camera, be sure to read “For Your Safety” (page xv). • After reading this manual, keep it in a readily accessible place for future reference.
-
Page 2: Package Contents
❏ User’s Manual • Memory cards are sold separately. • Purchasers of the lens kit option should confirm that the package also includes a lens (manuals for the lens may also be provided). D780 Model Name: N1722... - Page 3 D The Nikon Download Center A pdf version of this manual is available from the Nikon Download Center, together with an English-language reference manual with detailed operating instructions, which can be downloaded in pdf format or viewed online in html. Visit the Nikon Download Center to download...
-
Page 4: About This Manual
About This Manual ❚❚ Symbols The following symbols and conventions are employed in this manual. Use them to help locate the information you need. This icon marks notes, information that should be read before using this product. This icon marks tips, additional information you may find helpful when using this product. - Page 5 ❚❚ Nikon User Support Visit the site below to register your camera and keep up-to-date with the latest product information. You will find answers to frequently asked questions (FAQs) and can contact us for technical assistance. https://www.europe-nikon.com/support...
-
Page 6: Table Of Contents
Table of Contents Package Contents ................... ii About This Manual................. iv Menu List....................ix For Your Safety..................xv Notices ..................... xxi Getting to Know the Camera Parts of the Camera ................1 Camera Body..............1 The Control Panel............. 7 The Viewfinder ..............8 The Live View Displays (Photos/Movies).... - Page 7 Viewing Movies .............. 51 Deleting Unwanted Pictures........54 Technical Notes Caring for the Camera and Battery: Cautions......55 Camera Care ..............55 Battery Care..............59 Using the Charger............62 Using the Charging AC Adapter....... 62 Specifications ..................63 Nikon D780 Digital Camera........63...
- Page 8 Battery Endurance ................84 Trademarks and Licenses ..............87 Notices ...................... 91 Bluetooth and Wi-Fi (Wireless LAN)..........93 Kit Lens Manual Kit Lenses ....................98 AF-S NIKKOR 24–120mm f/4G ED VR Lens Manual..............98 Warranty Terms - Nikon Europe Service Warranty 105 viii...
-
Page 9: Menu List
Menu List The camera offers the following menus. Some items may not be displayed depending on camera settings or on the type of lens, flash unit, or other accessory attached. PLAYBACK MENU PHOTO SHOOTING MENU Delete White balance Playback folder Set Picture Control Playback display options Manage Picture Control... - Page 10 MOVIE SHOOTING MENU CUSTOM SETTING MENU Reset movie shooting menu Reset custom settings File naming a Autofocus Destination AF-C priority selection Image area AF-S priority selection Frame size/frame rate Focus tracking with lock-on Movie quality 3D-tracking face-detection Movie file type Auto-area AF face/eye detection ISO sensitivity settings...
- Page 11 CUSTOM SETTING MENU CUSTOM SETTING MENU b Metering/exposure d Shooting/display EV steps for exposure cntrl CL mode shooting speed Easy exposure Max. continuous release compensation Sync. release mode options Matrix metering Exposure delay mode Center-weighted area Electronic front-curtain Fine-tune optimal shutter exposure Extended shutter speeds...
- Page 12 CUSTOM SETTING MENU CUSTOM SETTING MENU e Bracketing/flash g Movie Customize i menu Flash sync speed Flash shutter speed Custom controls Exposure comp. for flash AF speed Auto c ISO sensitivity AF tracking sensitivity control Highlight display Modeling flash SETUP MENU Bracketing order Format memory card f Controls...
- Page 13 SETUP MENU SETUP MENU AF fine-tuning options Airplane mode Non-CPU lens data Connect to smart device Clean image sensor Connect to PC Lock mirror up for cleaning Wireless transmitter (WT-7) Image Dust Off ref photo Conformity marking Pixel mapping Battery info Image comment Slot empty release lock Copyright information...
- Page 14 RETOUCH MENU MY MENU NEF (RAW) processing Add items Trim Remove items Resize Rank items D-Lighting Choose tab Quick retouch Red-eye correction Straighten Distortion control Perspective control Monochrome Image overlay Trim movie...
-
Page 15: For Your Safety
For Your Safety To prevent damage to property or injury to yourself or to others, read “For Your Safety” in its entirety before using this product. Keep these safety instructions where all those who use this product will read them. A DANGER: Failure to observe the precautions marked with this icon carries a high risk of death or severe injury. - Page 16 Keep dry. Do not handle with wet hands. Do not handle the plug with wet hands. Failure to observe these precautions could result in fire or electric shock. Do not let your skin remain in prolonged contact with this product while it is on or plugged in.
- Page 17 Do not use batteries, chargers, or AC adapters not specifically designated for use with this product. When using batteries, chargers, and AC adapters designated for use with this product, do not: • Damage, modify, forcibly tug or bend the cords or cables, place them under heavy objects, or expose them to heat or flame.
- Page 18 Remove the battery and disconnect the AC adapter if this product will not be used for an extended period. Failure to observe this precaution could result in fire or product malfunction. Do not fire the flash in contact with or in close proximity to the skin or objects.
- Page 19 A DANGER (Batteries) Do not mishandle batteries. Failure to observe the following precautions could result in the batteries leaking, overheating, rupturing, or catching fire: • Use only rechargeable batteries approved for use in this product. • Do not expose batteries to flame or excessive heat. •...
- Page 20 A WARNING (Batteries) Keep batteries out of reach of children. Should a child swallow a battery, seek immediate medical attention. Keep batteries out of reach of household pets and other animals. The batteries could leak, overheat, rupture, or catch fire if bitten, chewed, or otherwise damaged by animals.
-
Page 21: Notices
• Nikon will not be held liable for any damages resulting from the use of this product. • While every effort has been made to ensure that the information in... - Page 22 Notice Concerning Prohibition of Copying or Reproduction ● Note that simply being in possession of material that has been digitally copied or reproduced by means of a scanner, digital camera, or other device may be punishable by law. • Items prohibited by law from being copied or reproduced Do not copy or reproduce paper money, coins, securities, government bonds, or local government bonds, even if such copies or reproductions are stamped “Sample.”...
- Page 23 Only Nikon brand electronic accessories (including lenses, chargers, batteries, AC adapters, and flash accessories) certified by Nikon specifically for use with this Nikon digital camera are engineered and proven to operate within the operational and safety requirements of this electronic circuitry.
- Page 24 xxiv...
-
Page 25: Getting To Know The Camera
Getting to Know the Camera Parts of the Camera Camera Body S ( Q ) button Accessory shoe (for optional flash unit) Sub-command dial Release mode dial Power switch Release mode dial lock release Shutter-release button ( 0 34) Mode dial lock release E button Eyelet for camera strap ( 0 19) E (focal plane mark) - Page 26 Self-timer lamp Focus-mode selector Stereo microphone ( 0 43) Lens mounting mark ( 0 23) c ( Y ) button Mirror BKT button Meter coupling lever Audio connector cover Power connector cover Accessory terminal connector Connector for external cover microphones Cover for USB and HDMI Headphone connector connectors...
- Page 27 CPU contacts Battery-chamber cover Lens mount ( 0 23) Battery-chamber cover latch Memory card slot cover ( 0 25) Tripod socket AF coupling Pv button Body cap ( 0 23) Fn button Getting to Know the Camera...
- Page 28 Viewfinder eyepiece ( 0 10) Memory card access lamp ( 0 25, 34) Rubber eyecup i button Diopter adjustment control Tilting monitor ( 0 5) ( 0 10) Live view selector ( 0 38, 43) R button a button ( 0 38, 43) W ( Y ) button X ( T ) button AF-ON button...
-
Page 29: The Monitor
D The Connector Covers Be sure to close the covers when the connectors are not in use. Foreign matter in the connectors could cause malfunction. D The Speaker Close proximity to the speaker could corrupt data stored on magnetic stripe cards or other such magnetic storage devices. Keep magnetic storage devices away from the speaker. - Page 30 D The Serial Number The product serial number is located behind the monitor. D Tilting the Monitor • Rotate the monitor gently within the limits of the hinges. Do not use force; failure to observe this precaution could damage the camera or monitor.
-
Page 31: The Control Panel
The Control Panel The following indicators appear in the control panel at default settings. Shutter speed Number of exposures remaining ( 0 32) Aperture ISO sensitivity Memory card icon (Slot 1; ISO sensitivity indicator 0 32) Auto ISO sensitivity indicator Memory card icon (Slot 2;... -
Page 32: The Viewfinder
The Viewfinder The following indicators appear in the viewfinder at default settings. Number of exposures AF area brackets ( 0 34 ) remaining ( 0 32) Metering Auto ISO sensitivity indicator Shutter speed “k” (appears when memory Aperture remains for over 1000 ISO sensitivity indicator exposures;... - Page 33 D The Viewfinder When the battery is exhausted or no battery is inserted, the display in the viewfinder will dim. The display will return to normal when a charged battery is inserted. D Temperature Extremes The brightness of the control panel and viewfinder displays varies with temperature, and response times may drop when the temperature is low;...
- Page 34 A The Diopter Adjustment Control With your eye to the viewfinder, rotate the diopter control until display in the viewfinder is in sharp focus. Viewfinder not in focus Viewfinder in focus Getting to Know the Camera...
-
Page 35: The Live View Displays (Photos/Movies)
The Live View Displays (Photos/Movies) Press the a button to display the view through the lens in the monitor. Rotate the live view selector to C to take photographs or to 1 to record movies. ❚❚ Live View Photography The following indicators appear in the monitor at default settings. - Page 36 “k” (appears when memory Aperture remains for over 1000 Shutter speed exposures; 0 32) Metering Number of exposures Battery indicator ( 0 31) remaining ( 0 32) Touch shooting ISO sensitivity ISO sensitivity indicator Auto ISO sensitivity indicator ❚❚ Movies Recording indicator ( 0 43) Subject tracking AF “No movie”...
-
Page 37: The G Button
The G Button Press the G button to view the menus. D PLAYBACK MENU C PHOTO SHOOTING MENU 1 MOVIE SHOOTING MENU A CUSTOM SETTING MENU B SETUP MENU N RETOUCH MENU O MY MENU/ m RECENT SETTINGS d Help icon Current settings * You can choose the menu displayed. -
Page 38: Using The Menus
❚❚ Using the Menus You can navigate the menus using the multi selector and J button. Move cursor up Select highlighted item Display sub-menu, select highlighted item, or move cursor right Move cursor down Cancel and return to previous menu, or move cursor left Highlight the icon for the current menu. -
Page 39: Display Options
Position the cursor in the selected menu. Press 2 to position the cursor in the selected menu. Highlight a menu item. Press 1 or 3 to highlight a menu item. Display options. Press 2 to display options for the selected menu item. Getting to Know the Camera... - Page 40 Highlight an option. Press 1 or 3 to highlight an option. Select the highlighted option. • Press J . • To exit without making a selection, press the G button. • To exit the menus and return to shooting mode, press the shutter-release button halfway.
-
Page 41: Text Entry
D Grayed-Out Items Some items and menu options may be unavailable depending on the mode and camera state. Unavailable items are displayed in gray and cannot be selected. D Text Entry A keyboard is displayed when text entry is required. Text display area Keyboard area Keyboard selection... - Page 42 A The d (Help) Icon • Where available, a description of the currently-selected item can be viewed by pressing the Q / g ( U ) button. • Press 1 or 3 to scroll. • Press Q / g ( U ) again to return to the menus. A Touch Controls You can also navigate the menus using touch controls.
-
Page 43: First Steps
First Steps Readying the Camera Attaching the Strap To attach a strap (whether the supplied strap or one that has been purchased separately): First Steps... -
Page 44: Charging The Battery
Charging the Battery Charge the supplied EN-EL15b battery in the supplied MH-25a battery charger before use. Insert the battery and plug the charger in (depending on the country or region, the charger comes with either an AC wall adapter or a power cable). •... - Page 45 The ambient temperature is too hot or too cold: Use the battery charger at temperatures within the designated temperature range (0 – 40 °C). If the problem persists, unplug the charger and end charging. Bring the battery and charger to a Nikon-authorized service representative. First Steps...
-
Page 46: Inserting The Battery
Inserting the Battery • Turn the camera off before inserting or removing the battery. • Using the battery to keep the orange battery latch pressed to one side, slide the battery into the battery chamber until the latch locks it in place. ❚❚... -
Page 47: Attaching A Lens
Attaching a Lens • The lens generally used in this manual for illustrative purposes is an AF-S NIKKOR 24–120mm f/4G ED VR. • Be careful to prevent dust entering the camera. • Confirm that the camera is off before attaching the lens. - Remove the camera body cap ( ) and rear lens cap ( - Align the mounting marks on the camera (... -
Page 48: Detaching Lenses
- Rotate the lens as shown until it clicks into place ( • Remove the lens cap before taking pictures. D CPU Lenses with Aperture Rings When using a CPU lens equipped with an aperture ring, lock aperture at the minimum setting (highest f-number). ❚❚... -
Page 49: Inserting Memory Cards
Inserting Memory Cards • Turn the camera off before inserting or removing memory cards. • The camera has two memory card slots: Slot 1 ( ) and Slot 2 ( ). If you are using only one memory card, insert it into Slot 1. -
Page 50: Memory Cards
D Memory Cards • Memory cards may be hot after use. Observe due caution when removing memory cards from the camera. • Do not perform the following operations during formatting or while data are being recorded, deleted, or copied to a computer or other device. - Page 51 D The Write Protect Switch • SD memory cards are equipped with a write-protect switch. Sliding the switch to the “lock” position write-protects the card, protecting the data it contains. • If you attempt to release the shutter while a write-protected card is inserted, a warning will be displayed and no picture will be recorded.
-
Page 52: Camera Setup
Camera Setup Choose a language and set the camera clock. Pictures cannot be taken nor settings adjusted until the clock is set. Turn the camera on. When the camera is turned on for the first time after purchase, a language- selection dialog will be displayed. - Page 53 Set the camera clock. Use the multi selector and J button to set the camera clock. Select time zone Select date format Select daylight saving time Set time and date (note that the option camera uses a 24-hour clock) The clock can be adjusted at any time using the [Time zone and date] >...
- Page 54 D The B (“Clock Not Set”) Icon Flashing B icon in the control panel indicates that the camera clock has been reset. The date and time recorded with new photographs will not be correct; use the [Time zone and date] > [Date and time] item in the setup menu to set the clock to the correct time and date.
-
Page 55: The Battery Level And Number Of Exposures Remaining
The Battery Level and Number of Exposures Remaining Before taking photographs, check the battery level and number of exposures remaining. Battery Level Check the battery level before taking photographs. The battery level is shown in the control panel and viewfinder. Control panel Viewfinder Description... -
Page 56: Memory Card Indicators And Number Of Exposures Remaining
Memory Card Indicators and Number of Exposures Remaining The control panel and viewfinder show the number of additional photographs that can be taken at current settings (i.e, the number of exposures remaining). • The control panel shows the slot or slots that currently hold a memory card (the example shows the icons displayed when cards are inserted in... - Page 57 • If two memory cards are inserted, the camera will show the number of additional photographs that can be recorded to the card in Slot 1. When the card in Slot 1 is full, the display will show the number of exposures remaining on the card in Slot •...
-
Page 58: Basic Photography And Playback Taking Photographs ( B Mode)
Basic Photography and Playback Taking Photographs ( b Mode) Select b (auto) mode for simple “point-and-shoot” photography. Photographs can be framed in the viewfinder (viewfinder photography) or in the monitor (live view photography). Framing Photographs in the Viewfinder (Viewfinder Photography) Pressing the mode dial lock release on top of the camera,... - Page 59 Ready the camera. Holding the handgrip in your right hand and cradling the camera body or lens with your left, bring your elbows in against the sides of your chest. Frame the photograph. • Frame a photograph in the viewfinder. •...
- Page 60 Press the shutter-release button halfway to focus. • The in-focus indicator ( I ) will appear in the viewfinder when the focus operation is complete. Viewfinder Description display The subject is in focus. (steady) The focus point is in front of the subject. (steady) The focus point is behind the subject.
- Page 61 Smoothly press the shutter- release button the rest of the way down to take the photograph. The memory card access lamp will light while the photograph is being recorded. Do not eject the memory card or remove or disconnect the power source until the lamp has gone out and recording is complete.
-
Page 62: Framing Photographs In The Monitor (Live View)
Framing Photographs in the Monitor (Live View) Pressing the mode dial lock release on top of the camera, rotate the mode dial to b . Rotate the live view selector to C (live view photography). Press the a button. The mirror will be raised and live view will start. - Page 63 Ready the camera. Hold the handgrip securely in your right hand and cradle the camera body or lens with your left. Frame the photograph. • Position the subject near the center of the frame. • At default settings, the camera automatically detects portrait subjects and positions the focus point over their faces or eyes.
- Page 64 Press the shutter-release button the rest of the way down to take the photograph. The monitor turns off during shooting. Press the a button to exit live view. Basic Photography and Playback...
- Page 65 D Shooting in Live View • Although these effects are not visible in the final pictures, during live view you may notice that: - Moving objects in the display appear distorted (individual subjects such as trains or cars moving at high speed through the frame may be distorted, or the entire frame may appear distorted when the camera is panned horizontally) - Jagged edges, color fringing, moiré, and bright spots are present in...
- Page 66 D The Count Down Display A count down will appear in the top left corner of the display approximately 30 s before live view ends automatically. • If the timer has been triggered by Custom Setting c4 [Monitor off delay], the count down will be displayed in black starting 30 s before the timer expires, switching to red when there are only 5 s to go.
-
Page 67: Recording Movies ( B Mode)
Recording Movies ( b Mode) b (auto) mode can also be used for simple “point-and-shoot” movie recording. A “Filming” Versus “Recording” Throughout this manual, the terms “filming” and “recording” are used as follows: “filming” is used if the live view selector is rotated to 1 , while “recording”... -
Page 68: To Start Recording
Press the a button. • The mirror will be raised and live view will start. The viewfinder will go dark and the view through the lens will be displayed in the monitor. • During live view, exposure for movies and photographs can be previewed in the monitor. - Page 69 • A recording indicator will be displayed in the monitor. The monitor also shows the time remaining, or in other words the approximate amount of new footage that can be recorded to the memory card. Recording indicator Time remaining • Sound is recorded via the built-in microphone.
-
Page 70: Recording Movies
D Recording Movies • When filming movies, you may notice the following in the display. These phenomena will also be visible in any footage recorded with the camera. - Flicker or banding in scenes lit by such sources as fluorescent, mercury vapor, or sodium lamps - Distortion associated with motion (individual subjects such as trains or cars moving at high speed through the frame may be distorted, or... - Page 71 • Sounds made by the camera may be audible in footage recorded: - During autofocus - When power aperture is used - During aperture adjustment - With vibration reduction enabled on vibration reduction (VR) lenses • If the sound level is displayed in red, the volume is too high. Adjust microphone sensitivity.
-
Page 72: Taking Photos During Filming
Taking Photos During Filming Photos can be taken during filming by pressing the shutter-release button all the way down. The resulting photo will have an aspect ratio of 16:9. • A C icon will flash in the display when a photo is taken. •... -
Page 73: Playback
Playback Press the K button to view photos and movies recorded with the camera. Press the K button. • A picture will be displayed in the monitor. • The memory card containing the picture currently displayed is shown by an icon. Press 4 or 2 to view additional pictures. - Page 74 A Image Review When [On] is selected for [Image review] in the playback menu, pictures are automatically displayed in the monitor after shooting without the user pressing the K button. Basic Photography and Playback...
-
Page 75: Viewing Movies
Viewing Movies Movies are indicated by a 1 icon. Tap the a icon in the display or press J to start playback (a progress bar shows your approximate position in the movie). 1 icon Length a icon Current position/total length Progress bar Volume Guide... - Page 76 ❚❚ Movie Playback Operations Description Press 3 to pause playback. Pause Press J to resume playback when playback is paused Resume or during rewind/advance. • Press 4 to rewind, 2 to advance. Speed increases with each press, from 2× to 4× to 8× to 16×.
- Page 77 Description If the movie contains indices, rotating the sub- command dial takes you to the next or previous index. • Indices can be added or removed from the [EDIT Skip to index MOVIE] menu, which can be displayed by pausing playback and pressing the i button.
-
Page 78: Deleting Unwanted Pictures
Deleting Unwanted Pictures Pictures can be deleted as described below. Note that once deleted, pictures cannot be recovered. Display the picture. • Press the K button to start playback and press 4 or 2 until the desired picture is displayed. •... -
Page 79: Technical Notes
Technical Notes Caring for the Camera and Battery: Cautions Camera Care Do Not Drop ● Do not drop the camera or lens or subject them to blows. The product may malfunction if subjected to strong shocks or vibration. Keep Dry ●... - Page 80 Lasers and other bright light sources ● Do not direct lasers or other extremely bright light sources toward the lens, as this could damage the camera’s image sensor. Cleaning ● When cleaning the camera body, use a blower to gently remove dust and lint, then wipe gently with a soft, dry cloth.
- Page 81 Do Not Touch the Shutter Curtain ● • The shutter curtain is extremely thin and easily damaged: under no circumstances should you exert pressure on the curtain, poke it with cleaning tools, or subject it to powerful air currents from a blower. These actions could scratch, deform, or tear the curtain.
- Page 82 Turn the Product Off Before Removing or Disconnecting the Power ● Source Removing or disconnecting the power source while the camera is on could damage the product. Particular care should be taken not to remove or disconnect the power source while images are being recorded or deleted.
-
Page 83: Battery Care
Battery Care Precautions for Use ● • If improperly handled, batteries may rupture or leak, causing the product to corrode. Observe the following precautions when handling batteries: - Turn the product off before replacing the battery. - Batteries may be hot after extended use. - Keep the battery terminals clean. - Page 84 • Remove the battery from the camera or charger when not in use. The camera and charger draw minute amounts of charge even when off and could draw the battery down to the point that it will no longer function. •...
- Page 85 Charge Batteries Before Use ● Charge the battery before use. The supplied battery is not fully charged at shipment. Ready Spare Batteries ● Before taking photographs, ready a spare battery and keep it fully charged. Depending on your location, it may be difficult to purchase replacement batteries on short notice.
-
Page 86: Using The Charger
Using the Charger • Do not move the charger or touch the battery during charging; failure to observe this precaution could in very rare instances result in the charger showing that charging is complete when the battery is only partially charged. Remove and reinsert the battery to begin charging again. -
Page 87: Specifications
Specifications Nikon D780 Digital Camera Type Type Single-lens reflex digital camera Lens mount Nikon F mount (with AF coupling and AF contacts) Effective Nikon FX format angle of view Effective pixels Effective 24.5 million pixels Image sensor Type 35.9 × 23.9 mm CMOS sensor Total pixels 25.28 million... - Page 88 Storage • FX (36×24) image area: - 6048 × 4024 (Large: 24.3 M) - 4528 × 3016 (Medium: 13.7 M) - 3024 × 2016 (Small: 6.1 M) • DX (24×16) image area: - 3936 × 2624 (Large: 10.3 M) - 2944 × 1968 (Medium: 5.8 M) - 1968 ×...
- Page 89 Storage Auto, Standard, Neutral, Vivid, Monochrome, Portrait, Landscape, Flat, Creative Picture Controls (Dream, Picture Morning, Pop, Sunday, Somber, Dramatic, Silence, Control Bleached, Melancholic, Pure, Denim, Toy, Sepia, Blue, System Red, Pink, Charcoal, Graphite, Binary, Carbon); selected Picture Control can be modified; storage for custom Picture Controls SD (Secure Digital) and UHS-II compliant SDHC and Media...
- Page 90 Viewfinder Focusing Type B BriteView Clear Matte Mark VIII screen (with screen AF-area brackets; framing grid can be displayed) Reflex mirror Quick return Pressing Pv button stops lens aperture down to value Depth-of-field selected by user (A and M modes) or by camera (P and S preview modes) Lens aperture Instant return, electronically controlled...
- Page 91 Shutter Electronically-controlled vertical-travel focal-plane Type mechanical shutter; electronic front-curtain shutter; electronic shutter –30 s (choose from step sizes of 8000 Speed extendable to 900 s in mode M); Bulb; Time; X200 Flash sync s; synchronizes with shutter at s or slower •...
- Page 92 Exposure • Viewfinder photography: TTL exposure metering using RGB sensor with approximately 180K (180,000) Metering pixels system • Live view: TTL exposure metering performed by image sensor • Matrix: 3D color matrix metering III (type G, E, and D lenses); color matrix metering III (other CPU lenses); color matrix metering available with non-CPU lenses if user provides lens data •...
- Page 93 Exposure Exposure meter Combined CPU and AI coupling b : Auto, P: programmed auto with flexible program, S: shutter-priority auto, A: aperture-priority auto, M: manual • EFCT Special effects modes: j night vision; f super Mode vivid; d pop; e photo illustration; k toy camera effect;...
- Page 94 Autofocus • Viewfinder photography: TTL phase detection performed using Advanced Multi-CAM 3500 II autofocus sensor module with support for 51 focus points (including 15 cross-type sensors; f/8 supported Type by 11 sensors); autofocus fine-tuning supported • Live view: Hybrid phase-detection/contrast-detect AF performed by image sensor;...
- Page 95 Autofocus • Viewfinder photography: Single-point AF, 9-, 21-, or 51- point dynamic-area AF, 3D-tracking, group-area AF, auto-area AF • AF-area mode Live view: Pinpoint AF (still photography only, single- servo AF/AF-S), single-point AF, dynamic-area AF (still photography only, continuous-servo AF/AF-C), wide- area AF (S), wide-area AF (L), auto-area AF Focus can be locked by pressing shutter-release button Focus lock...
- Page 96 Accessory ISO 518 hot-shoe with sync and data contacts and shoe safety lock i-TTL flash control, radio-controlled Advanced Wireless Nikon Lighting, optical Advanced Wireless Lighting, modeling Creative illumination, FV lock, Color Information Lighting Communication, auto FP high-speed sync, AF-assist for...
- Page 97 Movie Metering TTL metering using camera image sensor system Metering Matrix, center-weighted, or highlight-weighted mode • 3840 × 2160 (4K UHD); 30p (progressive), 25p, 24p • 1920 × 1080; 120p, 100p, 60p, 50p, 30p, 25p, 24p • 1920 × 1080 (slow-motion); 30p ×4, 25p ×4, 24p ×5 Frame size * Actual frame rates for 120p, 100p, 60p, 50p, 30p, 25p, (pixels) and...
- Page 98 Movie Manual selection (ISO 100 to 51200; choose from step ISO sensitivity sizes of EV) with additional options available (Recommended equivalent to approximately 0.3, 0.5, 0.7, 1, or 2 EV (ISO Exposure 204800 equivalent) above ISO 51200; auto ISO Index) sensitivity control (ISO 100 to Hi 2) available with selectable upper limit Active...
- Page 99 Playback Full-frame and thumbnail (4, 9, or 72 images or calendar) playback with playback zoom, playback zoom cropping, movie playback, photo and/or movie slide Playback shows, histogram display, highlights, photo information, location data display, picture rating, auto image rotation, and index marking Interface Type C USB connector (SuperSpeed USB);...
- Page 100 Wi-Fi/Bluetooth • Standards: - IEEE 802.11b/g/n (Africa, Asia, and Oceania) - IEEE 802.11b/g/n/a/ac (Europe, U.S.A., Canada, and Mexico) - IEEE 802.11b/g/n/a (other countries in the Americas) • Operating frequency: - 2412–2462 MHz (channel 11; Africa, Asia, and Oceania) - 2412–2462 MHz (channel 11) and 5180–5825 MHz (U.S.A., Canada, and Mexico) Wi-Fi - 2412–2462 MHz (channel 11) and 5180–5805 MHz...
- Page 101 Wi-Fi/Bluetooth • Communication protocols: Bluetooth Specification Version 4.2 • Operating frequency: - Bluetooth: 2402–2480 MHz Bluetooth - Bluetooth Low Energy: 2402–2480 MHz • Maximum output power (EIRP): - Bluetooth: –2.6 dBm - Bluetooth Low Energy: –4.1 dBm Approximately 10 m (32 ft) Range (line of * Without interference.
- Page 102 Nikon reserves the right to change the appearance and specifications of the hardware and software described in this manual at any time and without prior notice. Nikon will not be held liable for damages that may result from any mistakes that this manual may contain.
- Page 103 ❚❚ MH-25a Battery Charger Rated input AC 100–240 V, 50/60 Hz, 0.23–0.12 A Rated output DC 8.4 V/1.2 A Supported EN-EL15b rechargeable Li-ion batteries batteries Approx. 2 hours and 35 minutes * Time required to charge battery at an ambient Charging time temperature of 25 °C (77 °F) when no charge remains...
- Page 104 ❚❚ EN-EL15b Rechargeable Li-ion Battery: Type Rechargeable lithium-ion battery Rated capacity 7.0 V/1900 mAh Operating 0 °C–40 °C (+32 °F–104 °F) temperature Dimensions Approx. 40 × 56 × 20.5 mm (1.6 × 2.2 × 0.8 in.) (W× H × D) Weight Approx.
- Page 105 D Disposing of Data Storage Devices Please note that deleting images or formatting memory cards or other data storage devices does not completely erase the original image data. Deleted files can sometimes be recovered from discarded storage devices using commercially available software, potentially resulting in the malicious use of personal image data.
-
Page 106: Supported Standards
D Supported Standards • DCF Version 2.0: The Design Rule for Camera File System (DCF) is a standard widely used in the digital camera industry to ensure compatibility among different makes of camera. • Exif version 2.31: The camera supports Exif (Exchangeable Image File Format for Digital Still Cameras) version 2.31, a standard introduced with the goal of improving the interoperability of printers and digital cameras, making it easier to produce high-quality prints. -
Page 107: Approved Memory Cards
Approved Memory Cards • The camera can be used with SD, SDHC, and SDXC memory cards. • UHS-I and UHS-II are supported. • Cards rated UHS Speed Class 3 or better are recommended for movie recording and playback. Slower speeds may result in recording or playback being interrupted. •... -
Page 108: Battery Endurance
• Photographs, single-frame release mode: Approximately 2260 (CIPA standard • Photographs, continuous release modes: Approximately 4570 (Nikon standard • Movies: Approximately 95 minutes Actions such as the following can reduce battery endurance: • Using the monitor, for example for live view photography •... -
Page 109: Battery Performance
To ensure that you get the most from rechargeable Nikon EN-EL15b batteries: • Keep the battery contacts clean. Soiled contacts can reduce battery performance. • Use batteries immediately after charging. Batteries will lose their charge if left unused. 1 EN-EL15a/EN-EL15 batteries can also be used. Note, however, that fewer pictures may sometimes be taken on a single charge with the EN-EL15 than with an EN-EL15b/EN-EL15a. - Page 110 4 Actual battery endurance as measured under conditions specified by the Camera and Imaging Products Association (CIPA). Measured at 23 °C/73.4 °F (±2 °C/3.6 °F) with an AF-S NIKKOR 24–120mm f/4G ED VR lens. Figures are for a 32 GB SanDisk SD UHS-II memory card (SDSDXPK-032G-JNJIP –...
-
Page 111: Trademarks And Licenses
Trademarks and Licenses • The SD, SDHC, and SDXC logos are trademarks of SD-3C, LLC. • Windows is either a registered trademark or a trademark of Microsoft Corporation in the United States and/or other countries. • Apple®, App Store®, the Apple logos, iPhone®, iPad®, iPod touch®, Mac, macOS, and OS X are trademarks of Apple Inc. - Page 112 Wi-Fi Alliance. • All other trade names mentioned in this manual or the other documentation provided with your Nikon product are trademarks or registered trademarks of their respective holders. Use of the Made for Apple badge means that an accessory has been...
- Page 113 D Unicode® Character Database License (Unicode® Character Database) The software for this product uses the Unicode® Character Database License open-source software. The terms of the software license are as follows: COPYRIGHT AND PERMISSION NOTICE Copyright © 1991-2019 Unicode, Inc. All rights reserved. Distributed under the Terms of Use in https://www.unicode.org/copyright.html.
- Page 114 THE DATA FILES AND SOFTWARE ARE PROVIDED "AS IS", WITHOUT WARRANTY OF ANY KIND, EXPRESS OR IMPLIED, INCLUDING BUT NOT LIMITED TO THE WARRANTIES OF MERCHANTABILITY, FITNESS FOR A PARTICULAR PURPOSE AND NONINFRINGEMENT OF THIRD PARTY RIGHTS. IN NO EVENT SHALL THE COPYRIGHT HOLDER OR HOLDERS INCLUDED IN THIS NOTICE BE LIABLE FOR ANY CLAIM, OR ANY SPECIAL INDIRECT OR CONSEQUENTIAL DAMAGES, OR ANY DAMAGES WHATSOEVER RESULTING FROM LOSS OF USE, DATA OR PROFITS, WHETHER IN AN...
-
Page 115: Notices
Use the interface cables sold or provided interference to radio or television by Nikon for your equipment. Using reception, which can be determined by other interface cables may exceed the turning the equipment off and on, the limits of Class B Part 15 of the FCC rules. - Page 116 Power Cable At voltages over AC 125 V (U.S.A. only): The power cable must be rated for the voltage in use, be at least AWG no. 18 gauge, and have SVG insulation or better with a NEMA 6P-15 plug rated for AC 250 V 15 A. Notice for Customers in Canada CAN ICES-3 B / NMB-3 B Notices for Customers in Europe...
-
Page 117: Bluetooth And Wi-Fi (Wireless Lan)
FCC WARNING The FCC requires the user to be notified that any changes or modifications made to this device that are not expressly approved by Nikon Corporation may void the user’s authority to operate the equipment. Technical Notes... - Page 118 • Consult the dealer or an experienced radio/TV technician for help. Co-location This transmitter must not be co-located or operated in conjunction with any other antenna or transmitter. Nikon Inc., 1300 Walt Whitman Road, Melville, New York 11747-3064, U.S.A. Tel.: 631-547-4200 Technical Notes...
- Page 119 Notice for Customers in Europe and in Countries Complying with the Radio Equipment Directive Hereby, Nikon Corporation declares that the radio equipment type D780 is in compliance with Directive 2014/53/EU. The full texts of the EU declarations of conformity are available at the following internet addresses: https://imaging.nikon.com/support/pdf/DoC_N1722.pdf...
- Page 120 Notice for Customers in Singapore Trade Name: Model: D780 This device complies with radio-frequency regulations. The content of certification labels not affixed to the device is given below. Complies with IMDA Standards DA103423 Notice for Customers in Nigeria Connection and use of this communications...
- Page 121 Certificates Technical Notes...
-
Page 122: Kit Lens Manual
Kit Lens Manual Kit Lenses AF-S NIKKOR 24–120mm f/4G ED VR Lens Manual Note that lens kits may not be available in some countries or regions. AF-S NIKKOR 24–120mm f/4G ED VR Lens Manual... -
Page 123: Parts Of The Lens
❚❚ Parts of the Lens The parts of the AF-S NIKKOR 24–120mm f/4G ED VR are listed below. 5 6 7 8 9 10 11 12 13 Lens hood Focus distance mark Lens hood alignment mark Focus ring Lens mounting mark ( 0 23) Lens hood lock mark Lens hood mounting mark Rubber lens-mount gasket... - Page 124 Lens construction elements, 3 aspherical lens elements, and lens elements with Nano Crystal Coat) 84° – 20° 20´ (Nikon FX-format D-SLR cameras) Angle of view 61° – 13° 20´ (Nikon DX-format D-SLR cameras) Focal length scale Graduated in millimeters (24, 28, 35, 50, 70, 85, 120)
- Page 125 • Nikon will not be held liable for damages that may result from any mistakes that this manual may contain. AF-S NIKKOR 24–120mm f/4G ED VR Lens Manual...
-
Page 129: Warranty Terms - Nikon Europe Service Warranty
Nikon Europe B.V. will, without charge for labor and parts, repair the product in the terms and conditions set as below. Nikon reserves the right (at its sole discretion) to replace or repair the product. - Page 130 • any damage resulting from modifications or adjustments which may be made to the product, without the prior written consent of Nikon, in order to comply with local or national technical standards in force in any other country than the ones for which the product was originally designed and/or manufactured.
- Page 131 Notice: An overview of all authorized Nikon Service Stations can be found online by following this Link (URL = https://www.europe-nikon.com/service/).
- Page 132 Nikon D780 No reproduction in any form of this manual, in whole or in part (except for brief quotation in critical articles or reviews), may be made without written authorization from NIKON CORPORATION. AMA17061 Printed in Europe SB9L01(11) 6MB46311-01...
Need help?
Do you have a question about the D780 and is the answer not in the manual?
Questions and answers