Table of Contents
Advertisement
Quick Links
3
STEAM LOCOMOTIVE UPGRADE KIT
INSTALLATION MANUAL
Compatibility
This Proto-Sound 3.0 Steam Locomotive Upgrade Kit is compatible with any AC or DC
Powered locomotive equipped with a DC can motor and motor flywheel. The locomotive
must be large enough to house the electronics. The instructions herein are generic in
nature and will not provide the installer with specific installation details for specific
locomotives. Consult the individual item's operator's manual for specific instructions on
how to disassemble the locomotive prior to installing the upgrade kit.
WARNING: This product is not covered by a warranty unless installed by an M.T.H.
Authorized Conversion Center.
PLEASE READ BEFORE USE AND SAVE FOR REFERENCE
www.mthtrains.com
Advertisement
Table of Contents

Related Manuals for MTHTrains Proto-Sound 3.0


Summary of Contents for MTHTrains Proto-Sound 3.0
- Page 1 INSTALLATION MANUAL Compatibility This Proto-Sound 3.0 Steam Locomotive Upgrade Kit is compatible with any AC or DC Powered locomotive equipped with a DC can motor and motor flywheel. The locomotive must be large enough to house the electronics. The instructions herein are generic in nature and will not provide the installer with specific installation details for specific locomotives.
-
Page 2: Table Of Contents
Mounting The Proto-Sound 3.0 Board ........10... -
Page 3: Contents Of The Kit
O) Nuts 6/32 (3) P) Screw 6/32 x 8 mm (1) C) Tender harness (1) Q) Plastic Wire Sleeve D) Proto-Sound 3.0 metal heat sink bracket (1) (for wire managment) (1) E) Proto-Coupler, long (1) R) Shrink tubing (1) F) Tender Back-up light (1) S) Wire Ties (7) (6) 4”, (1) 7”... - Page 4 (H) Locomotive Wire Harness w/Tach Reader (BC-1000003) (J) Locomotive Headlight (CA-00000078) (K) Tach Reader Brackets (L) Tach Tape (BE-0000151) Mabuchi / IDG (27mm Flywheel) (pictured above) Pittman IH-0000475 (IH-0000479) (30mm Flywheel) (not pictured) IH-0000478 Proto-Sound 3.0 Upgrade Kit Installation Guide...
- Page 5 (P) 6/32 Screw x 8mm (IA-0000050) ® Shrink Tubing (S) Wire Ties (U) Headlight Grommet (T) Inductor (IH-0000010) (AI-0000044) (X) Coupler Insulator (ID-0000123) (V) Loco Harness Spacer (BD-0000065) (W) Pittman Motor Tach Bracket Screws (IA-0000466) (IA-0000375) (6-32) (8-32) Proto-Sound 3.0 Upgrade Kit Installation Guide...
-
Page 6: Required Tools
As ESD safe work area is an area set aside in your workshop that is electrically grounded and includes anti-static mats and grounding straps Grounding Strap ESD Mat Work Only in an ESD Safe Zone Proto-Sound 3.0 Upgrade Kit Installation Guide... -
Page 7: Locomotive Inspection & Review
Part of the plastic wire tube (Q) may be used for this purpose. Make sure pickup rollers are clean & lubed and roll freely. Proto-Sound 3.0 Upgrade Kit Installation Guide... -
Page 8: Preparing The Tender For The Upgrade
Preparing The Tender For The Proto-Sound 3.0 Upgrade Before you can install the Proto-Sound 3.0 components into your tender, any existing sound boards or reversing units must be removed. The Proto-Sound 3.0 Kit contains all the necessary electronics your locomotive requires to operate. -
Page 9: Installing The Proto-Sound 3.0 Components Into The Tender
B) Proto-Sound 3.0 plastic mounting bracket (1) P) Screw 6/32 x 8 mm (1) C) Tender harness (1) Q) Plastic Wire Sleeve D) Proto-Sound 3.0 metal heat sink bracket (1) (for wire managment) (1) E) Proto-Coupler, long (1) R) Shrink tubing (1) F) Tender Back-up light (1) S) Wire Ties (7) (6) 4”, (1) 7”... -
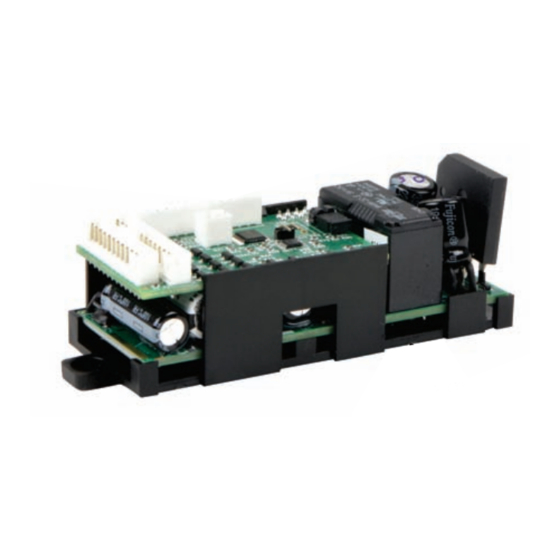
Page 10: Mounting The Proto-Sound 3.0 Board
Remove the speaker (I) from the protective packaging. Note: Be careful not to damage the speaker cone. Place the Proto-Sound 3.0 board/plastic mounting bracket (A/B) in the tender to verify the best location to mount the plastic mounting bracket (B) and the metal heat sink bracket (D) to the tender floor. - Page 11 Drill the holes as marked with the proper drill size. A 5/32” bit will be required for the Proto-Sound 3.0 plastic mounting bracket (B) and heat sink bracket (D). De-burr the holes slightly using a larger drill bit (3/8”) or a deburring tool.
- Page 12 Mounting The Proto-Sound 3.0 Board Cont’d Mount the plastic mounting bracket (B) containing the Proto-Sound 3.0 board (A) using the 2 of the screws (N) and nuts (O) Mount the Proto-Sound 3.0 plastic mounting bracket Apply white thermally conductive grease to the bridge rectifier on the Proto-Sound 3.0 board.
-
Page 13: Installing The Proto-Coupler
Mounting The Proto-Sound 3.0 Board Cont’d Secure the metal heat sink bracket (D) to the bridge rectifier using screw (P) Note: If screw is too long, cut it down so it does not hit the relay Apply thermal conductive grease to the metal heat sink bracket surface that contacts the frame and mount to the tender frame using screw (N) and nut (O). -
Page 14: Coupler Installation
Coupler Installation A plastic insulator, item EE in the parts list of your Proto-Sound 3.0 Upgrade Kit has been included with the rest of your Proto-Sound 3.0 Upgrade Kit parts. This insulator should be inserted between the coupler and the spring, washer and the C clip that holds the coupler to the T-Bar and truck bolster. -
Page 15: Optional Front Proto-Coupler Wiring
Optional Front Proto-Coupler Wiring *If front proto-coupler is desired purchase a coupler DD-0000032 and give up Headlight Control. Power headlight as it was powered prior to Proto-Sound 3.0 upgrade. Use the headlight connector (Blue) to control the front proto-coupler. Move the purple wire in the tender 12 pin connector from pin 5 location (purple wire next to green wire) to pin 9 location (between brown and blue wires). -
Page 16: Installing The Tender Harness
Installing The Tender Harness, Speaker, Switches & Lights *Note: If tender has harness to connect an auxiliary tender, connect the back-up light and coupler connectors to the harness. Use switch to select light/coupler operation in tender or auxiliary tender. Proto-Sound 3.0 Upgrade Kit Installation Guide... - Page 17 Proto-Sound 3.0 Board Connections These Connections DCS Jumper Are NOT Used (Remove for DCC Operation) 8 PIN 12 PIN 5 PIN 7 PIN 4 PIN Proto-Sound 3.0 Upgrade Kit Installation Guide...
- Page 18 Installing The Tender Harness, Speaker, Switches & Lights Attach tender harness (C) to the Proto-Sound 3.0 board (A) noting the connectors all should fit in their respective locations. See previous pages for locations. Take care to insert the correct plug into the correct connector on the Proto- Sound 3.0 board.
-
Page 19: Soldering Speaker Connections
Solder the yellow and white wires to the speaker (I) making sure soldered wires do not short to speaker frame. WARNING: If either wire shorts to the speaker frame the Proto-Sound 3.0 electronics will be damaged. Proto-Sound 3.0 Upgrade Kit Installation Guide... -
Page 20: Installing The Volume Pot
Note: Volume pot not required for command operation. Solder gray and red wires together to get full volume in conventional mode and insulate the blue wire from chassis ground. Proto-Sound 3.0 Upgrade Kit Installation Guide... -
Page 21: Preparing The Locomotive For The Upgrade
Note: This would be a good time to grease the chassis gearbox and rotate the drive wheel assembly to verify that the drive assembly rotates freely. Follow the lubrication instructions in the locomotive’s operator’s manual. If some binding is found, correct before proceeding. Proto-Sound 3.0 Upgrade Kit Installation Guide... -
Page 22: Determining The Locomotive Motor Type
Unscrew the top motor mount screws Screw the Tach Reader bracket onto so that the tach reader bracket can be the top of the Pittman motor using installed onto the Pittman motor. screws (AA) as shown. Proto-Sound 3.0 Upgrade Kit Installation Guide... -
Page 23: Installing The Flywheel Tach Tape
(measure flywheel diameter and select proper tape) Apply tape end with the largest white portion first, wrap the tape around the flywheel until it overlaps. Reassemble the flywheel onto the drive shaft (Pittman motors only). Proto-Sound 3.0 Upgrade Kit Installation Guide... -
Page 24: Mounting The Tach Reader To The Tach Bracket
Once the spacer has been removed, The tach reader spacer can be resolder the tach reader to the tach removed by unsoldering the tach reader circuit board. reader prongs on either side of the spacer as seen above. Proto-Sound 3.0 Upgrade Kit Installation Guide... -
Page 25: Installing The Proto-Sound 3.0 Harness Into The Locomotive
Use the spacer (Y) if neccessary. Spacer (Z) will prevent gap from If needed, the spacer goes beneath appearing above plug. the 10- Pin connector. It may need to be cut to fit. Proto-Sound 3.0 Upgrade Kit Installation Guide... -
Page 26: Connecting Motor, Ground & Pickup Wires
Connecting Headlight Bulb & Wire Harness Install the Headlight bulb (J) into the proper engine location and connect the headlight bulb wire connector (blue) to the engine harness connector (blue) attached to the sky blue and purple wires. Proto-Sound 3.0 Upgrade Kit Installation Guide... -
Page 27: Installing Headlight Into Railking Steam Engines
(U) into the hole. RailKing steam engines. After the rubber grommet has been inserted, push the headlight bulb through the grommet from the bottom of the bracket. Proto-Sound 3.0 Upgrade Kit Installation Guide... -
Page 28: Connecting The Proto-Sound 3.0 Harness To The Smoke Unit
Connecting The Proto-Sound 3.0 Harness To The Smoke Unit Solder Gray and Green wires to the smoke unit fan motor. If the smoke unit green wire motor terminals are hooked up backward, gray wire the impeller will spin in reverse and fail to pump out the smoke. -
Page 29: Other Proto-Smoke Circuit Wiring Methods
Please see the picture below showing one other style found in RK Allegheny, Big Boy, and Challengers. solder solder Cut traces here to put heating elements in parallel Proto-Sound 3.0 Upgrade Kit Installation Guide... -
Page 30: Connecting Power To The Constant Voltage Board
After soldering the inductor into Install the inductor between the place, use shrink tubing and engine’s power pickup lead and the electrical tape to insulate the power lead going to the constant inductor completely. voltage board. Proto-Sound 3.0 Upgrade Kit Installation Guide... -
Page 31: Wire Management/Short Circuit Prevention
Use the shrink tubing (R) supplied in the kit for this purpose whenever necessary. Add 7” wire tie (S) to tender cable to provide “strain” relief. Place the wire tie about 4” from the plug. Proto-Sound 3.0 Upgrade Kit Installation Guide... -
Page 32: Testing The Proto-Sound 3.0 Installation
Install the tender and boiler shells on the tender and engine chassis being very careful not to pinch any wires in the process and repeat the tests above. Proto-Sound 3.0 Upgrade Kit Installation Guide... -
Page 33: Loading Proto-Sound 3.0 Files Into Locomotive
Sound Files can be used to program your Proto-Sound 3.0 Steam Upgrade circuit board. Some sound files found on the regular M.T.H. Website will not work in the Proto-Sound 3.0 Upgrade circuit board. It is important to choose the correct file, PS2.0 Upgrade file or a Production 3volt PS2.0 sound file. - Page 34 STEP 1: The Proto-Sound 3.0 upgrade kit utilizes a special Proto-Sound 3.0 board that uses the Proto-Sound Upgrade sound file or 3-volt Proto-Sound 2.0 Production sound file. To find a 3-volt sound file, go to www.mthtrains.com and select “Service”. Then select “Proto-Sound Files” from the available options.
- Page 35 DCS feature under Engine Setup. Add the engine to the DCS system. The engine will add, but no name will appear next to the engine address number. Use the edit name feature to add the engine name (limit 16 characters). Proto-Sound 3.0 Upgrade Kit Installation Guide...
-
Page 36: Proto-Sound 3.0 Operation Instructions
Conventional Proto-Sound 3.0 Operation This manual contains the operating instructions for Proto-Sound 3.0 in conventional mode only. Instructions for accessing DCS command mode features accompany the DCS Remote Control System equipment. Instructions for DCC Command operation can be found on MTH’s website. - Page 37 Speed Control On/Off 1 Horn/Whistle, 2 Bells (from Neutral only) Lock into a Direction 1 Horn/Whistle, 3 Bells Ditch Lights (On/Off) 1 Horn/Whistle, 4 Bells Reset to Factory Defaults 1 Horn/Whistle, 5 Bells (from Neutral only) Proto-Sound 3.0 Upgrade Kit Installation Guide...
- Page 38 PFA. The reverse unit is temporarily disabled so that the train will not move as you use the Direction button to trigger the sounds. Proto-Sound 3.0 has disabled operator control over the Horn and Bell buttons until the full PFA sequence is complete.
- Page 39 Proto-Sound engine, PFA are triggered differently and that engine's motor- ® disable feature will not be active when you run PFA in Proto-Sound 3.0). • PFA can be triggered from Neutral. It will operate the same as if triggered while in motion except that, at the conclusion of the PFA, the engine will depart in the next direction of travel, as opposed to the direction it was traveling before entering Neutral.
- Page 40 Speed Control M.T.H. engines equipped with Proto-Sound 3.0 have speed control capabilities that allow the engine to maintain a constant speed up and down grades and around curves, much like an automobile cruise control. You can add or drop cars on the run, and the engine will maintain the speed you set.
- Page 41 Neutral to Normal Condition Automatic Sound Effects Certain Proto-Sound 3.0 sound effects automatically play in programmed conventional mode conditions: • Squealing Brakes play any time the engine's speed decreases rapidly. • Cab Chatter plays at random intervals when the engine idles in neutral.
-
Page 42: Troubleshooting
Troubleshooting Proto-Sound® 3.0 Problems Although Proto-Sound 3.0 has been designed and engineered for ease of use, you may have some questions during initial operation. The following table should answer most questions. If your problem cannot be resolved with this table, contact M.T.H. for assistance (www.mthtrains.com, e-mail: parts@mth- railking.com, Fax: 410-423-0009, Phone: 410-381-2580, Mail: 7020 Columbia... - Page 43 Volume Solution ® The sounds seem distorted, especially Proto-Sound 3.0 volume is set too high. when the Horn or bell is activated. Turn the volume control knob on the bottom of the chassis counter-clockwise to reduce the volume.
-
Page 44: Service & Warranty Information
See our website at www.protosound2.com or call 410-381-2580 to identify an Authorized M.T.H. Proto-Sound 2.0 Conversion Center near you. M.T.H. Proto-Sound 3.0 Upgrade Kits are warrantied for 90 Days from the date of installation by an Authorized M.T.H. Proto-sound 2.0 Conversion Center against defects in material or workmanship.
Need help?
Do you have a question about the Proto-Sound 3.0 and is the answer not in the manual?
Questions and answers