Table of Contents
Advertisement
Advertisement
Table of Contents

Related Manuals for I-Gard DSP-OHMNI


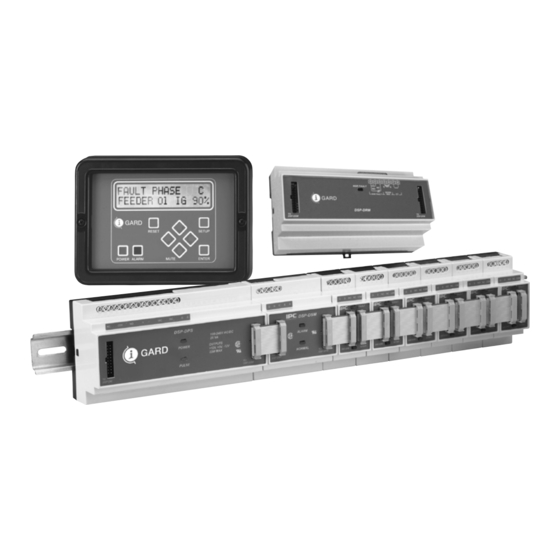
Summary of Contents for I-Gard DSP-OHMNI
- Page 1 DSP-OHMNI C-EG30EM Instruction Manual V2, June 2020...
- Page 2 ABOUT I-GARD I-Gard’s commitment to electrical safety provides both industrial and commercial customers with the products needed to protect their electrical equipment and the people that operate them. As the only electrical-safety focused company whose product portfolio includes neutral grounding resistors, high-resistance grounding systems and optical arc mitigation, we take pride in our technologies that reduce the frequency and impact of electrical hazards, such as arc flash and ground faults.
-
Page 3: Table Of Contents
TABLE OF CONTENTS SUBJECT 1. Introduction ..........................2. Application ..........................3. Installation ..........................4. Wiring ............................5. Setup ............................6. Alarm Settings ......................... 7. Operation ..........................8. Communications ........................9. Specifications .......................... 10. Outline Dimensions ......................... 11. How To Videos ......................... TABLES Table 1: DDR2 Types ........................ - Page 4 Figure 16: Feeder Module Successful ..................Figure 17: Pulse Settings Page ..................... Figure 18: Typical Examples of Pulse Circuit Connection ............Figure 19: Change of Date/Time Settings Warning ..............Figure 20: Date Settings Page ...................... Figure 21: Normal Home Screen ....................Figure 22: System Leakage Current Ig ..................
-
Page 5: Introduction
10% and 90% may be set as desired. Additionally, the DSP-OHMNI has two TRIP modes. It can be set up to control circuit breakers to TRIP on the occurrence of a single fault with or without time delay, or if the feeder circuit ground fault current exceeds 100A on two (phase to ground to phase) faults (this can only occur when two faults exist since the current on a single fault cannot exceed the grounding resistor rated current). - Page 6 This module must be installed following the system module (DSP-DSM) in the 35mm Din Rail line-up of the DSP-OHMNI system. The DSP-DRM uses external I-Gard zero se- quence current sensors and a NGRS sensing resistor which provide voltage and current measurements of the neutral grounding resistor to the (DSP-DSM).
-
Page 7: Application
The DSP-ADM is an arc detection module that uses air pressure and/or light sensing transducers to continuously monitor up to 21 possible fault sources and offer a first line of defense in the arc detection feature of the DSP-OHMNI system. It is used to provide protection against arc flash hazards by lowering the incident energy level to safer values protecting both, personnel and equipment, from severe damages. -
Page 8: Table 1: Ddr2 Types
The OHMNI-PM is connected between ground and the neutral (star) point of the transformer on wye systems. On delta systems an artificial neutral device (I-Gard type DDAI) is required to provide a neutral (star point). Both OHMNI-PM and DDAI devices are selected for appropriate current ‘let-through’, i.e.: the current, which will flow to ground, if there is a direct short from line to ground (on any one phase). -
Page 9: Installation
1 DSP-DSM, 1 DSP-DRM and a number of DSP-DFM feeder modules as required with 1 for each branch protected. Additionally there will be a DSP-OHMNI-PM pulsing resistor to ground the system. A voltage-sensing resistor DDR2 is required for the DSP-DSM input, as well as one current sensor for each DSP-DFM for current detection. See Table 2 for typical requirements. -
Page 10: Wiring
Figure 3. Ribbon cables are available in different lengths as shown in Table 4. For other lengths contact I-Gard. The RC-cables are used for module-to-module connections and are short in length. Note the orientation of the plug as marked on the DSP-DM display module. - Page 11 Figure 1b: DSP-DCM Wiring Figure 1c: System Module DSP-DSM Wiring...
- Page 12 Figure 1d: Power Supply DSP-DPS Wiring Figure 2: Preferred Feeder Module DSP-DFM Wiring...
- Page 13 Note: For main-tie-main systems and multiple sources with tie breakers the priority buses can be joined together with the use of I-Gard devices DSP-CA(S) and DSP-CA modules. The DSP-CA module converts ribbon cable to an 8-conductor shielded cable for this purpose. The DSP-CA(S) does the same thing except that it includes an electronic switch to make or break the connections when the tie breakers are closed or open.
- Page 14 RS-485 to RS-232 converter to a PC with supporting software. Note: the user must supply software to read the registers of the DSP-OHMNI system. The alarm contacts are available at the DSP-DPS as a Form C type and should be connected to operate a horn or other means to alert an operator to the fact that a fault has occurred on the HRG system.
- Page 15 Pulse current is provided at the DSP-DPS (+) and (-) terminals, which may be directly connected to the pulse Relay in the DSP-OHMNI-PM. It is important to observe the polarity of the connection. This 12V wiring need not be shielded but should be 14 or 16 AWG switchboard wire for durability.
-
Page 16: Setup
5. SETUP Settings On a new installation some simple set-up is required with at least maximum system current (NGR set-up) and feeder modules being set prior to use of the equipment. Optional settings are communications and pulse control. On a new installation some simple set-up is required with at least maximum system current (NGR set-up) and feeder modules being set prior to use of the equipment. - Page 17 Figure 9: Password Settings Page Enter the new password and press Change Password. The password must be only numbers up to 8 characters. The device will return to the User mode after save the data. It is possible to set a Password Hint to help to remember the password in the future.
-
Page 18: Alarm Settings
Figure 11: Communications Set-up MODBUS RTU Figure 10 shows the first set-up screen that will be encountered – COMMS set-up mode. The DSP-OHMNI is normally shipped with a 57600 Baud setup. The DSP system must be identified by an address number from 01 to 32, to distinguish between it and other MOD- BUS devices that may be connected on the same MODBUS network. - Page 19 The user may select from 10% to 90% of the neutral voltage displacement as a threshold in 10% increments. The DSP-OHMNI is normally shipped with 50% level selected. Changing this value will require the user to setup the feeder modules afterwards, since they are not automatically updated to the new alarm level. This will require Use of the next setup procedure.
- Page 20 Figure 13 shows the current feeder module configurations. Scroll to see all the feeders. To change the Feeder Configuration, press Add/Remove Feeder Module. Select the ID number to enter the set-up as follows: Figure 14: Feeder Module Selection, IDENT and Type selection After installation of feeder modules they must be given identification numbers from 01 to 50 (maximum) so that the display unit can determine which module it is talking to.
- Page 21 If a feeder module is configured to a particular I/D number, it must also have a defined TRIP setting. The trip mode must either be TRIP on 2nd fault or TRIP on first fault. The default is TRIP on 2nd fault. Click the trip mode drop down to change the trip mode to TRIP on 1st fault.
- Page 22 Figure 16: Feeder Module Successful Pulse Setup To setup Pulsing Settings, enter Admin mode, and from the HOME screen, press Settings ▸ PULSE CONTACTOR SETTINGS. Figure 17: Pulse Settings Page The pulse set-up screen allows the pulsing mode for fault location to be changed for different frequencies and mode of operation.
- Page 23 ON when the system is normal (no fault) and will open when pulsing is started, thus reducing current. DSP-OHMNI-PM grounding resistors require the inverter to be ON, in order to operate at the current rating indicated on the name plate.
-
Page 24: Table 5: Pulsing Frequency Selection
The interlock prevents pulsing from occurring when there is no fault on the system. Press to toggle ON or OFF to com- plete the pulse set-up. It is recommended to operate the DSP-OHMNI system with the lock ON. Clock Settings To setup the Pulsing Settings enter in the Admin mode, and from the HOME screen, press Settings ▸... -
Page 25: Operation
After filling all the fields, press Set Date and Clock. 7. OPERATION Normally with an un-faulted system and a recent RESET, the display module will display the normal home screen of Figure 21 with a green NORMAL indicator on the front panel of the DSP-TDM and no alarm. The system module will indicate a green NORMAL light and the DSP-DFM modules will show no light indication at all. - Page 26 Figure 22: System Leakage Current I Figure 23: Feeder Current I Only those DSP-DFM modules that have valid I/D settings will indicate successfully. All others will indicate as though they were not installed with status NOT DETECTED. Note: to identify which DSP-DFM is which, if not sure, the user can push the I/D/TEST button on each DSP-DFM until the status indicator on the feeder screen shows ‘Test’...
- Page 27 In User mode, the commands Interlock and Inverted Mode are blocked. Enter Admin mode to change this configura- tion. Faults can be located easily with the use of a flexcore sensor (I-Gard type TS-SENSOR). Following feeder fault iden- tification, faults may be traced by following the feeder circuits downstream with a multimeter. The flexcore sensor is wrapped around the feeder cable/duct and if a pulse is detected on the ammeter (DMM), then the circuit being tested is faulted and the detection process can be moved further down to a lower branch circuit.
- Page 28 Figure 26: New Home Screen indicates Pulsing ON 12V DC Pulse current is sent from the DSP-DPS ‘+’ and ‘-’ terminals to the DSP-OHMNI-PM neutral grounding resis- tor to energize the solid-state relay in the OHMNI-PM to modulate the ground fault current (if any). When finished with the pulse operation, press the home button to exit and return to the home screen.
- Page 29 3. Display The home screen will change to an alarm screen that indicates which phase is faulted, and the branch circuit that is affected. See Figure 27 for example. Figure 27: Alarm Screen The faulted feeder is identified by I/D number and name. The total system current IG will indicate the system cur- rent as determined by the voltage from the DDR2 voltage sensor unit .
- Page 30 Figure 28: Bus fault This screen may be observed under other situations as well. For example if a fault develops on a faulty DSP-DFM or the module is missing or a feeder has no protection on it at all, the same indication will result. Another situation might be on a main-tie-main system with two DSP systems and a fault develops on one side of the gear.
-
Page 31: Table 6: Fault Message List
Figure 30: Momentary Feeder Fault Example The logging function is part of the DSP-TDM display software which is constantly scanning the system module and the feeder modules status to determine if a TRIP, feeder fault, system fault or NGR fault occurs that was not there previously. - Page 32 The DSP-DRM is specifically designed for use in system voltages of up to 5kV. The DSP-DRM is designed to be used with an I-Gard zero sequence current sensor Type TxA or Rx-YA and a NGRS- XX resistor sensor installed with a neutral grounding transformer sized for a let-through current according to the specifications of the system in which it will be installed.
- Page 33 The DSP-DRM has one Form C output relay which can be used to give a door/panel mounted or remote indication of an NGR fault. DSP-DRM Operation with DSP-OHMNI system A DSP-DRM module must be present in the lineup of feeder modules In order to monitor the system ground resistor.
- Page 34 The health of the NGR is monitored. If the NGR becomes open or shorted this is an NGR FAULT. Such a fault is an- nunciated as shown in Figure 33 below. Figure 33: NGR Fault If a DSP-DRM is not connected, the following message will be reported: Figure 34: DSP-DRM Not Connected Pressing ENTER will terminate the set-up and self-test and the HOME screen will be returned.
- Page 35 DSP-ADM Installation (See Figure 46) The DSP-ADM is designed to be mounted in the DSP-OHMNI module array after (to the right of) the DSP-DFM feeder modules. The RC-3 ribbon cable supplies power to the DSP-ADM and allows communication to the main DSP-OHMNI system.
-
Page 36: Table 7: List Of Sensors For Dsp-Adm
Table 7: List of Sensors for DSP-ADM The internal Form C contact terminals NO 1, COM 2, NC 3 provide the output signal to the energy interruption circuit. This contact operates on signals from the sensors independently from the balance of the DSP-OHMNI system. DSP-ADM Setup The DSP-ADM does not require any setup on the DSP-TDM display module. - Page 37 Figure 36: Arc Detection Module status page with DSP-ADM present and no alarms active Arc Detection Mod Figure 37: Arc Detection Module status page with DSP-ADM present and flash alarm shown on channel Maintenance and Testing Due to the solid state design and the use of sealed components, it is not necessary to service the DSP other than occasionally dusting with a damp cloth or vacuum cleaner during regular switchboard maintenance.
-
Page 38: Communications
I-Gard offers comprehensive training, commissioning and inspection assistance by qualified engineers. For assis- tance with installation, set-up or testing, please call I-Gard toll free at 1-888-737-4787 (1-888-RESISTR). There are no user-serviceable parts in the DSP, therefore all service should be referred to qualified factory representatives, other than direct replacement of entire modules to I-Gard. -
Page 39: Table 8: Modbus Rtu Standard 8 Byte Holding Register Read Function (O3)
DSP MODBUS Output Structure Two functions are supported: Read Holding Register (03) and Set Coil (05) There are 156 registers available, which can be accessed by an external host system. This document summarizes the format and function of these registers. The request from the master is always 8 bytes long and are as shown in table 8 below. -
Page 40: Table 12: Returned Information From Dsp Following A Force Bit Request
The response of Table 12 will confirm this request: UNIT I/D FUNCTION COIL ADDRESS FORCE COIL High High High Table 12: Returned Information from DSP Following a Force Bit Request The registers can be read either one at a time or in a continuous block up to a maximum of 100 registers at a time. There are times when the DSP processor will not be able to respond to a request since it is busy with other tasks and no response will be returned. -
Page 41: Table 16: System Function Registers
REGISTER FUNCTION FORMAT DECRIPTION 40151 System lG current 0x00nn nn= 0-100% Total System leakage current lGt 40152 System Status 0x00nn 01= normal no fault 10= A phase low 20= B phase low 40= C phase low 70= all phases low 82= A phase faulted 84= B phase faulted 88= C phase faulted... -
Page 42: Specifications
9. SPECIFICATIONS Power Requirements DSP-DPS 100-240V, 50/60Hz or DC, 25V A Maximum Ratings DSP-DPS Control Voltage 250V AC/DC Dielectric Relay Contacts to Chassis 1500V rms. for 1 minute Control Terminals to Chassis 1500V rms. for 1 minute DC Output Maximum Rating 22W max for +5, +12 and 12V supplies Settings DSP-DSM System Module Alarm Level Pickup... -
Page 43: Outline Dimensions
E232710 Dimensions See Fig. 37 Note: I-Gard reserves the right to change specifications of products without notice. 10. OUTLINE DIMENSIONS Figure 38 shows typical dimensional details of the polymeric enclosures used for the modules. All have the same cross-section dimensions but with different widths as shown. - Page 44 MODULE WIDTH DSP-DFM 35mm (1.377 in.) DSP-DSM 70mm (2.755 in.) DSP-DPS 155mm (6.102 in.) DSP-DRM 155mm (6.102 in.) DSP-CAS 70mm (2.755 in.) DSP-CA 70mm (2.755 in.) DSP-ADM 155mm(6.102 in.) DSP-DCM 70mm (6.102 in.) Figure 39: DSP-DM Display Module with Cut-Out Detail Figure 40: DSP-DPS Power Supply Connections...
- Page 45 Figure 41: DSP-DPS System Module Connection...
- Page 46 Figure 43: DSP-DLM Logging Module Connections Figure 44: DSP-TDM Display Module Connections...
- Page 47 Figure 45: Typical DSP-DRM Installation Connections...
-
Page 48: How To Videos
This series of videos provides step-by-step answers to commonly asked questions about IC operation. Click on the video titles below to be redirected to each video on www.i-gard.com or, scan the QR code to be directed to the video on your smartphone. - Page 49 How to Edit Alarm Settings How to Set Date and Time How to Import and Export How to Set Password How to Configure MODBUS RTU How to Activate Pulsing How to Configure Feeder Modules How to Read and Interpret System Status How to Change Operating Language How to Identify Feeder Modules...
- Page 50 Phone: 905-673-1553 Fax: 905-673-8472 Toll Free: 1-888-737-4787 sales@i-gard.com www.i-gard.com...
Need help?
Do you have a question about the DSP-OHMNI and is the answer not in the manual?
Questions and answers