
Related Manuals for Acer n20


Summary of Contents for Acer n20
- Page 1 Quick Guide for Acer n20 Handheld...
- Page 2 Acer and its subsidiaries makes no representations or warranties, either expressed or implied, with respect to the contents hereof and specifically disclaims the implied warranties of merchantability or fitness for a particular purpose. Acer and its subsidiaries assume no responsibility for any damage or loss resulting from the use of this Acer n20 Quick Guide.
-
Page 3: Table Of Contents
Resetting your Acer n20 ....vii Locking your Acer n20 ....ix 1 Getting started Features summary. - Page 4 Using a Memory Stick ....24 Acer Versatile Connector ....26 2 Entering data in your Acer n20 Using the input panel .
-
Page 5: First Things First
First things first We would like to thank you for making Acer n20 your choice for your handheld needs. Your new sleek Acer n20 is a multi- functional tool packed with user-friendly features and high- performance applications designed to make organising work- related information and synchronising it with your personal activities a time-efficient task. -
Page 6: Your Guides
F i r s t t h i n g s f i r s t Your guides Your guides To help you use your Acer n20, we have designed a set of guides: For information on: Programs on your... -
Page 7: Proper Care And Usage Of Your Acer N20
Proper care and usage of your Acer n20 Your handheld’s rugged and tough construction is designed to provide you with years of reliable and trouble-free service. Observing the following general maintenance procedures will help ensure this: Take care not to scratch the screen of your handheld. Keep the screen clean. - Page 8 F i r s t t h i n g s f i r s t Taking care of your Acer n20 To perform a soft reset: • Using the tip of your stylus, lightly press the reset button inside the hole on the rear panel of your handheld.
-
Page 9: Locking Your Acer N20
NOTE: When you perform a hard reset, the current date and time are retained. Formats, preferences, and other settings are restored to their factory default settings. Locking your Acer n20 Your handheld is not just a financial investment but a wealthy source of personal information, some of which may be confidential so it is only logical to protect it from any unauthorized access. - Page 10 F i r s t t h i n g s f i r s t Locking your Acer n20 To assign a lock password On the Personal tab, tap Password. Select a password option. • Simple 4 digit password •...
-
Page 11: Getting Started
• Feature highlights of your Acer n20 • Acer n20 system tour • Step-by-step procedures on how to prepare your handheld for use • Basic concepts in using your Acer n20 Features summary Performance • Intel PXA250 Application Processor with Intel XScale technology •... -
Page 12: Connectivity
– Standard USB host connector Battery pack • Removable and rechargeable Lithium polymer battery – Acer n20 - 1000 mAH capacity battery pack – Acer n20w - 2000 mAH capacity battery pack • Operation time for normal usage – Acer n20 - 8 hours –... -
Page 13: Design And Ergonomics
Design and ergonomics Stylish, light and thin design • Specifications Acer n20 Height 12.9 cm Width 7.9 cm Depth 1.29 cm Weight 180g • User-friendly navigation features – Scroll wheel for one-hand operation – Directional pad for multi-directional scrolling in various menus and applications –... -
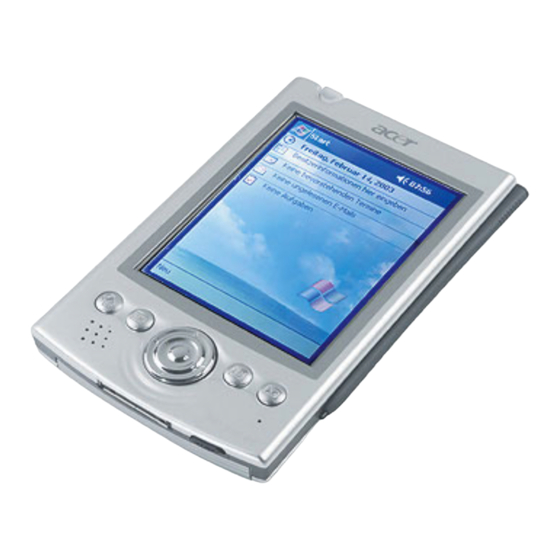
Page 14: System Tour
1 G e t t i n g s t a r t e d System tour System tour Front view Component Description Power button/ Press to turn on your handheld (LED lights LED indicator up green) if it is off and returns to the last screen that was displayed and off if it is on. - Page 15 Microphone Internal speaker NOTE: Refer to the Acer n20 Handheld Manual for instructions on how to reassign the hardware buttons to other applications installed on your handheld. If your handheld is turned off, pressing any Quick button turns on the handheld and opens the program assigned to that button.
-
Page 16: Left View
1 G e t t i n g s t a r t e d System tour To turn off the backlight: • Press the power button and hold it down for two seconds. Release the button when the backlight turns off. Left view Component Description... -
Page 17: Top View
Top view Component Memory Stick Accepts a Memory Stick, allowing you to slot add more memory, install add-on applications or use audio or text files stored in it for use with internal applications. You can also use it to back up data from your handheld. -
Page 18: Bottom View
1 G e t t i n g s t a r t e d Preparing to use your Acer n20 Bottom view Preparing to use your Acer n20 Perform first the following easy setup tasks to begin using your handheld: •... -
Page 19: Installing The Microsoft® Activesync® Software
® installing ActiveSync. • Do not copy the ActiveSync files to your computer’s hard disk. You must use the Acer n20 Handheld Companion CD to place the files in their proper locations and to decompress the files. To install the Microsoft Exit any open programs, including those that run at startup, and disable any virus-scanning software. -
Page 20: Installing The Battery Pack
1 G e t t i n g s t a r t e d Preparing to use your Acer n20 Click the buttons on the left pane to install each of the individual applications. • Outlook 2000 (recommended) • ActiveSync After installation, the ActiveSync icon will appear on your computer’s system tray (on the lower right-hand corner of the... - Page 21 Slide the battery release switch to the Unlock position (a), then pull out the battery pack from its bay (b). 1 G e t t i n g s t a r t e d Preparing to use your Acer n20...
-
Page 22: Connecting The Cradle
1 G e t t i n g s t a r t e d Preparing to use your Acer n20 IMPORTANT: Do not remove the battery pack for more than 30 minutes, unless you intend to use the expansion sleeve, otherwise you risk losing all data on the internal memory of your handheld. -
Page 23: Charging Your Acer N20
1 G e t t i n g s t a r t e d Preparing to use your Acer n20 Charging your Acer n20 For initial use, you need to charge your handheld for three hours. After that, you can charge it for a few minutes each day to recharge the battery to full capacity. -
Page 24: Setting Up Your Acer N20
1 G e t t i n g s t a r t e d Preparing to use your Acer n20 LED status during charging: • Charging: Flashing green • Charging complete: Steady green If the battery level becomes low in the course of normal use, a status icon appears on the handheld screen indicating low or very low battery status (refer to "Status icons"... -
Page 25: Performing The First Synchronisation Process
After completing the setup procedures you can now perform the first ActiveSync operation with the help of the 'New Partnership' setup wizard. 1 G e t t i n g s t a r t e d Preparing to use your Acer n20... - Page 26 1 G e t t i n g s t a r t e d Preparing to use your Acer n20 This wizard will help you: • Set up a partnership so you can synchronise information between your handheld and your computer •...
-
Page 27: Command Interface
Disconnect your handheld from your computer and you're ready to go! NOTE: If you have a wireless LAN card, you can synchronise remotely from your handheld. For the Acer n20w model, you can use the built-in IEEE 802.11b WLAN adapter. Command interface... -
Page 28: Status Icons
1 G e t t i n g s t a r t e d Command interface Status icons Following are some of the status icons you may see. Status icon Tap to view notification messages. Tap to switch Tap to change volume or mute all sounds. to a program. -
Page 29: Navigation Bar And Command Bar
Status icon Description Synchronisation is beginning or ending Synchronisation is occurring Notification messages were received Notification that one or more email messages were received If more notification icons need to be displayed than there is room to display them, the Notification icon icons. -
Page 30: Pop-Up Menus
1 G e t t i n g s t a r t e d Command interface • To see the name of a button, tap and hold the stylus on the button. Drag the stylus off the button so that the command is not carried out. -
Page 31: Notifications
Settings. In the Personal tab, tap Sounds & Notifications. The options you choose here are applied globally in your handheld. Customising your Acer n20 You can customise your handheld based on your personal requirements and preferences as well as depending on your usual work modes. - Page 32 1 G e t t i n g s t a r t e d Customising your Acer n20 The Settings window has three tabs—Personal, System, and Connections, each of which has its own set of options. Setting Personal Information...
-
Page 33: Adding And Removing Programs
You could add programs to your handheld either by using ActiveSync or by downloading the program from the Internet. For detailed instructions on how to add or remove programs, refer to the Acer n20 Handheld Manual. Description Set default number and time display formats and other related options. -
Page 34: Expansion Features
1 G e t t i n g s t a r t e d Expansion features Expansion features The slim and lightweight design of your Acer n20 belies the impressive expansion features that it is capable of. These expansion features includes the following: •... - Page 35 Insert the Memory Stick into the Memory Stick slot. Push the card into the slot using your finger until you feel the card lock and hear an audible system sound; this will signal that the card is already properly seated within the slot. To remove a Memory Stick Hold your handheld securely.
-
Page 36: Acer Versatile Connector
Connector to take advantage of the existing line of accessories available for the Acer s10 handheld series including the Travel Charger and the USB Sync Charge Cable. Refer to "Front view" on page 4 for the location of the Acer Versatile Connector. -
Page 37: Entering Data In Your Acer N20
• Use Microsoft information from your computer to your handheld. For instructions on using Microsoft data into your handheld, refer to the Acer n20 Handheld Manual. Using the input panel Use the input panel to enter information in any program on your handheld. -
Page 38: Writing On The Screen
For more detailed instructions on how to use the Letter Recognizer, Block Recognizer, or Transcriber to input data into your handheld, refer to the Acer n20 Handheld Manual. Writing on the screen In any program that accepts writing, such as the Notes program, and in the Notes tab of Calendar, Contacts, and Tasks, you can use your stylus to write directly on the screen. -
Page 39: To Create A Drawing
Tap Tools and then select a zoom level. For instructions on how to select, edit, and resize a drawing refer to the Acer n20 Handheld Manual. Recording a message In any program where you can write or draw on the screen, you can also quickly capture thoughts, reminders, and phone numbers by recording a message. -
Page 40: To Play A Recording
2 E n t e r i n g d a t a i n y o u r A c e r n 2 0 Using My Text • Press and hold (do not release) the Record hardware button on the left side of your handheld until you hear a beep.
Need help?
Do you have a question about the n20 and is the answer not in the manual?
Questions and answers