Advertisement
QUICK-START INSTALLATION GUIDE
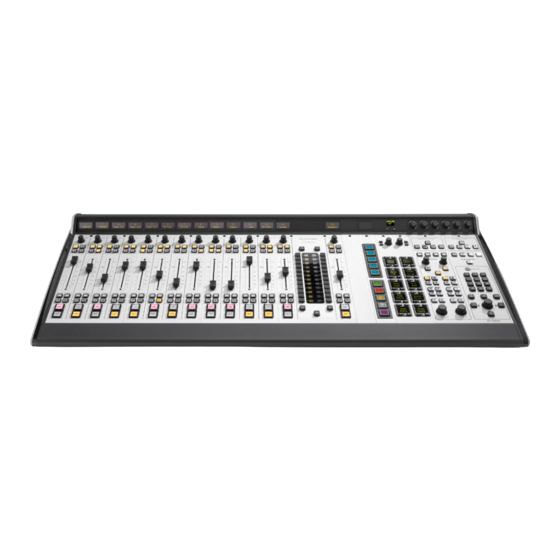
Axia Fusion AoIP Console
THANK YOU FOR PURCHASING THE
AXIA FUSION CONSOLE.
We have made Fusion the easiest Axia console, ever, to set up. This quick start guide will take you through the
basic steps to configure your new Fusion and have you up and running in no time. Before we get started, let's
check your installation type and make sure you have what you need.
Installation type:
You've got your choice of two mixing engines to pair with the Fusion, the
the
PowerStation.
We are providing instructions for both setups, so make sure you follow the instructions
for your engine
type.
THE FOLLOWING ITEMS ARE REQUIRED FOR INSTALLATION:
• Fusion Console
• Fusion Power Cable
• CAT5 Ethernet Cable
• Either a StudioEngine mixing engine and separate
Axia Power Supply, or PowerStation mixing engine
(with their appropriate power supply cables)
• 1080p Monitor with DVI Connector
• USB Keyboard (for PowerStation setup only)
• PC with network access
• Configured Network Switch
StudioEngine
or
Advertisement
Table of Contents

Summary of Contents for Telos Alliance Axia Fusion
- Page 1 QUICK-START INSTALLATION GUIDE Axia Fusion AoIP Console THANK YOU FOR PURCHASING THE AXIA FUSION CONSOLE. We have made Fusion the easiest Axia console, ever, to set up. This quick start guide will take you through the basic steps to configure your new Fusion and have you up and running in no time. Before we get started, let’s check your installation type and make sure you have what you need.
- Page 2 INSTALLATION WITH AXIA STUDIOENGINE PHYSICAL CONNECTIONS WITH AXIA STUDIOENGINE 1. Tilt the overbridge panel of the Fusion Console (A) forward (toward faders) to gain access to the Fusion Console overbridge board. 2. Connect one end of the supplied Fusion power cable to the power port on the Fusion Console overbridge board (B).
- Page 3 INSTALLATION WITH AXIA STUDIOENGINE NETWORK CONFIGURATION WITH AXIA STUDIOENGINE 1. Apply Power to the StudioEngine. The front display should indicate an error due to sync issue-this is normal. An IP address is needed. 2. Tap the rotary encoder knob (I) on the front panel for a menu view, rotate knob until “Engine IP settings”...
- Page 4 INSTALLATION WITH AXIA POWERSTATION PHYSICAL CONNECTIONS WITH AXIA POWERSTATION 1. Tilt the overbridge panel of the Fusion Console (A) forward (toward faders) to gain access to the Fusion Console overbridge board. 2. Connect one end of the 6-Pin molex power cable supplied with the PowerStation to the Surface port (B) on the PowerStation.
-
Page 5: Installation Help
Continue to the “System Configuration” instructions. INSTALLATION HELP If you have more questions, you can access the full manual online at http:/ /www.telosalliance.com/Axia/Fusion or call the Telos Alliance 24/7 Support Team at +1 (216) 622-0247, we’d be happy to help you out. -
Page 6: System Configuration
SYSTEM CONFIGURATION 1. Using a PC connected to your studio network, launch a web browser and enter the assigned IP address into the browser’s address bar. When prompted for authentication enter user name “user”, password is left blank. 2. The Fusion control center will launch (A). In the left column, under “Mix Engine”, select the “Network”... -
Page 7: Source Configuration
SOURCE CONFIGURATION 1. In the Fusion Control Center, in the left column under “Console”, select “Sources” (A). 2. Click the “Create New Source Profile” button (B). 3. On the Source Profile screen, select “Source Type” from the drop down list (C). 4. - Page 8 21. Repeat “Source Configuration” steps to configure additional sources. YOUR SETUP IS COMPLETE! That’s it! You are now ready to experience the Axia Fusion, a powerful, flexible and easy to use console, packed with all of the capabilities and features you need. Enjoy!
- Page 9 QUICK-START INSTALLATION GUIDE This Page Intentionally Left Blank...
- Page 10 QUICK-START INSTALLATION GUIDE This Page Intentionally Left Blank...
- Page 11 QUICK-START INSTALLATION GUIDE This Page Intentionally Left Blank...
-
Page 12: Quick Links
Radio: +1 (216) 622-0247 TV: +1 (717) 735-3611 Radio: support@telosalliance.com TV: support@linearacoustic.com 1241 Superior Ave. • Cleveland, Ohio, 44114, USA • +1.216.241.7225 • TelosAlliance.com © 2021 Telos Alliance. All Rights Reserved. C21/1/16009 • 1490-00137-002 — QUICK START GUIDE: FUSION CONSOLE...


Need help?
Do you have a question about the Axia Fusion and is the answer not in the manual?
Questions and answers