
Related Manuals for Palas Fidas Frog


Summary of Contents for Palas Fidas Frog
- Page 1 Fine Dust Measuring Device Fidas Frog Operating Manual For specialized users 3577-en-us_V1.1_08/17 V 1.1...
- Page 2 Copyright For all information in this technical document as well as drawings and technical descriptions provided by us, Palas GmbH reserves all proprietary and intellectual property rights. Duplication or dissemination to third parties without our prior written consent is prohibited.
-
Page 3: Table Of Contents
Table of contents Table of contents About this manual 5 Function of the manual 5 Target group for the manual 5 Validity of the manual 5 Related documents 5 Storage of documents 5 Presentation rules 5 For your safety 7 Hazards and safety instructions 7 Warnings... - Page 4 Table of contents 5.15 Printing measured values 23 5.16 Charging the device 24 5.17 Device calibration 24 5.17.1 Calibrating the particle size 24 5.17.2 Calibrating the volume flow rate 25 5.18 Checking the software version and serial number 25 5.19 Installing updates 25 5.20...
-
Page 5: About This Manual
Validity of the manual This manual applies to the fine dust measuring device Fidas Frog , firmware versions 1.0.0.327 and higher, beginning in June 2017. Related documents... - Page 6 1 About this manual “Text” Word compositions and figurative language Example: “Measuring Unit” [▷32] Reference to page number Example: For further information, see the section “Tech- nical data [▷12]” 3577-en-us_V1.1_08/17...
-
Page 7: For Your Safety
2 For your safety For your safety Hazards and safety instructions Electric shock Mains voltage is applied to the electrical connections. This can lead to elec- tric shock. Work on the electrical installation may only be performed by special- ized personnel. Ensure that live components do not get wet. -
Page 8: Regulations
2 For your safety Meaning of the pictograms DANGER Warnings with information about the severity of the hazard DANGER Danger to life due to electric shock NOTICE Damage to property Regulations Observe the following regulations and directives: Legal requirements • Legal regulations for Health and Safety at Work •... -
Page 9: Product Description
The Fidas Frog fine dust measuring device is intended exclusively for mea- suring fine dust. The device is primarily suited for taking indoor measure- ments: •... -
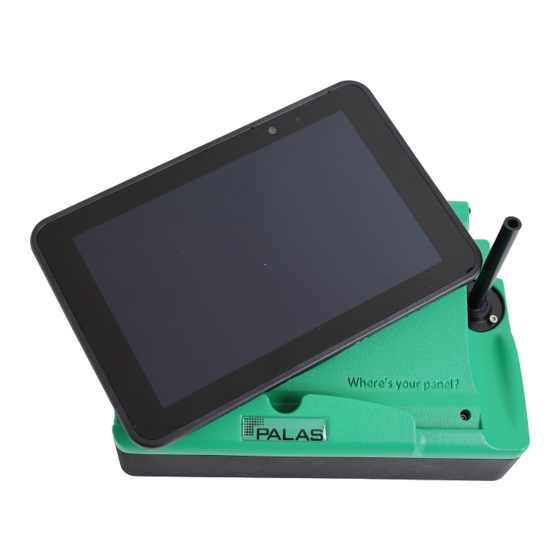
Page 10: Device Overview
3 Product description Device overview Device overview (side view) 1 Control LED, measuring unit 2 Sample collection tube on/off 3 Charging cable/mains cable 4 Measuring unit on/off switch connection 5 Opening to insert the sample 6 Mini USB serial port collection tube for transporta- tion and storage 7 Measuring unit 8 Operating element (removable... -
Page 11: Functional Description
3 Product description Functional description The Fidas Frog is a fine dust measuring device for indoor fine dust measure- ment. It is a portable, hand-held device. You can use the device at various measuring sites. The device can operate on battery or on a mains connec- tion. -
Page 12: Environmental Conditions
3 Product description Environmental conditions Environmental conditions affect the functionality of the device. The following environmental conditions apply for the operation and storage of the device: • Temperature range: 0 to 40 °C • Relative humidity: non-condensing, meaning that moisture in the air is not permitted to condense as water on or in the device •... -
Page 13: Dimensions
Front view/side view [mm] Scope of delivery 4 Inspect the delivered equipment for damage and completeness. The scope of delivery includes: • Fine dust measuring device Fidas Frog • Operating instructions • MonoDust 1500 test dust • Bag • Other small parts such as the charging cable... -
Page 14: Overview Of Operating And Display Elements
4 Overview of operating and display elements Overview of operating and display elements Operating element overview 4.1.1 Home screen Home screen 1 Charge level status, operat- 2 Menu bar ing panel and measuring unit 3 Signal strength of the WiFi connection between the op- erating panel and measuring unit 4.1.2... -
Page 15: Measuring Screen
4 Overview of operating and display elements 4.1.3 Measuring screen Measuring screen 1 PM values (fractions) 2 Particle mass concentration Current value 3 Particle mass concentration 4 Notification Mean value since the start of Indicates exceeding the limit the measurement value 5 Particle number concentra- 6 Particle number concentration tion... -
Page 16: Symbols, Buttons, And Navigation
4 Overview of operating and display elements Symbols, buttons, and navigation 4.2.1 Operating system A Windows operating system is installed on the operating panel. You have access to the standard Windows system functionality, such as: • Setting the date and time •... -
Page 17: Keyboard Input
4 Overview of operating and display elements 4.2.3 Keyboard input Keyboard input 1 Adds the time to the title field, 2 Adds the date to the title field, hour-minute-second (hh-mm- year-month-day (YYYY-MM-DD) 3577-en-us_V1.1_08/17... -
Page 18: Operation And Settings
5 Operation and settings Operation and settings Transporting the device Protect the device against severe impacts during transportation. Preparing the device Note the following to prepare the device for use: Charge the device and operating element Set the date and time (Windows operating system) Screw in the sample collection tube Configuring basic settings Settings such as the storage location for the measured data can be config-... -
Page 19: Taking Measurements
5 Operation and settings Taking measurements When you are taking measurements, the measured values are stored simul- taneously. To take a measurement, proceed as follows: Select the Measurement menu Start Recording… Tap this menu item The dialog window for describing the measurement opens. Enter a description: - Title: Name for the measurement - Operator: Name of the person taking the measurement... -
Page 20: Storing Limit Values
5 Operation and settings 5.8.2 Storing limit values Limit values that you need repeatedly can be stored in a file and loaded when they are needed for a measurement. To store limit values, proceed as follows: Select the Notifications menu Activate the limit value display by tapping Active Notification Activate PM value Enter limit values Store the limit values in a file with save... -
Page 21: Displaying Measurements
5 Operation and settings Displaying measurements To display a stored measurement, proceed as follows: Select the Analysis menu Select the desired measurement from the list If applicable, deactivate an existing selection with deselect Display the measurement with open With OK, confirm the dialog window to select the measurements The measurement is displayed. -
Page 22: Exporting Measured Values
5 Operation and settings Notes This function is only available to you while a measurement is in progress. To enter a comment, proceed as follows: Tap the comment symbol Enter a comment for the measurement You can add multiple comments for a measurement. 5.13 Exporting measured values You can store the measured values in various file formats. -
Page 23: Creating Pdf Reports
5 Operation and settings 5.14 Creating PDF reports You can create a report for a measurement in the PDF format. With the mi- cro-USB serial port, you can transfer the PDF report to a USB data carrier for further use on an external computer. The report contains the following information among other things: •... -
Page 24: Printing Measured Values
5 Operation and settings 5.15 Printing measured values If a printer is installed on the operating panel and the operating panel is con- nected to a network, you can print the measured values. To print the measured values, proceed as follows: Select the Analysis menu Select the desired measurement from the list If applicable, deactivate an existing selection with deselect... -
Page 25: 5.17.2 Calibrating The Volume Flow Rate
5 Operation and settings The sensor becomes polluted and the coincidence is too high. The set value of the test dust is 141.10 (Target channel). The actual value of the test dust is displayed (Current channel) Change the factor with Calibrate PM amplification until the set value and actual value are the same Example: Set value (Target channel): 141.10... -
Page 26: Installing Updates
5 Operation and settings 5.19 Installing updates You can install an update when a new software version becomes available. USB stick To install the update from a USB stick, proceed as follows: Store the software version on a USB stick Do not create any subfolders on the USB stick. Save the software ver- sion directly in the root directory. -
Page 27: Installing Firmware On Computer
5 Operation and settings 5.22 Installing firmware on computer You can install the firmware on your computer and then operate the measur- ing unit from your computer. A flash drive is included in the delivery of the device. The following folder on the flash drive is needed to install the firmware on your computer: •... -
Page 28: What To Do When
5 Operation and settings 5.23 What to do when… This section contains answers to some common questions related to using the device with the operating panel. What to do when… Explanation/action … a WiFi connection is not Restart the device. established, even though If a WiFi connection is still not established, contact the manufacturer. -
Page 29: Maintenance
Maintenance message A message is shown on the display at the end of the maintenance interval. Maintenance tasks Maintenance tasks are carried out by the manufacturer. Send the device to the manufacturer. Address: Palas GmbH Greschbachstrasse 3b D-76229 Karlsruhe Germany 3577-en-us_V1.1_08/17... -
Page 30: Packaging And Transportation
7 Packaging and transportation Packaging and transportation Package the device securely to exclude damage during transportation. Original packaging For the purpose of shipping, use the original packaging including the protec- tive inner packaging or the original transport case (if applicable). If you no longer have the original packaging, use packaging that securely protects the device against detrimental influences during transportation. -
Page 31: Disposal
8 Disposal Disposal The device, accessories, and transport packaging are largely made of recy- clable raw materials. Transport packaging You can dispose of the transport packaging at collection points. 4 Observe the applicable national regulations. Device and accessories The device and accessories must not be disposed of in household waste. Ensure that the used device and any accessories are properly dis- posed of. -
Page 32: Declaration Of Conformity
Germany hereby declare that the products Fine Dust Monitoring Devices: Fidas 100 Fidas 200 Fidas 200 S Fidas 200 E Fidas Frog Fidas mobile Fidas Fly 100 DustView II Fidas Fly 200 are in conformity with the following Directives: 2014/35/EU... -
Page 33: Technical Data
10 Technical data Technical data Interfaces USB, Ethernet via USB serial port, wifi ac- cess point Size measuring range Two measuring ranges 0.15 - 18 µm (standard) 0.15 - 93 µm Size channels 32 per decade, 256 raw data channels Measuring principle Optical light scattering by single particles Quantity measuring range C 0 - 20,000,000 particles/l Time resolution... - Page 34 Palas GmbH Greschbachstraße 3 b D-76229 Karlsruhe Tel.: +49 721 96213-0 Fax: +49 721 96213-33 www.palas.de mail(at)palas.de...
Need help?
Do you have a question about the Fidas Frog and is the answer not in the manual?
Questions and answers