Table of Contents
Advertisement
Available languages
Available languages
Quick Links
Advertisement
Table of Contents

Related Manuals for BENKISER SINTRA 1995263


Summary of Contents for BENKISER SINTRA 1995263
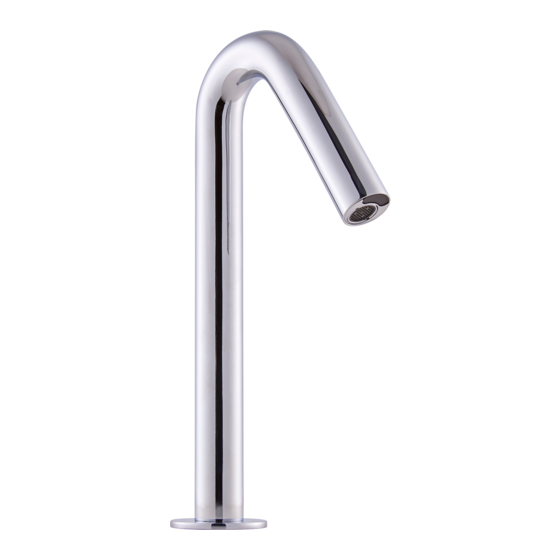
- Page 1 ELEkTRONIsChE BERühRUNgsLOsE WAsChTIsChARmATUR I n s t a l l a t I o n s - u n d W a r t u n g s a n l e I t u n g SINTRA WASCHTISCH VENTIL ELECTRONIC LAVATORY FAUCET I n s t a l l a t I o n a n d m a I n t e n a n c e g u I d e...
-
Page 2: Technische Daten
Sensorbereich Die in diesem Dokument enthaltenen Informationen stellen die Produkte zum Zeitpunkt des Drucks dar. Benkiser Armaturenwerk GmbH behält sich das Recht vor, vorbehalten aller zutreffender Gesetze, jederzeit, nach freiem Ermessen und ohne Ankündigung die Eigenschaften, Ausführungen, Materialien und andere Spezifikationen ihrer Produkte... - Page 3 HINwEISE VOR DER MONTAGE PACKUNGSINHALT machen sie sich mit den Bezeichnungen der Teile vertraut und vergewissern sie INHAlT üBERpRüFEN sich, dass alle Teile vollständig enthalten sind. Entfernen sie sämtliche Teile aus der Verpackung und vergleichen sie jedes Teil mit der Liste im Abschnitt „Packungsinhalt“. Beachten sie die Abweichungen für die jeweiligen modelle.
-
Page 4: Installation
INSTALLATION INSTALLATION SCHRITT 1 - VORBEREITUNG ZUR BEFESTIGUNG DER ARMATUR SCHRITT 3 - VERBINDUNG MIT wASSERANSCHLUSS hINWEIs: Flussrichtung ist durch einen Pfeil am magnetventilgehäuse gekennzeichnet. Verbinden sie den Nippel und Filter an der Wasserzufuhr abdrehen. Einlass-seite des magnetventils. Verbinden sie den schnellanschluss an der Auslass-seite des magnetventils. - Page 5 JUSTIERUNG DER EINSTELLUNGEN JUSTIERUNG DER EINSTELLUNGEN HINWEIS: Nachdem sie den Aktivierungsbereich mit der Fernbedienung eingestellt haben, bleibt dieser Abstand auch bei Unterbrechung der stromzufuhr gespeichert. Um den selbstjustierungsmodus wieder auszurufen, die ADJ-Taste drücken. AkTIVIERUNgsBEREICh NAChLAUFZEIT SElBSTJuSTIERuNgSMOduS AKTIVIEREN: Prüfen, dass sich keine Fremdobjekte vor dem sensor befinden.
-
Page 6: Wartung
JUSTIERUNG DER EINSTELLUNGEN wARTUNG KOMFORTSpüluNg: Falls Ihr modell mit der komfortspülungseinstellung ausgestattet ANlEITuNg FIlTE RREINIguNg ist, kann diese durch betätigen der spülungstaste aktiviert werden. Nach Betätigung der Taste leuchtet das Licht in der sensorlinse einmal auf. Anschließend findet der Das system ist mit einem Edelstahlfilter ausgestattet, der das Eindringen von Fremdkörpern in vorprogrammierte spülungszyklus statt. -
Page 7: Eingeschränkte Garantie
Einbau gemäß der einschlägig geltenden gesetzlichen Bestimmungen erfolgt. wenn ventil. Beim Einsetzen des kolbens, Des Weiteren sind in jedem Fall bei der Installation des Produktes die von Benkiser die hände des achten sie darauf, dass die Nutzers in Reich- Feder in vertikaler Position ist. -
Page 8: Technical Data
Maximum sensor range 120 mm / 4.72” The information in this document reflects products at the date of printing. BEnkISER Armaturenwerk GmbH reserves the right, subject to all applicable laws, at any time, at its sole discretion, and without notice, to discontinue or change the features, designs, materials and other specifications of its products, and to either permanently or temporarily withdraw any of the forgoing from the market. -
Page 9: Pack Contents
PRE-INSTALLATION INFO PACK CONTENTS CHECK CONTENTS Familiarize yourself with the part names and confirm that the parts are included. separate all parts from the packaging and check each part with the “Pack contents” section. Pay attention to the different models variations. make sure all parts are accounted for before discarding any packaging material. - Page 10 INSTALLATION INSTALLATION STEP 1 – PREPARATION FOR MOUNTING THE FAUCET STEP 3 – CONNECTING THE wATER SUPPLY NOTE: Flow direction is denoted by the arrow on the solenoid housing. Connect the Nipple and FILTER on the inlet side of the solenoid. shut off the water supply.
-
Page 11: Settings Adjustment
SETTINGS ADJUSTMENT SETTINGS ADJUSTMENT DETECTION dETECTION RANgE: This faucet was supplied with a self DELAY OUT TImE RANgE adjusting sensor. The ideal detection range for the specific location will be set automatically. Only if necessary, use the remote control to adjust the sensor TEmPORARY OFF DELAY IN TImE range as follows:... -
Page 12: Maintenance
SETTINGS ADJUSTMENT MAINTENANCE Filter cleaning instructions DELAY IN TImE: It is recommended to change the delay in time for This tap is provided with a stainless steel filter preventing foreign particles to enter the flush valves for urinals or toilets only. lines. -
Page 13: Limited Warranty
If a defect is found in proper usage and error is transmitted in an appropriate period, Benkiser Low battery. Replace battery hands are within Armaturenwerk gmbh will, at its discretion, repair, provide a replacement part or product, or the sensor’s... - Page 15 02.20 01500490-A...
Need help?
Do you have a question about the SINTRA 1995263 and is the answer not in the manual?
Questions and answers