Advertisement
Table of Contents
WEGMATT
LLC
Quick Start Guide
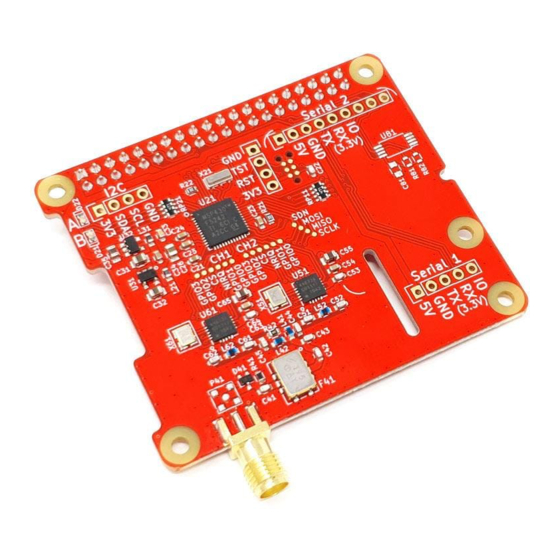
Thank you for purchasing the dAISy HAT AIS Receiver for Raspberry Pi.
Disclaimer: dAISy HAT is a reliable, dual-channel AIS Receiver. However, under no circumstances it
should be solely relied on for collision avoidance or navigation. It's the user's responsibility to use the
product prudently. Neither Wegmatt LLC nor its dealers accept responsibility or liability to the product
user or their estate for any accident, loss, injury or damage whatsoever arising out of the use of this
product.
Installation
The dAISy HAT communicates with the Raspberry Pi through the serial port pins (8, 10) on the Raspberry
Pi's expansion header. By default, the serial port of the Raspberry Pi is used for other purposes and
needs to be reconfigured.
If you are running a recent version of Raspian, the
way to configure the serial port. Open a terminal window on your Raspberry Pi and execute the
following commands:
wget https://github.com/itemir/rpi_boat_utils/raw/master/uart_control/uart_control
chmod +x ./uart_control
sudo ./uart_control gpio
sudo reboot now
After completing the reboot, AIS data is available using the following parameters:
Use this information to configure OpenCPN or other programs. Keep in mind, that only one application
at a time can consume serial data. dAISy immediately starts receiving AIS messages when powered up.
When connecting to dAISy with a serial terminal (e.g. screen), you can press ESC to enter a debug and
configuration menu. In this menu you can control the function of the 2
For older versions of Raspian (pre-2016), follow this tutorial by Adafruit to configure the serial port:
https://learn.adafruit.com/adafruit-ultimate-gps-hat-for-raspberry-pi/pi-setup
Please refer to the manual on our website:
dAISy HAT AIS Receiver
uart_control
Serial port
Baud rate
Data bits
Parity
Stop bits
Flow control
http://www.wegmatt.com
shell script by Ilker Temir is the easiest
/dev/serial0
38400
8
None
1
None
nd
serial port.
for more detailed instructions.
Advertisement
Table of Contents

Related Manuals for Wegmatt dAISy HAT


Summary of Contents for Wegmatt dAISy HAT
- Page 1 Installation The dAISy HAT communicates with the Raspberry Pi through the serial port pins (8, 10) on the Raspberry Pi’s expansion header. By default, the serial port of the Raspberry Pi is used for other purposes and needs to be reconfigured.
- Page 2 LED status indicator dAISy HAT features two red/green LEDs to indicate its status of each AIS channel. Indicator Description Green, short flash every 5 seconds Channel is in reception mode Green, ¼ second flash Channel received a valid AIS message Red, ¼...
Need help?
Do you have a question about the dAISy HAT and is the answer not in the manual?
Questions and answers