Draper Onyx Assembly/Mounting Instructions
Permanently tensioned
Hide thumbs
Also See for Onyx:
- Brochure (32 pages) ,
- Assembly/mounting instructions (2 pages) ,
- Assembly/mounting instructions (2 pages)
Advertisement
Quick Links
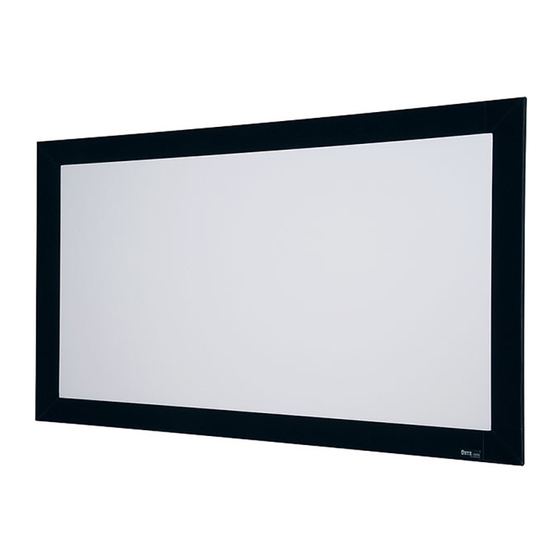
Onyx Permanently Tensioned Projection Screen by Draper
➀ Read instructions through completely before proceeding.
➁ Follow instructions carefully. Installation contrary to instructions
invalidates warranty.
➂ Screen should be accessible for complete removal should fabric
become damaged or should other service be required.
➃ Screen should be installed level (using a carpenter's level).
➄ Nothing should be fastened to screen frame or viewing surface.
➅ Make sure you have received all parts (see parts list below and
exploded diagram on page 2).
➆ Tools Required: Medium (#2) Phillips screwdriver (6" or greater shaft
length suggested). Optional tools: Flat blade screwdriver or small
putty knife.
NOTE: Screen has been thoroughly inspected and tested at factory and
found to be operating properly prior to shipment.
Onyx—Hardware and Parts List
Frame Extrusions - 4
Z-Brackets - 2
Surface Retention
Extrusions- 4
#10-24 fasteners - 8
Lag Bolts - 6
Frame Preparation
➀ Clean area and place frame assembly pieces face down. Insert plastic
corner pieces into ends of aluminum frame extrusions as indicated in
Figures 1 through 4. Secure each corner to each frame extrusion by
threading one #10-24 fastener through hole in plastic corner and into
rounded slot in aluminum frame extrusion.
Copyright © 2003 Draper Inc.
Assembly/Mounting Instructions
Caution
Frame Corners - 4
Plastic Tubing - 4
Viewing Surface - 1
Figure 1
Form Onyx_Inst03
➁ Secure corner pieces to aluminum frame extrusions with four (4) remaining
fasteners. Check to verify that all four (4) plastic corners are secure to
aluminum frame extrusion lengths and all eight (8) fasteners are tight (see
Fig. 5).
Please Note: It is not necessary to over-tighten fasteners.
If you encounter any difficulties installing or servicing your Onyx
screen, call your dealer or Draper, Inc., Spiceland, Indiana,
Printed in U.S.A.
(765) 987-7999; draper@draperinc.com.
Figure 2
Figure 3
Figure 4
Figure 5
(Continued on Page 2)
Advertisement

Related Manuals for Draper Onyx


Summary of Contents for Draper Onyx
- Page 1 Please Note: It is not necessary to over-tighten fasteners. Figure 1 Figure 5 (Continued on Page 2) If you encounter any difficulties installing or servicing your Onyx screen, call your dealer or Draper, Inc., Spiceland, Indiana, Copyright © 2003 Draper Inc. Form Onyx_Inst03 Printed in U.S.A.
- Page 2 ➁ Insert any side of surface to notch #1 on corresponding side of frame extrusion (see Fig. 8). *Viewing surface is approximately ¼" from wall. Surface Retention Extrusion Onyx (Exploded Rear View) Viewing Surface Fabric Attachment Extrusions Figure 8 ➂ Insert opposite side of surface to notch #1 of frame extrusion.
Need help?
Do you have a question about the Onyx and is the answer not in the manual?
Questions and answers