Ask Proxima M2+ User Manual
Askproxima m2+: users guide
Hide thumbs
Also See for M2+:
- Specifications (2 pages) ,
- User manual (44 pages) ,
- User manual (51 pages)
Table of Contents
Advertisement
Advertisement
Table of Contents
Troubleshooting

Related Manuals for Ask Proxima M2+


Summary of Contents for Ask Proxima M2+
- Page 1 > > > > > > > User’s Guide...
- Page 2 FCC Warning This equipment has been tested and found to comply with the limits for a Class A digital device, pursuant to part 15 of the FCC Rules. These limits are designed to provide reasonable protection against harmful interference when the equipment is operated in a commercial environment.
- Page 3 Declaration of Conformity Manufacturer: InFocus Corporation 27700B SW Parkway Ave. Wilsonville, Oregon 97070 USA European Office: Strawinskylaan 585, 1077 XX Amsterdam, The Netherlands We declare under our sole responsibility that the projector conforms to the follow- ing directives and norms: Directive 89/336/EEC, Amended by 93/68/EEC EMC: EN 55022 EN 55024...
-
Page 4: Table Of Contents
TABLE OF CONTENTS Safety Instructions Introduction Image Resolution Compatibility Unpacking the Projector Usage Guidelines If You Need Assistance Warranty Setting up the Projector Connecting a Computer Connecting a Video Player Powering up the Projector Turning Off the Projector Using the Projector Basic Image Adjustment Adjusting the Projector Using the Remote Control... -
Page 6: Safety Instructions
SAFETY INSTRUCTIONS Please read and follow all safety instructions provided BEFORE using your new projector. Failure to comply with safety instruc- tions may result in fire, electrical shock, or personal injury and may damage or impair protection provided by equipment. Please save all safety instructions. - Page 7 Caution: Don’t set liquids on the projector. Spilled liquids may • damage your projector. Caution: Don’t place the projector on a hot surface or in direct • sunlight. Caution: Do not drop the projector. Transport the projector in • an approved case; see page 37 for a list of cases. Important Operating Considerations for Safety Place the projector in a horizontal position no greater than 15 •...
-
Page 8: Introduction
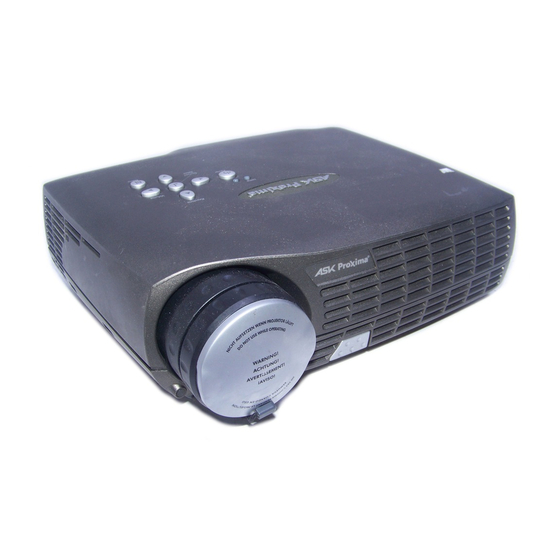
User’s Guide. Electronic versions of this user’s guide in mul- tiple languages are available on the included CD and on our web- site at www.askproxima.com. ® computers up to... - Page 9 IGURE Shipping box contents Projector + lens cap Remote control with batter- User’s Guide, Quick Start card, and CD Audio/Video (A/V) cable Power cord * * country-dependent Audio cable Computer cable SCART adapter *...
- Page 10 zoom ring focus ring power connector security lock speaker adjustable foot leveling foot keypad remote control sensor (IR) IGURE Front view of projector connectors remote control sensor (IR) IGURE Rear view of projector foot release lamp housing IGURE Bottom view of projector...
-
Page 11: Usage Guidelines
The first place to look for help is in this manual. Be sure to check the guidelines in “Troubleshooting” on page 33. Or, check the Service and Support section of our website at http://www.askproxima.com/service. Warranty This product is backed by a limited warranty. The details of the warranty are printed at the back of this manual. -
Page 12: Setting Up The Projector
SETTING UP THE PROJECTOR 1 Place the projector on a flat surface. The projector must be within 6 feet (1.8 m) of your power • source and your computer. If you want to project from behind a translucent screen, set •... -
Page 13: Wireless Projection
NOTE: Before you continue, make sure the projector and all other equipment is turned off. If you’re connecting a computer, make sure the distance between it and the projector is 6 feet or less. S-video Audio in IGURE Connector panel Wireless Projection You can use the projector’s Computer connector along with the I nFocus... -
Page 14: Connecting A Computer
Connecting a Computer The projector ships with an analog computer cable. If your com- puter has a digital output, you can order the optional digital com- puter cable. Using a digital source generates the highest quality and brightest image possible. See “Optional Accessories” on page 37. - Page 15 NOTE: The USB mouse is supported for use with Windows 98 or higher only. Do you want to advance slides in PowerPoint with the projector’s remote? 1 Plug the USB end of the computer cable into the mouse con- nector on your computer. You must have the appropriate USB drivers installed on your computer to use the USB feature.
-
Page 16: Connecting A Video Player
Connecting a Video Player If your video device (VCR, DVD player, video camera) uses a round, one-prong composite video connector, use the composite audio/video (A/V) cable. If your video device uses a round, four-prong S-video con- • nector, use an S-video cable, ordered separately. S-video generates a higher quality image. - Page 17 CAUTION: Your video player may also have a “Video Out” connector for a coaxial cable connection. DO NOT use this to connect to the projector. S-video audio IGURE Connecting the projector to a VCR using the S-video cable and A/V cable 3 Plug the A/V cable’s white connector into the left “audio out”...
-
Page 18: Powering Up The Projector
Powering up the Projector 1 Remove the lens cap. 2 Plug the power cord into the side of the projector, then plug it into your electrical outlet. A surge-protected power strip is recommended. The LED turns orange (Figure 6 on page 6). •... - Page 19 Uncheck any checked boxes, then click Next. Windows auto- matically locates the driver. If this driver has been removed, reload the driver using your Windows operating system CD. When Windows finds the driver, you are ready to install it. Click Next.
- Page 20 Click Finish when installation is complete. 6 The computer image should display on the projection screen. If it doesn’t, press the Source/Select button on the remote to display your com- Computer puter’s image. Make sure your laptop’s external video port is activated; •...
-
Page 21: Turning Off The Projector
NOTE: To maximize lamp life, allow the projector to run for at least five minutes before turning it off. Turning Off the Projector To turn off the projector, press the appears, asking for confirmation. Press lamp off. The fans continue to run and the LED blinks orange for about 90 seconds, then the projector shuts off. -
Page 22: Using The Projector
USING THE PROJECTOR This section describes how to use and make adjustments to the projector. It also provides a reference to the keypad and remote buttons and the options available from the on-screen menus. Basic Image Adjustment 1 Make sure you have powered up your equipment in the right order (page 11). - Page 23 The projector is equipped with a self-locking, quick-release foot and a leveling foot. To raise the projector: 1 Raise the projector to the height you want, then press and hold the foot release button. Release the button to lock the foot into position (Figure 11).
-
Page 24: Using The Remote Control
Using the Remote Control To advance PowerPoint slides with the projector’s remote, you must connect the USB cable on the projector’s computer cable to the computer. See page 8 for more information. Point the remote control at the projection screen or at the front or rear of the projector (not at the computer). -
Page 25: Using The Keypad And Remote Buttons
Using the Keypad and Remote Buttons While the menus are displayed, the on the keypad and the arrow buttons on the remote and the Select but- act as menu navigation and adjustment buttons. See “Using the On-Screen Menus” on page 20 for details. IGURE Keypad and remote buttons Menu... -
Page 26: Effect Button
Volume, Mute Press the buttons to adjust the volume and the Volume ton to silence the sound. Arrow buttons Use these to navigate through and make adjustments to the on-screen menus. See “Using the On-Screen Menus” on page 20 for details. Keystone (keypad only) Use this feature to adjust the image vertically and make a squarer image. -
Page 27: Using The On-Screen Menus
NOTE: Some menu items may be grayed out (dimmed) at certain times. This indicates the item is not applicable to your setup or the item is not enabled until another selection is made. Blank Press this button to display a blank screen instead of the current image. -
Page 28: Basic Menu
Basic Menu Contrast The contrast controls the degree of difference between the lightest and darkest parts of the picture. Adjusting the contrast changes the amount of black and white in the image. 1 Use the up and down arrows to highlight Contrast, press , use the arrows to adjust the contrast from 0 to 100 in Select the slider bar, then press... - Page 29 Keystone This option helps to keep the image square as the angle of projec- tion is changed. Use this feature to adjust the image vertically and make a squarer image. See page 19 for details on keystone adjustments. 1 Press the down button to highlight Keystone, then press .
-
Page 30: Setup Menu
Setup menu Picture menu : The default is 4:3. Click 16:9 if you are watching • Aspect Ratio videos in widescreen format. Click Native to display the image in its native format. Highlight Aspect Ratio, press the up and down arrows to highlight your selection, then press Select : The default is Presentation. - Page 31 System menu Turn the features in the System menu on and off by highlighting them and pressing . A checkmark in the box indicates the Select feature is on; an empty box means the feature is off. IGURE System menu : This reverses the image so you can project from behind a •...
- Page 32 Language menu You can display the on-screen menus in German, English, Span- ish, French, Italian, Norwegian, Portuguese, Japanese, Chinese, or Simplified Chinese. Highlight the desired language, then press . The menus redraw immediately. Select Effect menu This menu allows you to assign a different effect to the ton on the remote.
- Page 33 Service menu IGURE Service menu : This resets all options (except rear, language, and • Factory reset lamp time) to the original factory settings. Highlight it, then press . A confirmation dialog box appears. Press Select reset, or press the right arrow button to highlight No, then press if you don’t want a reset.
- Page 34 User’s logo menu This menu allows you to display a blank blue or black screen instead of the default screen at startup and when no source is detected. It also allows you to capture and display a custom logo. Highlight the desired color (black or blue), then press •...
- Page 35 PiP (Picture in Picture) allows you to overlay a smaller window showing the video source on top of the larger computer source window. You must have both a computer and video source con- nected to use PIP. You can’t show a computer image in the smaller PiP window, only a video image.
-
Page 36: Maintenance & Troubleshooting
MAINTENANCE & TROUBLESHOOTING This section describes how to: clean the lens • clean the lamp filter screens • replace the projection lamp • replace the batteries in the remote • use the security lock feature • troubleshoot the projector • Cleaning the Lens Follow these steps to clean the projection lens: 1 Apply a non-abrasive camera lens cleaner to a soft, dry cloth. -
Page 37: Replacing The Projection Lamp
WARNING: To avoid burns, allow the projector to cool for at least 60 minutes before you replace the lamp. Never extract the lamp housing while the projector is operating. WARNING: Be extremely careful when removing the lamp housing. In the unlikely event that the bulb ruptures, small glass fragments may be generated. - Page 38 Inserting the screwdriver into the lamp housing tab 5 Carefully remove the lamp housing. Dispose of the lamp in an environmentally proper manner. 6 Install the new lamp housing. Be careful to attach the connec- tor on the lamp housing to the connector inside the projector. These connectors are located near the leveling foot.
-
Page 39: Replacing The Batteries In The Remote Control
& Replacing the Batteries in the Remote Control The life of the batteries depends on how often and how long you use the remote. Symptoms of low battery charge include erratic responses when using the remote and a reduced range of opera- tion. -
Page 40: Troubleshooting
Troubleshooting LEDs The Lamp LED on top of the projector (Figure 13 on page 18) will alert you to certain problems. A solid red Lamp LED means it is time to change the lamp. • See page 30. A blinking red Lamp LED means the projector is overheat- •... - Page 41 & Problem: Only the start-up screen displays Verify that the cables are connected correctly. See page 7 for • connection procedures. Make sure that the cables do not have any bent pins. • Verify that the proper input source is connected. See “Com- •...
- Page 42 Problem: Image is too wide or narrow for screen Adjust the zoom or projector placement. • Adjust the width of the image. See page 23. • Problem: Image is out of focus Turn the projection lens to focus the image. •...
- Page 43 Make sure the vents on the projector are not blocked. • The most current troubleshooting information can be found in the Service and Support section of our website at http://www.askproxima.com/service.
-
Page 44: Appendix
APPENDIX Accessories Standard Accessories (ship with the projector) Quick Start card User’s Guide Shipping Box (with packaging) Computer Cable 6 ft (1.8 m) Audio/Video Cable 6 ft (1.8 m) Audio Cable 6 ft (1.8 m) Power Cord, US* Power Cord, Europe* Remote Projection Lamp Module (included in projector) Lens Cap... -
Page 45: Projected Image Size
Projected Image Size Use the table to help you determine projected image sizes. Table 1: Image Size, Width and Height for Lens at Maximum Image Size Distance to Diagonal Screen (feet/m) (inches/m) 4.9/1.5 40/1 7.4/2.3 60/1.5 9.9/3.0 80/2 12.3/3.8 100/2.5 18.5/5.6 150/3.8 32.8/10.0... -
Page 46: Index
INDEX About 22 accessories, ordering 37 adjusting brightness 21 color 21 contrast 21 height of projector 15 image position 23 image width 23 keystone 22 adjusting the image 23 Application 23 ARLS 23 Aspect Ratio 23 assistance. See Technical Support audio/video (A/V) cable connecting to video source 9 Basic menu 21... - Page 47 IBM-compatible computers compatibility 1 connecting 6, 7 image adjusting 11, 15 colors don’t match computer’s 35 focusing 15 freezing 25 has lines or spots 35 not centered 34 not displayed 33 out of focus 35 quality 34–35 resolution 1 reversed 35 size 5, 38 too wide or too narrow 35 zooming 15...
- Page 48 safety guidelines iii security lock 32 Service Code 26 Service menu 26 Setup menu 21, 22 Sharpness 23 Shipping box contents 2 shutting off the projector 14 sound no sound 35 Source/Select button 18 SourceSearch 24 starting up the projector 11 startup screen custom logo 27 S-video, connecting 9...
-
Page 50: Warranty Limitation And Exclusion
Limited Warranty Subject to the Limitations, Exclusions and Disclaimers hereof, InFocus Corporation (“InFocus”) warrants that the Projector, Lamps and Accessories (hereinafter collectively or individually referred to as “Product” as appropriate) purchased from InFocus, an InFocus distributor, or an InFocus reseller will conform to InFocus’ specifications and be free from defects in material or workmanship for the respective Limited Warranty period provided below. -
Page 51: Limitation Of Liability
Limited Warranty Period The Limited Warranty periods hereof commence on the date of purchase by the end-user customer. These Limited Warranty provisions shall apply only to the end-user purchaser (first person or entity that purchased a new Product for personal or business use and not for the purpose of distribution or resale). SOME JURIS- DICTIONS MAY GRANT YOU CONSUMER RIGHTS WITH MINIMUM WARRANTY DURATION THAT DIFFER FROM THE DURATIONS PROVIDED HEREIN, AND INFOCUS WILL HONOR ALL SUCH CON- SUMER RIGHTS.
Need help?
Do you have a question about the M2+ and is the answer not in the manual?
Questions and answers