Ask Proxima M8 User Manual
Askproxima m8: user guide
Hide thumbs
Also See for M8:
- Owner's manual (35 pages) ,
- Technical specifications (2 pages) ,
- Reference manual (35 pages)
Table of Contents
Advertisement
Quick Links
Download this manual
See also:
Reference Manual
User's Guide
Warning
Please read the safety instructions booklet before setting up the projector.
• This manual covers only basic operations, including how to set up the projector, and basic
projector operations. For more detailed information, see the Reference Guide on the CD-ROM
that comes with the projector.
Contents
Unpacking ....................................................................................................................................... 2
Using the User Documentation on the CD-ROM .......................................................................... 2
Register with ASK Proxima........................................................................................................... 2
General Guide ................................................................................................................................. 3
Remote Controller General Guide ................................................................................................ 5
Preparing the Remote Controller .................................................................................................. 5
Replacing the Remote Controller Battery ..................................................................................... 6
Getting Ready ................................................................................................................................. 7
Setting Up the Projector................................................................................................................ 7
Screen Size and Distance ............................................................................................................ 7
Adjusting the Projector Elevation Angle........................................................................................ 8
Rear Projection (From the Back of the Screen)............................................................................ 8
Connecting a Computer to the Projector ...................................................................................... 9
Connecting to a Standard Video Device....................................................................................... 9
Turning On the Projector ............................................................................................................ 10
Turning Off the Projector ............................................................................................................ 12
Projector Basics ........................................................................................................................... 13
Selecting the Input Source.......................................................................................................... 13
Adjusting the Projected Image.................................................................................................... 13
Keystone Correction (KEYSTONE) ............................................................................................ 14
Using the Setup Menu.................................................................................................................. 15
Troubleshooting ........................................................................................................................... 16
Indicators .................................................................................................................................... 16
Projector Troubleshooting........................................................................................................... 20
Service and Support..................................................................................................................... 22
English
1
Advertisement
Table of Contents
Troubleshooting

Related Manuals for Ask Proxima M8


Summary of Contents for Ask Proxima M8
-
Page 1: Table Of Contents
User’s Guide Warning Please read the safety instructions booklet before setting up the projector. • This manual covers only basic operations, including how to set up the projector, and basic projector operations. For more detailed information, see the Reference Guide on the CD-ROM that comes with the projector. -
Page 2: Unpacking
If you don't, go to www.adobe.com to download and install it. Register with ASK Proxima It's quick, easy, and secure. Activate your warranty to ensure eligibility for service and support. Get special offers and notifications about free product updates. Go to www.askproxima.com/register Unpacking Remote Controller Video Cable Mini D-Sub Cable Reader ®... -
Page 3: General Guide
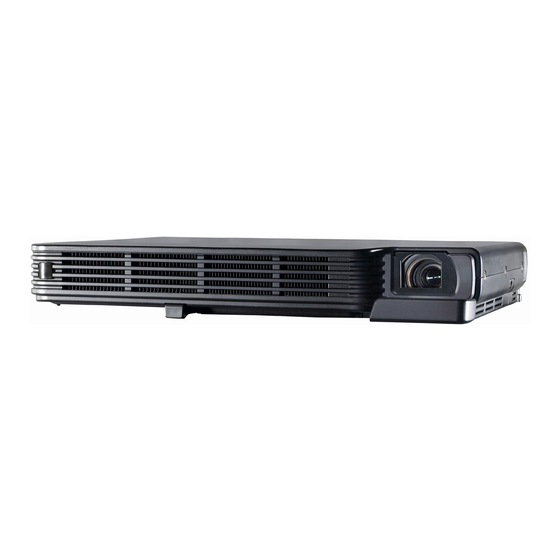
General Guide [Front/Top/Left Side] Intake vents Elevation adjustment foot release button Remote control signal receiver [Key and Indicator Panel] TEMP indicator LAMP indicator POWER/STANDBY indicator ] (Power) key [INPUT] key [AUTO] key * The projector’s enter key does not have anything printed on it. When you see [ENTER] in this manual, it means you should press the projector’s enter key or the [ENTER] key of the remote controller. - Page 4 General Guide [Bottom] Elevation adjustment foot Elevation adjustment foot release button Left, right adjustment feet (2) [Back, Terminals] Anti-theft lock hole Intake vents Remote control signal receiver VIDEO input terminal In the unlikely event of a lamp rupture, particles may be ejected from the Warning projector.
-
Page 5: Remote Controller General Guide
Remote Controller General Guide [INPUT] key [AUTO] key ] (Power) key – [ZOOM ] [ZOOM ] keys [FOCUS [FOCUS ] keys M +] [D-ZOO –] k -ZOOM [KEYSTONE +] – [KEYSTONE ] keys [BRIGHT] key ([ ] key) [ECO] key ([ ] key) [ASPECT] key ([ ] key) -
Page 6: Replacing The Remote Controller Battery
General Guide Replacing the Remote Controller Battery Before you can use the remote controller for the first time, you need to load the battery that comes with it. RISK OF EXPLOSION IF BATTERY IS REPLACED BY AN INCORRECT Caution TYPE. DISPOSE OF USED BATTERIES ACCORDING TO THE INSTRUCTIONS. -
Page 7: Getting Ready
Screen Size and Distance Diagonal Screen Size Inches Note that the distances provided above are for reference only. Interactive screen size and distance calculator www.askproxima.com/calculator Getting Ready Viewed from the Side Make sure the projector is at a right angle to the screen. -
Page 8: Adjusting The Projector Elevation Angle
Getting Ready Adjusting the Projector Elevation Angle You can change the elevation angle of the projector in a range of 0 to 12 degrees. You can also make fine adjustments to the left and right side elevation angle when necessary. To change the projector elevation angle Lift up the front of the projector and press the release button. -
Page 9: Connecting A Computer To The Projector
Connecting a Computer to the Projector You can use the projector to project an image of video output from a computer. Always turn off the projector and the computer before connecting them. Projector RGB input terminal Bundled mini D-Sub cable Connecting to a Standard Video Device You can use the projector to project an image from a video deck, TV, video camera, or other video device. -
Page 10: Turning On The Projector
Getting Ready Turning On the Projector Before performing any of the operations in this section, make sure you first set up the projector and connect to an output device. AC Power Cord Precautions Use the AC power cord that comes with the projector. Make sure that you use a power source with the same voltage as that specified for the projector. -
Page 11: Direct Power On
If the Eco Mode is turned on, the LAMP indicator will light green when warm up starts. If the projector is hot when you plug the AC power cord into a power outlet, it will go into a cool down state. The cool down state is indicated by the POWER/STANDBY indicator flashing orange. -
Page 12: Turning Off The Projector
Getting Ready Turning Off the Projector When you turn off the projector, the lamp goes out and the projector goes into a cool down state. Note that you will not be able to turn the projector back on again while it is cooling down. -
Page 13: Projector Basics
Projector Basics For detailed information about projection operations, see the Reference Guide on the CD-ROM that comes with the projector. Selecting the Input Source When you turn on the projector, it first checks the RGB terminal for an input signal and then the VIDEO terminal. -
Page 14: Keystone Correction (Keystone)
Projector Basics Auto Adjustment of an RGB Image When the input source is RGB (computer), the projector automatically adjusts vertical and horizontal positioning, frequency, and phase whenever it detects an RGB signal (following input source selection, power up, etc.). You can also execute an automatic adjustment operation by pressing the [AUTO] key. -
Page 15: Using The Setup Menu
Using the Setup Menu Pressing the [MENU] key while an image is being projected displays the setup menu on the Using the Setup Menu projected image. The setup menu can be used to configure a variety of different projector settings. Use the cursor keys to select and configure settings, and the [ENTER] key to register them. -
Page 16: Troubleshooting
Troubleshooting Indicators The status of the indicators lets you know the current operational status of the projector. This section provides details about indicators. “POWER” in the following table stands for the “POWER/STANDBY” indicator. TEMP indicator LAMP indicator POWER/STANDBY indicator Normal Operation Indicators When this indicator: Is this: POWER :... - Page 17 Next, reconnect the power cord and turn projector power back on. If the error occurs again when you turn power back on, contact ASK Proxima service at www.askproxima.com/service Power has turned off automatically due to a system problem. After confirming that the POWER/STANDBY indicator is lit red (without flashing), disconnect the power cord from the projector and wait for all of the projector’s indicators to go out.
- Page 18 Turn off the projector and then turn it back on again. If the error occurs again when you turn power back on, contact ASK Proxima service at www.askproxima.com/service Press the [ESC] key to clear the warning message. The projector was turned off automatically due to some problem that was probably caused by external digital noise or some other reason.
- Page 19 Indicator/Error Message POWER : Green steady TEMP : – LAMP : Red flashing (1-second interval) Message : It is time to replace the lamp. Use the procedure in the User’s Guide to replace the lamp as soon as possible. POWER : Amber flashing Red steady TEMP...
-
Page 20: Projector Troubleshooting
Troubleshooting Projector Troubleshooting Check the following items whenever you experience any problem with the projector. Problem The projector does If the POWER/STANDBY indicator is not lit, the AC not turn on when I power cord may not be connected correctly. press the [ ➔... - Page 21 Problem The message “It is It is time to replace the lamp. time to replace the ➔ Replace the lamp (see “Replacing the Lamp”). lamp.” is being projected. The message “The The allowable life for the lamp has been exceeded, lamp has exceeded and the projector will not turn on.
-
Page 22: Service And Support
Service and Support Questions? We're here to help! Service and Support Visit us at: www.askproxima.com/service We're here to support you with your new purchase. We can help you with... Determining screen sizes Documentation in other languages Connecting your sources (TV, DVD, Cable/Satellite, Game, etc.) - Page 23 Service and Support Canada This Class A digital apparatus complies with Canadian ICES-003. Cet appareil numérique de la classe A est conforme à la norme NMB-003 du Canada. Agency Approvals Product Models: W120 UL, CUL, NOM, IRAM, GOST, C-tick Other specific Country Approvals may apply. Please see product certification label. InFocus reserves the right to alter product offerings and specifications at any time without notice.
Need help?
Do you have a question about the M8 and is the answer not in the manual?
Questions and answers