Apogee Symphony Desktop User Manual
Hide thumbs
Also See for Symphony Desktop:
- User manual (46 pages) ,
- User manual (28 pages) ,
- User manual (23 pages)
Table of Contents
Advertisement
Advertisement
Table of Contents

Related Manuals for Apogee Symphony Desktop


Summary of Contents for Apogee Symphony Desktop
- Page 1 Symphony Desktop User’s Guide User’s Guide v1.0 October, 2020...
-
Page 2: Table Of Contents
Connecting to a Mac or Windows computer Connecting to an iPad Pro (USB-C) Connecting to an iOS Device Update Touch Screen Control On Windows 10: Configure OS to use Symphony Desktop for Audio I/O macOS Windows 10 Apple iOS Connecting Your Studio... - Page 3 Monitor/Output Section Menu Bar Menus Desktop Control Menu File Menu View Menu Window Menu Help Menu Choose Your Symphony Desktop Workflows A Glossary of Important Workflow Concepts Monitoring Workflows Software Monitoring Direct Monitoring Plugin Processing Workflows Apogee Alloy Mic Preamp Emulation Print FX Monitor FX &...
-
Page 4: Overview
Put the Sound of a Symphony on Your Desktop Symphony Desktop for Mac, iPad Pro and Windows offers the legendary sound quality of Apogee’s flagship Symphony I/O Mk II into an elegant 10x10 audio interface that sits on your desk and fits in your bag. - Page 5 U ser’s Guide Apogee Alloy Mic Preamp Emulation Apogee Alloy mic preamp emulation offers analog circuitry plus DSP processing to create the richest, most authentic audio modeling available in an audio interface. Critical aspects of the model such as input impedance, transient profile and distortion characteristics are first implemented in the analog domain, followed by precise and accurate refinement in DSP, for a hybrid result that’s greater than...
- Page 6 U ser’s Guide Advanced Stepped Gain Mic Preamps At the core of the input stage, Symphony Desktop’s mic preamps offer up to 75dB of gain. The preamp design features Apogee’s unique Advanced Stepped Gain Architecture to ensure ultra-low noise and distortion regardless of the source, from pounding kick drum to delicate fingerpicking on an acoustic guitar.
-
Page 7: Navigating This User's Guide
Control application (and driver if required) on your computer ( l ink ● Connect Symphony Desktop to AC power (required) and to your computer via USB ( l ink ● Update Touch Screen Control using the included USB thumb drive (... -
Page 8: In The Box
● Mac & Windows: 4GB minimum RAM, 8GB Recommended Register your Product ● Access Apogee’s expert Technical Support for free ● Receive important product update information by email ● Take the Customer Satisfaction Survey for a chance to win Apogee gear! Register Now: w ww.apogeedigital.com/support/register... -
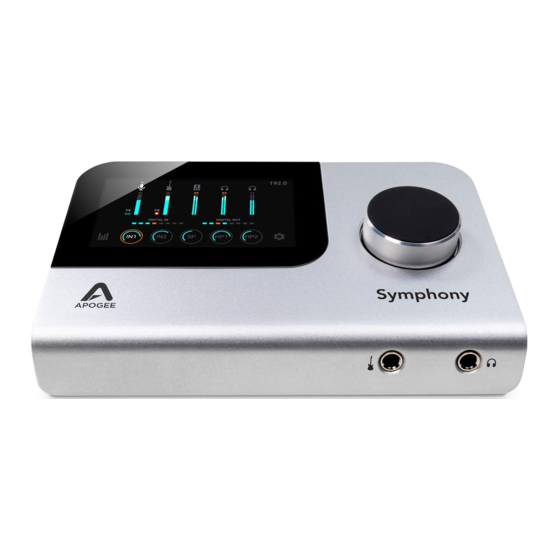
Page 9: Symphony Desktop Panel Tour
Apogee Symphony Desktop U ser’s Guide Symphony Desktop Panel Tour... -
Page 10: Getting Started
2. A dialog box will appear with a series of steps to complete the installation. 3. By default, all Apogee plugins are installed in all formats. Even if you don’t have an iLok license for a plugin, you can try it for a limited time. You can customize what plugins and formats are installed in the Plugins step. -
Page 11: Ipad Pro/Iphone
5. The User’s Guides are installed on your computer’s desktop. iPad Pro/iPhone There is no software to be installed when using Symphony Desktop with an iPad Pro or other iOS device like your iPhone. All Desktop settings are accessed from the touch screen. -
Page 12: Connecting Symphony Desktop
4. Lightly tug the connector to ensure it’s locked in place. 5. Tap the Control Knob to power up Symphony Desktop - the touch screen will flash for for approximately 30 seconds as the internal processor starts. -
Page 13: Connecting To A Mac Or Windows Computer
Be sure to use Symphony Desktop’s USB-C port, not the port labelled USB Host. Connecting to an iPad Pro (USB-C) Using the supplied USB-C to USB-C, connect Symphony Desktop’s USB-C port to the iPad Pro’s USB-C connector. Connecting to an iOS Device Using one of the supplied cables (USB-C to USB-C or USB-C to USB-A), connect Symphony Desktop’s USB-C port to an Apple Camera Connection Kit, supplied separately. -
Page 14: Update Touch Screen Control
U ser’s Guide Update Touch Screen Control Please note - Before using Symphony Desktop, it’s necessary to update Touch Screen Control, using the supplied USB thumb drive. If you don’t have the supplied thumb drive, any USB thumb drive formatted in the FAT32 format will work. -
Page 15: On Windows 10
Apogee Symphony Desktop U ser’s Guide To use your own USB thumb drive, it must be formatted to the FAT32 file system. 1. On macOS: ● Connect your USB drive to your computer, then open Disk Utility from the Applications >... -
Page 16: Configure Os To Use Symphony Desktop For Audio I/O
Configure OS to use Symphony Desktop for Audio I/O macOS To choose Symphony Desktop as the audio interface for Mac applications that don’t have specific audio hardware preferences, such as Safari, Spotify, Voice Memos and others: 1. Open System Preferences by choosing Apple menu >... -
Page 17: Apple Ios
U ser’s Guide Apple iOS Apple iOS automatically chooses the most recently connected audio interface as the audio I/O device for all applications. Simply connect Symphony Desktop to your iOS device’s Lightning or USB-C port as described h ere... -
Page 18: Connecting Your Studio
Connecting Your Studio A wide range of devices, including dynamic & condenser microphones, electric instruments, speakers, headphones, and digital I/O expanders may be connected to Symphony Desktop. 1. Connect microphones and line level audio gear to the rear panel XLR inputs. - Page 19 Apogee Symphony Desktop U ser’s Guide 3. Connect consumer headphones, earbuds and balanced armature headphones (with comparatively low impedance and higher sensitivity) to the rear panel ⅛” headphone output. 4. Connect Main outputs 1-2 directly to active speakers. If your speakers are equipped with XLR inputs, use a ¼”...
- Page 20 - both may remain set to Internal clock. ● Set Symphony Desktop Optical format to match that of the connected device from the touch screen (...
-
Page 21: Standalone Operation
U ser’s Guide Standalone Operation Symphony Desktop may be used standalone (i.e not connected to a computer) with any digital audio device equipped with S/PDIF or ADAT/SMUX optical I/O. To configure for standalone operation, make the following settings from the touch screen: 1. -
Page 22: Tft Touch Screen Control
TFT Touch Screen Control The immersive Touch Screen Control and responsive Control knob gives you total control over all aspects of Symphony Desktop, from input and output levels, mic preamp emulation, Direct monitoring mixers and routing. Navigating the Touch screen Interface The touch screen interface consists of three primary views - Input/Output, Mixer, and System Settings, accessible by tapping the icons indicated below. - Page 23 2. In the upper right hand corner of the touch screen, the hardware sample rate and current USB connection status are displayed. The Mixer view provides access to Symphony Desktop’s two Direct monitoring mixers. 1. Tap the Mixer icon repeatedly to toggle between the two Direct mixers. You can also swipe L<>R between the mixers.
- Page 24 Apogee Symphony Desktop U ser’s Guide The System Settings views provide complete I/O routing plus system level settings. ● Swipe left <> right to navigate through the 3 System Settings views. All I/O, Mixer and System Settings views are described in greater detail below.
-
Page 25: I/O Views
Apogee Symphony Desktop U ser’s Guide I/O Views Input 1-2 Overview The Input 1-2 Overview has 3 different presentations, based on the Preamp setting: SD-MP, AP-66 and AP-57. 1. Input Gain - tap to set the gain of the preamp with the Control knob, when Analog Level is set to Mic or Instrument. - Page 26 3. Monitor FX On/Off & Preset Select - Enable Apogee Channel FX processing in the Monitor path (through the Control app direct monitoring mixer), and select a preset. 4. Print FX On/Off & Preset Select - Enable Apogee Channel FX processing in the Record path (to audio software) and select a preset.
- Page 27 Apogee Symphony Desktop U ser’s Guide Main Out Overview 1. Level - set the level of Main outputs 1-2; 2. Source Meter - displays the digital level of the Main output source, before D/A conversion; 3. Main Out parameters: ●...
- Page 28 Apogee Symphony Desktop U ser’s Guide Headphone Out 1-2 Overview 1. Level - displays the level of the headphone output: ● HP1 = front panel output. ● HP2 = rear panel output. 2. Source Meter - displays the digital level of the HP output source, before D/A conversion.
-
Page 29: Mixer Views
Apogee Symphony Desktop U ser’s Guide Mixer Views Mixer Overview 1. Tap the Mixer icon repeatedly to toggle between the two Direct mixers. You can also swipe L<>R between the mixers. 2. Tap repeatedly or swipe to toggle between Analog IN Channel settings views. -
Page 30: System Settings Views
Apogee Symphony Desktop U ser’s Guide 1. Input meter (mono or stereo) - displays the digital signal level of the channel. The Analog IN channel levels are post A/D conversion. 2. Stereo Link - tap to toggle the channel between mono and stereo. Playback channels are always stereo linked, so no button appears. - Page 31 Apogee Symphony Desktop U ser’s Guide Page 2 1. Optical Meters - tap to show or hide Optical I/O level meters on the I/O View. 2. Optical Format - tap to set the Optical I/O digital format: ● S/PDIF - 2 channel format at sample rates of 44.1-96kHz.
-
Page 32: Shutdown/Display Sleep
2. Display Brightness - set the brightness of the touch screen. 3. Sample Rate ● When Symphony Desktop is connected to a computer or iPad, the sample rate is a read-only indicator of the current sample rate. ● When Symphony Desktop is not connected, i.e. in Standalone mode, tap to set the system sample rate. -
Page 33: Apogee Desktop Control Software
The Apogee Desktop Control application provides access to all settings, including System setup, direct monitor mixing, hardware DSP and Monitor controller functionality. Primary Window All features and settings of the Symphony Desktop interface can be controlled from the Primary window. It is broken down into several sections:... -
Page 34: Tool Bar
- System not ready. Either the hardware is not connected, or the system is not locked to the Clock Source. 2. Sample Rate - Set Symphony Desktop’s sample rate. In some cases this setting may be overridden by software running on the computer (e.g. when a DAW session is open). -
Page 35: Channel Section
Apogee Symphony Desktop U ser’s Guide ● ADAT/SMUX: Optical I/O is formatted in the ADAT/SMUX format, which offers 8 channels 44.1/48kHz sample rate and 4 channels at 88.2/96kHz. 9. Mixer View - Show/hide the Direct mixers in the Primary window. -
Page 36: Analog In Channels
5. Print FX On/Off - Toggle on/off Apogee Channel FX plugins on the Print signal path. 6. Load Print FX - Load and modify Apogee Channel FX plugins on the Print signal path. For more detailed information about Apogee Channel FX plugins, see ... - Page 37 Apogee Symphony Desktop U ser’s Guide...
-
Page 38: Optical In Channels
Apogee Symphony Desktop U ser’s Guide Optical IN Channels 11. Optical IN channels represent digital inputs from external digital audio devices like standalone mic preamp expanders, digitally connected synths, and others. ● Optical inputs are routed to software (DAW) inputs 3-10, depending on the Optical Format setting;... -
Page 39: Mixer Section
1. Mixer View - toggle the faders, pan controls and Mute/Solo buttons between two independent mixers, Mixer 1 and Mixer 2. 2. Enable Apogee FX processing in the Monitor path (through the Mixer). 3. Load Monitor FX - Load and modify Channel FX plugins on the Monitor signal path. For more detailed information about Channel FX plugins, see ... -
Page 40: Monitor/Output Section
Apogee Symphony Desktop U ser’s Guide Monitor/Output Section In the Monitor/Output Section, select the signals to be routed to the Main and Headphone outputs, then control their volume. Output Level Meters display the presence of signal at the outputs, useful as a diagnostic tool. -
Page 41: Menu Bar Menus
About Symphony Desktop Control - Choose this menu item to display version information for all hardware connected and software elements installed on your Mac. Hide Symphony Desktop Control - Choose this menu item to hide the Maestro application Hide Others - Choose this menu item to hide all other open applications Show All... -
Page 42: View Menu
Selecting an item in the W indow Menu switches to a view of that selection. Help Menu Use the S earch Field to search for a specific menu item. Symphony Desktop Support Online - Select this menu item to be taken to the Apogee website’s Support page for Symphony Desktop. -
Page 43: Choose Your Symphony Desktop Workflows
U ser’s Guide Choose Your Symphony Desktop Workflows In the previous sections of this User’s Guide, the individual components of Symphony Desktop have been described in detail. This section describes how these components work together to form a sophisticated and efficient audio production environment. - Page 44 Apogee Channel FX Plugin - when referred to in this User’s Guide, the Channel FX Apogee FX Plugin - the collection of Apogee plugins that can be opened in the Channel FX plugin Print FX - the term “Print FX” or “printing” is used in this guide to specify DSP processing that is “destructive”, or permanently applied to the audio file being processed.
- Page 45 Many software applications include audio functionality but don’t offer the critical functionality for completely supporting Symphony Desktop workflows. Nevertheless, these apps can work with Symphony Desktop when the OS is configured to use Symphony Desktop for audio input/output, as described ...
-
Page 46: Monitoring Workflows
Apogee Symphony Desktop U ser’s Guide Monitoring Workflows The two basic monitoring workflows, Software monitoring and Direct monitoring, are described below. Software Monitoring When your system is set up for Software monitoring, the audio that the performer hears is routed through the DAW, including plugins and mixers, and thus incurs the maximum latency of the system, as shown below. -
Page 47: Direct Monitoring
● Cons - With many audio interface systems, it’s necessary to toggle between your DAW window and a separate direct monitoring mixer app. Adding non-destructive plugins while Direct monitoring can become unwieldy. Apogee’s proprietary DualPath monitoring workflow, described h ere... -
Page 48: Plugin Processing Workflows
Plugin Processing Workflows Symphony Desktop also includes flexible and powerful onboard DSP processing that supports a wide range of innovative workflows - 1) Apogee Alloy mic preamp emulation; 2) Print FX; 3) Monitor FX (DualPath Monitoring); and 4) Native operation. -
Page 49: Print Fx
U ser’s Guide Print FX With Print FX, you can shape your sound as you record it using up to 6 Apogee FX EQ, compression and saturation plugins running on Symphony Desktop hardware DSP. Print FX processing may be applied to analog and optical inputs. -
Page 50: Monitor Fx & Dualpath Monitoring
Apogee Symphony Desktop U ser’s Guide Monitor FX & DualPath Monitoring With Monitor FX and DualPath monitoring, users experience workflow benefits that have previously only been available with Avid Pro Tools HD - 1) very low latency, even when the DAW IO Buffer size is high 2) simple, non-destructive plugin workflow - open a single plugin in your DAW that processes monitoring and playback 3) control from a single app window - your DAW. -
Page 51: Monitor Fx & Software Monitoring
Built-In headphone outputs or other audio hardware. Of course, all Apogee FX plugins may be run directly in your DAW, without opening them in the Channel FX plugin. These plugins are powered natively by your computer’s CPU, so they work even... -
Page 52: Using The Apogee Fx Rack
2. Print FX - Up to 6 Apogee FX plugins, processed in Hardware DSP. 3. Direct Mixer Monitor FX - Up to 6 Apogee FX plugins, processed in Hardware DSP. 4. DAW Monitor FX - Up to 6 Apogee FX plugins, processed in Native (computer) CPU. - Page 53 Print FX tab. 5. Apogee FX plugin selection and settings to be inserted in b oth the direct monitoring signal path and the DAW playback path may be made from the Monitor FX tab (see Monitor FX & DualPath Monitoring ...
-
Page 54: Additional Workflows
Mix Inputs Before Recording You can use the Symphony Desktop Mixer to mix hardware inputs and record the mixed output: 1) use two mics to capture an instrument and record a blend to one DAW track; 2) pan one input to the center of a stereo output for audio apps without panning functionality. -
Page 55: Configuring Your Daw
U ser’s Guide Configuring Your DAW Find below detailed information to configure Symphony Desktop with popular DAWs: ● Configure the DAW to use Symphony Desktop ● Configure the DAW for Direct or Software monitoring ● Access Symphony Desktop inputs & outputs in the DAW ●... - Page 56 Symphony Desktop labels are highlighted, then unclick. 3. Close the I/O labels window. 4. Select Symphony Desktop inputs and outputs in any Logic Pro Channel Strip. Direct Monitoring with Apogee FX plugins - Logic Pro and Symphony Desktop: Thanks to the proprietary integration between Symphony Desktop and Logic Pro, Direct monitoring with Apogee FX plugins is incredibly simple.
-
Page 57: Avid Pro Tools
Apogee Symphony Desktop U ser’s Guide Avid Pro Tools To configure Avid Pro Tools to use Symphony Desktop: 1. Open Pro Tools, then choose Setup > Playback Engine in the menu bar. 2. Set Playback Engine to Symphony Desktop. - Page 58 Apogee Symphony Desktop U ser’s Guide 1. To use native reverb while Direct monitoring, choose Pro Tools > Preferences to open the Preferences window; click the Mixing tab, then check “Allow Sends to persist during LLM” under Setup. 2. When checked, Pro Tools channels behave in the following manner that’s crucial to the DualPath workflow and other operations of the Channel FX plugin.
-
Page 59: Ableton Live
Apogee Symphony Desktop U ser’s Guide Ableton Live To configure Ableton Live to use Symphony Desktop: 1. In the Live menu bar, choose Live > Preferences and click the Audio tab. 2. Mac - set Driver Type to CoreAudio;... - Page 60 Apogee Symphony Desktop U ser’s Guide To set channel Input & Output list labels: ● Choose Live > Preferences and click the Audio tab. ● Under Audio Device, click the Input Config and Output Config buttons. ● Activate inputs & outputs by clicking the numbered buttons.
-
Page 61: Troubleshooting
Apogee Symphony Desktop U ser’s Guide Troubleshooting For more information ● Apogee KnowledgeBase and FAQs ● Informational Videos ● Apogee Product Registration ● How to contact Apogee Technical Support Please visit: www.apogeedigital.com/support... -
Page 62: Specifications
Apogee Symphony Desktop U ser’s Guide Specifications System Requirements Computer Compatible Software: ● All major DAW applications on Mac, ● MacOS 10.13 or greater Windows 10 and iOS ● Windows 10 Anniversary update or later ● Recommended apps: Logic Pro, Pro ●... -
Page 63: Warranty Information And Legal Notices
12 months. The term of this warranty begins on the date of sale to the purchaser from an authorized Apogee dealer (proof of purchase in the form of a receipt may be required). Units returned for warranty repair to Apogee or an authorized Apogee warranty repair facility will be repaired or replaced with a functional equivalent product that is new or refurbished at the manufacturer’s option, free of charge. - Page 64 Règlement sur le matérial brouilleur du Canada. Declaration of Conformity – CE Apogee Electronics Corporation hereby declares that the product, Symphony Desktop, to which this declaration relates, is in material conformity with the following standards or other normative documents: (EN50081-1/EN55022;...
Need help?
Do you have a question about the Symphony Desktop and is the answer not in the manual?
Questions and answers