Table of Contents
Advertisement
Quick Links
Advertisement
Table of Contents

Related Manuals for Apogee symphony i/o mk II


Summary of Contents for Apogee symphony i/o mk II
- Page 1 Symphony I/O Mk II Quick Start Guide April 2016...
- Page 3 Symphony I/O Mk II Quick Start Guide February 2016...
-
Page 4: Table Of Contents
Touchscreen section overview........Rear panel - Thunderbolt model ........ Rear panel - HD model..........Thunderbolt setup ..............System Requirements..........Install Symphony I/O Mk II Software......Apogee Maestro install..........Powering On and Off............... Update Firmware ..............Connecting headphones ............Connecting speakers ............ -
Page 5: Overview
Symphony I/O Mk II offers direct connectivity to one of three different platforms - Thunderbolt™, Pro Tools® HD or Waves SoundGrid® network. This Quick Start Guide describes the steps to set up Symphony I/O Mk II with an Apple Mac via Thunderbolt and Avid Pro Tools HD systems. -
Page 6: In The Box
In the box The following items are included in the box with Symphony I/O Mk II: • Symphony I/O Mk II • 3-pin IEC power cable • Quick Start Guide • Warranty Booklet Note: Thunderbolt models, Thunderbolt cable not included Pro Tools HD models, HD cable not included. - Page 7 Symphony I/O Mk II 3-pin IEC power cable Quick Start Guide Warranty Booklet Symphony I/O Quick Start Guide |...
-
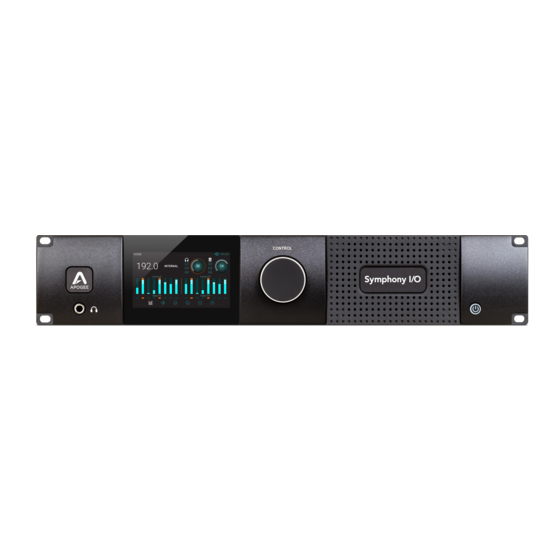
Page 8: Product Tour
Product Tour Front panel Touchscreen/display Headphone output Control knob Power button | Symphony I/O Quick Start Guide... - Page 9 Navigating the touchscreen Swipe to navigate You can swipe the screen left or right to access any of the main sections; HOME, MONITOR, INPUT, OUTPUT, DIGITAL I/O, SETTINGS. Swiping can be disabled in SETTINGS. Tap section icons to navigate You can also directly select any of the section icons on the bottom of the screen to jump directly to a section.
- Page 10 Navigating the touchscreen Symphony I/O Mk II’s front panel touchscreen offers convenient access to nearly every setting. Control knob focus selection Settings that may be controlled using the front panel control knob are displayed as a circle; i.e. Speaker and Headphone, Input calibration and Gain levels To “focus”...
-
Page 11: Touchscreen Section Overview
Touchscreen section overview HOME MONITOR Sample Rate, Clock Source, Headphone Headphone & speaker output levels, mute, & Speaker output levels, Meters for all I/O, dim, sum to mono, headphone ouput and section navigation selection, speaker set selection and section navigation Symphony I/O Quick Start Guide |... - Page 12 Touchscreen section overview INPUT LEVEL OUTPUT LEVEL Analog input reference levels, calibration, Analog output reference levels, calibration Soft Limit, mic pre parameters (when 8 and section navigation channel mic preamp module is installed) and section navigation | Symphony I/O Quick Start Guide...
- Page 13 DIGITAL I/O SETTINGS Digital format settings, Digital input signal Reset, WC termination, Internal meters, SPDIF Coax In replaces and temperature, Meter characteristics, Display coax output mirrors settings and section brightness navigation Symphony I/O Quick Start Guide |...
-
Page 14: Rear Panel - Thunderbolt Model
Rear panel - Thunderbolt™ model AC power Module slot 2 Word clock I/O Module slot 1 Thunderbolt ports Option card slot Chassis shown without I/O modules installed | Symphony I/O Quick Start Guide... -
Page 15: Rear Panel - Hd Model
Rear panel - HD model AC power Word clock I/O Module slot 2 Module slot 1 Pro Tools® HD option card Chassis shown without I/O modules installed Symphony I/O Quick Start Guide |... -
Page 16: Thunderbolt Setup
2. Download the latest Symphony I/O Mk II Thunderbolt software installer. 3. Open the downloaded .dmg file and double-click Symphony I/O Mk II Thunderbolt Software Installer.pkg 4. Follow the prompts. You will be required to restart your computer. Apogee Maestro Apogee Maestro is a controller software for Symphony I/O Mk II Thunderbolt. - Page 17 Symphony I/O Mk II Thunderbolt features two connections to enable daisy-chaining of other Thunderbolt peripherals to your computer. It does not matter which position Symphony I/O Mk II Thunderbolt is placed in the chain. 1. Using a certified Thunderbolt cable, connect Symphony I/O Mk II to a Thunderbolt port on your computer.
-
Page 18: Powering On And Off
Powering On Powering Off 1. Ensure any speakers or amplifiers connected to the Powering Symphony I/O Mk II off is the reverse of outputs are turned off, or the volume turned to the powering the unit on. minimum setting. 1. Power off, or turn the volume to minimum, any speakers or amplifiers connected to 2. -
Page 19: Update Firmware
Update Firmware After the software installation, you may be prompted to update the firmware. 1. Open Symphony I/O Mk II Thunderbolt Firmware Updater.app located in your computer’s Applications > Utilities folder. 2. Select “Update” 3. Follow any prompts that may appear. -
Page 20: Connecting Headphones
Connecting headphones 1. Connect headphones to the front panel headphone output. 2. To control the volume of the headphone output tap the headphone level ring on the HOME screen or the MONITOR screen. 3. Adjust the volume by turning the control knob. | Symphony I/O Quick Start Guide... -
Page 21: Connecting Speakers
Connecting speakers 1. Connect a DB25 breakout cable (not included) to the Analog OUT connector on Module 1 (bottom slot) 2. Connect breakout cable outputs 1-2 to your speakers. Connect outputs 3-4 and 5-6 to alternate speaker sets if desired. 3. -
Page 22: Connecting Inputs
Connecting inputs 1. Connect an 8 channel DB25 breakout cable (not included) to Analog IN on the lower I/O Module (Module Slot1) and plug in the desired input source. 2. On the front panel touchscreen, tap the INPUT icon to navigate to the INPUT page. -
Page 23: Playback From Itunes
To route audio from general audio applications such as iTunes and Safari through Symphony I/O Mk II, you must set up Symphony I/O Mk II as the default output device in Mac System Preferences. NOTE: Make sure you have already installed the most recent Symphony I/O Mk II Software from the Apogee website before proceeding. - Page 24 Most professional applications have their own audio preferences that are separate from the Mac System Preferences. Basic steps for setting up Symphony I/O Mk II are provided. For more detail on this topic, refer to the documentation that comes with your recording program.
- Page 25 Maestro control software Apogee Maestro software provides complete control and monitoring of all Symphony I/O Mk II functions and settings, from levels to direct monitoring to routing and more. See page 16 for Maestro installation instructions (Thunderbolt models only). Complete information for Maestro can be found in the User’s Guide which can be downloaded at: www.apogeedigital.com/support/...
-
Page 26: Pro Tools Setup
The following instructions refer to Symphony I/O Mk II Pro Tools HD models. No software installation is required or provided with Symphony I/O Mk II HD. All Symphony I/O Mk II hardware settings can be made from the front panel touchscreen. - Page 27 Symphony I/O Mk II to Pro Tools HD Native PCI Symphony I/O Mk II to Pro Tools HD Native PORT 1 PORT 2 Symphony I/O Mk II to Pro Tools Accel Core (requires adapter, not included) Accel Core Symphony I/O Quick Start Guide |...
-
Page 28: Additional Support
Additional Support For more information • Symphony I/O Mk II User’s Guide • Apogee KnowledgeBase and FAQs • Apogee support and live chat Please visit: www.apogeedigital.com/support | Symphony I/O Quick Start Guide... - Page 29 It’s never been easier to get back to work. As a ProCare member you’ll have premium access to Apogee’s world-class technical support group for the life of your agreement. The contract is fully transferable by the original registered owner of the agreement. All Apogee support technicians reside and are continuously trained at Apogee Electronics, Santa Monica, CA.
- Page 30 | Symphony I/O Quick Start Guide...
- Page 31 Symphony I/O Quick Start Guide |...
- Page 32 Apogee Electronics Corp. Santa Monica, CA www.apogeedigital.com Part Number: 7070-0040-2014-Rev 2.0, Art Number: 2740-4155-2014-Rev 2.0...
Need help?
Do you have a question about the symphony i/o mk II and is the answer not in the manual?
Questions and answers