ROBOTIQ Wrist Camera Original Notice
For universal robots
Hide thumbs
Also See for Wrist Camera:
- Instruction manual (108 pages) ,
- Instruction manual (134 pages) ,
- Quick start manual (2 pages)

Related Manuals for ROBOTIQ Wrist Camera


Summary of Contents for ROBOTIQ Wrist Camera
- Page 1 Original Notice © 2019. Robotiq, Inc. Robotiq Wrist Camera for Universal Robots Instruction Manual...
-
Page 2: Table Of Contents
3. General Presentation 3.1. Vision System Components 4. Safety 4.1. Warning 4.2. Intended Use 5. Installation 5.1. Scope of Delivery: Wrist Camera Kitsfor Universal Robots 5.2. Required Toolsand Equipment 5.3. Environmental and Operating Conditions 5.4. Mechanical Installation 5.5. Electrical Setup 5.6. Software 6. - Page 3 10.4. Apply Visual Offset Node 11. Save Image Node 12. Specifications 12.1. Mechanical Specificationsof Wrist Camera 12.2. Electrical and Optical Specificationsof the Wrist Camera 12.3. Vision System Specifications 13. Maintenance of the Wrist Camera 14. Spare Parts, Kits and Accessories 15.
-
Page 4: Revisions
Added subsection " Guidelines on Reading Codes" Added subsection " Strings Data Stored in CSV files" Section " Intended Use" : since barcodes and 2D codes is now supported by the Wrist Camera, URCap, removed a sen- tence that mentionned it was not. - Page 5 Updated Sections 5.2, 5.2.1, 5.2.2, 5.2.3 for new and improved teaching methods. Added Section 6.2 to use advanced programming with the vision system. Updated technical specifications (Section 7.3). Updated calibration board for UR5 and UR10 robots (Section 4) 2016-11-16 Robotiq Wrist Camera Instruction M anual...
- Page 6 Updated specifications (section 6) Updated installations instructions (section 4) Added Troubleshooting instructions (section 9.1) 2016-08-26 First release Robotiq Wrist Camera Instruction M anual...
-
Page 7: General Presentation
3. General Presentation The terms " Camera" and " Wrist Camera" used in the following manual all refer to the Robotiq Wrist Camera, while the terms " Vision" and " Vision System" used in the following manual all refer to the Robotiq Wrist Camera Vision System for Universal Robots. - Page 8 The object location process will always start at the snapshot position, that position will determine the field of view of the Wrist Camera i.e. the workspace. Seesection Snapshot Position on page 29 for details on how to teach the snapshot position.
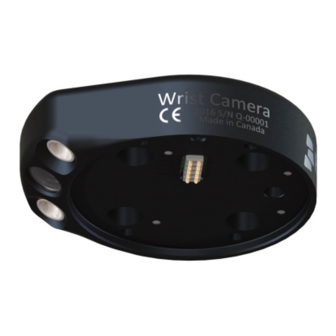
- Page 9 Table 3-2: Terminology of the object location process. 3.1 .3. Wrist Camera The hardware at the heart of the Vision System is the Robotiq Wrist Camera illustrated in the . For installation instructions, section Wrist Camera on page 10. Robotiq Wrist Camera Instruction M anual...
- Page 10 Grippers are mounted on the Wrist Camera Table 3-3: Some hardware specifications of the Wrist Camera. Info The Robotiq Wrist Camera provides a direct mounting interface for grippers, including a mechanical interface, 24V power and gripper/robot communication capabilities. Robotiq Wrist Camera Instruction M anual...
-
Page 11: Safety
Warning The Wrist Camera Vision System used in human-robot collaboration must not be considered a complete safety measure, additional dedicated safety device(s) must be considered. Vision System failure can occur and result in danger for workers or machinery if not properly secured. See local or international safety measure for human-robot collaboration. - Page 12 Do not install or operate a Wrist Camera that is damaged or lacking parts. Only supply direct current to the Wrist Camera. Make sure all cords are secured at both the Wrist Camera and the robot levels. Always respect the recommended keying for electrical connections.
-
Page 13: Intended Use
The unit may be used only within the range of its technical specifications. Any other use of the product is deemed improper and unintended use. Robotiq will not be liable for any damages resulting from any improper or unintended use. -
Page 14: Installation
Details on the operating range of the Wrist Camera can be found in section Environmental and Operating Conditions on page 18. To find out how to mount your Wrist Camera on your robot, see section Mechanical Installation on page 19. It also includes information on coupling it with another end-effector. -
Page 15: Scope Of Delivery: Wrist Camera Kitsfor Universal Robots
5.1 . Scope of Delivery: Wrist Camera Kits for Universal Robots 5.1 .1 . RWC-UR-KIT Includes the Wrist Camera and required hardware. Robotiq Wrist Camera with 10-m high flex cable RWC-CAM-001 Universal Robots pattern tool plate RWC-TOOL-062 16 Gb USB stick... -
Page 16: Required Toolsand Equipment
Fuse, see information below. The Wrist Camera needs to be supplied by a DC voltage source. This power supply is not included with the Wrist Camera Kit for Universal Robots. Required power supply must match the Robotiq device. The following table shows the specifications with regards to the power supply required to operate the Wrist Cameraand the optional Robotiq gripper. -
Page 17: Environmental And Operating Conditions
5.3. Environmental and Operating Conditions The Wrist Camera is designed for industrial applications. Always respect the following specified operating environmental conditions: CONDITION VALUE Minimum storage -30°C [-22°F] Maximum storage 70°C [158°F] Minimum operating 0°C [32°F] temperature Maximum operating 50°C [122°F]... -
Page 18: Mechanical Installation
Fig. 5-1: Mouting the Wrist Camera kit on Universal Robots. Info The end-effector is secured directly in the tool flange of the robot arm. Both the Wrist Camera and the tool plate are fitted with clearance holes for this assembly. - Page 19 Warning Wrist Camera must be oriented properly. Do not offset the Wrist Camera from the tool center point on the X and Y axes, or around the Z axis. 5.4.2. Mounting the Wrist Camera With a Gripper on Universal Robots...
-
Page 20: Electrical Setup
Wiring setups are identical whether you use the Wrist Camera alone, or with an end-effector. Power and communication are established with the Wrist Camera via the 10-m high flex cable. It provides 24V power supply to the Wrist Camera and enables USB 2.0 communication with the Universal Robots controller. - Page 21 5. Connect the USB license dongle (ACC-USB-DONGLE) to the 4-port USB hub. Fig. 5-4: Connecting to the 4-port USB hub. Wrist Camera grounding is optional and is done via the robot ground. The Wrist Camera dowel pin acts as ground connector.
-
Page 22: Software
5.6. Software Make sure the Wrist Camera is properly mounted on the robot arm and that all electrical wiring is correctly done (see section Mechanical Installation on page 19 and section Electrical Setup on page 21). Make sure your Universal Robots software is up-to-date. - Page 23 5.6.1 . Installing the Wrist Camera URCap Make sure the Wrist Camera is properly mounted to the robot arm and that all electrical wiring is correctly done (see section Mechanical Installation on page 19 and section Electrical Setup on page 21). Make sure your Universal Robots software is up-to-date.
- Page 24 Do not disconnect the 16 Gb USB stick or the USB license dongle from the robot controller, even after the installation has been completed. The Dashboard tab contains helpful information for troubleshooting the Vision System. Robotiq Wrist Camera Instruction M anual...
- Page 25 3. Go to the Camera tab. The output image will display. Before using your Universal Robots, adjust the center of mass and payload from the Installation tab. For details, see section Mechanical Specifications of Wrist Camera on page 119. Robotiq Wrist Camera Instruction M anual...
- Page 26 5.6.2. Update and Uninstall Warning Updating the Wrist Camera software, unplugging the USB storage device and/or switching USB ports must always be done while the robot is initialized and running. Version 1 .1and later For CB-Series: PolyScope 3.9 and later 1.
- Page 27 11. Connect to a PC the 16 Gb USB stick containing the URCap and Vision Server. 12. Format USB stick in FAT32 format. 13. See section Installation on page 15 to install the latest software. Robotiq Wrist Camera Instruction M anual...
-
Page 28: Snapshot Position
You can select a thumbnail displayed in a blue rectangle, as shown in Fig. 6-1. During the snapshot position process, you will be offered to move to the snapshot position linked to this thumbnail . 6.2. Choosing a Calibration Method When calibrating, three calibration methods are available. Robotiq Wrist Camera Instruction M anual... - Page 29 Before first use of the camera. position. Fig. 6-2: You can calibrate using one of three methods. Caution You first need to perform a Full Calibration. Afterwards, you will be allowed to select any calibration method. Robotiq Wrist Camera Instruction M anual...
- Page 30 Calibration Boards. From the dropdown list, choose either UR3 or UR5 & UR10 > DOWNLOAD PDF. To print a calibration board, follow these recommendations. The official Robotiq two-sided calibration board is 357 mm x 278mm. Print as " Ledger/Tabloid" or " A3" formats.
- Page 31 Caution Move your robot so that the Wrist Camera can see the whole calibration board. The button Hold to Align to Axis reorientates the Wrist Camera to make it parallel to an axis of the robot base. 3. The " Calibrating Camera" window is displayed, and the calibration process starts. Your robot moves around the calibration board, and the Vision System will take 27 pictures of the calibration board from different poses during 7-10 minutes.
-
Page 32: Saving The Snapshot Position
Toggle grid display by tapping Show Grid or Hide Grid. Objects to locate must completely fill at least one grid square, as smaller objects are difficult to detect. To re-align the Wrist Camera at this step, tap Hold to Align Over or otherwise move it. - Page 33 Info You can teach as many snapshot positions as required. The snapshot positionrepresents the coordinates (x, y, z) and orientation (Rx, Ry, Rz) of the Wrist Camera. A singlesnapshot position can be used to teach different objects. After completing the teaching process (seesection Object Teaching on page 35), it is linked to the snapshot position;...
-
Page 34: Object Teaching
Object teaching is linked to a snapshot position. Changing this position will require you to reteach the object. The background used when teaching objects should provide a high contrast. You can use the yellow/pink background provided with the Wrist Camera. For details, see section Snapshot Position on page 29. 7.1 . Guidelines on Object Teaching Info During the object teaching, the ambient light must be approximately 500 lux, and stable. - Page 35 Your work plane should contain as few objects and object types as possible. This will decrease cycle time. Ambient light should be diffuse. Avoid high contrast light spots on your background. Light spots make object detection slower, and cause errors. Robotiq Wrist Camera Instruction M anual...
-
Page 36: Teach Object Wizard
The Teach object wizard will guide you through the process of teaching an object that will be located by the Wrist Camera. To launch the wizard, tap the Cam Locate node > Command > Teach object. Fig. 7-1: The CB-Series Teach object wizard. Robotiq Wrist Camera Instruction M anual... - Page 37 Tap the Snapshot position you want to use. Info If the robot is not at the snapshot position, you will be prompted to move to it. Tap and hold the Move button to do so. Robotiq Wrist Camera Instruction M anual...
- Page 38 Fig. 7-3: CB-Series " Select Calibration" step. Robotiq Wrist Camera Instruction M anual...
- Page 39 46 for more details. Automatic Area Selection The object is selected since the Magic Wand tool is enabled by default. The Magic Wand feature allows to locate objects on the background without user intervention. Robotiq Wrist Camera Instruction M anual...
- Page 40 Centering an object in the field of view often provides the best edges detection. Tapping toggles to Manual area selection mode. to switch to the Machine View to visualize edges detections and to optimize part location, depending on lighting setup. Robotiq Wrist Camera Instruction M anual...
- Page 41 Tapping the Manual selection button in the right pane toggles back to the " Automatic area selection" mode. Camera Viewing Modes The following viewing modes are available for the Wrist Camera: Standard View Machine Edge View...
- Page 42 Fig. 7-6: Select Model step with standard view enabled in the upper right corner of the camera feed window to display the Machine view. Robotiq Wrist Camera Instruction M anual...
- Page 43 The Machine edge view is a convenient tool that can be used to better understand the quality of the image and the object contrast, and to improve adjustments made to the selection. Tap to display the Machine color view. Robotiq Wrist Camera Instruction M anual...
- Page 44 Minus button decreases a value. Camera LEDs are OFF; see section Camera LED on page 47 for more details. Retake button; the setting is reinitialized. Please refer to the specific set- ting section for more details Robotiq Wrist Camera Instruction M anual...
- Page 45 The Machine color view displays the elementary colors perceived by the vision system. Fig. 7-8: " Select Model" step with Machine color view enabled. The Machine color view helps to understand the color signature and scale used by the system. to display the Standard view. Robotiq Wrist Camera Instruction M anual...
- Page 46 The flash and focus settings selected will be used at runtime unless changes are made at the Configure Model step at the end of the teaching process. Please refer to the Configuring the Model for more details. Robotiq Wrist Camera Instruction M anual...
- Page 47 It is possible to reduce or eliminate camera image flicker (also seen as vertical moving bands) by matching camera exposure time with illumination frequency. See the following table to match exposure time and current frequency (50/60Hz). Robotiq Wrist Camera Instruction M anual...
- Page 48 To improve image quality, it is recommended to increase exposure time before increasing gain. Info The exposure value (EV) represents a combination of exposure time and digital gain. Simply put, increase EV to make images brighter. Robotiq Wrist Camera Instruction M anual...
- Page 49 To some extent, the automatic focus feature detects sharpness in the overall image. If the image is blurry, the autofocus system will adjust the focus until sharpness and/or contrast is achieved. This type of automatic focus requires enough contrast between the object and the background for it to render an appropriate image. Robotiq Wrist Camera Instruction M anual...
- Page 50 Expert mode. This can be done by clicking on the Basic button. In this mode, three sliders, each representing a different color (red, green, blue) are available to adjust the level of their own color. Fig. 7-14: Select Model step with White Balance option enabled (Manual mode enabled) Robotiq Wrist Camera Instruction M anual...
- Page 51 When teaching metallic objects, using the pink mat will increase the contrast between the part and the background. Reduce the red channel and increase the green one to optimize the contrast of a shiny metallic object. Use the Machine View to adjust these parameters. Robotiq Wrist Camera Instruction M anual...
- Page 52 Note that when zoomed in, the user can neither change the area selection mode nor accept the model selected (the buttons are greyed out). The zoom in feature is therefore solely used for inspecting the model in details and for adjusting the depth of field via the manual focus settings. Robotiq Wrist Camera Instruction M anual...
- Page 53 In order to zoom out from the selection area, the user has to tap the magnifier with a minus symbol in the lower right corner of the teach pendant interface. Accepting the model To accept the model, and proceed to the next step of the wizard, tap Fig. 7-18: Select Model step with Accept button highlighted Robotiq Wrist Camera Instruction M anual...
- Page 54 Summary of Camera Settings Robotiq Wrist Camera Instruction M anual...
- Page 55 Accepting the model for more details. Info For details on toggling color/machine view while editing a model, see To ternate between color and machine view while editing the model, see section Object Teaching on page 35. Robotiq Wrist Camera Instruction M anual...
- Page 56 Rectangle around object selection tool is automatically selected when the object has been manually selected at the " Select Model" step. Tools Tap the arrow to the left of the tools button to expand the tools menu. Robotiq Wrist Camera Instruction M anual...
- Page 57 When the view of the model is satisfactory and you wish to carry on with the teaching wizard steps, tap the button with the check mark in the lower right corner of the teach pendant interface. Robotiq Wrist Camera Instruction M anual...
- Page 58 Caution to take a picture of the model that will act as the first step in the next phase of the teaching process: " Refine Model" . Robotiq Wrist Camera Instruction M anual...
- Page 59 The Validate Model step starts after the fourth picture is taken at the end of the Refine Model step. Info If the object is properly detected, it will display green and red outlines. If the object has not been recognized, please refer to the Guidelines on Object Teaching for instructions. Robotiq Wrist Camera Instruction M anual...
- Page 60 The operator should watch the robot at all times and have the emergency stop button at hand. Scan button used to start the scanning process Cancel button used to abort the scanning process while it is running Robotiq Wrist Camera Instruction M anual...
- Page 61 The flash and focus settings selected will be used at runtime unless changes are made at the Configure Model step at the end of the teaching process. Please refer to the Configuring the Model for more details. Robotiq Wrist Camera Instruction M anual...
- Page 62 When the view of the model selected is satisfactory and you wish to carry on with the teaching wizard steps, tap the button with the check mark in the lower right corner of the teach pendant interface. Fig. 7-23: Select Model step with Accept button highlighted Robotiq Wrist Camera Instruction M anual...
- Page 63 Camera Settings Summary Robotiq Wrist Camera Instruction M anual...
- Page 64 Rectangle+ (add area) tool; please refer to the Object Teaching for more details. Accept model button; please refer to the Accepting the model for more details. Delete selection area button; please refer to the Accepting the model for more details. Robotiq Wrist Camera Instruction M anual...
- Page 65 Info The user can alternate between color and machine view while editing the model. Please refer to the Object Teaching for more details. Robotiq Wrist Camera Instruction M anual...
- Page 66 The Rectangle around object selection tool is automatically selected when the object has been manually selected at the Select Model step. Tools Tap the arrow to the left of the tools button to expand the tools menu. Robotiq Wrist Camera Instruction M anual...
- Page 67 Caution Tapping takes a picture of the model that will act as the first step in the next phase of the teaching process: Refine Model. Robotiq Wrist Camera Instruction M anual...
- Page 68 1. The user is prompted to turn the object 90 degrees clockwise. 2. The user is prompted to take the second Note that the first picture is already taken, in the upper right picture of the object. corner. Robotiq Wrist Camera Instruction M anual...
- Page 69 " Refine Model" , tap Object contours and detected features are outlined in green, while features that cannot be located on the object in the field of view are outlined in red. Robotiq Wrist Camera Instruction M anual...
- Page 70 2D shape (circle, ring, square or rectangle). This method allows the vision system to recognize and locate with high robustness objects that have few distinctive features such as raw material blanks. It usually gives best results than the Automatic method for simple geometry and highly reflective objects. Robotiq Wrist Camera Instruction M anual...
- Page 71 (~ 3mm) used to calibrate the work plane. Caution If you calibrated the work plane using a printed paper calibration board, add 3mm to height . Define button used to confirm the dimensions of the object. Robotiq Wrist Camera Instruction M anual...
- Page 72 Fig. 7-27: Definition of a circle 2D shape. Ring Enter the ring outer diameter (D), inner diameter (d) and the height (h) at which the ring is located. Tap the Define button. Fig. 7-28: Definition of a ring 2D shape. Robotiq Wrist Camera Instruction M anual...
- Page 73 Enter the square length (l) and the height (h) at which the square is located. Fig. 7-30: Definition of a square 2D shape. When the process is done, the wizard will switch to the Configure Model step. Please refer to the Configuring the Model for more details. Robotiq Wrist Camera Instruction M anual...
- Page 74 Detection Threshold button; tap to expand the detection threshold menu. Please refer to the Detection thresholds and scores for more details. Minus button; tap to lower the value. Robotiq Wrist Camera Instruction M anual...
- Page 75 Polyscope, once the Teach object wizard is completed. When selecting Test/Edit CamLocate node under the Command tab, if Camera is not at Snapshot Position, you either Move there OR stay and Ignore snapshot position. Robotiq Wrist Camera Instruction M anual...
- Page 76 Reset button; accessible via the Command tab of the Program Robot interface in PolyScope, once the Teach object wizard is completed. Tap to reset the whole process of the object teaching wizard. Robotiq Wrist Camera Instruction M anual...
- Page 77 Once in the multi-object menu, tap the plus (+) symbol to increase the maximum number of objects to detect, or tap the minus (-) symbol to reduce that number. Fig. 7-32: Configure Multiple Detection menu. Color Validation Color validation adds reliability to the Cam Locate functionality. Robotiq Wrist Camera Instruction M anual...
- Page 78 1. Tap the color validation button to access the color validation menu. Fig. 7-33: Configure Model with color validation button highlighted. 2. Turn on color validation by tapping the red button on the right side of the screen. Robotiq Wrist Camera Instruction M anual...
- Page 79 2. Eraser The eraser tool can be used to ignore features and edges in the color sampling area. Slide your finger or pointing device on the undesired area(s) on the teach pendant. Robotiq Wrist Camera Instruction M anual...
- Page 80 Fig. 7-36: Examples of Edges Score for (a) a blue part (b) a red part. Parametric method 1. Tap the color validation button to access the color validation menu. Fig. 7-37: Configure Model Step (Parametric method) with color validation button highlighted. Robotiq Wrist Camera Instruction M anual...
- Page 81 Fig. 7-39: Color selection zone (a) 50% of object size (b) 80% of object size Caution The size of the color selection zone ranges from 50% of the object size to 150% of the object size. Robotiq Wrist Camera Instruction M anual...
- Page 82 After adjusting the detection thresholds, if applicable, the user can test the location of the object(s) in the field of view by tapping the camera icon. Fig. 7-41: Configure Model Step with camera icon highlighted. Info In the context of multiple objects detection, each object detected has its own set of detection score values (%). Robotiq Wrist Camera Instruction M anual...
- Page 83 When testing the object(s) locating, object contours and detected features are outlined in green, while features that cannot be located within the field of view of the Wrist Camera are outline in red. Features from the model that cannot be located on the object in the field of view of the camera are outlined in red.
- Page 84 If the object goes through the 2-step detection successfully, you will see the object(s) outlined, surrounded by a blue rectangle, with the detection score values (%). Other objects detected will be surrounded by a white rectangle. Tap the other object(s) to display their own set of detection score values. Robotiq Wrist Camera Instruction M anual...
- Page 85 Fig. 7-43: Multiple objects found each with their selection rectangles and detection scores. Robotiq Wrist Camera Instruction M anual...
- Page 86 The Automatic method is only available when the model is defined with the automatic teaching method. 1. Tap the Gripper Clearance Validation button Fig. 7-44: Configure Model with Gripper Clearance Validation button highlighted. 2. To toggle Clearance Validation, tap the red button on the right side of the screen. Robotiq Wrist Camera Instruction M anual...
- Page 87 3. Adjust the clearance area with the available tools and tap the checkmark button to confirm the model and collision areas shown on screen. Fo more details about the gripper clearance samplings tools, please refer to the following section. Gripper Clearance Sampling Tools Robotiq Wrist Camera Instruction M anual...
- Page 88 The Parametric method is only available when the model is defined with the parametric teaching method. 1. To access the Gripper Clearance Validation menu, tap the Gripper Clearance Validation button. Fig. 7-47: Configure Model screen. The Gripper Clearance Validation button is highlighted. Robotiq Wrist Camera Instruction M anual...
- Page 89 3. Set the required clearance around the object using the plus and minus buttons. Fig. 7-49: Setting up the clearance perimeter. 4. Tap the checkmark button to confirm the model and collision areas shown on screen. Robotiq Wrist Camera Instruction M anual...
- Page 90 Clearance verification While the program is running, it is possible to see if there is enough clearance around the parts seen by the wrist camera. Here are the steps to follow to get this information. Fig. 7-50: Path to follow to have access to the clearance verification.
- Page 91 Editing the camera settings at the Configure Model step will override the settings selected at the Select Model step of the Automatic teaching method. Please refer to the Object Teaching for more details. Save location Once you are done with the test and adjustment, tap the Set reference position button. Robotiq Wrist Camera Instruction M anual...
- Page 92 When you are done with the teaching process, the Cam Locate node shows a snapshot of your saved object. You can tap Reset to redefine completely. You can tap Test / Modify to change the detection threshold or both the threshold and the saved object position. Robotiq Wrist Camera Instruction M anual...
-
Page 93: Cam Locate Node
Enabling Fast Cycle Time If ambient lighting is stable at runtime, you can enable the fast cycle time configuration. Go to the Installation tab > Camera > Configurations, and select Enable fast cycle time. Robotiq Wrist Camera Instruction M anual... -
Page 94: Programming A Cam Locate Loop
Fig. 8-2: Cam Locate Loop, " Process all" mode. If you select the radio button Process one at a time from the " Cam Locate Loop" window, the node " For object(s) found" is renamed to " For next object" . Robotiq Wrist Camera Instruction M anual... -
Page 95: Linear Move With Feature
8.1 .1 . Process all When this option is selected, the Wrist Camera takes one pitcture, and finds objects (their number can be changed when teaching the object). Then, the robot program will carry out instructions under " For object(s) found" for all objects that have been found, and finally, the Cam Locate Loop will be exited. -
Page 96: Object_Location Pose
8.3. object_location pose Once a snapshot position is defined, the work plane used for the calibration gets its own coordinate system, regardless of its orientation. This coordinate system is shown in the figure below. Robotiq Wrist Camera Instruction M anual... - Page 97 Fig. 8-7: Work plane reference frame. The Wrist Camera detects an object on the workplane and find its X-Y position, as well as its Z-orientation in the work plane coordinates system (see Fig. 8-8). Thus, a detected object is always laid flat (parallel) to the work plane. It is possible to use the object_location pose, which is a variable containing the detected object pose [positions X, Y, Z, and rotations Rx, Ry, Rz]) in the robot base reference frame.
- Page 98 Fig. 8-10: Program example - place the TCP on the detected object. e-Series robot program is illustrated. The second example moves the robot so that the TCP goes 20 cm above the detected object. This is in the case of an horizontal plane. Robotiq Wrist Camera Instruction M anual...
-
Page 99: Edit Detection Threshold And Object Location
8.4. Edit Detection Threshold and Object Location It is possible to edit both the detection threshold and the object location after the Teach object wizard has been completed. Tap Cam Locate > Command > Test/ Modify (see Fig. 8-13). Robotiq Wrist Camera Instruction M anual... - Page 100 Fig. 8-13: The taught object model can be viewed from the " Command" tab of a Cam Locate node. Objects can be retaught. To do so, tap . The " Configure Model" window is displayed. Robotiq Wrist Camera Instruction M anual...
- Page 101 . To confirm this new position, tap . A warn- ing message is displayed to prompt you to confirm this new position.To confirm, tap Define. A thumbnail of the object appears under to exit the wizard. Robotiq Wrist Camera Instruction M anual...
-
Page 102: Using A Variable Snapshot Position
Cam Locate node. The pose at which the robot enters the Cam Locatenode is calculated knowing how many trays are stacked. Thesnapshot_position_offset is calculated accordingly for the Wrist Camera to consider the pose offset from the original snapshot position. - Page 103 Fig. 8-14: Program example, using Universal Robots CB-Series models. Fig. 8-15: Program example, using Universal Robots e-Series models. Robotiq Wrist Camera Instruction M anual...
-
Page 104: Auto Pick
TCP value entered in the Teach Pendant for your hardware setup. Here is a general view of the Auto Pick functionnality, and how it can be used in a robot program. Robotiq Wrist Camera Instruction M anual... -
Page 105: Camera Locate Settings
Move to Snapshot Position Whenever a picture must be taken by the Cam Locate, the robot will automaticallly move to the snapshot position. Ignore object rotation Use the located object's position, but not its orientation. Robotiq Wrist Camera Instruction M anual... - Page 106 Ignore Snapshot Position can reduce cycle time. Move to Snapshot Position can improve part detection. Ignore object rotation can reduce cycle time for round objects. Ignore Snapshot Position and Move to Snapshot Position are mutually exclusive. Robotiq Wrist Camera Instruction M anual...
-
Page 107: Scan Code Node
The Scan Code node is used to read various types of barcodes and 2D codes (QR, Datamatrix, PDF417). Code Image Type Datamatrix PDF-41 7 Code 93 EAN-8 EAN-1 3 ITF-1 4 UPC-E UPC-A Code 39 Code 1 28 Robotiq Wrist Camera Instruction M anual... -
Page 108: Guidelineson Reading Codes
Code must be entirely visible in the field of view of the Wrist Camera. However, code should not fill the field of view entirely. Some whitespace must be left around its edges. Moving the Wrist Camera away from the code should increase its field of view and provide an adequate amount of whitespace. -
Page 109: Stringsdata Stored In Csv Files
Records the year, month, date, hour, minutes, seconds, and seconds decimals at w hich the code TimeStamp w as read. CodeType Records w hich type of code w as read. CodeData Records a string read from a code. Robotiq Wrist Camera Instruction M anual... -
Page 110: Find Visual Offset And Apply Visual Offset Nodes, And Defining Tags
The Wrist Camera Visual Offset capabilities are based on two nodes: Find Visual Offset and Apply Visual Offset. By attaching a Robotiq tag to a fixture (a tray, for instance), you can teach robot moves which are relative to this tag position. -
Page 111: Using A Tag In A Robot Program
Once a tag has been defined, you can start creating yourrobot program. The tag can serve as a reference point for moves in your program. Even if the tag moves (i.e. it is" offset" ), the Wrist Camera can find its new location (see section Find Visual Offset and Apply Visual Offset Nodes, and Defining Tags), and quickly adjust your moves based on the value of the offset (see section Find Visual Offset and Apply Visual Offset Nodes, and Defining Tags). - Page 112 Fig. 10-1: This robot program detects a tag, then uses the nodes Find Visual Offset and Apply Visual Offset . Robotiq Wrist Camera Instruction M anual...
-
Page 113: Find Visual Offset Node
3. The " Select Tag For Visual Offset" window is displayed. Tap the tag you wish to use for your Find Visual Offset node. 4. A tag is selected for the Find Visual Offset node. Robotiq Wrist Camera Instruction M anual... -
Page 114: Apply Visual Offset Node
After inserting this node into your robot program, create the rest of your program under the Apply Visual Offset node. All robot moves will be adjusted based on the value injected by this node. Robotiq Wrist Camera Instruction M anual... -
Page 115: Save Image Node
1 1 . Save Image Node You can take pictures with the Wrist Camera in the course of a robot program, and save them to a USB stick. This node is complementary to theWrist Camera URCap nodes. Since saving an image can take up to five seconds for high-definition images, this node might slow down your cycle time. - Page 116 You can add different instructions following the Save Image node, based on its success or failure. Before adding those instructions, you will need to select the directory where images are saved. Each image is saved in a separate .jpg file, and named as per this format: yyyy-MM-ddtHH-mm-ss.jpg. Robotiq Wrist Camera Instruction M anual...
-
Page 117: Specifications
Mechanical Specifications of Wrist Camera on page 119 Dimensions Maximum load Center of mass Moment of inertia section Electrical and Optical Specifications of the Wrist Camera on page 121 Electrical supply Resolution section Vision System Specifications on page 122 Field of view... -
Page 118: Mechanical Specificationsof Wrist Camera
1 2.1 .1 . Center of Mass and Moment of Inertia The coordinate system used to calculate the moment of inertia and center of mass of the Wrist Camera is the base of the Wrist Camera, which correspond to the Universal Robots tool flange reference [0,0,0]. - Page 119 Here is the approximate position for the center of mass. It has been calculated for the Wrist Cameraitself and for combinations with other Robotiq products. The tool plateis included when no gripper is mounted on the Wrist Camera. Combination x (mm)
-
Page 120: Electrical And Optical Specificationsof The Wrist Camera
1 2.2. Electrical and Optical Specifications of the Wrist Camera Robotic User Interface recommends you supply power to the Wrist Camera from the Universal Robots robot controller , as shown in section Electrical Setup; if for any reasons you cannot do so, here are the electrical specifications of the Wrist Camera. -
Page 121: Vision System Specifications
6 LED diffuse white light Autofocus technology Liquid lens Table 12-5: Wrist Camera optical specifications. 1 2.3. Vision System Specifications 1 2.3.1 . Accuracy The accuracy of the vision system is as described in the table below and depends on the robot model used. It is valid for the area where the calibration board was located during the calibration process. - Page 122 1 2.3.3. Field of view The field of view of the Wrist Camera varies based on the distance between the work plane and the Wrist Camera. The table below shows fields of view for some Universal Robots models. Robotiq Wrist Camera Instruction M anual...
- Page 123 1 2.3.4. Part dimensions The maximum part size that can be detected by the Wrist Camera is 60% of the field of view. The minimum is 10%, no matter the robot or the field of view size.
- Page 124 Fig. 12-6: Maximum part height. Info Part height ratio is taken between the maximum part height at any point and the minimum dimension present on part contour, width or length. Robotiq Wrist Camera Instruction M anual...
- Page 125 You can use either the yellow or pink side of the colored background provided with the camera kit. If required, use a different colored background to teach your part. Robotiq Wrist Camera Instruction M anual...
-
Page 126: Maintenance Of The Wrist Camera
1 3. Maintenance of the Wrist Camera The Wrist Camera requires no maintenance. Make sure its lens remains free from liquid or dust. To clean the lens, apply alcohol and wipe it with the pouch that contained your Wrist Camera. -
Page 127: Spare Parts, Kits And Accessories
Item Ordering Number Wrist Camera Kit for Universal Robots. RWC-UR-KIT Includes Wrist Camera, calibration board, tool plate for UR, USB memory stick, license and hub and all hardware. Replacement Wrist Camera. Includes 10 m pigtail cable. RWC-CAM-001 Wrist Camera tool plate for ISO 9409-1-50-4M6 pattern (Universal Robots). -
Page 128: Troubleshooting
1 5. Troubleshooting Info For details on the Vision server, Camera URCap and Wrist Camera firmware versions, go to the Installation tab > Camera > About. Versions are displayed. Check version numbers, and update all URCap to their latest release. -
Page 129: Wrist Camera Warranty And Patent
Camera. During the warranty period, Robotiq will repair or replace any defective Wrist Camera, as well as verify and adjust the Camera free of charge if the equipment should need to be repaired or if the original adjustment is erroneous. If the equipment is sent back for verification during the warranty period and found to meet all published specifications, Robotiq will charge standard verification fees. - Page 130 Robotiq reserves the right to make changes in the design or construction of any of its products at any time without incurring any obligation to make any changes whatsoever on units already purchased. Robotiq Wrist Camera Instruction M anual...
-
Page 131: Wrist Camera Harmonized Standards, Declarations And Certificates Eb
1 7. Wrist Camera Harmonized Standards, Declarations and Certificates 1 7.1 . Declaration of Incorporation Robotiq Wrist Camera Instruction M anual... - Page 132 1 7.2. Ingress Protection Certificate Robotiq Wrist Camera Instruction M anual...
- Page 133 Technical Support and Engineering extension 3 Sales extension 2 Head office Robotiq: 966, chemin Olivier Suite 500 Lévis, Québec G7A 2N1 Canada Where automation Pros come to share their know-how and get answers. dof.robotiq.com Robotiq Wrist Camera Instruction M anual...
Need help?
Do you have a question about the Wrist Camera and is the answer not in the manual?
Questions and answers