
Related Manuals for Petsafe 15201


Summary of Contents for Petsafe 15201
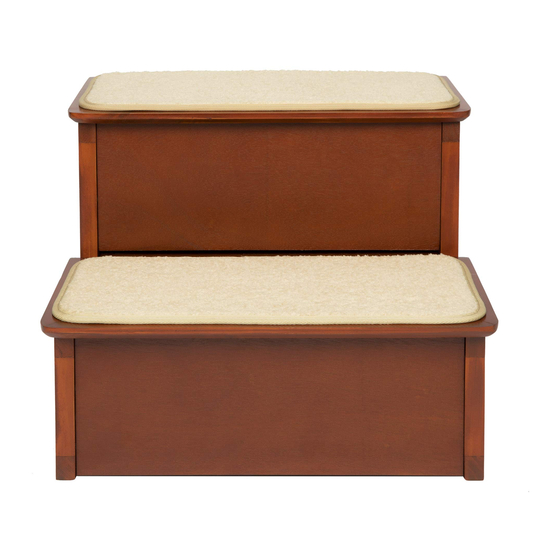
- Page 2 CozyUp WOOD PET STEPS ™ Let’s make home sweet home even sweeter.
-
Page 3: What You Have
What you have... - Page 4 Lay both side panels flat with side A facing up. Screw cam bolts into the threaded holes in each side panel.
- Page 5 Insert wood dowels into the remaining holes in each side panel.
- Page 6 Connect the risers to one side panel with sides B facing inward. Line up the holes in one end of each riser with the cam bolts and dowels in the side panel. Note the two holes in each riser where you will insert the cam nuts.
- Page 7 Insert cam nuts into the holes in each riser next to where the panels are connected. (The arrow on the cam nut should point toward the cam bolt.) Tighten the cam nuts to secure the connections.
- Page 8 Connect the back panel to the side panel with side C facing inward. Secure the connection with cam nuts.
- Page 9 Connect the remaining side panel and secure the connections with cam nuts. Attach the self-adhesive feet to the four bottom corners and turn the steps upright.
- Page 10 Squeeze glue into the slots on the top edge of the side panels and place a wood biscuit in each one. Starting at the top of the steps with tread E, attach each stair tread by applying glue to the slots on the underside of the tread, lining it up with the wood biscuits and pressing down.
- Page 11 You’re almost there! Offer treats to gently encourage your pet to practice walking up and down. With a little patience and lots of praise, your pet will soon be happy using the steps on his own!
- Page 12 Let us help! For questions or additional tips: +1 (800) 732-2677 petsafe.com 1-Year Warranty ©2019 Radio Systems Corporation Model: 15201 | Z400-2254 For important safety information, please see the customer care guide.
Need help?
Do you have a question about the 15201 and is the answer not in the manual?
Questions and answers