
Related Manuals for Kambrook KSB655


Summary of Contents for Kambrook KSB655
- Page 1 INSTRUCTION BOOKLET Suits all KSB655 models KSB655_IB_A20_FA.indd 1 31/3/20 7:03 pm...
- Page 2 Please retain your instruction book for future use. In the event that you need some assistance with your Kambrook appliance, please contact our Customer Service Department on 1300 139 798 (Australia) or 0800 2738 45 (New Zealand). Alternatively, visit us on our website at www.kambrook.com.au or www.kambrook.co.nz...
-
Page 3: Table Of Contents
Contents Kambrook Recommends Safety First p4 Components Using Your Stick Mixer Blending & Whisking Guide Attachment Guide Care, Cleaning & Storage Troubleshooting KSB655_IB_A20_FA.indd 3 31/3/20 7:03 pm... -
Page 4: Kambrook Recommends Safety First P4
INSTRUCTIONS BEFORE USE AND SAVE FOR FUTURE REFERENCE At Kambrook, we are very safety conscious. We design and manufacture consumer products with the safety of you, our valued customer, foremost in mind. In addition, we ask that you exercise a degree of care when using any electrical appliance and adhere to the following precautions. - Page 5 power off at the power outlet • If using, always ensure the and remove the power plug blending wand is securely fitted from the outlet. Use a spatula to onto the motor body before operating. dislodge the food. Do not use fingers as the blades are sharp.
- Page 6 20cm away from walls, • Any maintenance other than curtains and other heat or steam cleaning should be performed sensitive materials and provide at an authorised Kambrook adequate space above and on all Service Centre. sides for air circulation. KSB655_IB_A20_FA.indd 6...
-
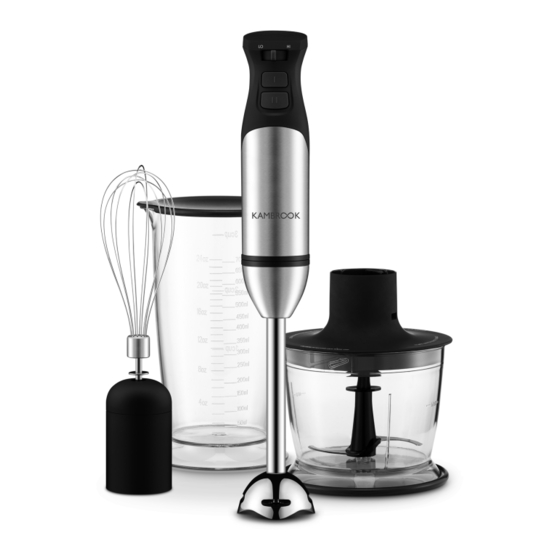
Page 7: Components P7
Components 1. Variable speed control Can be used to cover the Adjust the speed from Low to High blending jug or as an anti-slip when using the ON button. surface protector to be placed on the bottom of blending jug. 2. -
Page 8: Using Your Stick Mixer P8
Using Your Stick Mixer BEFORE FIRST USE Assembling the Chopping Bowl to the Motor Body Before using your stick mixer for the first time, remove packaging material and 1. Align the notches under the promotional labels. Ensure that you S-blade, with the tabs on the have all parts and accessories listed in spindle. - Page 9 2. Align the tabs on the processing bowl cover with the grooves on the chopping bowl. Push the processing bowl cover down the groove in a clockwise motion until it clicks into place. The processing bowl cover is now assembled to the processing bowl.
- Page 10 Using Your Stick Mixer Blending & Whisking 1. Fill the blending jug with the Fig. 5 ingredients, ensuring that they do not exceed the highest line indicated on the blending jug. NOTE Do not use frozen ingredients. NOTE Do not use non-food items. 5.
- Page 11 Food Processing 1. Assemble the S-blade into the chopping bowl as per the instructions in this book. 2. Fill the chopping bowl with the ingredients, ensuring that they do not exceed the ‘MAX’ line found on the chopping bowl. Assemble the chopping bowl cover onto the chopping bowl.
-
Page 12: Attachment Guide P12
Attachment Guide Attachment Speed Food Blending Wand Soups* Blending Wand HIGH Mayonnaise or gravy Blending Wand TURBO BOOST Milkshakes and smoothies S-blade Chopper Chopping vegetables for soups, salads etc. S-blade Chopper HIGH/TURBO BOOST Puree to make pesto or salsa Whisk Cake mixes Whisk HIGH... - Page 13 Hints & Tips • This stick mixer is not designed for • The plastic lid of the measuring jar use over a heat source. may be flipped upside down and placed underneath the base of • This stick mixer is not intended to the cup or chopping bowl in order chop ice.
-
Page 14: Care, Cleaning & Storage P14
Care, Cleaning & Storage Storage Before cleaning, ensure to turn the stick mixer off at the power outlet and Before storing, turn the power off remove the plug from the outlet. at the power outlet and remove Allow the stick mixer and all the power plug from the outlet. - Page 15 There are 2 ways to use the wall mount, depending on preference. • Attach the blending wand to the motor body to store in the large hole of the wall mount. Gather the power cord and plug and place into the small hole. (Fig. 7) •...
- Page 16 Troubleshooting Guide Problem Possible Issue Solution The motor Too many ingredients in the bowl. Remove some ingredients and restart. works very The speed dial is set too low. Set the speed dial to higher speed. slowly The motor The power plug is not plugged into the Plug into outlet and check function does not start.
- Page 17 Notes KSB655_IB_A20_FA.indd 17 31/3/20 7:03 pm...
- Page 18 Notes KSB655_IB_A20_FA.indd 18 31/3/20 7:03 pm...
- Page 19 Notes KSB655_IB_A20_FA.indd 19 31/3/20 7:03 pm...
- Page 20 Kambrook - Australia Kambrook - New Zealand Ground Floor, Suite 2, 170-180 Bourke Rd Private Bag 94411 Alexandria NSW 2015, Australia Botany, Manukau Auckland 2163 Locked Bag 2000 New Zealand Botany NSW 1455 Customer Service Line/ Customer Service Line 1300 139 798...
Need help?
Do you have a question about the KSB655 and is the answer not in the manual?
Questions and answers