Table of Contents
Advertisement
Available languages
Available languages
Quick Links
A
ssembly Instructions
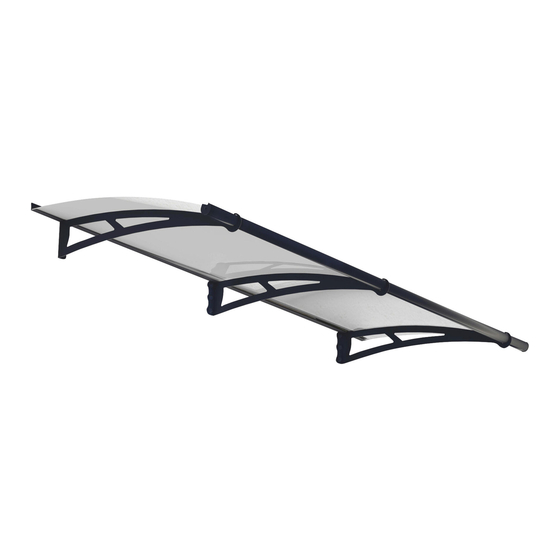
Aquila
2050
™
Clear / Solar Grey
Approx. Dim.
205.5W x 91.5D x 17.5H cm / 80.9"W x 36"D x 6.9"H
x2
USA
877-627-8476
Canada
1 800-866-5749
After Sale Service
Email: customer.service@palram.com
England 01302-380775
Germany 0180-522-8778
www.palramapplications.com
13 mm
1/2"
8 mm
10mm
5/16"
13/32"
France
0169-791-094
International +972 4-848-6942
Snow Load
150
kg/m 2
35
lbs/ft 2
Wind Resistant
120
km/hr
75
ml/hr
10 mm
13/32"
Advertisement
Table of Contents

Subscribe to Our Youtube Channel
Related Manuals for Palram Aquila 2050


Summary of Contents for Palram Aquila 2050
- Page 1 205.5W x 91.5D x 17.5H cm / 80.9”W x 36”D x 6.9”H 13 mm 10 mm 1/2” 13/32” 8 mm 10mm 5/16” 13/32” After Sale Service Email: customer.service@palram.com 877-627-8476 England 01302-380775 France 0169-791-094 Canada 1 800-866-5749 Germany 0180-522-8778 International +972 4-848-6942 www.palramapplications.com...
- Page 2 Extending the Door Cover Aquila 2050 / Capella 2050 2.05m / 6’9” Index 2.05m / 6’9” Canopy Connector Kit 0.01m / 0.4” 4.11m / 13’7’...
-
Page 3: Door Cover
Door Cover Attention! Please read these instructions carefully before you start to assemble this product. Please carry out the steps in the order set out in these instructions. Keep these instructions in a safe place for future reference. Safety Advice Additional information • Sort the parts and check against the content list. • The wall anchoring kit supplied with this product is suitable only for concrete walls. Other wall types need an accordant wall fixation kit. (Contact your supplier) • For safety purposes we strongly recommend the product be assembled by two people. • Please apply silicone sealant if needed • We strongly recommend the use of work gloves during assembly. • You are solely responsible for determining whether the handling, storage, assembly, • Do not attempt to assemble the Door Cover in windy or wet conditions. installation or use of this product is safe and appropriate in any location or for any given • Always wear shoes and safety goggles. application. The manufacturer is not responsible for any damages or injury to you, any other • Dispose of all plastic bags safely - keep them out of reach of small children. person or any property resulting from the improper handling, storage, installation, assembly or use of this product, or the failure to follow the manufacturer’s written instructions • Keep children away from the assembly area. regarding the handling, storage, installation, assembly and use of this product. This product • Do not attempt to assemble the Door Cover if you are tired, have taken drugs, medication is intended for normal residential use only. Do not use this product for any application that or alcohol, or if you are prone to dizzy spells. is not recommended in these instructions or building codes in effect in location where this • When using a stepladder or power tools, make sure that you follow the manufacturers product will be used. Always take care and use appropriate safety equipment (including eye... -
Page 4: Avis De Sécurité
MARQUISE Attention! Veuillez lire ces instructions attentivement avant de commencer l’assemblage de ce produit. Veuillez exécuter les étapes dans l’ordre indiqué dans ces instructions. Conservez ces instructions dans un endroit sûr pour usage ultérieur. Avis de Sécurité Attention: • Sortez les pièces et comparez avec la liste du contenu. •... - Page 5 Vordachmontage Achtung! Bitte lesen Sie sich diese Anleitung sorgfältig durch, bevor Sie mit der Montage dieses Produktes beginnen. Bitte befolgen Sie die Aufbauanweisungen in der beschriebenen Reihenfolge. Bewahren Sie diese Anlei- tung für spätere Einsätze an einem sicheren Ort auf. Sicherheitshinweise Warnung: •...
- Page 6 Deurluifels Attentie: Lees deze instructies nauwkeurig door voordat u met de montage van dit product begint. Voer de stappen uit in de volgorde zoals in de instructies staat vermeld. Bewaar deze instructies op een veilige plek voor toekomstige referentie. Veiligheidsadvies Waarschuwing: •...
-
Page 7: Consejos De Seguridad
Cubierta de la puerta ¡Atención! Por favor, lea estas instrucciones con cuidado antes de comenzar el montaje de este producto. Por favor, siga los pasos en el orden establecido en estas instrucciones. Mantenga estas instrucciones en lugar seguro para referencia futura. Consejos de seguridad: Advertencia: •... - Page 8 Dørudhænget OBS! Læs venligst denne vejledning grundigt, før du påbegynder monteringen af dette produkt. Udfør venligst trinnene i den rækkefølge, der er angivet i vejledningen. Opbevar denne vejledning på et sikkert sted for fremtidig konsultation. Sikkerhedsvejledning Advarsel: • Sortér delene, og tjek dem i forhold til indholdslisten. •...
-
Page 9: Bezpečnostní Pokyny
Markýza DŮLEŽITÉ Předtím, než začnete terasovou střechu sestavovat, si pečlivě přečtěte tyto pokyny. Provádějte jednotlivé kroky v pořadí uvedeném v těchto pokynech. Uchovávejte tyto pokyny pro další potřebu na bezpečném místě. Bezpečnostní pokyny Poznámka: • Dodržujte, prosím, instrukce uvedené v tomto manuálu. •... - Page 10 Ovisuoja Huomio! Lue ohjeet huolellisesti ennen kuin alat kokoamaan tätä tuotetta. Suorita vaiheet ohjeiden mukaisessa järjestyksessä. Säilytä ohjeet turvallisessa paikassa myöhempää tarvetta varten. Turvallisuusohje Varoitus: • Lajittele osat ja tarkista vertailemalla sisältöluetteloon. • Tämän tuotteen mukana toimitettavat seinäkiinnitystarvikkeet sopivat vain betoniseinille. Muita seinätyyppejä...
-
Page 11: Bezpečnostné Pokyny
Plátenná strecha DÔLEŽITÉ Prosím pred tým ako začnete s montážou si starostlivo prečítajte tento návod. Prosím vykonávajte jednotlivé kroky podľa poradia v tomto návode. Uchovajte si tento návod na bezpečnom mieste pre budúcu potrebu. Bezpečnostné pokyny Poznámka: • Prosím postupujte podľa nasledujúcich inštrukcií v tejto príručke. •... - Page 12 Ușă Cover - Baldachin IMPORTANT Vă rugăm să citiți aceste instrucțiuni cu atenție, înainte de a începe să asamblați acest produs. Vă rugăm să urmați pașii în ordinea stabilită în aceste instrucțiuni. Vă rugăm să păstrați aceste instrucțiuni într-un loc sigur, pentru consultare ulterioară. Sfaturi privind siguranța Informații suplimentare •...
- Page 13 Entrétak OBS! Les disse instruksjonene nøye før du begynner å montere produktet. Utfør alle trinnene i den rekkefølgen som er fastsatt i instruksjonene. Oppbevar disse instruksjonene på et trygt sted for framtidig referanse. Sikkerhetsråd Advarsel: • Sorter delene og sjekk dem opp mot innholdslisten. •...
-
Page 14: Avvertenze Di Sicurezza
Canopy Attention! Si invita a leggere attentamente queste istruzioni prima di iniziarel’ installazione di questa copertura per patio. Eseguire le operazioni nell’ordine stabilito da queste istruzioni. Conservare le istruzioni in un posto sicuro per futuro riferimento. Avvertenze di sicurezza Nota Bene: •... - Page 15 ENTRÉTAK Obs! Läs dessa instruktioner noga innan för börjar montera den här produkten. Följ stegen i den ordning som finns i dessa instruktioner. Förvara instruktionerna på ett säkert sätt för framtida behov. Säkerhetsråd Varning: • Sortera delarna och jämför mot innehållslistan. •...
- Page 16 Contents Item Qty. Item Qty. Item Qty. 1013 1003 7873 1014 4006 1019 4009 1015 2002 4000 2003 4010 5000 3009 (+3) 4020 3010 3022...
- Page 17 3022 1013 3010 2002 / 2003 3022 3022 3010 1013 3022 2002 2003 2003 4009 6 cm 2.4” 102.5 cm 40.35” 102.5 cm 40.35” Min. 30 cm / 11.8” 8 mm 5/16”...
- Page 18 102.5 cm 4010 40.35” 4010 8310 4010 8310 8309 13 mm 1/2” 4020 15 cm 10mm 4000 5.9” 5000 13/32” 1014 1019 1014 1015 1015 1015 1019 1015 1014 1015 1014...
- Page 19 1013 8308 3009 1013 3009 8308 4006...
- Page 20 1003 3009 1019 3009 3009 1003...
Need help?
Do you have a question about the Aquila 2050 and is the answer not in the manual?
Questions and answers