Advertisement
Quick Links
SERVICE MANUAL
PDP COLOUR TELEVISION
02
52088
2003
TS-42DX
[FRONT SPEAKER (L)]
[RM-C63]
[RECEIVER UNIT]
1
PRECAUTIONS . . . . . . . . . . . . . . . . . . . . . . . . . . . . . . . . . . . . . . . . . . . . . . . . . . . . . . . . . . . . . . . . . . . . . . . 1-3
2
SPECIFIC SERVICE INSTRUCTIONS . . . . . . . . . . . . . . . . . . . . . . . . . . . . . . . . . . . . . . . . . . . . . . . . . . . . . . 1-6
3
ADJUSTMENTS . . . . . . . . . . . . . . . . . . . . . . . . . . . . . . . . . . . . . . . . . . . . . . . . . . . . . . . . . . . . . . . . . . . . . . 1-19
4
TROUBLE SHOOTING . . . . . . . . . . . . . . . . . . . . . . . . . . . . . . . . . . . . . . . . . . . . . . . . . . . . . . . . . . . . . . . . . 1-46
PD-42DX
TU-42DX
TABLE OF CONTENTS
COPYRIGHT © 2003 VICTOR COMPANY OF JAPAN, LTD.
TS-42DX
[FRONT SPEAKER (R)]
VM-42DX
[PLASMA DISPLAY UNIT]
[SUB WOOFER]
BASIC CHASSIS
MK
TS-42DX
No.52088
2003/02
PD-42DX
Advertisement

Related Manuals for JVC PD-42DX


Summary of Contents for JVC PD-42DX
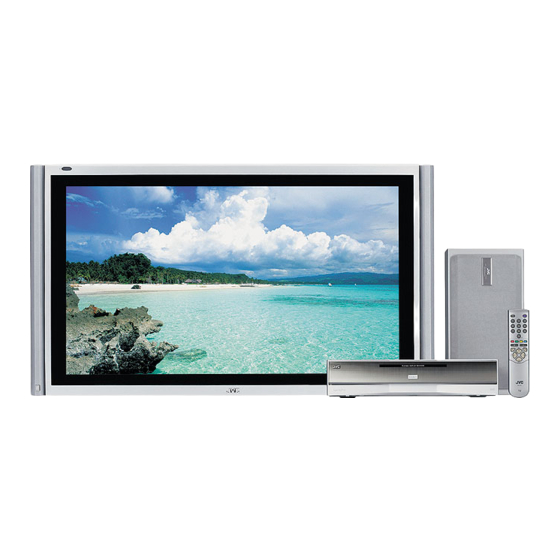
- Page 1 PD-42DX SERVICE MANUAL PDP COLOUR TELEVISION 52088 2003 PD-42DX BASIC CHASSIS TS-42DX [FRONT SPEAKER (R)] TS-42DX [FRONT SPEAKER (L)] VM-42DX TS-42DX [PLASMA DISPLAY UNIT] [RM-C63] [SUB WOOFER] TU-42DX [RECEIVER UNIT] TABLE OF CONTENTS PRECAUTIONS ............... 1-3 SPECIFIC SERVICE INSTRUCTIONS .
- Page 2 PD-42DX SPECIFICATION Item Contents Dimensions (W x H x D) Plasma display unit 103.5cm x 64.0cm x 9.8cm (without Front speaker) 112.3cm x 64.0cm x 10cm (with Front speaker) Receiver unit 43.5cm x 9.9cm x 38.2cm Front speaker 4.2cm x 63.9cm x 5.4cm Sub woofer 43.5cm x 23.0cm x 12.6cm...
-
Page 3: Precautions
PD-42DX SECTION 1 PRECAUTIONS 1.1 SAFETY PRECAUTIONS and connecting the other end of the lead through a 10k 2W resistor to the anode button. (1) The design of this product contains special hardware, (8) When service is required, observe the original lead dress. - Page 4 PD-42DX 1.2 INSTALLATION 1.2.1 HEAT DISSIPATION 1.2.2 INSTALLATION REQUIREMENTS If the heat dissipation vent behind this unit is blocked, cooling Ensure that the minimal distance is maintained, as specified efficiency may deteriorate and temperature inside the unit will below, between the unit with and the surrounding walls, as well rise.
- Page 5 PD-42DX 1.3 PRECAUTIONS REGARDING PDP 1.3.1 PRECAUTIONS DURING NOTES FOR TRANSPORTA- Do not use solvents such as benzine or thinner to wipe the filter TION surface. This may cause the filter to deteriorate in quality or the When transporting the display unit, pressure exerted on the inter- coating on the surface to come off.
-
Page 6: Specific Service Instructions
PD-42DX SECTION 2 SPECIFIC SERVICE INSTRUCTIONS 2.1 FEATURES HIGH-DEFINITION IMAGE TECHNOLOGY (DIST), High Quality Sound Technology (DD) equipped. DIST (Digital Image Scaling Technology) Employs an interpolation method that doubles the scanning lines to realize 768-line flicker- free picture making it especially suitable for reproducing high-resolution pictures even on large-screen displays. - Page 7 PD-42DX 2.2 TECHNICAL INFORMATION 2.2.1 PDP STRUCTURE AND CHARACTERISTIC This unit (Display Unit) uses the flat type panel PDP (Plasma Display Panel), instead of the conventional CRT (Cathode Ray Tube), as a display unit. 2.2.2 PIXEL (CELL) ARRAY PDP is constructed by sealing the xenon, which emits neon and ultraviolet rays for discharging purpose, in between the electrodes lay on the front glass substrate and rear glass substrate.
- Page 8 PD-42DX 2.3 MAIN CPU FUNCTIONAL TABLE (RECEIVER UNIT) Pin No. Terminal Name Port Name Remark Pin No. Terminal Name Port Name Remark VSS33 VSS33 VDD33 VDD33 3.3V REMOCON P2.8 KEY1 P2.9 KEY2 P2.10 (NOR/INST) I/O KEY3 P2.11 RESET-IN RSTIN TV_LINK P2.12...
- Page 9 PD-42DX 2.4 DISASSEMBLY PROCEDURE [DISPLAY UNIT] Caution: 2.4.3 REMOVING THE LINE FILTER PWB (Fig.3) • When exchanging parts etc. with the front side (PDP side) • Remove the REAR COVER. facing down, please place a protection sheet below before • Remove the TERMINAL COVER.
- Page 10 PD-42DX 2.4.9 REMOVING THE PDP UNIT (Fig.5) DISPLAY INTERFACE PWB • Remove the REAR COVER. • Remove the TERMINAL COVER. FILTER SHIELD • Remove the CHASSIS BASE (with each PWB affixed on the (x6) (x2) CHASSIS BASE). PDP POWER PWB (1) Remove the 4 screws [M], and remove the TERMINAL BRACKET.
- Page 11 PD-42DX (x4) TERMINAL BRACKET SUPPORT BRACKET (x3) (BOTTOM) (x2) SUPPORT BRACKET (TOP) (x2) (x2) (x2) BACK FRAME SUPPORT BRACKET (BOTTOM) (x2) (BOTTOM) (x2) BACK FRAME (BOTTOM) (x2) (x2) PANEL SHIELD (x4) PDP UNIT insertion hole INNER CASE FRONT PANEL FRONT FILTER Fig.5...
- Page 12 PD-42DX 2.4.10 REMOVING THE INNER CASE (Fig.6) 2.4.11 REMOVING THE DISPLAY SW PWB (Fig.6) • Remove the REAR COVER. • Remove the INNER CASE. • Remove the TERMINAL COVER. (1) Remove the 2 screws [X], and remove the DISPLAY LED •...
- Page 13 PD-42DX 2.5 DISASSEMBLY OF PROCEDURE [RECEIVER UNIT] 2.5.1 REMOVING THE TOP COVER 2.5.7 REMOVING THE MAIN PWB AND RECEIVER POWER (1) Remove the 4 screws [A] on the both left and right sides. (2) Remove the 3 screws [B] on the rear side.
- Page 14 PD-42DX (x2) TOP COVER (x3) SUPPORT BRACKET (x2) MI-COM PWB PB HOLDER DIST PWB MI-COM INTERFACE (x5) DIST RELAY PWB AV JACK PWB MI-COM HOLDER SUB TUNER AV SW PWB (x4) FRONT PANEL RECEIVER POWER PWB INSULATOR (x1) MAIN (x4)
- Page 15 PD-42DX 2.6 REPLACEMENT OF MEMORY IC This unit uses the nonvolatile memory IC. The memory IC memories data for video and deflection circuits. To replace the memory IC without the data written, malfunctions might occurred while power is on, and the normal image might not appear. When replacing the memory IC, be sure to use the IC written with the initial values of data.
- Page 16 PD-42DX 2.6.3 SETTINGS OF THE LAST MEMORY FACTORY SHIPMENT Setting item Setting value Setting item Setting value MAIN POWER SW SOUND SETTING · SHIPPING CHANNEL STEREO/I Stereo sound PRESET CHANNEL Refer to BASS Center OPERATING INSTRUCTIONS TREBLE Center VOLUME BALANCE...
- Page 17 PD-42DX 2.6.5 SERVICE MENU SETTING ITEMS Setting item Setting value Setting item Setting value 1.IF 1.VCO 6.STATUS (Do not adjust) 2.ATT ON/OFF 2. V/C 1.CUT OF R 13.COLOUR 7.VNR (Do not adjust) 2.CUT OF G 14.HUE 1.MYLV 10.MCCOR 3.CUT OF B 15.BY GAIN...
- Page 18 PD-42DX 2.7 REPLACEMENT OF CHIP COMPONENT 2.7.1 CAUTIONS (1) Avoid heating for more than 3 seconds. (2) Do not rub the electrodes and the resist parts of the pattern. (3) When removing a chip part, melt the solder adequately. (4) Do not reuse a chip part after removing it.
-
Page 19: Adjustments
PD-42DX SECTION 3 ADJUSTMENTS 3.1 ADJUSTMENT PREPARATION 3.2 MEASURING INSTRUMENT AND FIXTURES (1) Adjustment of many Majority of the adjustment items for • DC voltmeter (or Digital voltmeter) this unit is performed using the remote control. • Oscilloscope (2) However, adjustment of some adjustment items is •... - Page 20 PD-42DX 3.4 MAIN PARTS LOCATIONS (DISPLAY UNIT) Fig.2 1-20 (No.52088)
- Page 21 PD-42DX 3.5 SERVICE MENU SCREEN SERVICE MENU SERVICE MENU 1. IF 2. V/C 3. AUDIO 4. DD/CM 5. VSM PRESET 6. STATUS 7. VNR 8. IP 9. SHIPPING (OFF) 0. BUS FREE 1-9 : SELECT i : EXIT 1.IF 4. DD/CM...
- Page 22 PD-42DX 3.6 BASIC OPERATION OF THE SERVICE MENU MODE [USING REMOTE CONTROL UNIT] 3.6.1 HOW TO ENTER THE SERVICE MENU MODE 3.6.4 SETTINGS OF THE SERVICE MENUS NOTE: 3.6.4.1 [1. IF] (VCO adjustment, ATT setting) Ensure that the cursor (arrow) of the User Menu screen is [Do not adjust] pointing at Picture Control.
- Page 23 PD-42DX 3.7 DEFAULT VALUES IN THE SERVICE MENU SETTING MODE • Perform fine-tuning based on the "default values" using the remote control when in the SERVICE MENU setting mode. • The "default values" serve only as an indication rough standard and therefore the values with which optimal display can be achieved may be different from the default values.
- Page 24 PD-42DX Setting value Item No. Item Variable range SECAM NTSC (NO DISPLAY) -128~0127 0000 0000 0000 (NO DISPLAY) 0000~0255 0128 0128 0128 (NO DISPLAY) -128~0127 0000 0000 0000 (NO DISPLAY) 0000~0255 0123 0123 0123 (NO DISPLAY) -128~0127 0000 0000 0000...
- Page 25 PD-42DX Setting value Item No. Item Variable range SECAM NTSC (NO DISPLAY) 0000~0003 0003 0003 0003 (NO DISPLAY) 0000~0003 0003 0003 0003 (NO DISPLAY) 0000~0015 0000 0000 0000 (NO DISPLAY) 0000~0063 0019 0019 0019 (NO DISPLAY) 0000/0001 0001 0001 0001...
- Page 26 PD-42DX Setting value Item No. Item Variable range SECAM NTSC (NO DISPLAY) 0000~0007 0000 0000 0000 (NO DISPLAY) 0000~0003 0000 0000 0000 (NO DISPLAY) 0000~0003 0000 0000 0000 (NO DISPLAY) 0000~0003 0000 0000 0000 Setting value Item No. Item Variable range...
- Page 27 PD-42DX Setting value Item No. Item Variable range SECAM NTSC DDT13 (NO DISPLAY) 0000~0255 0000 0000 0000 DDT14 (NO DISPLAY) 0000~0003 0000 0000 0001 DDT15 (NO DISPLAY) 0000~0007 0000 0000 0000 DDT16 (NO DISPLAY) 0000~0255 0021 0021 0123 DDT17 (NO DISPLAY)
- Page 28 PD-42DX Setting value Item No. Item Variable range SECAM NTSC CMT24 (NO DISPLAY) -128~0127 0010 0010 0003 CMT25 (NO DISPLAY) -128~0127 0020 0020 0010 CMT26 (NO DISPLAY) -128~0127 0010 0010 0005 CMT27 (NO DISPLAY) -128~0127 0015 0015 0010 CMT28 (NO DISPLAY)
- Page 29 PD-42DX Setting value Item No. Item Variable range SECAM NTSC DDP12 (NO DISPLAY) 0000~0007 0006 0006 0006 DDP13 (NO DISPLAY) 0000~0007 0004 0004 0002 DDP14 (NO DISPLAY) 0000~0003 0002 0002 0000 DDP15 (NO DISPLAY) 0000~0015 0000 0000 0001 DDP16 (NO DISPLAY)
- Page 30 PD-42DX 3.7.4 [7.VNR] (*All fixed) NOTE: • For reference, initial setting values in the following conditions are written here. Inut signal :PAL/SECAM/NTSC Picture mode :Standard Zoom :Full Multi screen :Single screen White balance :Mid Setting value Item No. Item Variable range...
- Page 31 PD-42DX Setting value Item No. Item Variable range SECAM NTSC PPB005 (NO DISPLAY) 0000~00FF 0000 0000 0000 PPB006 (NO DISPLAY) 0000~00FF 0000 0000 0000 PPB007 (NO DISPLAY) 0000~001F 0000 0000 0000 PPB008 (NO DISPLAY) 0000~00FF 0000 0000 0000 PPB009 (NO DISPLAY)
- Page 32 PD-42DX Setting value Item No. Item Variable range SECAM NTSC PPD004 (NO DISPLAY) 0000~00FF 0002 0002 0002 PPD005 (NO DISPLAY) 0000~00FF 0038 0038 0038 PPD006 (NO DISPLAY) 0000~00FF 0000 0000 0000 PPD007 (NO DISPLAY) 0000~00FF 001A 001A 001A PPD008 (NO DISPLAY)
- Page 33 PD-42DX Setting value Item No. Item Variable range SECAM NTSC ADS033 (NO DISPLAY) 0000/0001 0001 0001 0001 ADS034 (NO DISPLAY) 0000~00FF 0002 0002 0002 Setting value Item No. Item Variable range SECAM NTSC IPA001 (NO DISPLAY) 0000/0001 0001 0001 0001...
- Page 34 PD-42DX Setting value Item No. Item Variable range SECAM NTSC IPA044 (NO DISPLAY) 0000~003F 0020 0020 0020 IPA045 (NO DISPLAY) 0000~003F 0020 0020 0020 IPA046 (NO DISPLAY) 0000~003F 0020 0020 0020 IPA047 (NO DISPLAY) 0000~0003 0002 0002 0002 IPA048 (NO DISPLAY)
- Page 35 PD-42DX Setting value Item No. Item Variable range SECAM NTSC IPA092 (NO DISPLAY) 0000~00FF 0000 0000 0000 IPA093 (NO DISPLAY) 0000~000F 0006 0006 0006 IPA094 (NO DISPLAY) 0000~00FF 0071 0071 0071 IPA095 (NO DISPLAY) 0000~000F 0000 0000 0000 IPA096 (NO DISPLAY)
- Page 36 PD-42DX Setting value Item No. Item Variable range SECAM NTSC IPB017 (NO DISPLAY) 0000~000F 0000 0000 0000 IPB018 (NO DISPLAY) 0000~00FF 0000 0028 0028 IPB019 (NO DISPLAY) 0000~000F 0000 0000 0000 IPB020 (NO DISPLAY) 0000~00FF 0000 0026 0026 IPB021 (NO DISPLAY)
- Page 37 PD-42DX Setting value Item No. Item Variable range SECAM NTSC IPB065 (NO DISPLAY) 0000~00FF 0000 0000 0000 IPB066 (NO DISPLAY) 0000/0001 009D 009D 009D IPB067 (NO DISPLAY) 0000~000F 0006 0006 0006 IPB068 (NO DISPLAY) 0000~000F 0040 0040 0040 IPB069 (NO DISPLAY)
- Page 38 PD-42DX Setting value Item No. Item Variable range SECAM NTSC IPC031 (NO DISPLAY) 0000/0001 0000 0000 0000 IPC032 (NO DISPLAY) 0000/0001 0000 0000 0000 IPC033 (NO DISPLAY) 0000/0001 0000 0000 0000 IPC034 (NO DISPLAY) 0000/0001 0000 0000 0000 IPC035 (NO DISPLAY)
- Page 39 PD-42DX Setting value Item No. Item Variable range SECAM NTSC IPD033 (NO DISPLAY) 0000/0001 0000 0000 0000 IPD034 (NO DISPLAY) 0000/0001 0000 0000 0000 IPD035 (NO DISPLAY) 0000~0003 0000 0000 0000 IPD036 (NO DISPLAY) 0000~000F 0000 0000 0000 IPD037 (NO DISPLAY)
- Page 40 PD-42DX 3.8 ADJUSTMENT PROCEDURE 3.8.1 DISPLAY UNIT Measuring Item Test point Adjustment part Description instrument PDP POWER DC voltmeter Connector Vs VR :170V ADJ <When PDP POWER PWB is not replaced> SUPPLY CN0C4 (R628) (1) Connect the load resistor (5Ω/5W) to the CN0C4...
- Page 41 PD-42DX 3.8.2 RECEIVER UNIT Measuring Item Test point Adjustment part Description instrument VCO (AFC) Remote control [1.IF] (1) Receive a PAL colour bar signal. check unit (2) Select "1. IF" from the SERVICE MENU. (3) Select "1. VCO." Signal generator (4) Make sure that an arrow of "MAIN"...
- Page 42 PD-42DX Measuring Item Test point Adjustment part Description instrument PAL/SECAM/ Remote control [2.V/C] - PAL COLOUR - NTSC SUB unit 13. COLOUR (1) Receive a PAL colour bar signal (full field colour COLOUR (Colour) bar). Signal generator (2) Select "2. V/C" from the SERVICE MENU.
- Page 43 PD-42DX Measuring Item Test point Adjustment part Description instrument SUB-SCREEN Remote control [2. V/C] (1) Receive a PAL black and white pattern signal BRIGHTNESS unit 11. TWN BRG (including 0% black signal). (Sub-screen (2) Select "2. V/C" from the SERVICE MENU.
- Page 44 PD-42DX Measuring Item Test point Adjustment part Description instrument PAL/SECAM/ Remote control [2. V/C] - SUB-SCREEN PAL COLOUR - 16. TWN COL NTSC unit (1) Receive a PAL colour bar signal (full field colour (Sub-screen SUB-SCREEN bar). colour) COLOUR Signal generator (2) Select "2.
- Page 45 PD-42DX Measuring Item Test point Adjustment part Description instrument WHITE Remote control [2. V/C] (1) Receive a PAL 75% all-white signal. BALANCE unit S13: R GAIN (2) Set white balance to "MID." (HIGH LIGHT) S15: G GAIN (3) Select "2. V/C" from the SERVICE MENU.
-
Page 46: Trouble Shooting
PD-42DX SECTION 4 TROUBLE SHOOTING 4.1 SELF-DIAGNOSIS FEATURE 4.1.1 OUTLINE This model has a "Self-diagnosis function," which checks the operation state of the circuits and informs us of a failure by flashing POWER LED when a failure occurs. Diagnosis is performed when power is turned on, and information input to the main microcomputer is monitored at all time. - Page 47 PD-42DX (No.52088)1-47...
- Page 48 PD-42DX VICTOR COMPANY OF JAPAN, LIMITED AV & MULTIMEDIA COMPANY DISPLAY CATEGORY 12, 3-chome, Moriya-cho, kanagawa-ku, Yokohama, kanagawa-prefecture, 221-8528, Japan (No.52088) Printed in Japan 200302WPC...
Need help?
Do you have a question about the PD-42DX and is the answer not in the manual?
Questions and answers