Table of Contents
Advertisement
Quick Links
Advertisement
Table of Contents

Related Manuals for LACO Technologies TITAN VERSA C


Summary of Contents for LACO Technologies TITAN VERSA C
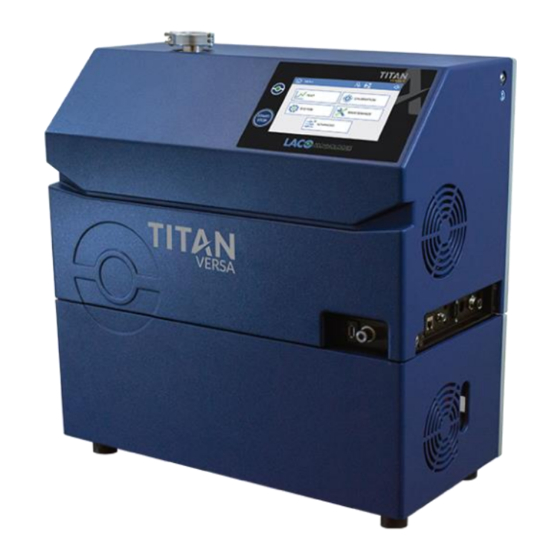
- Page 1 TITAN VERSA LEAK DETECTORS OPERATIONS AND MAINTENANCE MANUAL...
- Page 2 Product Group: TITAN VERSA Leak Detector Manual Rev. Number: SMT-07-1037, Rev. A2 © 2020 LACO Technologies, Inc. No part of this manual may be reprinted, translated or duplicated without the expressed written consent of LACO Technologies, Inc. 3085 West Directors Row, Salt Lake City, UT 84104 | Phone: 801-486-1004 | info@LACOtech.com - www.lacotech.com...
-
Page 3: Table Of Contents
Two Pumps ....................20 Installation ..........................21 5.1. Mechanical Setup and Mounting ................21 5.2. Mechanical Connections ....................22 Vacuum Test Port .....................22 VERSA C External Pump Connections ............24 High-Flow Evac Valve Connections ............25 LACO Technologies TITAN VERSA Operations and Maintenance Manual... - Page 4 Test and Settings Main Screens ..................62 Test Screen Quick Access Features ............62 Test ID Function ....................63 Settings Main Menu ..................65 6.7. Test Settings ........................66 Method Settings ....................67 Reject Limits .......................69 Vent Settings ......................71 AutoTest Settings .....................72 TITAN VERSA Operations and Maintenance Manual LACO Technologies...
- Page 5 Maintenance Tools and Parts ................... 123 8.5. Maintenance Tasks and Intervals ................124 8.6. Software Maintenance ....................125 Maintenance Reminders on Test Screens ..........125 Completing Maintenance Tasks in Software ........126 LACO Technologies TITAN VERSA Operations and Maintenance Manual...
- Page 6 Pump Repair Options ................... 152 Other Pump Parts ..................152 8.17. VERSA T Dry Pump Maintenance ................152 Accessing the MVP-030 Pumps..............152 Removing the MVP-030 Pump ..............153 Pump Maintenance and Repair Options ..........154 TITAN VERSA Operations and Maintenance Manual LACO Technologies...
- Page 7 Accessories ........................165 9.1. TITAN VERSA Accessories ..................165 Appendix..........................168 10.1. Reference Information....................168 Leak Rate Conversions ................168 Pressure Conversions .................. 168 Gas Flow Conversions .................. 170 Leak Flow Regime ..................170 LACO Technologies TITAN VERSA Operations and Maintenance Manual...
- Page 8 High-Flow Evac Options .......................90 Remote I/O Default Options ....................91 Digital Input Options......................92 Digital Output Options......................93 Option Button Selections .....................97 Event Logging ........................103 Terminal Testing Communication Method Summary ..........113 General Factory Settings ....................114 TITAN VERSA Operations and Maintenance Manual LACO Technologies...
- Page 9 TITAN VERSA Accessories ....................165 Leak Rate Conversions ....................... 168 Pressure Conversions ......................168 Elevation vs. Vacuum Level....................169 Gas Flow Conversions ......................170 Helium Leak Rate vs. Other Gases ................. 170 LACO Technologies TITAN VERSA Operations and Maintenance Manual...
-
Page 11: About This Manual
Barcode Reader, Remote Start / Stop module, and Remote Pass / Fail Light. This manual is available for download at www.lacotech.com. These operating instructions are intended for customers of LACO Technologies and owners of the TITAN VERSA Leak Detector. All information in this operating manual applies to the current state of the products development. -
Page 12: Displaying Information
WARNING: Dangerous situation resulting in major injuries. Dangerous situation resulting in damage to property or the environment. CAUTION: Dangerous situation resulting in minor injuries. NOTICE: Dangerous situation resulting in damage to property or the environment. TITAN VERSA Operations and Maintenance Manual LACO Technologies... -
Page 13: Safety
• Use of accessories or spare parts that are not named in this manual The product is not designed to carry people or loads, and is not intended for use as a Safe Operation seat, stepladder, or any other similar purpose. LACO Technologies TITAN VERSA Operations and Maintenance Manual... -
Page 14: Owner Requirements
Carry out work only with adherence to the complete operating instructions. • If you have further questions regarding the TITAN VERSA operation or maintenance, please contact LACO customer service: Phone: 801-486-1004 | Toll Free: 800-465-1004 Email: Technical Support: techsupport@lacotech.com TITAN VERSA Operations and Maintenance Manual LACO Technologies... -
Page 15: Dangers
If parts of the body or other objects are in the vicinity of the inlet flange, they may be sucked in. ➔ Always use the provided inlet screen filter. ➔ Always keep parts of the body or other objects away from the inlet flange. LACO Technologies TITAN VERSA Operations and Maintenance Manual... - Page 16 This may result in the burning out of the cathode. • Do not test gas whose molecules contain halogens such as fluorine or chlorine. TITAN VERSA Operations and Maintenance Manual LACO Technologies...
-
Page 17: Transport And Storage
➔ Keep the packaging (recyclable materials) in the event the product needs to be transported or stored. ➔ Keep the blanked-off plate on the inlet port when the product is not in use. LACO Technologies TITAN VERSA Operations and Maintenance Manual... -
Page 18: Product Configurations
Use either a lifting crane or a two-person lift to remove unit from packaging. Use the yellow lifting strap to remove leak detector. Be careful not to tip leak detector more than 20 degrees. TITAN VERSA Operations and Maintenance Manual LACO Technologies... -
Page 19: Replace Lifting Hardware (Versa T And L)
Store the device under the following conditions: • Ambient temperature • A cool, dry place • Ensure the inlet test port is blanked off with a KF-25 blank LACO Technologies TITAN VERSA Operations and Maintenance Manual... -
Page 20: Description
TITAN VERSA Lifting Guide Two lifting eyes Lifting sling • Maintenance Kit (see Maintenance Tools and Parts for contents) Maintenance tools Spare parts Oil drain and fill accessories (wet pump versions only) TITAN VERSA Operations and Maintenance Manual LACO Technologies... -
Page 21: Usb Drive Folder Structure
The provided USB drive contains files located per the file structure summarized below. USB Drive Folder Structure Root Folder Sub-Folder TITAN VERSA Manuals Accessories Pumps Manuals Brochures Catalog Reference Certification Technical Reference Application Notes Drawings Operation Video Maintenance LACO Technologies TITAN VERSA Operations and Maintenance Manual... -
Page 22: Configurations
323 (12.7") provides) VERSA L (“Horizontal”) 403 (15.8") 562 (22.1") 497 (19.6") Wet or Dry VERSA T (“Tower”) 607 (23.9") 562 (22.1") 323 (12.7") Wet or Dry VERSA T VERSA C VERSA L TITAN VERSA Operations and Maintenance Manual LACO Technologies... -
Page 23: Feature Locations And Dimensions
USB Port Display and Cycle Start button Product label Power entry module Multi-Use ports – Area 1 Electrical Interface Fan inlet with filter External pump port Secondary external pump port (for High-Flow) LACO Technologies TITAN VERSA Operations and Maintenance Manual... -
Page 24: Versa T Features
Multi-Use ports – Area 1 Multi-Use ports – Area 2 Electrical Interface Oil sight glass Oil fill area Fan inlet with filter Pump fan with filter Secondary external pump port (for High-Flow) TITAN VERSA Operations and Maintenance Manual LACO Technologies... -
Page 25: Versa L Features
Display and Cycle Start button Product label Power entry module Multi-Use ports – Area 1 Multi-Use ports – Area 2 Electrical interface Oil sight glass Oil fill area Fan inlet with filter Pump fan with filter LACO Technologies TITAN VERSA Operations and Maintenance Manual... -
Page 26: Technical Data
607 x 562 x 323 403 x 562 x 497 Dimensions mm (H x W X D) (in) (15.8 x 22.1 x 12.7) (23.9 x 22.1 x 12.7) (15.8 x 22.1 x 19.6) TITAN VERSA Operations and Maintenance Manual LACO Technologies... -
Page 27: Titan Versa Part Number Matrix
Environmental Conditions Environmental Conditions Storage temperature -20 °C to + 55 °C Maximum humidity of air 85% without condensing Maximum magnetic field 3 mT Maximum altitude above sea level 2000 m ASL LACO Technologies TITAN VERSA Operations and Maintenance Manual... -
Page 28: Vacuum Diagrams
4 DESCRIPTION Vacuum Schematic – Main Version TITAN VERSA Operations and Maintenance Manual LACO Technologies... -
Page 29: Vacuum Schematic - High-Flow Evac And High-Flow Vent With One Pump
4 DESCRIPTION Vacuum Schematic - High-Flow Evac and High-Flow Vent with One Pump LACO Technologies TITAN VERSA Operations and Maintenance Manual... -
Page 30: Vacuum Schematic High-Flow Evac And High-Flow Vent With Two Pumps
4 DESCRIPTION Vacuum Schematic High-Flow Evac and High-Flow Vent with Two Pumps TITAN VERSA Operations and Maintenance Manual LACO Technologies... -
Page 31: Installation
• Keep heat sources away from the device. • Do not expose the device to direct sunlight. NOTICE: VACUUM PUMP OIL All wet pump units are shipped with vacuum pump oil in the pumps. LACO Technologies TITAN VERSA Operations and Maintenance Manual... -
Page 32: Mechanical Connections
This filter provides 40-micron protection and leads to increased leak detector life. Place filter into inlet test port with filter towards the inside of the manifold. TITAN VERSA Operations and Maintenance Manual LACO Technologies... - Page 33 • Test that the entire line is completely sealed when the detector is attached to the pumping circuit to ensure the connections (pump, pipe, valves, etc.) are correct. LACO Technologies TITAN VERSA Operations and Maintenance Manual...
-
Page 34: Versa C External Pump Connections
Primary pump meeting the following specifications: Ultimate pressure below 3 mbar ▪ Pumping speed greater than 2 m3/h ▪ • Vacuum hose with KF-25 end connection • Power connection to external primary pump TITAN VERSA Operations and Maintenance Manual LACO Technologies... -
Page 35: High-Flow Evac Valve Connections
TITAN VERSA models. High-Flow Evac Internal Configurations One Pump High-Flow Evac Two Pump High-Flow Evac VERSA C (Compact) VERSA T This version not available (Tower) VERSA L This version not available (Horizontal) LACO Technologies TITAN VERSA Operations and Maintenance Manual... -
Page 36: Versa High-Flow Evac External Configurations
5 INSTALLATION VERSA High-Flow Evac External Configurations One Pump High-Flow Evac Two Pump High-Flow Evac Small pump VERSA C (Compact) Large pump VERSA T This version not available (Tower) TITAN VERSA Operations and Maintenance Manual LACO Technologies... -
Page 37: Sniffer Port
A selection of appropriate sniffer probes is listed in the Accessories section. Multi-Use Ports Table 11 summarizes the port configurations and locations for all TITAN VERSA configurations. Ports include: • Vacuum vent • Pump exhaust • Oil drain and oil fill LACO Technologies TITAN VERSA Operations and Maintenance Manual... -
Page 38: Titan Versa Multi-Use Ports And Locations
Hole in top rear cover exhaust Pump VERSA L - Dry Vent Spare Spare exhaust TITAN VERSA Multi-Use Port Details Port Specification Picture Vacuum vent 12 mm tube Pump exhaust (wet pump) 12 mm tube TITAN VERSA Operations and Maintenance Manual LACO Technologies... - Page 39 High humidity • Test areas with high helium backgrounds • Production test with fast cycles • High sensitivity testing (<1 x 10 mbar*L/sec) See the Gas Vent Module Manual (SMT-07-1047) for more information. LACO Technologies TITAN VERSA Operations and Maintenance Manual...
- Page 40 Use short, large-diameter tubing sections (see P/N: LMSA5503 for 6- foot section). Dry pump versions contain a muffler for the pump exhaust and are to be left alone. Mufflers should be replaced every two years under typical operations. TITAN VERSA Operations and Maintenance Manual LACO Technologies...
- Page 41 • VERSA L oil drain 5.2.5.4. Vacuum Pump Oil Fill See the following sections for details on oil change and oil fill. • VERSA T oil fill • VERSA L oil fill LACO Technologies TITAN VERSA Operations and Maintenance Manual...
-
Page 42: Electrical Power Connection
2. Connect the device to the electric power supply using the supplied power cable. Electrical interface connections are located on the right side of all TITAN VERSA configurations. Table 13 summarizes all the interfaces, connection specifications, parts, and accessories used with each connection. TITAN VERSA Operations and Maintenance Manual LACO Technologies... -
Page 43: Usb Port
The TITAN VERSA is equipped with a local I/O on the M8 pin per table below. The local I/O is provided primarily for the analog output features. See Local I/O for configuring local analog inputs. For traditional leak detector I/O, see Remote I/O. LACO Technologies TITAN VERSA Operations and Maintenance Manual... -
Page 44: Local I/O Pinout
NOTICE: Digital outputs utilize 5-volt open collector logic with very low current. LACO recommends using a solid-state relay with a 5-volt coil (P/N: LMSA5981) to drive other voltages (i.e. 24 VDC) or larger current loads. TITAN VERSA Operations and Maintenance Manual LACO Technologies... -
Page 45: Serial Port
Communication settings: 9600, 19,200, 57,600 and 115,2000. These can be set at Menu > System > Communications. All communication follows these additional serial settings: • Bits: 8 • Parity: None • Stop Bit: 1 LACO Technologies TITAN VERSA Operations and Maintenance Manual... -
Page 46: Ethernet Port
Scan any barcode on the Test ID screen. Barcode reader entry allows for quick entry of critical test ID data. See Test ID for more details. TITAN VERSA Operations and Maintenance Manual LACO Technologies... -
Page 47: Remote I/O
Easy I/O wiring with no soldering needed; just a screwdriver is required • 24 VDC logic inputs and outputs • Flexible digital inputs – PNP or NPN • 4-20 mA analog outputs provide less noise and longer runs LACO Technologies TITAN VERSA Operations and Maintenance Manual... -
Page 48: Accessory Features
Pass / Fail Light Accs. 1 and Accs. 2 (externally) This section The pass / fail light assembly illuminates a pass or fail depending the final leak rate value vs. the reject limit. TITAN VERSA Operations and Maintenance Manual LACO Technologies... -
Page 49: Remote Wired Screen
Configure remote screen to Menu > System > Accessories. See the Remote Screen Manual (SMT-07-1041) for more information on the screen and various mounting options. Figure 8: Remote Wired Screen LACO Technologies TITAN VERSA Operations and Maintenance Manual... -
Page 50: Wireless Handheld Pendant
4. From the list, select the correct MAC address. Unit is connected wirelessly and directs to home page. Refer to the RC10 Manual (P/N: 124628) for more information. Figure 9: Wireless Handheld Pendant TITAN VERSA Operations and Maintenance Manual LACO Technologies... -
Page 51: Disposal Of The Titan Versa
5 INSTALLATION The device can be disposed of by the user or sent to LACO Technologies for disposal. The device is made of recyclable materials. Use this option to avoid waste and to protect the environment. ➔ Please comply with the environmental and safety regulations of your country when disposing of the device. -
Page 52: Operation
Vacuum mode Test object Any test mode Accessories needed per test 2. To power on the VERSA C, the user must power on their external pump prior to switching on the leak detector. TITAN VERSA Operations and Maintenance Manual LACO Technologies... - Page 53 5. After startup is complete, the test screen appears, and the leak detector status will read “Standby”. NOTICE: Allow the device to warm up for 20 minutes before making exact measurements or executing a calibration. LACO Technologies TITAN VERSA Operations and Maintenance Manual...
-
Page 54: Power-Off Process
This feature prevents oil migration in the cell block in the case of anti-suck back valve failure on a wet pump. NOTICE: Safe to move detector Only after the leak detector has been powered off for five minutes is it safe to move the unit. TITAN VERSA Operations and Maintenance Manual LACO Technologies... -
Page 55: General Use Guidelines
Calibration Types per Mode and Mass Test Mode Test Gas Mass Calibration Type Vacuum Internal Vacuum Helium 4 Sniff Vacuum Helium 3 External Sniff Vacuum Hydrogen Sniff LACO Technologies TITAN VERSA Operations and Maintenance Manual... - Page 56 This background reading is used for the background suppression feature. 4. If the unit fails a calibration the user will be notified. See Calibration History for more information on reviewing calibration results. TITAN VERSA Operations and Maintenance Manual LACO Technologies...
- Page 57 External leaks require the user to enter an estimated calibrated leak temperature. LACO manufactured leak standards are very temperature independent, so entering an average temperature of around 25 °C will work for most applications. LACO Technologies TITAN VERSA Operations and Maintenance Manual...
- Page 58 Edit to change the calibrated leak valve settings. 6. Confirm calibrated leak valve is open. 7. Calibration proceeds through peak find and peak measure. 8. Dialog prompts user to close calibrated leak valve. After valve is closed, press Continue. TITAN VERSA Operations and Maintenance Manual LACO Technologies...
- Page 59 3. Use a sniff calibrated leak standard. This type of leak standard is different than other vacuum-style calibrated leaks in that the leak element is built directly on the end the calibrated leak element. 4. Place the sniffer probe into the calibrated leak inlet port. LACO Technologies TITAN VERSA Operations and Maintenance Manual...
- Page 60 8. Confirm sniffer probe is connected and leak rate is stable. Keep sniffer probe inserted. 9. Calibration proceeds through peak find and peak measure. 10. Dialog prompts user to remove sniffer probe. After probe is removed, press Continue. TITAN VERSA Operations and Maintenance Manual LACO Technologies...
-
Page 61: Vacuum Method Leak Testing
If test objects are small enough, a plastic bag can be placed over the test object and helium sprayed into bag. This method ensures helium application is global around the entire part LACO Technologies TITAN VERSA Operations and Maintenance Manual... -
Page 62: Sniff Method Leak Testing
5e-7 mbar*L/sec. The test object is filled with helium gas (or another tracer gas) and leaks are detected with a sniffer probe. Exact leak locations can be detected. However, sometimes leaks can be missed if test operators move the probe too quickly. TITAN VERSA Operations and Maintenance Manual LACO Technologies... -
Page 63: Gas Charging Process
2. Connect test part to charge manifold and turn on evac vacuum pump. 3. For gross leak check, fill test part with air and close air fill valve. Ensure test part pressure is stable. 4. Vent air and close air fill valve. LACO Technologies TITAN VERSA Operations and Maintenance Manual... -
Page 64: User Interface Features
Option button User can configure button to perform these commonly-used functions: None, Zero, Vent, Data Log On, Alarm. The default setting is None. TITAN VERSA Operations and Maintenance Manual LACO Technologies... -
Page 65: Option Button
➔ To edit the current configuration, press and hold the screen area for one second. The following screen appears. The user can toggle through the various options as outlined in Table 21. The Option button can also be edited from Settings > System > Display. LACO Technologies TITAN VERSA Operations and Maintenance Manual... -
Page 66: Screen Type Navigation
2. Upper-middle – Status text or screen name. Note that status text is also displayed on the bottom of the screen. 3. Upper-right – Status icons. 4. Right-side menu on test screens for Quick-Access features . TITAN VERSA Operations and Maintenance Manual LACO Technologies... -
Page 67: Status Icons
F = Fine test mode Method / Mode / Mass • U = Ultra Test mode Superscript – Mass • 2 = Hydrogen • 3 = Helium 3 • 4 = Helium LACO Technologies TITAN VERSA Operations and Maintenance Manual... -
Page 68: Volume Settings
Pressing near the zero level will turn off the audio signal. Setting nine is the loudest signal. If the audio is on and the user quickly presses on the audio icon, the signal will automatically turn off. TITAN VERSA Operations and Maintenance Manual LACO Technologies... -
Page 69: User Access Levels
The Advanced level has access to all functions. Users should only use these functions if properly trained. When the advanced menu button is pressed, the user will be prompted to enter the advanced password. LACO Technologies TITAN VERSA Operations and Maintenance Manual... -
Page 70: Screen Menu Structure
Counters Manual Control Event History Event History Detail Maintenance Detector Info Software Versions Turbo Pump Info Parameters Software Update Pirani Cal Cell Info Advanced Settings Advanced Method Correction Cell Tuning Terminal Testing TITAN VERSA Operations and Maintenance Manual LACO Technologies... -
Page 71: Screenshot To Usb Drive
See the area indicated by a red square in the screen shot below. 3. The following dialog appears. Press the OK button to capture the current screen. Note that the HMI will become unresponsive for about 20 seconds after the screenshot event occurs. LACO Technologies TITAN VERSA Operations and Maintenance Manual... -
Page 72: Test And Settings Main Screens
Calibration check process. Vent options: • A: Auto Vent mode • M: Manual vent mode Vent Icon vent arrows are green when venting is active. Icons are blue or grey when incactive. TITAN VERSA Operations and Maintenance Manual LACO Technologies... -
Page 73: Test Id Function
To access the Test ID settings, the user must select the Test ID icon from the test screen. ➔ Enter data via the bar code reader or the touchscreen keyboard. ➔ Barcode entry will cycle through all the configured commands. LACO Technologies TITAN VERSA Operations and Maintenance Manual... - Page 74 The user can define up to five user defined Test ID parameters. These parameters are Test ID Fields typically used in data logging. Examples include: • Operator • Part Number • Serial Number • Lot number • Test Description TITAN VERSA Operations and Maintenance Manual LACO Technologies...
-
Page 75: Settings Main Menu
To access the main Settings menu from the test screens, press the menu icon (three bars). In the Settings main menu, the following setting categories are available. Settings Menu Structure Menu Icon Test Calibration System Maintenance Advanced LACO Technologies TITAN VERSA Operations and Maintenance Manual... -
Page 76: Test Settings
6 OPERATION The test settings section has the following sub-menus: • Test Settings • Reject Levels • Vent • AutoTest • Zero • Data Log TITAN VERSA Operations and Maintenance Manual LACO Technologies... -
Page 77: Method Settings
6 OPERATION Method Settings LACO Technologies TITAN VERSA Operations and Maintenance Manual... -
Page 78: Vacuum Test Mode Summary
(see table below). Test Mode Skip Example Vacuum Scenario 1 – Crossover Pressures to Scenario 2 – Crossover Pressures Pump Directly to Ultra mode to skip Gross Mode only Test Mode Gross Fine TITAN VERSA Operations and Maintenance Manual LACO Technologies... -
Page 79: Reject Limits
➔ On the Test graph screen, the reject point is identified with a red line. When the leak rate is above the reject limit, the graph line is red; the line is green when the leak rate is below the reject limit. LACO Technologies TITAN VERSA Operations and Maintenance Manual... - Page 80 If a gross leak appears the above the setpoint, the unit will switch to Gross Mode and pump to remove gross leak condition. In this condition, the detector can switch between gross and ultra modes to help eliminate the high leak rate condition. TITAN VERSA Operations and Maintenance Manual LACO Technologies...
-
Page 81: Vent Settings
If enabled, the vent valve stays open per the vent timer and then closes. The vent timer can be useful for applications where nitrogen venting the of the test volume will enable low background readings. LACO Technologies TITAN VERSA Operations and Maintenance Manual... -
Page 82: Autotest Settings
6 OPERATION AutoTest Settings TITAN VERSA Operations and Maintenance Manual LACO Technologies... -
Page 83: Zero Settings
If signal increases while zero is on, the Zero function stays on but is not functional. To re-zero, the user must deactivate Zero function and then reactivate. • When the signal decreases while zero is on a new reference, background is automatically calculated. LACO Technologies TITAN VERSA Operations and Maintenance Manual... - Page 84 Zero Threshold To set Zero Threshold, enter the leak rate at which you need Zero function to start. Zero Timer Enter the desired Zero time, at which the Zero function will automatically start. TITAN VERSA Operations and Maintenance Manual LACO Technologies...
-
Page 85: Data Log Settings
For data logging features to function, a USB drive must be inserted in the USB port. A USB is provided in shipment in documentation packet. Spare drives can be ordered (P/N: TV5928). LACO Technologies TITAN VERSA Operations and Maintenance Manual... -
Page 86: Test Summary Field Description
Leak Rate Pressure Method Mode Pass Operator Part Num Serial # Lot Num Operator 1/1/2019 15:45:40 2.17E-06 0.174 Vacuum Ultra Fail Operator Part Num Serial # Lot Num Operator 1/1/2019 15:55:59 2.78E-11 0.001 Vacuum Ultra Pass TITAN VERSA Operations and Maintenance Manual LACO Technologies... -
Page 87: Stream Data Log Field Summary
Test Method Log Interval Leak Rate Units Pressure Units Vent Valve Status Zero Status 1/1/2019 16:16:56 Vacuum mbar l/s mbar Time LeakRate Vacuum Status 1.00E-12 26.4 Roughing 1.00E-12 24.3 Roughing 2.81E-07 Roughing 2.05E-03 20.4 Gross LACO Technologies TITAN VERSA Operations and Maintenance Manual... -
Page 88: Graph Settings
The following graph line colors are used. • Black – Standby • Blue – Rough • Green – In cycle and below reject limit • Red – In cycle and above reject limit TITAN VERSA Operations and Maintenance Manual LACO Technologies... - Page 89 Select options of 1 minute, 2 minutes, 4 minutes, or 30 seconds. Logarithmic Select to graph values to log scale; default graph logs in linear scale. Show Grid Select to show grid on graph. LACO Technologies TITAN VERSA Operations and Maintenance Manual...
-
Page 90: Calibration Settings
6 OPERATION The calibration settings menu has the following sub-menus: • Calibrated Leak Standard • Calibration Start • Calibration History TITAN VERSA Operations and Maintenance Manual LACO Technologies... -
Page 91: Calibrated Leak Standard
See Section 6.4.1 for more information on performing the different types of calibrations. Reference the leak standard label to enter the parameters below. LACO Technologies TITAN VERSA Operations and Maintenance Manual... -
Page 92: Calibration Start
Cal Start Method There are three options for calibration start. • Cal at Start (not recommended but available) • Cal Check at Start (This runs both a cal check and an autocalibration) TITAN VERSA Operations and Maintenance Manual LACO Technologies... - Page 93 Only use machine factors when external calibrations have been used to verify correct readings. Machine Factor-Vacuum The machine factor is only used in split flow applications. Machine Factor-Sniff Enter desired machine factor for sniff mode. LACO Technologies TITAN VERSA Operations and Maintenance Manual...
-
Page 94: Calibration History
Select the desired the event to review and the following screen will appear where the user can review the calibration history. In a calibration, both the cal factor and acceleration voltage (Vacc) are adjusted. TITAN VERSA Operations and Maintenance Manual LACO Technologies... -
Page 95: System Settings
6 OPERATION The calibration settings section has the following sub-menus: • Mass Spec • Units • Accessories • Communication • Local I/O • Remote I/O • Display LACO Technologies TITAN VERSA Operations and Maintenance Manual... -
Page 96: Mass Spec Settings
The filament should only be turned off in cases of required maintenance or troubleshooting. Filament Status This parameter indicates the relative life of the filament. When below 20% the user should schedule maintenance for a filament change. TITAN VERSA Operations and Maintenance Manual LACO Technologies... -
Page 97: Unit Settings
Press the Date and Time box and the screen below appears. Set the desired date and time and press the Back button to save. ➔ Date format: MMDDYY ➔ Time Format: HHMMSS in 24 hour (military) LACO Technologies TITAN VERSA Operations and Maintenance Manual... - Page 98 The audio setting is turned off by default. Select toggle to turn on Audio levels range from 0 (off) to 9 (loudest). Audio levels can also be adjusted by pressing the audio status icons (upper right). Additionally, the option button can be programmed to mute audio signal. TITAN VERSA Operations and Maintenance Manual LACO Technologies...
-
Page 99: Accessory Settings
High-Flow Evac, High-Flow Vent and Pass / Fail light. If no accessory is configured, select the None option. When the High-Flow Evac valve is configured, the user must select from the options summarized in the following table. LACO Technologies TITAN VERSA Operations and Maintenance Manual... -
Page 100: Communication Settings
Available baud rates are 9600 (default), 19200, 57600, and 115200. All communication adheres to the following additional serial settings: • Bits: 8 • Parity: None • Stop Bit: 1 See the Terminal Testing section for more information on this feature. TITAN VERSA Operations and Maintenance Manual LACO Technologies... -
Page 101: Remote I/O
Ready to Start Exponent Internal Cal LD error Zero In final test mode Inlet Vent Calibrate Ack Clear Error Reject 2 Int Cal Check Reject 3 Go to Ultra mode Calibration active LACO Technologies TITAN VERSA Operations and Maintenance Manual... -
Page 102: Digital Input Options
Int Cal Check Set to internal calibration mode, then start Cal Check. Gross Set test mode to Gross. Fine Set test mode to Fine. Ultra Set test mode to Ultra. None No function. TITAN VERSA Operations and Maintenance Manual LACO Technologies... -
Page 103: Digital Output Options
Leak Detector is in vacuum method. Fil 1 active Filament 1 is active. Fil 2 active Filament 2 is active. Start Up System is in Startup Initialization. Shutdown System is in Shutdown / Power down. None LACO Technologies TITAN VERSA Operations and Maintenance Manual... -
Page 104: Local I/O
The "Mantissa" output corresponds with the leak rate mantissa: Mantissa U = Voltage measured (V) on analog output Formula Mantissa = U Examples • U = 3.5 V -> Mantissa = 3.5 TITAN VERSA Operations and Maintenance Manual LACO Technologies... - Page 105 • the integer part represents the exponent • the decimal part represents the mantissa. U = Voltage measured (V) on analog output Formulas Mantissa = 10 x (U - Integer value (U)) LACO Technologies TITAN VERSA Operations and Maintenance Manual...
-
Page 106: Display
= 2.50 10 (8-12) Inlet Pressure The "Inlet Pressure" output corresponds with the inlet pressure source: U = Voltage measured (V) on analog output Formula Inlet pressure = 10 (U- 5.5) Display TITAN VERSA Operations and Maintenance Manual LACO Technologies... -
Page 107: Maintenance Settings
French, Chinese. The maintenance settings section has the following sub-menus: • Maintenance Tasks • Counters • Manual Control • Event History • Detector Info • Turbo Pump • Parameters • Pirani Calibration LACO Technologies TITAN VERSA Operations and Maintenance Manual... -
Page 108: Maintenance Tasks
When maintenance items are close to being due, the maintenance icon wrench on the test screen (status icon area) will appear orange. When items are due, the icon will become red. TITAN VERSA Operations and Maintenance Manual LACO Technologies... - Page 109 However, this is not recommended in usual practice. In this case the dialog below appears. The maintenance due date will remain the same even if the warning is ignored, but the warning will be suppressed. LACO Technologies TITAN VERSA Operations and Maintenance Manual...
-
Page 110: Counters
Filament 1 / 2 Hours Displays the current hours for filaments 1 and 2. When filaments are replaced the hour counters should be reset to 0. Detector hours Display the current total detector hours. TITAN VERSA Operations and Maintenance Manual LACO Technologies... -
Page 111: Manual Control
Visual indications of valve state, system status, pressure and leak rates. • Control of purge valve. This is the only valve that can be controlled through the HMI. • Ability to Start and Stop leak test cycles. LACO Technologies TITAN VERSA Operations and Maintenance Manual... -
Page 112: Event History
Test screen or the Manual Control screen, and is ideal for applications where the background requires improvement or when new valves are installed on the valve block. Event History TITAN VERSA Operations and Maintenance Manual LACO Technologies... -
Page 113: Event Logging
Reset count TMP1 Reset count TMP2 Reset count TMP3 Reset count Fil1 Reset count Fil2 Reset count cycle Ie increase Auto-cal restart Date/Time update Full param Reset Fil change Cal Pirani int Storage delay LACO Technologies TITAN VERSA Operations and Maintenance Manual... -
Page 114: Detector Info
Press the Software button to display the Software versions screen. For informational purposes, the software revisions the of the following items are summarized. • HMI Software • Supervisory Board Software • Mass Spec Software TITAN VERSA Operations and Maintenance Manual LACO Technologies... -
Page 115: Turbo Pump
The Pirani vacuum gauge sensor should be calibrated every six months. The calibration process had two main steps: • Atmosphere reading • Deep Vacuum reading (take 3-5 minutes to ensure deep vacuum has been reached). LACO Technologies TITAN VERSA Operations and Maintenance Manual... - Page 116 6. Proceed to Deep vacuum section below. Deep Vacuum Reading Setting deep vacuum pressure 1. Place KF-25 blank-off on vacuum inlet. 2. Verify test mode is in Ultra. 3. Press “Go to Vacuum Button”. TITAN VERSA Operations and Maintenance Manual LACO Technologies...
- Page 117 4. Leak detector will go into test and evacuate for five minutes. The text “Stabilizing, Please wait” will show. 5. After five minutes, press the Set Vacuum Count button and then press the Stop button and the screen will automatically close. LACO Technologies TITAN VERSA Operations and Maintenance Manual...
-
Page 118: Parameters
Select the “Set Technician Level Password” button. Set up a four-digit password. This new password enables the technician user to have access to the all parameters except Advanced. TITAN VERSA Operations and Maintenance Manual LACO Technologies... - Page 119 Software Update button. The screen below appears. 4. Press the Start Update button. 5. The update will take approximately two to four minutes. Status text will be displayed. 6. The system will reboot after the update is completed. LACO Technologies TITAN VERSA Operations and Maintenance Manual...
-
Page 120: Advanced Settings
The Service settings section has the following sub-menus: • Cell Info • Advanced Settings • Method Correction • Cell Tuning (Characterization) • Terminal testing (Serial, Ethernet and barcode) TITAN VERSA Operations and Maintenance Manual LACO Technologies... -
Page 121: Cell Info
NOTICE: Careless changing of these parameters can lead can cause serious issues with the detector. Use with caution. The advanced settings page allows access the following parameters: • Cal Factor • Acceleration Voltage • Emission Current • Electronic Zero LACO Technologies TITAN VERSA Operations and Maintenance Manual... -
Page 122: Method Correction
Select this button to enter a different password other than the default 5226. Method Correction This screen is only available for factory use. Cell Tuning This screen is only available for factory use. TITAN VERSA Operations and Maintenance Manual LACO Technologies... -
Page 123: Terminal Testing
The LD Command method transmits data via the Send Data box, and responses are displayed in the Received Data box. Press the Send button to transmit the entered command to the leak detector. The LD Command method does not require any external communication devices. LACO Technologies TITAN VERSA Operations and Maintenance Manual... -
Page 124: Factory Default Settings
None (High-Flow Evac, High-Flow Accessory 2 Function Vent, Pass, Fail, None) Accessory @AC1 and @AC2 High-Flow Only (High-Flow Valve High-Flow Evac Pump down State Only, High-Flow and LD Rough) High-Flow Evac Measure State TITAN VERSA Operations and Maintenance Manual LACO Technologies... -
Page 125: Leak Detector Settings
Vent Method Automatic (Manual, Automatic) Vent Vent Delay Vent Timer Off (0 seconds) Cycle End Method Manual (Manual, Automatic) Test Time 10 seconds AutoTest Roughing Time On, 10 seconds Sniff Auto Test LACO Technologies TITAN VERSA Operations and Maintenance Manual... - Page 126 Off, 3 (1-9) SO, SY Digital Voice Setting Off, 4 (1-9) Analog Out 1 Mantissa Local I/O Analog Out 2 Logarithmic, -12 Analog Out 3 Exponent, -12 Advanced Signal Filtering Stable (Disabled, Stable) TITAN VERSA Operations and Maintenance Manual LACO Technologies...
-
Page 127: Troubleshooting
Operation of the device is not interrupted. ➔ Errors are events where device operation will stop until the fault is corrected. The five levels of warnings or faults are outlined in the following table. LACO Technologies TITAN VERSA Operations and Maintenance Manual... -
Page 128: Warning Levels
Launch an autocalibration two calibrations reached Int Pirani Cal Error Ensure leak detector is used Ambient temperature too Temperature too High in the required temperature high tolerance Cell zero stability TITAN VERSA Operations and Maintenance Manual LACO Technologies... - Page 129 • Change the air filter of the vacuum block Filament Request Off High. vac pump speed 3 - Critical Fil. current too high Fault – Test not Filament 2 collector short possible Filament 1 collector short LACO Technologies TITAN VERSA Operations and Maintenance Manual...
- Page 130 VHS uncalibrated No electrical current Triode SECU active Check MDP connection 4 - Service Fault – No PIC no found Display 24 VDC problems Calibrated leak external Shutdown of Autocal TITAN VERSA Operations and Maintenance Manual LACO Technologies...
- Page 131 • Leak detector cannot start because the use conditions Ensure leak detector is used at startup are not met Out start condition in the required temperature • Ambient temperature too tolerance LACO Technologies TITAN VERSA Operations and Maintenance Manual...
-
Page 132: Maintenance And Service
CAUTION: Risk of injury from improper maintenance work Maintenance on the TITAN VERSA may only be performed by personnel who have been authorized by LACO Technologies to execute these tasks. ➔ When handling gases, comply with the applicable regulations and safety measures. -
Page 133: Maintenance Documentation
Hex bit, metric hex head, 5 mm LMSA5932 Hex bit, metric hex head, 6 mm LMSA5941 Hex bit, torx tamper proof, TT20 LMSA5933 Hex bit, torx tamper proof, T6 LMSA5934 Hex bit, nutsetter, 7 mm hex bit LMSA5935 LACO Technologies TITAN VERSA Operations and Maintenance Manual... -
Page 134: Maintenance Tasks And Intervals
LS-TVLD-3C Exchange pump 36000 h or 72 months OS or LS LS-TVLD-3L Replace pump AIISP-90 36000 h or 72 months OS or LS Exhaust muffler PFP0995942 12000 h or 24 months TITAN VERSA Operations and Maintenance Manual LACO Technologies... -
Page 135: Software Maintenance
“maintenance wrench” icon in in the status icon area (upper right) will change to orange. When maintenance tasks are due, the icon will change to red and flash. Press the icon to see a list of all due or almost due maintenance items. LACO Technologies TITAN VERSA Operations and Maintenance Manual... -
Page 136: Completing Maintenance Tasks In Software
CAUTION: Ensure all maintenance is performed at the required time per instructions in this manual. When a maintenance task is completed, press the reset button to reset the maintenance timer and reminder. TITAN VERSA Operations and Maintenance Manual LACO Technologies... -
Page 137: Maintenance Support
72-hour uptime guarantee PM services offer the same basic service items as a service agreement, but without the benefits listed above. Contact us to learn how you can benefit from LACO's service offerings. LACO Technologies TITAN VERSA Operations and Maintenance Manual... -
Page 138: Removing Covers
10. Lift cover until the top is above the test port, then lift at a forward angle. 11. Carefully pull cover away from leak detector to locate and detach the 40 pin IDC screen cable from screen. TITAN VERSA Operations and Maintenance Manual LACO Technologies... -
Page 139: Removing Back Cover (Compact Configuration)
2. Lift metal cover straight up until it comes free from leak detector. 3. Slowly pull cover away from leak detector and locate fan power cable. 4. Disconnect fan power cable from fan. LACO Technologies TITAN VERSA Operations and Maintenance Manual... -
Page 140: Removing Back Cover (Tower Configuration)
Pull off the panel. 2. Use a 5 mm Hex wrench to remove the four M6 screws located inside of the bottom compartment and slide the plastic cover forward off the leak detector. TITAN VERSA Operations and Maintenance Manual LACO Technologies... -
Page 141: Cleaning
Quantity Part Number Mains Fuse T 10.0 A 2 LMSA3844-C Remote I/O Fuse (F2) T 2.0 A LMSA3850 Remote Screen Fuse (F3) T 2.0 A LMSA3850 Accessories Fuse (F1) T 2.0 A LMSA3850 LACO Technologies TITAN VERSA Operations and Maintenance Manual... - Page 142 5. Lock the fuse holders back into place. 6. Close the cover. 8.10.1.2. Replacing terminal block fuses (F1, F2, F3) 1. Turn off power to unit. 2. Remove back cover (see Removing Covers). TITAN VERSA Operations and Maintenance Manual LACO Technologies...
- Page 143 4. Open fuse terminal block fuse compartment to reveal defective fuse and replace (2.0 AT, 250 V, Ø5 x 20 mm). 5. Close fuse compartment and rotate terminal block top to closed position. LACO Technologies TITAN VERSA Operations and Maintenance Manual...
-
Page 144: Power Cords
Overlay, Tower Wet Pump Configuration LL0233-3 Overlay, Tower Dry Pump Configuration LL0233-4 Overlay, Horizontal Wet Pump Configuration LL0233-5 Overlay, Horizontal Dry Pump Configuration LMSA5847 Touchscreen LMSA115901 Screen board LMSA5965 40 Pin screen board cable TITAN VERSA Operations and Maintenance Manual LACO Technologies... -
Page 145: Circuit Boards
There are three to four fans within the TITAN VERSA. All models have an inlet fan in the main enclosure, a turbo fan, and a mass spectrometer fan. The tower and horizontal units also include a pump fan. LACO Technologies TITAN VERSA Operations and Maintenance Manual... -
Page 146: Filters
2. Use hand to pop off plastic guard on fan. 3. Replace filter (center filter to avoid major gaps). 4. Replace plastic guard. 8.11.2.2. Filter Locations Inlet Fan Filter (all models) Pump Fan Filter – Horizontal Configuration TITAN VERSA Operations and Maintenance Manual LACO Technologies... -
Page 147: Calibrated Leak Maintenance
• Depletion rate is indicated on the calibrated leak identification label. • Return leak standards to LACO Technologies calibration lab for recalibration LACO Technologies TITAN VERSA Operations and Maintenance Manual... -
Page 148: Replacement
3. Disconnect the temperature sensor from the calibrated leak using a 2.5 mm Hex wrench. 4. Connect Temp Sensor to replacement leak and insert into retaining device. 5. Update the settings of the internal calibrated leak. TITAN VERSA Operations and Maintenance Manual LACO Technologies... -
Page 149: Valve Block
Minisol Valve 3/2 PF101303 Minisol Valve 2/2 Vacuum Inlet Screens The two vacuum inlet screens on the KF-25 inlet are shown below. Inlet screens may require replacement if they become damaged or clogged. LACO Technologies TITAN VERSA Operations and Maintenance Manual... -
Page 150: Exhaust Vent Filter
Purge Valve Restrictor / Filter The VERSA TD dry pump configurations include a 50 sccm flow reducer per diagram below. Use a 2.5 mm hex wrench to remove. TITAN VERSA Operations and Maintenance Manual LACO Technologies... -
Page 151: Valves
Valves 8.13.4.1. Valve Cleaning • Clean all surfaces—especially the valve seat area—of valve parts with alcohol. • Improve the cleaning by blowing off the parts with dry filtered air—particularly the o-ring grooves. LACO Technologies TITAN VERSA Operations and Maintenance Manual... -
Page 152: Pirani Vacuum Gauge Sensor
20 test cycles. Test external tightness with a tracer gas to check the vacuum quality. Pirani Vacuum Gauge Sensor TITAN VERSA Pirani Gauge Components Part Number Description PF795706 Pirani Gauge PF057972 Gauge Filament TITAN VERSA Operations and Maintenance Manual LACO Technologies... -
Page 153: High-Flow Valves
Follow the valve replacement instructions below to inspect valves. Valve Replacement Valves should be replaced every 200,000 cycles or every four years (whichever comes first). LACO Technologies TITAN VERSA Operations and Maintenance Manual... -
Page 154: Turbo Pump
• Dispose of the oil wick cartridge as stipulated by local regulations. • Prevent health hazards or environmental pollution from contamination by means of suitable safety precautions. • Decontaminate affected parts prior to executing maintenance work. TITAN VERSA Operations and Maintenance Manual LACO Technologies... - Page 155 7. Use the special tool (P/N: T10071 or PFPVM40813) to unscrew the cover on the back. 8. Pry the oil wick cartridge with two screwdrivers and dispose of it according to local regulations. 9. Remove the Porex rods (8x) from the guides using tweezers. LACO Technologies TITAN VERSA Operations and Maintenance Manual...
- Page 156 15. Reinstall all previous parts. 16. Reconnect the power supply and power on unit. 17. Verify proper turbo pump performance. 18. Enter your maintenance work on the TMP in Maintenance Tasks section. TITAN VERSA Operations and Maintenance Manual LACO Technologies...
-
Page 157: Replace Splitflow 50 For Bearing Change
With the covers off, LACO recommends cleaning the interior area and pump surfaces. 8.16.2.1. Removing Pump 1. Place leak detector on blocks to gain access to pump bolts under the unit. 2. Remove lower tower covers. LACO Technologies TITAN VERSA Operations and Maintenance Manual... -
Page 158: Oil Change - Quick Method
LVOFFUNO6 – Flushing Fluid is recommended for contaminated, older or heavily used pumps. 1. It is recommended the UNO6 be a little hot to make the oil drain easy. Open the oil fill port to drain the oil faster TITAN VERSA Operations and Maintenance Manual LACO Technologies... - Page 159 6. Remove cap from quick-change oil fill bottle. Install oil refill cap onto the bottle. 7. Place cap connector onto fill tube end, as shown below, and let oil fully drain from container into pump. LACO Technologies TITAN VERSA Operations and Maintenance Manual...
-
Page 160: Oil Change - Traditional Method
2. Remove the oil cap on the vacuum pump fill line. 3. With the use of a funnel, start to fill the pump with new vacuum oil. 4. Keep watching the oil window to fill to the correct level. TITAN VERSA Operations and Maintenance Manual LACO Technologies... -
Page 161: Oil Mist Eliminator Maintenance
2. Remove bolt on top of filter. Be sure to keep o-ring under bolt attached to the bolt. 3. Replace filter element. 4. Lightly oil all o-rings with pump fluid. 5. Assemble in reverse order. LACO Technologies TITAN VERSA Operations and Maintenance Manual... -
Page 162: Pump Repair Options
Accessing the MVP-030 Pumps To access the MSP-030 pumps on the VERSA T model it is necessary to remove the bottom front and back covers (see Removing Covers). TITAN VERSA Operations and Maintenance Manual LACO Technologies... -
Page 163: Removing The Mvp-030 Pump
Slide the tube off the black barbed hose fitting on each pump. 4. Remove the hose vent hose from the push tube fitting on each pump. 5. Remove four bolts from each pump and slide out pumps. LACO Technologies TITAN VERSA Operations and Maintenance Manual... -
Page 164: Pump Maintenance And Repair Options
PFP0995941 *Utilize to remove/install new diaphragms. Additional Pump Parts VERSA TD Pump Parts Part Number Description LMK-TVTD-4 MVP-030 exhaust hose assembly LMK-TVTD-3 MVP-030 pump mount assembly LMSA117070 MVP-030 hose assembly Diaphragm Inspection TITAN VERSA Operations and Maintenance Manual LACO Technologies... -
Page 165: Replacing Diaphragms
4. Detach diaphragm support disk and diaphragm from the square head of the connecting screw of the diaphragm clamping disk. If it is difficult to separate the old diaphragm from the diaphragm support disk, use methanol to loosen it. LACO Technologies TITAN VERSA Operations and Maintenance Manual... -
Page 166: Versa L Wet Pump Maintenance
➔ Oil level reading is most accurate if checked while pump is off, hot, and on a horizontal plane. TITAN VERSA Operations and Maintenance Manual LACO Technologies... -
Page 167: Accessing 1015 Pump
1. Remove the back cover using 6 mm hex wrench. 2. Disconnect the foreline hose from the pump. 3. Disconnect the black exhaust hose from the chassis exhaust port. 4. Unplug the power cord. LACO Technologies TITAN VERSA Operations and Maintenance Manual... -
Page 168: Oil Change - Quick Method
1. Is recommended the pump be a little hot to make the oil drain easy. Open the oil fill port to drain the oil faster. 2. Remove cap from top of rear cover. TITAN VERSA Operations and Maintenance Manual LACO Technologies... - Page 169 8. Attach 12 mm tube to oil refill bottle and then to fill port, as shown below, and let oil fully drain from container into pump. 9. Remove fill container and place tube cap back on fill hose. 10. Replace back cover with two screws. LACO Technologies TITAN VERSA Operations and Maintenance Manual...
-
Page 170: Oil Change - Traditional Method
4. Watch the oil window to fill to the correct level. Oil Mist Eliminator Maintenance The oil mist eliminator filter cannot be replaced individually. To replace the oil mist eliminator, use P/N: PF121494. TITAN VERSA Operations and Maintenance Manual LACO Technologies... -
Page 171: Pump Repair Options
5. Place leak detector on blocks to gain access to the bottom of the unit. 6. Remove the four pump mounting bolts with a 5 mm hex wrench. 7. Take the pump off for repair or maintenance. LACO Technologies TITAN VERSA Operations and Maintenance Manual... -
Page 172: Pump Maintenance And Repair Option
(see following image). 3. Remove the outboard housing axially from the frame by removing six Allen head bolts (see image below). TITAN VERSA Operations and Maintenance Manual LACO Technologies... - Page 173 5. If there is compressed air available, blow both scroll parts to remove any seal debris using a razor blade or an exact-o knife to remove debris. Clean the main o- ring and ensure it is in good condition. LACO Technologies TITAN VERSA Operations and Maintenance Manual...
-
Page 174: Other Pump Parts
11. Place the front flywheel cowling in place and reinstall the three bolts. Other Pump Parts VERSA L Pump Parts Part Number Description LMSA119448 ISP-90 hose assembly LMK-TVLD-4 ISP-90 exhaust hose assembly LMK-TVLD-3 ISP-90 pump mount assembly TITAN VERSA Operations and Maintenance Manual LACO Technologies... -
Page 175: Accessories
Section 5 or 6 TITAN VERSA Cable accessory, 5 m, gray TV5945 Pass / Fail Light box TV118378 Local I/O TITAN VERSA Local I/O Connector, Screw Terminal TV5944 Section 5 or 6 LACO Technologies TITAN VERSA Operations and Maintenance Manual... - Page 176 LVF-B-2.5-0.75-40- Filters Internal sintered bronze filter, NW25, 40 micron Section 5 NW25 4" x 4" x 2" LD Vacuum Chamber LVC040402-2222-LD Leak Detection SMT-07-1051 Chambers 4" x 4" LD Vacuum Chamber LVC0404-3321-LD TITAN VERSA Operations and Maintenance Manual LACO Technologies...
- Page 177 4" x 4" Leak Test Bombing Chamber (PSI) LBC0404-60 8" x 3" Leak Test ASME Pressure Bombing Chamber Bombing LBC083-60 (60 PSI) SMT-07-1016 Chambers 9" x 15" Leak Test ASME Pressure Bombing LBC0915-100 Chamber (100 PSI) LACO Technologies TITAN VERSA Operations and Maintenance Manual...
-
Page 178: Appendix
2.95 x 10 psia 7.5 x 10 9.87 x 10 0.01 1.45 x 10 2.95 x 10 in.Hg Ab 7.5 x 10 9.87 x 10 0.01 1.45 x 10 2.95 x 10 TITAN VERSA Operations and Maintenance Manual LACO Technologies... -
Page 179: Elevation Vs. Vacuum Level
0 (sea level) 29.92 1,000 28.85 2,000 27.82 3,000 26.82 10.4 4,000 25.84 13.6 5,000 24.89 16.8 6,000 23.98 19.9 7,000 23.06 22.9 8,000 22.20 25.7 9,000 21.38 28.5 10,000 20.58 31.2 LACO Technologies TITAN VERSA Operations and Maintenance Manual... -
Page 180: Gas Flow Conversions
Helium Leak Rate vs. Other Gases Multiply Helium Leak Rate by: Convert to Viscous Flow Molecular Flow Argon 0.883 0.316 Neon 0.626 0.447 Hydrogen 2.23 1.41 Nitrogen 1.12 0.374 1.08 0.374 Water Vapor 2.09 0.469 TITAN VERSA Operations and Maintenance Manual LACO Technologies... - Page 181 1'OLD 2'OLD = 0.001 ((20 )/(10 )) = 0.004 atm-cc/sec V'NEW Using the table above, the equivalent leak rate for air under the same conditions is: = 0.004 (1.08) = 0.0043 V,AIR LACO Technologies TITAN VERSA Operations and Maintenance Manual...
Need help?
Do you have a question about the TITAN VERSA C and is the answer not in the manual?
Questions and answers