Table of Contents
Advertisement
Quick Links
Advertisement
Table of Contents

Related Manuals for Indesit HOTPOINT HVL200UK


Summary of Contents for Indesit HOTPOINT HVL200UK
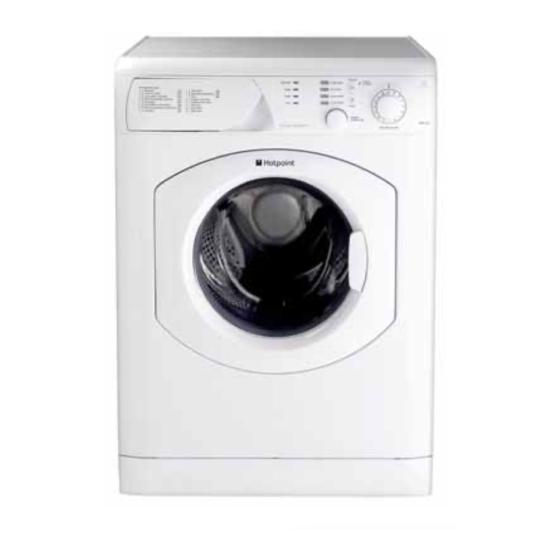
- Page 1 5407380 Issue 2 Jan. 2008 HOTPOINT WASHING MACHINES Models Covered: Comm. Model Code HVL200UK 46531 HVL211UK 47857 HVL222UK 46532 HVL241UK 53556 Service Information Indesit Company UK Ltd © 2007 Reg. Office: Peterborough PE2 9JB Registered in London: 106725...
-
Page 2: Safety Notes, Servicing & Serial Number Information
SAFETY NOTES & GENERAL SERVICING ADVICE 1. This manual is NOT intended as a comprehensive repair/maintenance guide to the appliance. 2. It should ONLY be used by suitably qualified persons having technical competence applicable product knowledge and suitable tools and test equipment. 3. -
Page 3: Table Of Contents
INDEX Safety Notes, Servicing & Serial Number Information ....2 Serial Number Information.........3 Specifications . -
Page 4: Specifications
SPECIFICATIONS Models Covered HVL200UK 1000 rpm HVL211UK 1100 rpm HVL222UK 1200 rpm HVL241UK 1400 rpm Colour White Country of Origin Italy Factory Teverola Dimensions Height 850 mm Width 525 mm Depth 595 mm Weight 67.0 kg (Unpacked) 68.6 kg (Packed) Electrical Supply 230 / 240 Volts AC Energy Structure (All Models) -
Page 5: Installation
2. If the floor is not INSTALLATION perfectly level, Unpacking compensate for any unevenness by 1. Unpack the washing machine. tightening or 2. Check whether the washing machine has loosening the been damaged during transport. If this is the adjustable front feet case, do not install it and contact your (see figure);... - Page 6 - the socket is compatible with the washing DRAINAGE CONNECTIONS machines plug. If this is not the case, A. Connect the drain hose, without bending it, replace the socket or the plug. to a draining duct or a wall drain fixed at a height between 65 and 100 cm from the floor.
-
Page 7: Detergent Dispenser
DETERGENT DISPENSER Good washing results depend on the correct dose of detergent: adding too much detegent won’t necessarily make for a more efficient wash and may in fact cause build up on the interior of the appliance and even pollute the environment. Open the detergent dispenser and pour in the detergent and fabric softener, as follows: - Compartment 1: Detergent for pre-wash (powder);... -
Page 8: Function Buttons & Controls
FUNCTION BUTTONS The FUNCTION BUTTONS also act like LEDs. When a function is selected, the corresponding button is illuminated. If the function selected is incompatible with the programme set, the button will flash and the function will not be enabled. If you set a function that is incompatible with another function you selected previously, only the last one selected will be enabled. - Page 9 FUNCTIONS To enable a function: - Press the button corresponding to the desired function, according to the table below. The function is enabled when the corresponding button is illuminated. NOTE: - The rapid flashing of the button indicates that the corresponding function cannot be selected for the programme set.
- Page 10 STARTING & PROGRAMMES STARTING A PROGRAMME Switch the washing machine on by pressing the ON/OFF button. All the LEDs will light up or a few seconds and the ON-OFF/DOOR LOCKED LED will begin to flash. Load the laundry into the washing machine and shut the appliance door. Set The WASH PROGRAMME knob to the programme required.
-
Page 11: Error Codes Displayed On Console Panel & Possible Causes
ERROR CODES DISPLAYED ON CONSOLE PANEL & POSSIBLE CAUSES On these models the door lock / mains on LED will Key 1 flash as well as a combination of the option / Key 2 programme progress LEDs as shown right. Key 3 A fault code will also display on the Hardware Key as Key 4... - Page 12 ADDITIONAL ERROR CODE DETAILS F01: Motor Triac short circuit Check continuity of motor (field coil pins 3-5, split field pins 3-4 and armature pins 1-2). Check efficiency of module connector block J9, motor terminal block, and wiring between motor and edge connector J9. If all above are correct change module or eeprom as required.
- Page 13 F08: Heater relay stuck on or pressure switch stuck on full Check wiring to heater and continuity of element (31 ohms approximately). Check operation of pressure switch (water levels normal etc.), and efficiency of pressure switch wiring and connections. Check pressure chamber is not blocked with sludge. Check efficiency of module edge connector J3 and associated wiring.
- Page 14 F17: No supply to door lock or door open Check door closed and efficiency of door catch. Check efficiency on module edge connector J4. Remove edge connector on module J4 and check wiring and contacts on all connections. If all above are OK replace door lock, module or eeprom as required. F18: Communication Error - 3 Phase Motor Control (only) Change Power Module.
-
Page 15: Wiring Connection Chart
WIRING CONNECTION CHART MODULE BLUE RADIO INTERFERENCE SUPPRESSOR BROWN BLUE PRESSURE SWITCH BROWN Module BLUE BLUE BROWN HEATING ELEM. WIRING (HEATING ELEM.AND PRESSURE SWITCH) BLACK MODULE WHITE LIGHT BLUE LIGHT BLUE LIGHT BLUE LIGHT BLUE WIRING (EVL - EVP - NTC) BLACK Module BLACK... -
Page 16: Wiring Diagram
WIRING DIAGRAM Mains Wash Pressure Wash Fill Drain Motor Filter Heater Switch Valves Pump Potentiometer Black Black Potentiometer Display 5407380wd.ai Door Lock... - Page 17 EEPROMS There are two versions of Eeprom EVO1 and EVO2 and they are not interchangeable. They match the version of software fitted on production to an appliance. Before programming a blank Eeprom via E-mit identify the correct Eeprom before fitting to the Power Board.
-
Page 18: Eeproms & Diagnostics
Information can be found in Service Manuals 5407180 (C00221229) and 5407182 (C00221231) respectively. Note: This version of the Hardware Key, Eeprom Writer and Washing Machine Doctor programmes are only available to Indesit Company Engineers. Pre-programmed Eeproms and Service socket boards are available for repairs and Spare Parts. -
Page 19: Dismantling Instructions
DISMANTLING INSTRUCTIONS Safety Notes: Ensure that the appliance is disconnected from the Electricity Supply before commencing any work. Beware of sharp edges on metal or plastic parts - wear safety gloves. Refer to the Safety Notes at the beginning of this publication. A. - Page 20 F. Detergent Drawer 1. Open the dispenser drawer fully, gently lift slightly on the right hand side, grip draw front and pull to remove dispenser. G. Dispenser Hopper 1. Remove the top cover (A). 2. Remove the drawer (F). 3. Remove the 2 screws securing the dispenser to the control panel. 4.
- Page 21 M. Belt & Pulley Removal 1. Remove the back panel (B). 2. Using the Pulley Locking Tool (Part No. 560114) and T40 Torx Bit (Part No. 5500048), remove the pulley fixing screw and ease the pulley away from the shaft. N.
- Page 22 T. Power Module Service Modules are not supplied with an Eeprom fitted. Order and fit the correct item before fitting the module to the machine. 1. Remove the back panel (B). 2. Remove the T15 torx screw and the hardware key cover securing the module support to the cabinet.
Need help?
Do you have a question about the HOTPOINT HVL200UK and is the answer not in the manual?
Questions and answers