Table of Contents
Advertisement
Available languages
Available languages
设 计
黄志胜
DESIGN
2020.04.27
校 对
CO.BY
标准化
STANDARD
业务
陈路
seller
批 准
AUTHORI
曾磊
ZE
技术要求
1.尺寸:216*279mm,36P
2.印刷颜色:单色(灰度印刷)
3.制件必须符合QMB-J036.1008 产品说明书及其它类似印刷件技术规范;
4.除客户特别要求外均参照美的冰箱最新版相关企业标准执行;
标记
MARKER
图纸名称 PART NAME
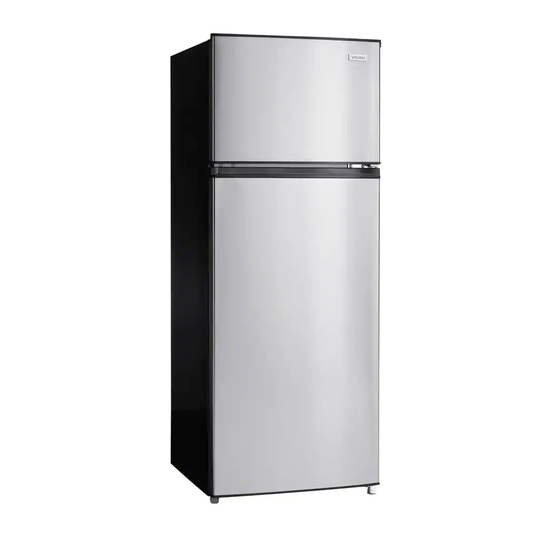
Vissani MDFF7SS
UR-BCD210CM-FQ
说明书
图样标记
版本号
REL
REV.NO.
0
共 页
TOTAL SHEETS
变更内容
图号/物料编码 PART NO.
材料 MATERIAL
重量(g)
比例
WEIGHT
scale
1:1
MIDEA REFRIGERATION
第 页
NO. OF SHEETS
16131000A38157
80g双胶纸
美的冰箱事业部
DIVISION
修改日期
签名
Advertisement
Chapters
Table of Contents

Related Manuals for Vissani MDFF7SS


Summary of Contents for Vissani MDFF7SS
- Page 1 设 计 黄志胜 图号/物料编码 PART NO. 图纸名称 PART NAME DESIGN 2020.04.27 校 对 16131000A38157 Vissani MDFF7SS CO.BY UR-BCD210CM-FQ 标准化 说明书 材料 MATERIAL STANDARD 80g双胶纸 业务 图样标记 版本号 重量(g) 比例 陈路 seller REV.NO. WEIGHT scale 批 准 AUTHORI 曾磊 美的冰箱事业部 MIDEA REFRIGERATION DIVISION 共...
- Page 2 THANK YOU We appreciate the trust and con dence you have placed in Vissani through the purchase of this wine cooler. We strive to continually create quality products designed to enhance your home. Visit us online to see our full line of products available for your home improvement needs.
-
Page 3: Table Of Contents
Table of Contents Table of Contents ........2 Reverse the door swing . -
Page 4: Safety Information
Safety Information □ DANGER: Risk of child entrapment. Before you throw away your old refrigerator or freezer: - Take off the doors. - Leave the shelves in place so that children may not easily climb inside. □ The refrigerator must be disconnected from the source of electrical supply before attempting the installation of accessory. □... -
Page 5: Warnings For Using
Safety Information WARNINGS FOR USING □ Do not arbitrarily disassemble or reconstruct the refrigerator, nor damage the refrigerant circuit; maintenance of the appliance must be conducted by a specialist. □ Damaged power cord must be replaced by the manufacturer, its maintenance department or related professionals in order to avoid danger. -
Page 6: Warnings For Energy
Safety Information WARNINGS FOR ENERGY □ Refrigerating appliances might not operate consistently (possibility of defrosting of contents or temperature becoming too warm in the frozen food compartment) when sited for an extended period of time below the cold end of the range of temperatures for which the refrigerating appliance is designed. -
Page 7: Warranty
• Costs of service calls that are a result of items listed under NORMAL RESPONSIBILITIES OF THE CONSUMER** VISSANI replacement parts shall be used and will be warranted only for the period remaining on the original warranty. NORMAL RESPONSIBILITIES OF THE CONSUMER** This warranty applies only to products in ordinary household use, and the consumer is responsible for the items listed below: 1. -
Page 8: Pre-Installation
Warranty IF YOU NEED SERVICE Keep your bill of sale, delivery slip, or some other appropriate payment record. Should service be required, the date on the bill establishes the warranty period commencement date. If service is performed, it is in your best interest to obtain and keep all receipts. This written warranty gives you speci c legal rights. -
Page 9: Levelling Feet
Pre-Installation LEVELLING FEET Schematic diagram of the levelling feet. Adjusting procedures: a. Turn the feet clockwise to raise the refrigerator; b. Turn the feet counterclockwise to lower the refrigerator; c. Adjust the right and left feet based on the procedures above to a horizontal level. REVERSE THE DOOR SWING Follow all steps when reversing the door swing. - Page 10 Pre-Installation □ Take off freezer chamber door, middle hinge, the sleeve WARNING: Unplug the refrigerator from its electrical pipe of refrigerating door and hole caps on the other side. outlet. Empty all door shelves. □ Take off top hinge cover, top hinge ,the sleeve pipe of freezer door and hole cap on the other side.
- Page 11 Pre-Installation □ □ Remove the refrigerating door. Assemble the stopper of the freezer door on the other side. □ □ Remove the bottom hinge and adjustable foot on the Assemble the stopper of the refrigerating door on the other other side. side.
- Page 12 Pre-Installation □ □ Put the freezer door on the middle hinge, assemble the top Put the refrigerating door on bottom hinge, assemble the middle hinge, hole caps and the sleeve pipe of hinge, the top hinge cover assemble the sleeve pipe of the refrigerating door.
-
Page 13: Starting
Pre-Installation STARTING □ Before initial start, keep the refrigerator still for half an hour before connecting it to power supply. □ Before putting any fresh or frozen foods, the refrigerator shall have run for 2-3 hours, or for above 4 hours in summer when the ambient temperature is high. -
Page 14: Assembly
Assembly KEY COMPONENTS Part Description Quantity Freezer shelf Lamp Temperature control knob Lamp switch Fresh food shelves Vegetable crisper with glass cover Leveling legs Door tray Refrigerating chamber □ The refrigerating chamber is suitable for storage of a variety of fruits, vegetables, beverages and other food consumed in the short term. □... -
Page 15: Functions
Assembly FUNCTIONS □ Turn the temperature control knob to MAX, the internal temperature of the refrigerator becomes lower. □ Turn the temperature control knob to MIN, the internal temperature of the refrigerator becomes higher. □ The letter on the knob only represents the level, but does not mean the speci c temperature, the "OFF" means stop working. Please adjusting and using between "MAX"and"MIN". -
Page 16: Maintenance And Cleaning
Maintenance and Cleaning OVERALL CLEANING lease unplug the refrigerator for defrost and cleaning. WARNING: P □ Dusts behind the refrigerator and on the ground shall be timely cleaned to improve the cooling effect and energy saving. The interior of the refrigerator should be cleaned regularly to avoid odor. □... -
Page 17: Troubleshooting
Troubleshooting You may try to solve the following simple problems by yourself. If them cannot be solved, please contact the after-sales NOTICE: department. Problem Possible Cause & Solution Failed operation Check whether the appliance is connected to power or whether the plug is in well contact; Check whether the voltage is too low;... - Page 18 Questions, problems, missing parts? Before returning to the store, call THD Customer Service Mon-Fri 8:00 AM to 8:00 PM (EST) , Saturday 8:00 AM to 6:00 PM (EST) 1-866-646-4332 HOMEDEPOT.COM Retain this manual for future use.
- Page 19 Gracias Agradecemos la confianza que usted ha depositado en Vissani a través de la compra de este enfriador de vino. Nos esforzamos por crear continuamente productos de calidad diseñados para mejorar su hogar. Visí tenos en lí nea para ver nuestra lí...
- Page 20 Tabla de contenidos Tabla de contenidos ............2 Arranque ..............13 Información de seguridad ..........2 Consejos para ahorro de energí a ....... 13 Advertencia ..............2 Ensamblaje ..............14 Advertencias relacionadas con la electricidad ....3 Componentes clave ............ 14 Advertencias para uso ..........
-
Page 21: Información De Seguridad
Información de seguridad Quite las puertas. Deje los estantes en su lugar para que los niñ os no puedan subirse fácilmente. □ El refrigerador debe desconectarse de la fuente de alimentación antes de intentar la instalación del accesorio. □ El refrigerante y el material espumante de ciclopentano que se utilizan para el aparato son inflamables. Por lo tanto, cuando se desecha el aparato, se mantendrá... -
Page 22: Advertencias Para Uso
Información de seguridad Advertencias para uso □ No desmonte ni reconstruya arbitrariamente el refrigerador, ni dañe el circuito refrigerante; el mantenimiento del aparato debe ser realizado por un especialista. □ El cable de alimentación dañado debe ser reemplazado por el fabricante, su departamento de mantenimiento o profesionales relacionados para evitar peligros. -
Page 23: Advertencia Para Energí A
Información de seguridad Advertencia para energí a □ Es posible que los aparatos de refrigeración no funcionen de manera constante (posibilidad de descongelar el contenido o que la temperatura se caliente demasiado en el compartimento de alimentos congelados) cuando se coloca durante un perí... -
Page 24: Garantí A
Costos de las llamadas de servicio que son el resultado de los í tems enumerados en las Responsabilidades Normales del Cliente** Las piezas remplazadas de VISSANI se utilizarán y estarán garantizadas ú nicamente por el perí odo restante de la garantí a original. - Page 25 Garantí a causas externas tales como abuso, mal uso, suministro de energí a inadecuado o fuerza mayor. Llamadas de servicio resultantes de una instalación incorrecta de su producto. Llamadas de servicio para instruirle sobre el uso de su producto. Recargos que incluyen, pero no se limitan a, cualquier llamada de servicio después de la jornada, fin de semana o vacaciones, peajes, gastos de viaje en ferry o gastos por kilometraje para llamadas de servicio a áreas remotas, incluido el estado de Alaska.
-
Page 26: Preinstalación
Preinstalación Preinstalación Colocación □ Antes del uso, retire todos los materiales de embalaje, incluidos los cojines del fondo, almohadillas de espuma y cintas en el refrigerador; rasgue la pelí cula protectora en las puertas y el cuerpo del refrigerador. □ Mantenga alejado del calor y evite la luz solar directa. -
Page 27: Pie De Nivelación
Preinstalación Preinstalación Pie de nivelación Diagrama esquemático del pie de nivelación. Procedimientos de ajuste: Gire los pies en sentido horario para levantar el refrigerador; Gire los pies en sentido antihorario para bajar el refrigerador; Ajuste los pies derecho e izquierdo según los procedimientos anteriores a un nivel horizontal. Invertir la oscilación de la puerta Siga todos los pasos al invertir la oscilación de la puerta. - Page 28 Preinstalación □ Quite la puerta de la cámara del congelador, la Advertencia: Desconecte el refrigerador de su bisagra central, el manguito de la puerta del tomacorriente. Vací e todos los estantes de las refrigerador y las tapas de orificio en el otro lado. puertas.
- Page 29 Preinstalación Preinstalación □ □ Retire la puerta del refrigerador. Monte el tapón de la puerta del congelador en el otro lado. □ Retire la bisagra inferior y el pie ajustable en el otro □ lado. Monte el tapón de la puerta del refrigerador en el otro lado.
- Page 30 Preinstalación □ □ Coloque la puerta del refrigerador en la bisagra Coloque la puerta del congelador en la bisagra inferior, monte la bisagra central, tapas de orificio y central, monte la bisagra superior, la cubierta de la el manguito de la puerta del refrigerador. bisagra superior, y monte el manguito de la puerta del congelador y la tapa de orificio en el otro lado.
-
Page 31: Arranque
Preinstalación Arranque □ Antes del encendido inicial, mantenga el refrigerador quieto durante media hora antes de conectarlo a la fuente de alimentación. □ Antes de meter alimentos frescos o congelados en el refrigerador, el último debe haber funcionado durante 2-3 horas, o durante más de 4 horas en verano cuando la temperatura ambiente es alta. -
Page 32: Ensamblaje
Ensamblaje Ensamblaje Componentes clave Pieza Descripción Cantidad Estante del congelador Lámpara Perilla de control de temperatura Interruptor de lámpara Estantes de alimentos frescos Cajó n de verduras con cubierta de vidrio Patas niveladoras Bandeja de puerta Cámara frigorí fica □ La cámara frigorí... -
Page 33: Funciones
Ensamblaje Funciones □ Al girar la perilla de control de temperatura a MAX, la temperatura interna del refrigerador se vuelve más baja. □ Al girar la perilla de control de temperatura a MIN, la temperatura interna del refrigerador se vuelve más alta. □... -
Page 34: Mantenimiento Y Limpieza
Mantenimiento y limpieza Mantenimiento y limpieza Limpieza general Advertencia: Desenchufe el refrigerador para descongelar y limpiar. □ Los polvos detrás del refrigerador y en el suelo deben limpiarse a tiempo para mejorar el efecto de enfriamiento y el ahorro de energí a. El interior del refrigerador debe limpiarse regularmente para evitar el olor. □... -
Page 35: Resolución De Problemas
Resolución de problemas Resolución de problemas Aviso: Puede intentar resolver los siguientes problemas simples por sí mismo. En caso de no poder resolverlos, por favor ponga en contacto con el Departamento de Posventa. Problema Posible causa y solución Operación fallida Compruebe si el aparato está... - Page 36 Notas...
- Page 37 ¿Preguntas, problemas, piezas perdidas? Llame al Servicio de Atención al Cliente de THD antes de regresar a la tienda. Lunes a Viernes 8:00 AM a 8:00 PM (EST), Sábado 8:00 AM a 6:00 PM (EST) 1-866-646-4332 HOMEDEPOT.COM Guarde este manual para consultas futuras.
Need help?
Do you have a question about the MDFF7SS and is the answer not in the manual?
Questions and answers
CLEAN AIR FILTERS
My vissani fridge is making a hissing sound whats the problem