
Related Manuals for Gradus Group Elvid STUDIOVISION STV-150-4KHDR


Summary of Contents for Gradus Group Elvid STUDIOVISION STV-150-4KHDR
- Page 1 STUDIOVISION STV-150-4KHDR / STV-230-4KHDR / STV-280-4KHDR 4K HDMI Monitor with HDR (15" / 23" / 28") STUDIOVISION 4K HDMI1 HDMI2 HDMI3 HDMI4 MENU EXIT USER MANUAL...
- Page 2 THANK YOU FOR CHOOSING ELVID. The Elvid StudioVision 4K monitor with HDR support is a professional display for SD, HD, and 4K video signals. A wide variety of sources can be connected using the available inputs, and multiple inputs can be displayed simultaneously. HDR10 support provides a picture with color accuracy, high contrast , and a dynamic range for a thoroughly realistic and dynamic image.
-
Page 3: Table Of Contents
TABLE OF CONTENTS Overview ....................................................4 Getting Started ...................................................6 Using the StudioVision Monitor ...........................................7 User Interface ..................................................9 Picture Menu ..................................................11 Function Menu .................................................12 Display Mode Menu ................................................13 Display Setting Menu ..............................................13 Input Menu ..................................................14 Audio Menu ..................................................14 VGA Menu ..................................................14 System Menu ..................................................15 Information Menu ................................................15 Supported Resolutions and Frame Rates ........................................16 Specifications ..................................................18... -
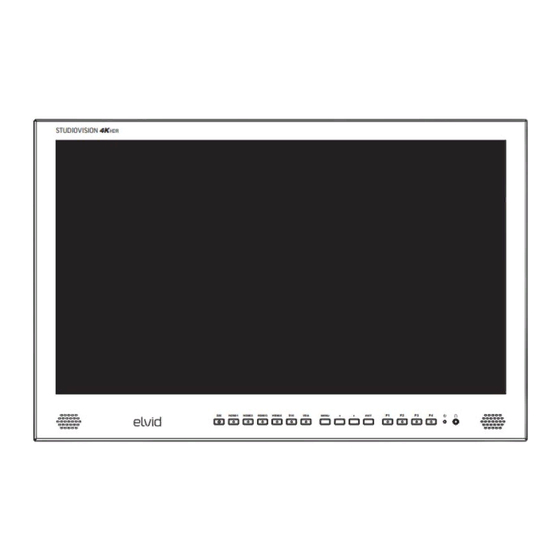
Page 4: Overview
OVERVIEW FRONT STUDIOVISION 4K HDMI1 HDMI2 HDMI3 HDMI4 MENU EXIT SDI input selector Speakers HDMI 1–4 input selectors DVI input selector VGA input selector Menu button Scroll left button Scroll right button Exit button F1–F4 function buttons Power indicator Headphone output... - Page 5 BACK Release button V-mount battery plate Handle Connector protection USB port VESA 75/100 mounting threads Tally port VGA input DVI input HDMI input (×4)* RCA audio L/R input SDI input/output 4-pin XLR power input Power switch *Note: HDMI 1 & 2: Support HDMI 2.0 for 4K @ 60 Hz HDMI 3 &...
-
Page 6: Getting Started
GETTING STARTED ATTACHING A V-MOUNT BATTERY Attach a battery by sliding it into the V-mount plate until it clicks into place. Release the battery by pressing the release button and sliding the battery off the V-mount. CONNECTING TO AC POWER 1. -
Page 7: Using The Studiovision Monitor
USING THE STUDIOVISION MONITOR REMOVING THE MONITOR FROM THE FLIGHT CASE VESA MOUNT 1. Remove the V-mount battery, or unplug the AC power adapter. The monitors are equipped with 75 × 75 and 100 × 100 VESA mounting holes. Refer to your VESA mount’s weight capacity 2. - Page 8 STAND-ALONE USE RACK MOUNT (15 IN. MONITOR ONLY) Metal feet and attachment screws are included for stand-alone To mount the STV-150-4KH 15-inch monitor into a standard 19-inch operation. machine rack, follow these steps: 1. Attach the feet to the bottom edge of the monitor with the 1.
-
Page 9: User Interface
USER INTERFACE FRONT PANEL BUTTONS To reassign menus to the function buttons, follow these steps: Use the buttons on the front of the monitor as shortcuts to various functions instead of cycling through the on-screen menus. 1. Press and hold the function button until the function select menu appears on-screen. - Page 10 SUBMENUS RESTORING THE FACTORY PRESETS 1. As you scroll through the submenu functions, the current value To erase all submenu changes and return to the factory presets: will appear below it. 1. Press Menu to open the main menu, and scroll to the System 2.
-
Page 11: Picture Menu
PICTURE MENU BRIGHTNESS Adjusts the monitor’s brightness value from 0–100. The preset Available only with HDMI 1 input. Select Off, Auto, or HDR10. In value is 50. Auto mode, if HDR metadata is detected, HDR10 is activated, and Brightness, Saturation, Hue, Sharpness, Color Space, Backlight, and CONTRAST Color Temperature functions are disabled. -
Page 12: Function Menu
FUNCTION MENU CENTER MARKER Select On to display a center marker on-screen. SAFETY MARKER Displays and adjusts the size of the on-screen safety frame markers. Press the or navigation buttons repeatedly to scroll through the safe frame settings: 95%, 93%, 90%, 88%, 85%, or 80%. ASPECT MARKER Displays a frame line corresponding to the selected aspect ratio. -
Page 13: Display Mode Menu
DISPLAY MODE MENU 2P PIP Displays the incoming video signal on the full screen. 1P is the Displays the first video signal on the full screen and places the preset value for display mode. In 1P mode, the display can be second video signal in a frame within the picture. -
Page 14: Input Menu
INPUT MENU Select SDI, HDMI 1–4, DVI, and VGA inputs, or Auto mode. When Auto is selected, the monitor scans each input and displays the first input signal it detects. AUDIO MENU VOLUME Adjusts the volume output from 0 (preset) to 100. LEVEL METER When SDI is selected in the Input Menu, an onscreen audio level meter can be set to on or off. -
Page 15: System Menu
SYSTEM MENU RESET COLOR CALIBRATION Resets the monitor to the factory presets. Use this option to set up the monitor for generating a proper calibration LUT using separately available professional software. MENU TIME LUT generation and loading workflows are covered in the full Adjusts the length of time the on-screen menu is displayed. -
Page 16: Supported Resolutions And Frame Rates
SUPPORTED RESOLUTIONS AND FRAME RATES HDMI2.0 HDMI1.4 3G-SDI 480i (59.94) 480i (59.94) 59.94i 480i (60) 480i (60) 576i (50) 576i (50) 480p (59.94) 480p (59.94) 59.94p 480p (60) 480p (60) 576p (50) 576p (50) 23.98p (1280×720) 720p (23.98) 720p (23.98) 720p (24) 720p (24) 720p (25) - Page 17 DVI-I Resolution Resolution 800×600 56/60/70/72/75 720×480 1024×768 50/60/66/70/75 800×600 56/60/72/75 1152×864 60/70/75 1024×768 50/60/66/70/75 1152×900 1152×864 60/70/75/76 1280×720 50/60/70/72/75 1280×720 50/60/70/72/75 1280×768 50/60/70/75 1280×768 50/60/70/75 1280×800 60/70/72/75 1280×800 60/70/72/75/85 1280×960 60/70/72/75 1280×960 60/72/75 1280×1024 60/70/72/75/76 1280×1024 60/70/72/75/76 1360×768 1360×768 1440×900 60/75 1400×1050 60/75/85...
-
Page 18: Specifications
SPECIFICATIONS DISPLAY POWER Panel Type IPS LCD DC Input Power 12 to 24 V DC Display Size STV-150-4KH: 15.6 in. (39.6 cm) Battery Type V-mount STV-230-4KH: 23.8 in. (60.5 cm) Power STV-150-4KH: ≤18 W STV-280-4KH: 28 in. (71.1 cm) Consumption STV-230-4KH: ≤41 W Screen Resolution 3840 ×... -
Page 19: Troubleshooting
TROUBLESHOOTING Problem Solution The StudioVision will not turn on. • Make sure that the AC adapter is fully plugged in, and that the AC power source is reliable. • Make sure the V-mount battery is fully charged and properly seated in the V-mount battery plate. The StudioVision is turned on, but •... - Page 20 For more information or to arrange service, visit www.elvidcinema.com or call Customer Service at 212-594-2353. Product warranty provided by the Gradus Group. www.gradusgroup.com Elvid is a registered trademark of the Gradus Group. © 2020 Gradus Group LLC. All Rights Reserved. www.elvidcinema.com...
Need help?
Do you have a question about the Elvid STUDIOVISION STV-150-4KHDR and is the answer not in the manual?
Questions and answers