Kestrel 5000 Environmental User Manual
Hide thumbs
Also See for 5000 Environmental:
- User manual (24 pages) ,
- Manual (17 pages) ,
- Quick start manual (9 pages)
Table of Contents
Advertisement
Quick Links
U S E R G U I D E
K e s t r e l 5 0 0 0 E n v i r o n m e n t a l M e t e r
K e s t r e l 5 1 0 0 R a c i n g W e a t h e r M e t e r
K e s t r e l 5 2 0 0 P r o f e s s i o n a l E n v i r o n m e n t a l M e t e r
GlobalTestSupply
www.
.com
Find Quality Products Online at:
sales@GlobalTestSupply.com
Advertisement
Table of Contents

Related Manuals for Kestrel 5000 Environmental


Summary of Contents for Kestrel 5000 Environmental
- Page 1 U S E R G U I D E K e s t r e l 5 0 0 0 E n v i r o n m e n t a l M e t e r K e s t r e l 5 1 0 0 R a c i n g W e a t h e r M e t e r K e s t r e l 5 2 0 0 P r o f e s s i o n a l E n v i r o n m e n t a l M e t e r GlobalTestSupply www.
-
Page 2: Table Of Contents
CONTENTS Measurements and Features ..........3 Getting to Know Your Kestrel ..........4 Buttons .................. 5 Kestrel Options Menu ............5 Kestrel Menu Navigation ........... 6 Weather Mode Screen ............7 Getting Started ..............8 Altimeter and Barometer ........... 9 Using Min/Avg/Max ............ -
Page 3: Measurements And Features
• Delta T (˚F | ˚C) • FEATURES 5000 5100 5200 Environmental Racing Professional LiNK Connectivity & Kestrel LiNK Mobile App Backlit Display switchable white or • • • Night-Vision preserving red optional GlobalTestSupply www. .com Find Quality Products Online at:... -
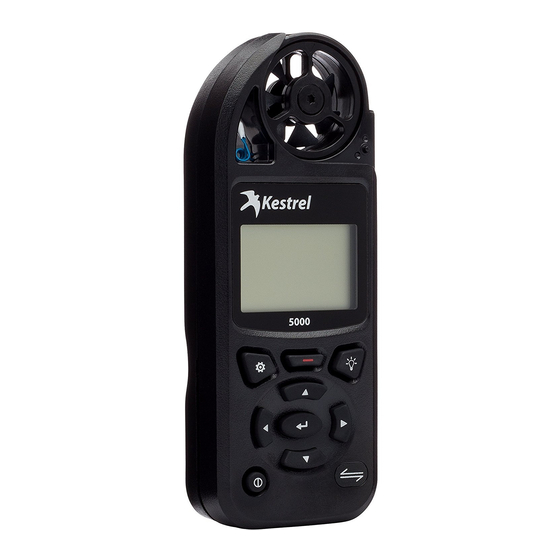
Page 4: Getting To Know Your Kestrel
GETTING TO KNOW YOUR KESTREL FRONT BACK IMPELLER COVER REPLACEABLE IMPELLER TEMPERATURE SENSOR SERIAL NUMBER HUMIDITY SENSOR PRESSURE SENSOR SUNLIGHT AA BATTERY (1) READABLE (Lithium recommended) DISPLAY CAPTURE OPTIONS/EXIT BATTERY DOOR BACKLIGHT DATA TRANSFER PORT SELECT SCROLL/ADJUST LANYARD ATTACHMENT BATTERY DOOR LATCH... -
Page 5: Buttons
Button Name Function from the main Options menu by pressing the button POWER Turns Kestrel on and off. from any Weather Measurement Screen or the main Press for on, hold for two Targeting Screen. seconds to turn off. • BLUETOOTH »... -
Page 6: Kestrel Menu Navigation
KESTREL MENU NAVIGATION TYPES OF MENU ITEMS » Tasks are executed by highlighting the field and pressing Select. » The presence of a submenu is indicated by a “…” following a field. » Highlight the field and press Select to enter a submenu. -
Page 7: Weather Mode Screen
WEATHER MODE SCREENS MORE MEASUREMENTS Data Point Scroll Bar Measurement Data Point Value Graph of Stored Data Log & Icon Units Data Point Time Stamp Current Measurement Screen Min Ave Max Screen Data Graph Screen Data Points Screen Press SELECT to enter settings Press SELECT to start, stop Press... -
Page 8: Getting Started
7. SET AUTO SHUTDOWN. Scroll to and select Display. Scroll to Auto Shtdwn and choose a time window after which the Kestrel will shut down without any button presses. 8. SET BACK LIGHT COLOR. Scroll to and select Display. -
Page 9: Altimeter And Barometer
Note! You should enter new reference values whenever values on the other. you are using the Altimeter or Barometer functions and your location or the weather conditions have changed. Note! You cannot use your Kestrel as a barometer and altimeter simultaneously. GlobalTestSupply www. -
Page 10: Using Min/Avg/Max
USING MIN/ AVG/ MAX Pressing the right scroll button from any Current Measurement Screen will open the Min/Avg/Max Screen. The capture process is linked for all measurement screens, capturing Min/Avg/Max values on one measurement screen will capture Min/Avg/Max values over the same time period for all measurements. -
Page 11: Connecting To Devices Using Link
CONNECTING TO COMPUTERS USING USB CABLE CONNECTING TO DEVICES USING LiNK If your Kestrel is marked LiNK on the bottom front label, All Kestrel 5 Series units can connect to a computer it can be connected wirelessly to other LiNK-compatible via the Data Transfer Port using the USB Data devices. -
Page 12: Creating, Viewing, & Exporting Data Logs
Bluetooth® Smart/LE devices. VIEWING LOGGED DATA ON THE KESTREL METER: » Exported to a PC or Mac using Kestrel LiNK software and » Scroll to the Graph Data Screen of the desired a Kestrel USB Dongle (available separately). Requires a measurement. - Page 13 » In the Kestrel LiNK software, choose a data log from the EXPORTING DATA LOGS TO A COMPUTER: Logs window and click on the Export to File button.
-
Page 14: Measuring Air Flow
MEASURING AIR FLOW Kestrel 5200 Professional Units Only Kestrel Professional Meters can calculate air flow through a duct by combining user input information about the size and shape of the duct with the measured air velocity. In addition to reading the... -
Page 15: Measuring Evaporation Rate
To avoid inaccurate Evaporation Rate readings due to thermal loading it is best to shade the Kestrel. (Be sure the source of shade is not obstructing the wind speed measurement.) 4. The ACI recommends taking a 6-10 second average of the evaporation rate to account for fluctuating wind speeds. -
Page 16: Using Evaportation Rate Solver
Evaporation Rate. 10s capture. Note: 10s capture data is cleared when the Kestrel power is turned » From any current measurement screen, scroll to off. If no 10s capture data is available, selecting Reset will clear all EVAP and select Options conditions. -
Page 17: Weather Glossary
For greatest accuracy, point the equal to or lower than ambient temperature. back of the Kestrel directly into the wind. BARO – Barometric Pressure is the local CROSWND – Crosswind uses the internal compass and a user... - Page 18 DENSITY - Air density is the mass of the measured air per unit volume. (Not available in Environmental models) RAD – Relative Air Density is the ratio of the measured air density to the air density at sea level using the International Civil Aviation Organization (ICAO) standard reference conditions.
-
Page 19: Impeller Replacement
» Press FIRMLY on the impeller module to remove it. » Insert the new impeller so the side that has the Figure 2 small triangle (close to the perimeter) faces the front of the Kestrel when installed. Figure 1 GlobalTestSupply www.
Need help?
Do you have a question about the 5000 Environmental and is the answer not in the manual?
Questions and answers