Table of Contents
Advertisement
Advertisement
Table of Contents

Subscribe to Our Youtube Channel
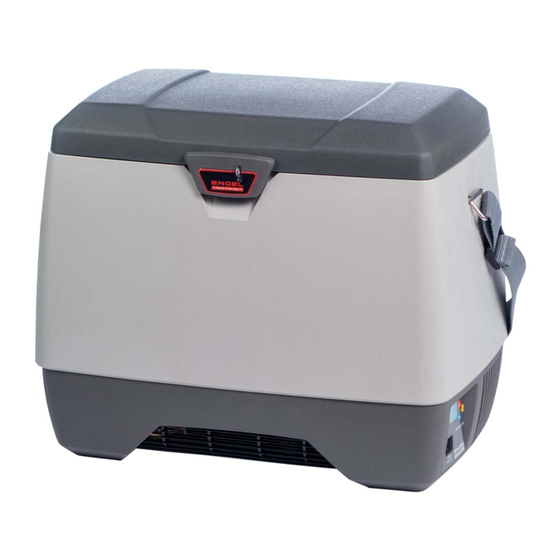
Related Manuals for Engel MHD13F-DM


Summary of Contents for Engel MHD13F-DM
- Page 1 SERVICE MANUAL MODEL : MHD13F-DM 0642 013 4020 2020.12...
- Page 2 This service manual describes maintenance procedures for ENGEL refrigerator. This manual is intended for repair engineers who are familiar with basics service skills and knowledge for ENGEL refrigerator. This manual does not guarantee correct maintenance when service is done by a non-skilled worker without technical knowledge.
-
Page 3: Table Of Contents
CONTENTS 1. SPECIFICATIONS ・・・・・・・・・・・・・・・・・・・・・・・・・・・・・・・・・・・・・・・・・・・・・・・・・・・・・・・・・・・・・・・・ ■ Specifications Table ・・・・・・・・・・・・・・・・・・・・・・・・・・・・・・・・・・・・・・・・・・・・・・・・・・・・・・ ■ Dimensions ・・・・・・・・・・・・・・・・・・・・・・・・・・・・・・・・・・・・・・・・・・・・・・・・・・・・・ 2. INSTALLING A REFRIGERATOR ・・・・・・・・・・・・・・・・・・・・・・・・・・・・・・・・・・・・・・・・・・・・・・・・・・ ■ Installation ・・・・・・・・・・・・・・・・・・・・・・・・・・・・・・・・・・・・・・・・・・・・・・・・・・ ■ Temperature Setting ・・・・・・・・・・・・・・・・・・・・・・・・・・・・・・・・・・・・・・・・・・・・・・・・・・ 3. PARTS NAME ・・・・・・・・・・・・・・・・・・・・・・・・・・・・・・・・・・・・・・・・・・・・・・・ 4. CONNECTING DIAGRAM ・・・・・・・・・・・・・・・・・・・・・・・・・・・・・・・・・・・・・・・・・・・・・・・ ■ Block Diagrams ・・・・・・・・・・・・・・・・・・・・・・・・・・・・・・・・・・・・・・・・・・・・・・・・・・・・・・・・・・・・・・・・・・・・ ■ Wiring Diagrams ・・・・・・・・・・・・・・・・・・・・・・・・・・・・・・・・・・・・・・・・・・・・・・・・・・・・・・・・・・・・ 5. TROUBLE SHOOTING ・・・・・・・・・・・・・・・・・・・・・・・・・・・・・・・・・・・・・・・・・・・・・・・・・・・ ■ Error Code (digital display) ・・・・・・・・・・・・・・・・・・・・・・・・・・・・・・・・・・・・・・・・・・・・・・・・・・・・・・・・・・・ ■... -
Page 4: Specifications
1. SPECIFICATIONS ■ Specifications Table MODEL MHD13F-DM MODEL CODE 0642 013 4020 STORAGE VOLUME 17.4×11.2×14.6 ※ EXTERIOR DIMENSIONS W×D×H 442×284×372 ※ 13.7×7.5×7.5 ※ INTERIOR DIMENSIONS W×D×H 348×190×190 ※ Polypropylene resin Material DOOR Heat Foamed polyurethane insulator Polypropylene resin Material CABINET Heat Foamed polyurethane insulator... -
Page 5: Dimensions
1. SPECIFICATIONS ■ Dimensions ※ Tolerance is omitted (mm) -
Page 6: Installing A Refrigerator
⑥ Clean the interior with a cloth moistened in warm water and wipe with a dry cloth. ⑦ Never use the ENGEL refrigerator inside a freezer container car or refrigerator container car. Condensation can easily occur in the interior of the refrigerator container car and freezer container car,... -
Page 7: Temperature Setting
2. INSTALLING A REFRIGERATOR ■ Temperature Setting Set the cabinet inside air temperature range by means of the Temperature controller. TEMPERATURE SETTING (see Fig 6) Temperature range – Achievable temperature from -18 ~ 55℃ ( 0 ~ 131°F ) at Ambient of 25°C (77°F). The preset temperature is displayed when the LED starts blinking. -
Page 8: Parts Name
3. PARTS NAME DOOR ASSY SHOULDER STRAP COOLING SYSTEM HINGE COMPRESSOR EVAPOLATOR THERMISTOR (EVA. THERMISTOR) (It is inside the insulation) HEATER ASSY LATCH ASSY FAN MOTOR WIRE POWER SUPPLY CONDENSER CONTROL ASSY (TEMPERATURE CONTROLLER) TERMINAL BLOCK HOLDER ASSY DIAL DC CORD CASE BOTTOM SPECIAL FUSE... -
Page 9: Connecting Diagram
4. CONNECTING DIAGRAM ■ Block Diagrams ■ Wiring Diagrams... -
Page 10: Trouble Shooting
Error message will be displayed if the voltage of the battery is low or in the event of any malfunctions – (see table below). When error message is displayed, the unit will be on “standby mode”. Operations will stop. An error is displayed on the digital display. ※(MHD13F-DM Only) ※DEFAULT VALUES FOR BATTERY PROTECTION... -
Page 11: Does Not Get Cold
5. TROUBLE SHOOTING Checking Test result Judge Fixing See page 12 【Check 2】 Power supply output voltage. Output Replace the Lower than AC11V Approx. AC11V - 18V ※1 maladjustment power supply. ■ Does not get Cold. Normal See page 14 【Check 8】... -
Page 12: Cooling Is Weak
5. TROUBLE SHOOTING Checking Test result Judge Fixing ■ Cooling is Weak Ambient temperature is Please keep the ambient Ambient temparature is higher than 30℃ temperature below 30℃. too high. Make at least 150mm Is the machine part ventilated enough? Insufficient ventilation. -
Page 13: Refrigerator Is Too Cold. (Can Not Be Temperature Adjustment)
5. TROUBLE SHOOTING Checking Test result Judge Fixing ■ Refrigerator is too Cold. (Can not be temperature adjustment) See page 13 【Check 5】 Replace the Resistance of the thermistor. cooling system. Thermistor is short. 0Ω Approx. 2kΩ - 10kΩ ※2 ※4 Normal ※2... -
Page 14: Typical Problem
5. TROUBLE SHOOTING ※1 Ambient temp 25℃ ■ Typical Problem ※2 Ambient temp 25℃ to -16℃ ※4 Replacement of only the thermistor can not. ※3 Use tester: Digital multimeter It will be the exchange of the cooling system. Symptoms Cause Test Result Treatment Resistance of compressor is ∞Ω... -
Page 15: Check Point&Check Method
6. CHECK POINT&CHECK METHOD 【Check 1】 Special Fuse. (Fig.1) Fig.1 DC CORD ◇ Check the resistance of special fuse by tester. Test result Judge 0Ω Normal ※ ∞Ω Broken WORK TIPS SPECIAL FUSE ・Please attach attention to the special fuse of orientation. -
Page 16: Check 4】 Resistance Of The Compressor
6. CHECK POINT&CHECK METHOD INPUT CORD 【Check 4】 Resistance of the Compressor. (Fig.4) Fig.4 ◇Checking points Remove two pin couplers at input cord, and check. ※3 (Ambient temp 25℃) Test result Judge Approx. 1.6 Ω Normal ∞Ω Broken Coil of compressor is short 0Ω... -
Page 17: Check 7】 Fan Motor Assy
6. CHECK POINT&CHECK METHOD 【Check 7】 Fan motor Assy. (Fig.7) Fig.7 ◇Checking point If the refrigerator of the switch is ON, the fan motor will start. Please make sure that the wind has come out by hand.(Fig.7) If the wind does not come out (fan is not moving), the failure of the fan motor or, will be the code breaking. -
Page 18: Replacing Parts
7. REPLACING PARTS 【How to Replace Cooling System】 Fig.1 DOOR 1. Remove four screw (Fig.1-①), remove the door assy. ASSY 2. Remove screw (Fig.1-②), remove the latch ① LATCH ② 3. Remove four screw, remove the bottom case.(Fig.2-①) Fig.2 CASE BOTTOM ① 4. -
Page 19: How To Replace Power Supply
7. REPLACING PARTS Remove two screws (Fig.5-①) and remove the Fig.5 HOLDER ASSY two couplers.(Fig.5-②) ② ② Pull out the power supply and holder assy from the main body. (Fig.5-③) WORK TIPS ③ ③ In the case of power supply only exchange, the holder assembly is not removed. -
Page 20: How To Replace Control Assy
7. REPLACING PARTS 【How to Replace Control Assy】 Fig.9 1. Perform the procedure of how to replace the cooling system. (Page 17 Step 3~5) ① ② 2. Remove the five coupler. (Fig.9‐①) 3. Remove the screws. (Fig.9‐②) 4. Remove the screws. (Fig.10‐①) ①...
Need help?
Do you have a question about the MHD13F-DM and is the answer not in the manual?
Questions and answers